Motion Detection
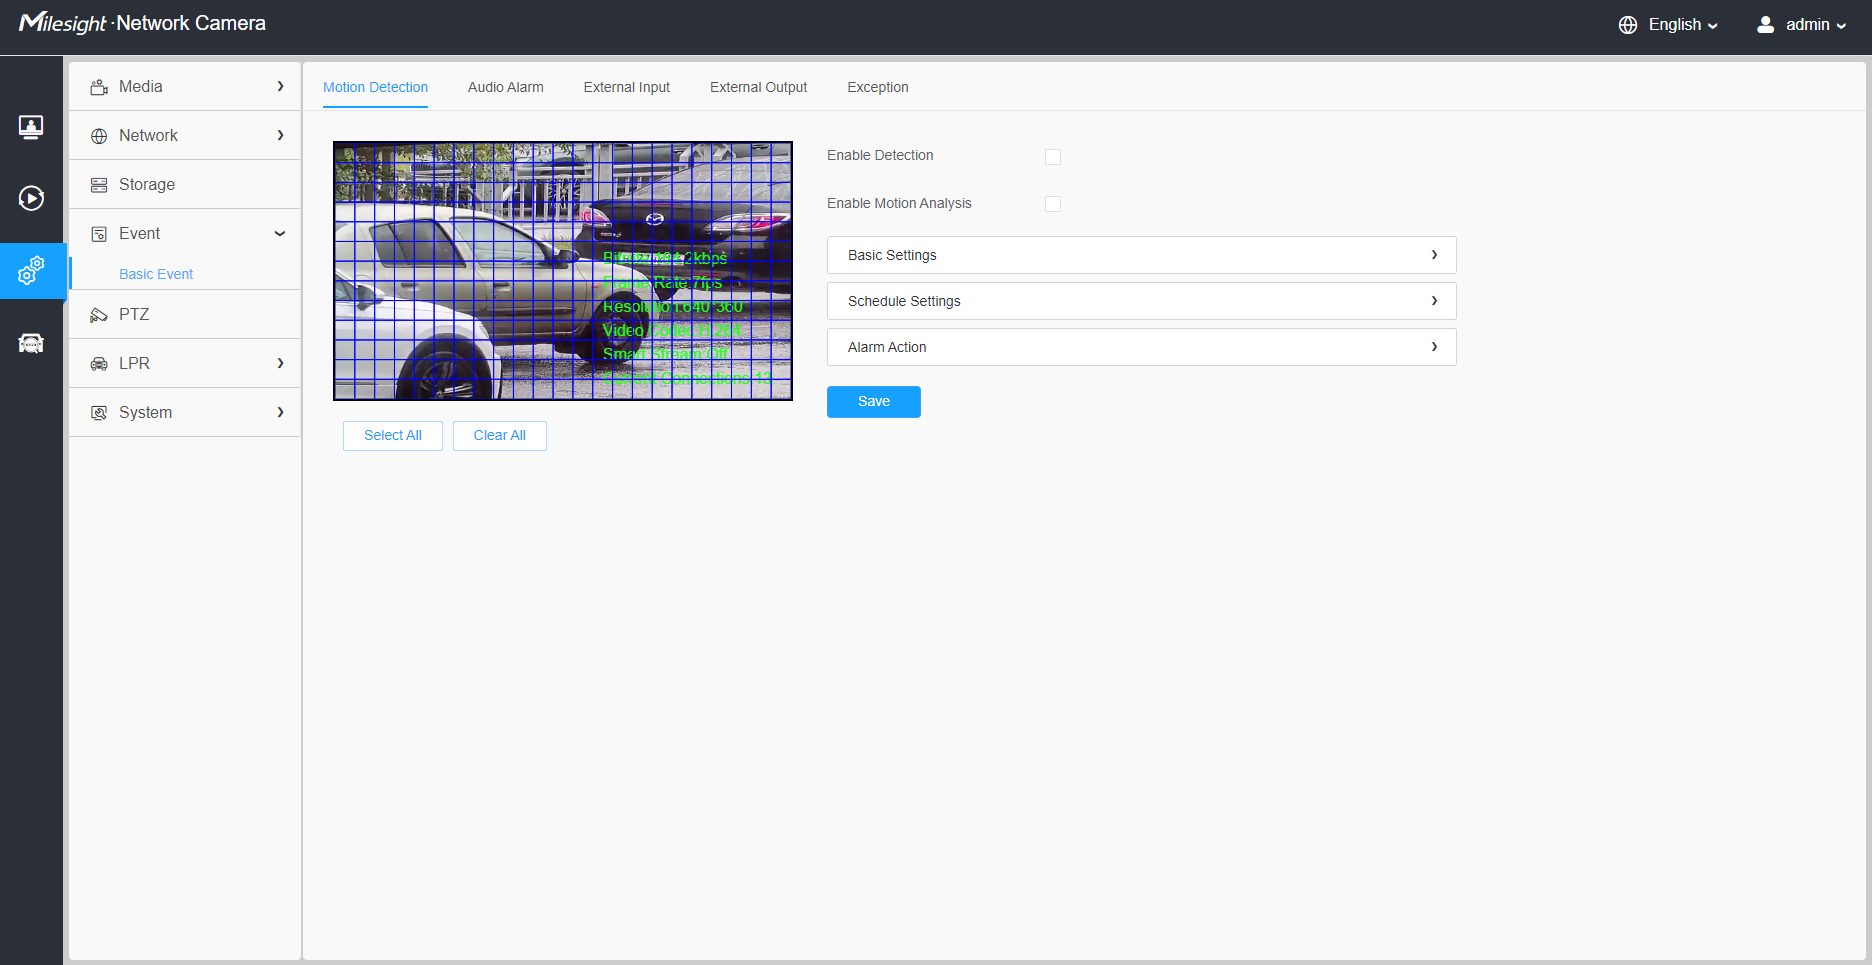
Settings steps are shown as follows:
Step1: Check the checkbox to enable the motion detection.
Step2: Check the check box to enable the motion analysis.
Step3: Select the detection mode;
Step4: Set motion region;
| Parameters | Function Introduction |
|---|---|
| Enable Detection | Check the checkbox to enable Motion Detection function. |
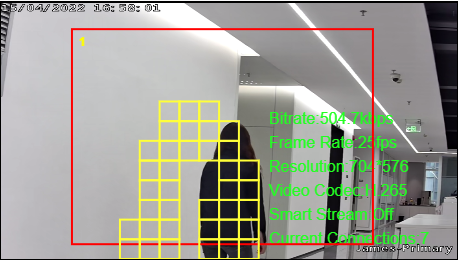
| Enable Motion Analysis |
When Motion Analysis is enabled, the moving region will turn yellow so that the user can know exactly where the motion occurred. Note: Only support when HTTP is selected in Live View.
 |
| Click the button, the motion in the area will be detected. | |
| Click the button, the area drawn before will be removed. | |
| Save the configuration. |
[Basic Settings]
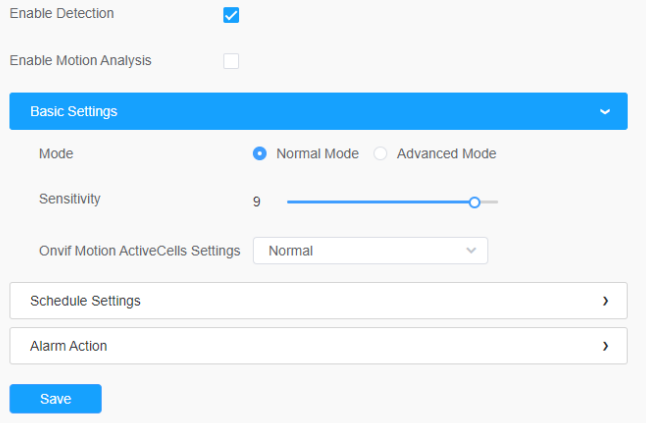
| Parameters | Function Introduction |
|---|---|
|
Detection Mode |
Normal Mode and Advanced Mode are available for the option. When Advanced Mode is selected, users can configure up to 4 detection regions and sensitivity for each detection region. |
| Sensitivity | Sensitivity level, 1~10 |
| Onvif Motion ActiveCells Settings | Normal and Compatible are available for the option. If the setting of motion region of the third-party software is different from ours, please set this option to Compatible |
[Schedule Settings]
Step5: Set motion detection schedule;
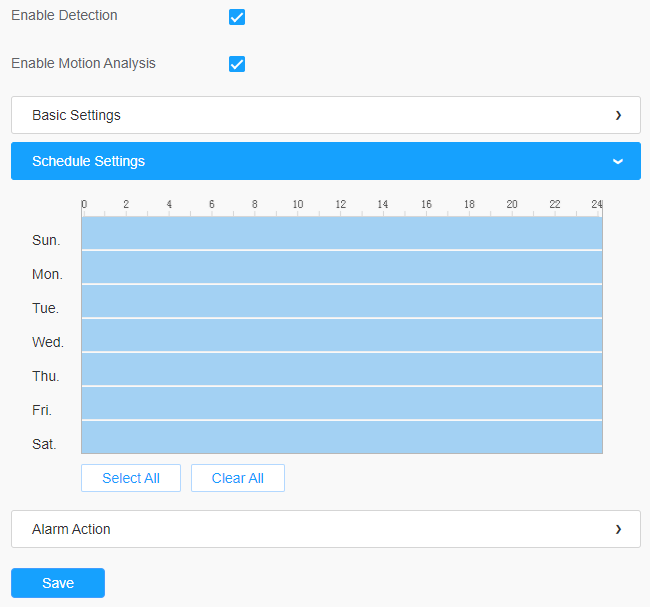
| Parameters | Function Introduction |
|---|---|
| Copy the schedule area to another date. | |
|
Select all schedule. |
|
| Clear all schedule. |
[Alarm Action]
Step6: Set alarm action;
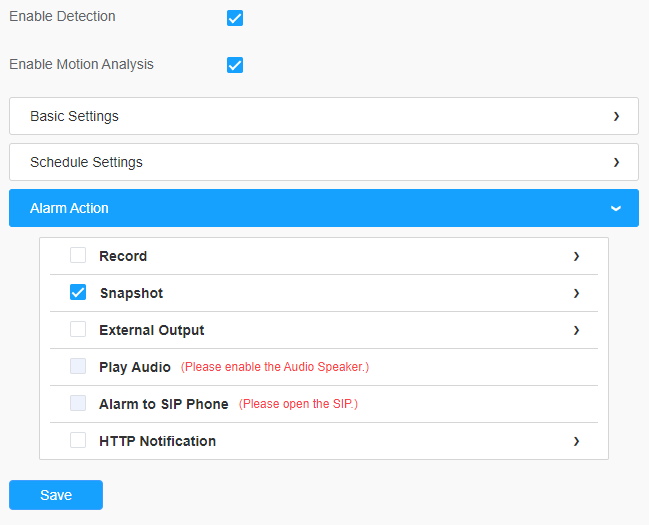
| Parameters | Function Introduction |
|---|---|
| Record | Duration: Selected the duration time of alarm.
5s/10s/15s/20s/25s/30s are available. Linkage: Save alarm recording files into SD Card or NAS or Upload the recording files via FTP. |
| Snapshot | Number: The number of snapshot, 1~5 are
available. Interval: This cannot be edited unless you choose more than 1 to Snapshot. Linkage: Save alarm recording files into SD Card or NAS, Upload the recording files via FTP and send alarm email. |
| External Output | If the camera equips with External Output, you can enable the action after configuring the trigger duration. |
| Play Audio |
Auto/10 seconds/30 seconds/1 minute/5 minutes/10 minutes are available. Note: Please enable the Audio Speaker.
|
| Alarm to SIP Phone | Support to call the SIP phone after enable the SIP function. |
| HTTP Notification |
Support to pop up the alarm news to specified HTTP URL. Note:
|
| White LED |
When the alarm triggered, White LED will turn on to warn the detected
objects.
Note: Only for PTZ Bullet. |
| PTZ Motion | When the motion alarm triggered, PTZ Motion allows the camera move
the lens to the motion triggered position and zoom in. Note: Only for
PTZ series. |
| Call Preset/ Call Patrol/Call
Pattern (Only for External Input) |
When the motion alarm triggered, the
specified preset/patrol/pattern can be called. Note: Only for PTZ series.
|