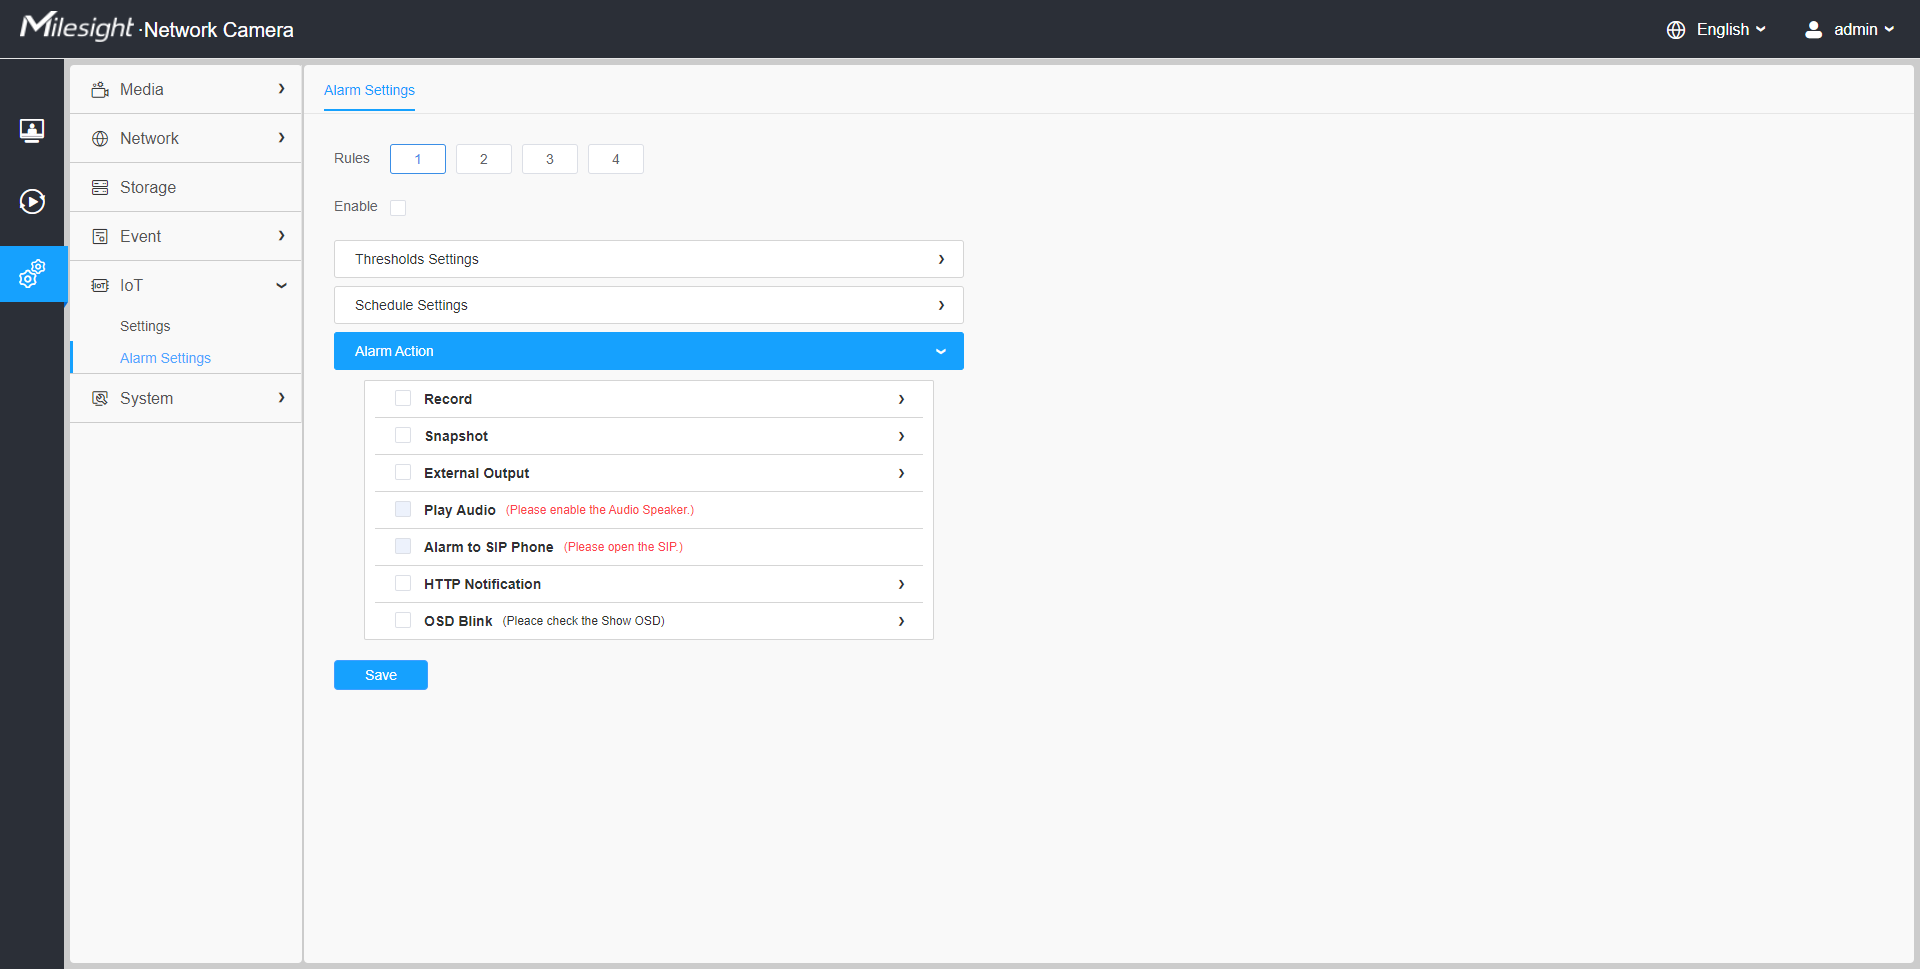
8.7.2 Alarm Settings
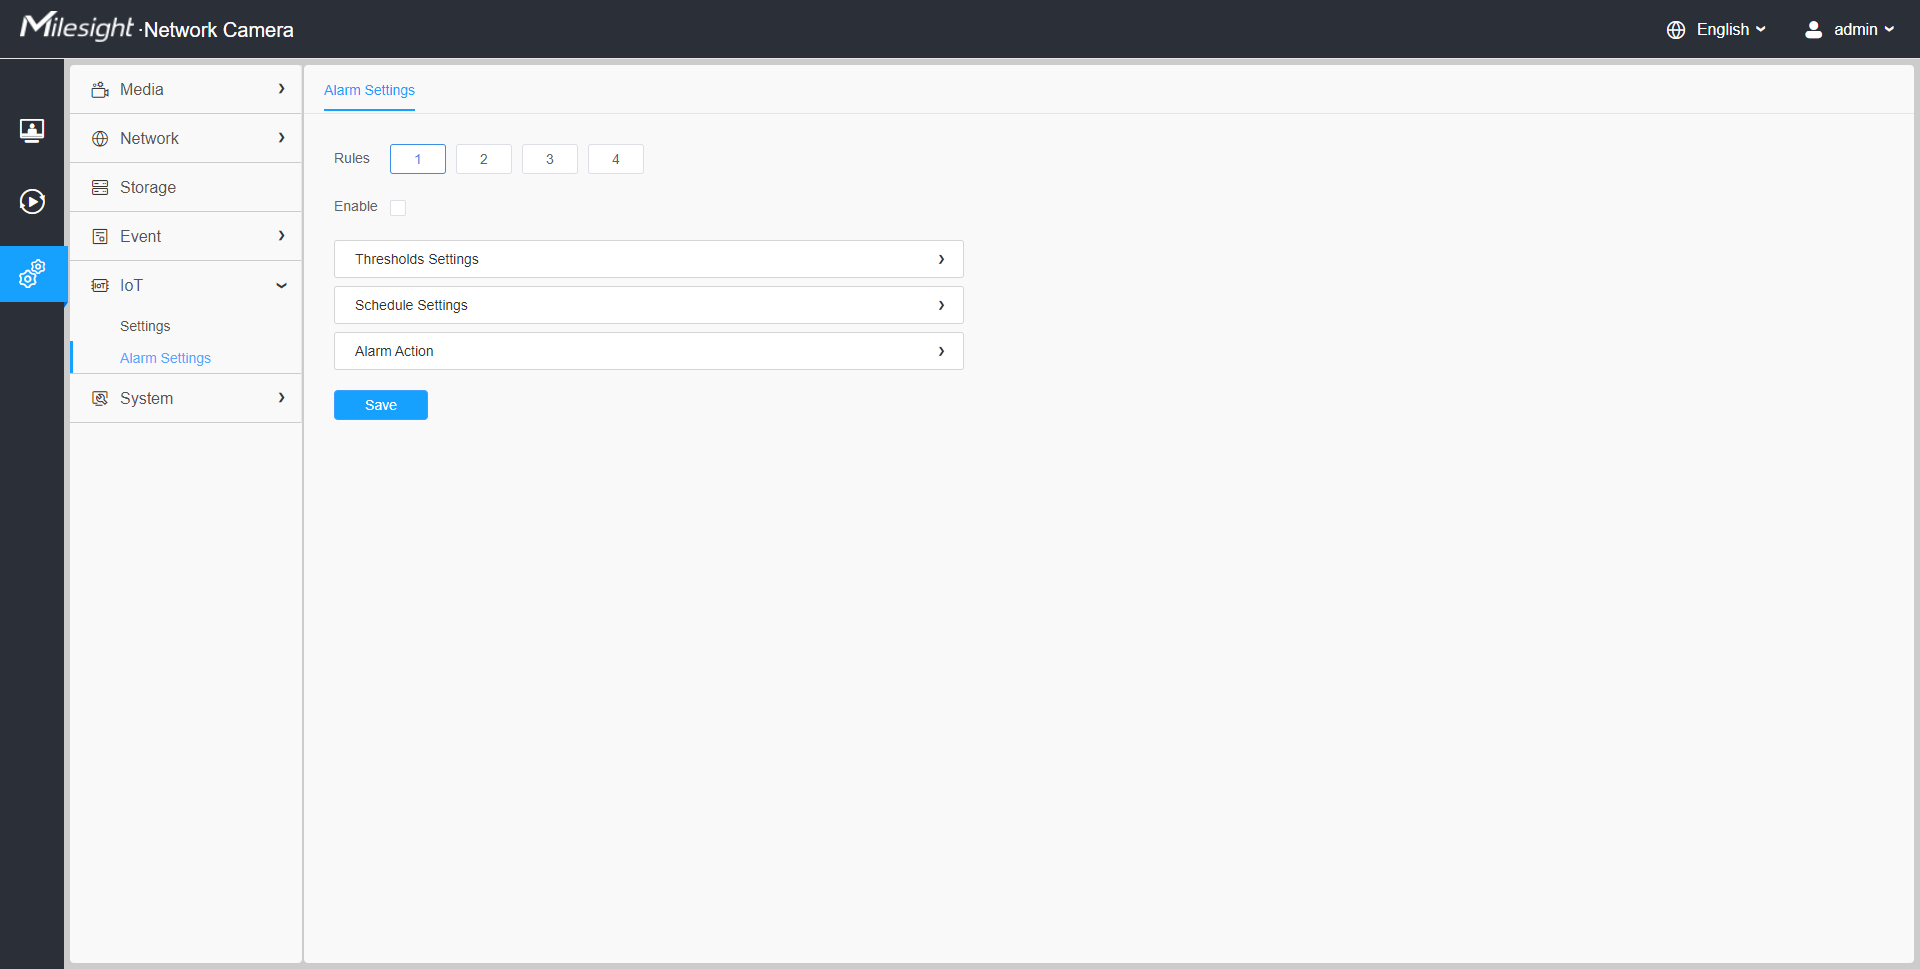
Step 1: Select the alarm rule that you want to set and you can configure four kinds of rules.
Step 2: Check the check box to enable Alarm Rules.
[Thresholds Settings]
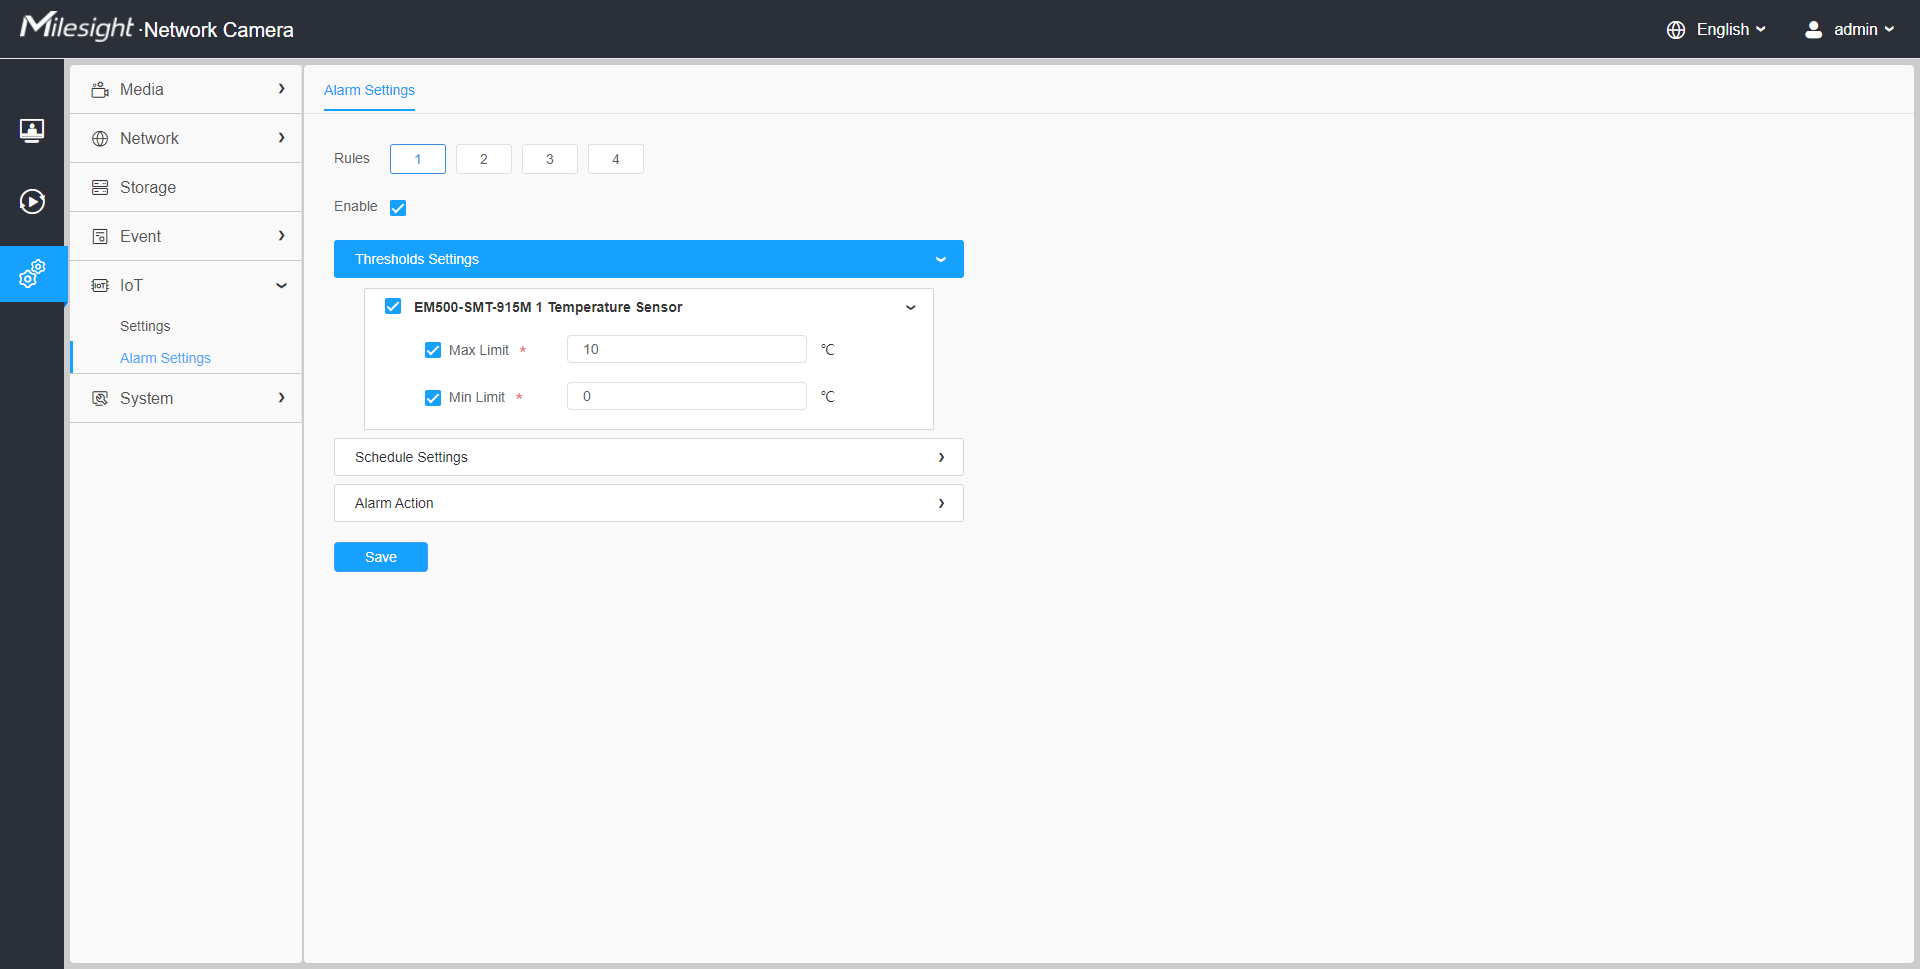
Step 3: Click to select the sensor to alarm.
Step 4: Set threshold for the selected sensor. When the data reaches the critical value, the alarms will be triggered. Both upper and lower thresholds are configurable. You can also only configure upper or lower threshold.
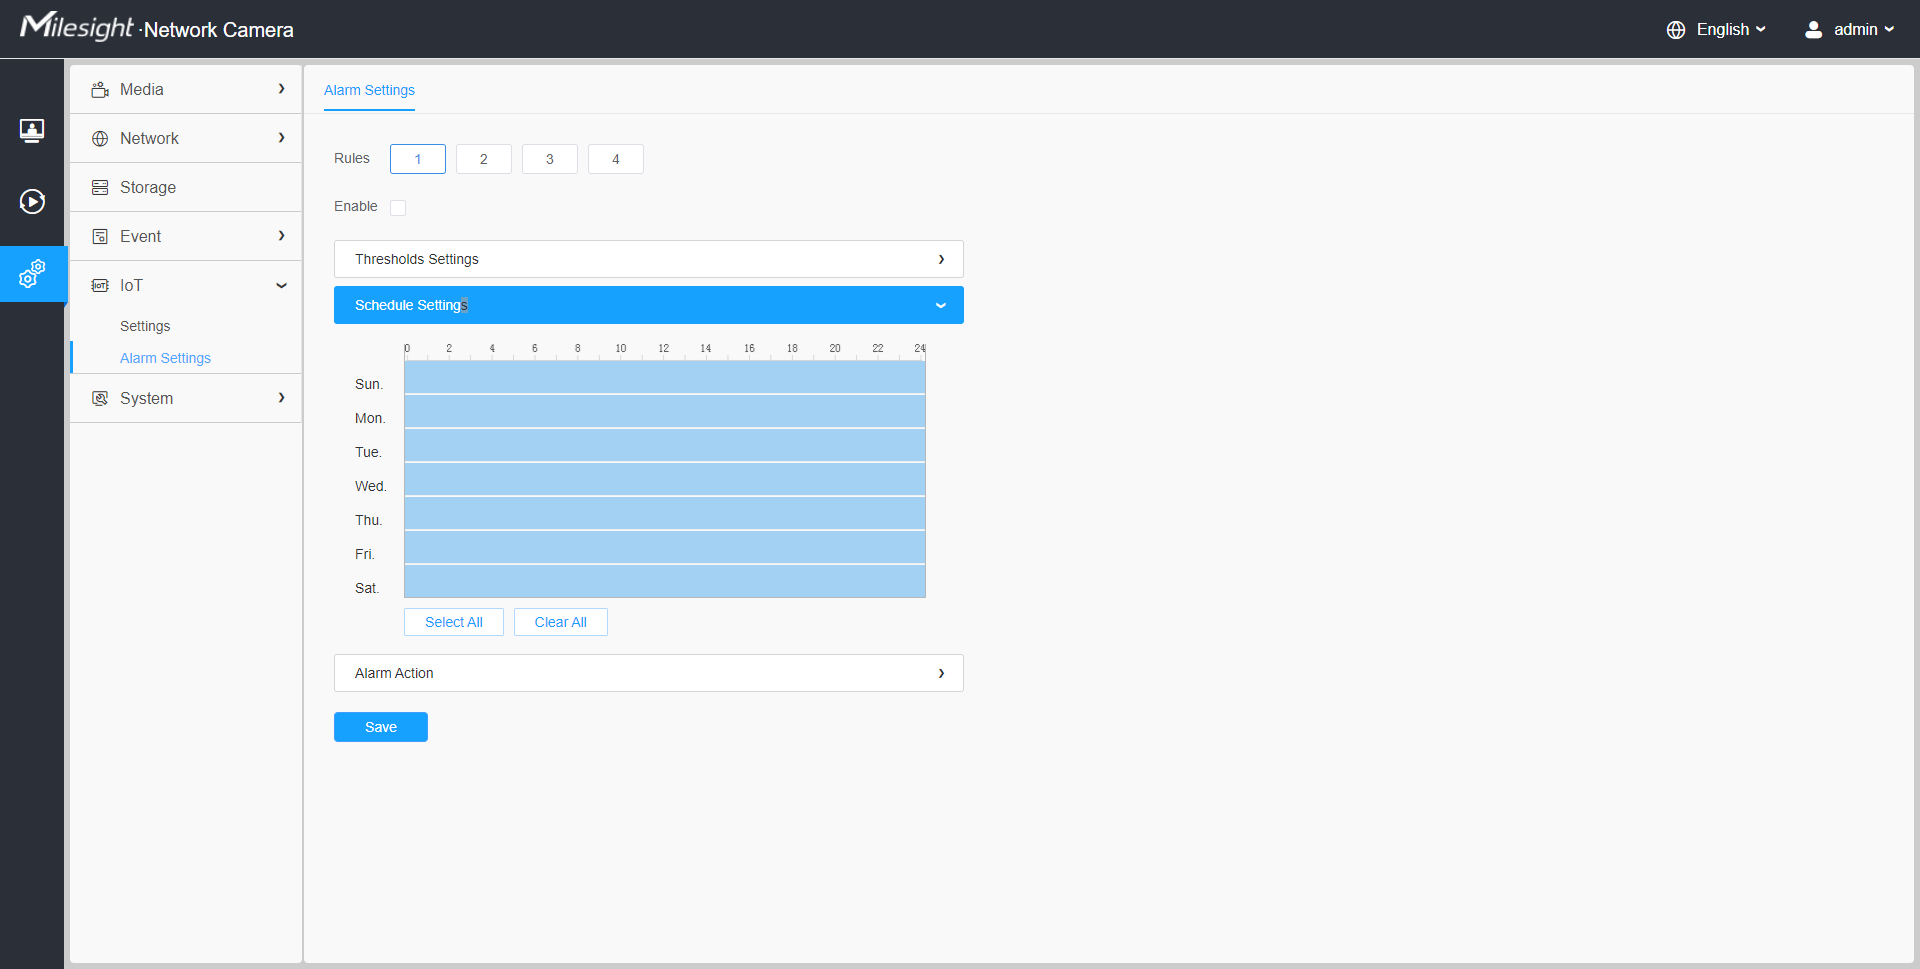
[Schedule Settings]
Step 5: Set the alarm schedule for IoT.
| Parameters | Function Introduction |
|---|---|
| Copy the schedule area to another date. | |
|
Select all schedule. |
|
| Clear all schedule. |
[Alarm Action]
Step 6: Set Alarm Action.
| Parameters | Function Introduction |
|---|---|
| Record | Duration: Selected the duration time of alarm.
5s/10s/15s/20s/25s/30s are available. Linkage: Save alarm recording files into SD Card or NAS or Upload the recording files via FTP. |
| Snapshot | Number: The number of snapshot, 1~5 are
available. Interval: This cannot be edited unless you choose more than 1 to Snapshot. Linkage: Save alarm recording files into SD Card or NAS, Upload the recording files via FTP and send alarm email. |
| External Output | If the camera equips with External Output, you can enable the action after configuring the trigger duration. |
| Play Audio |
Auto/10 seconds/30 seconds/1 minute/5 minutes/10 minutes are available. Note: Please enable the Audio Speaker.
|
| Alarm to SIP Phone | Support to call the SIP phone after enabling the SIP function. Note:
Please open the SIP. |
| HTTP Notification | Support to pop up the alarm news to specified HTTP URL. |
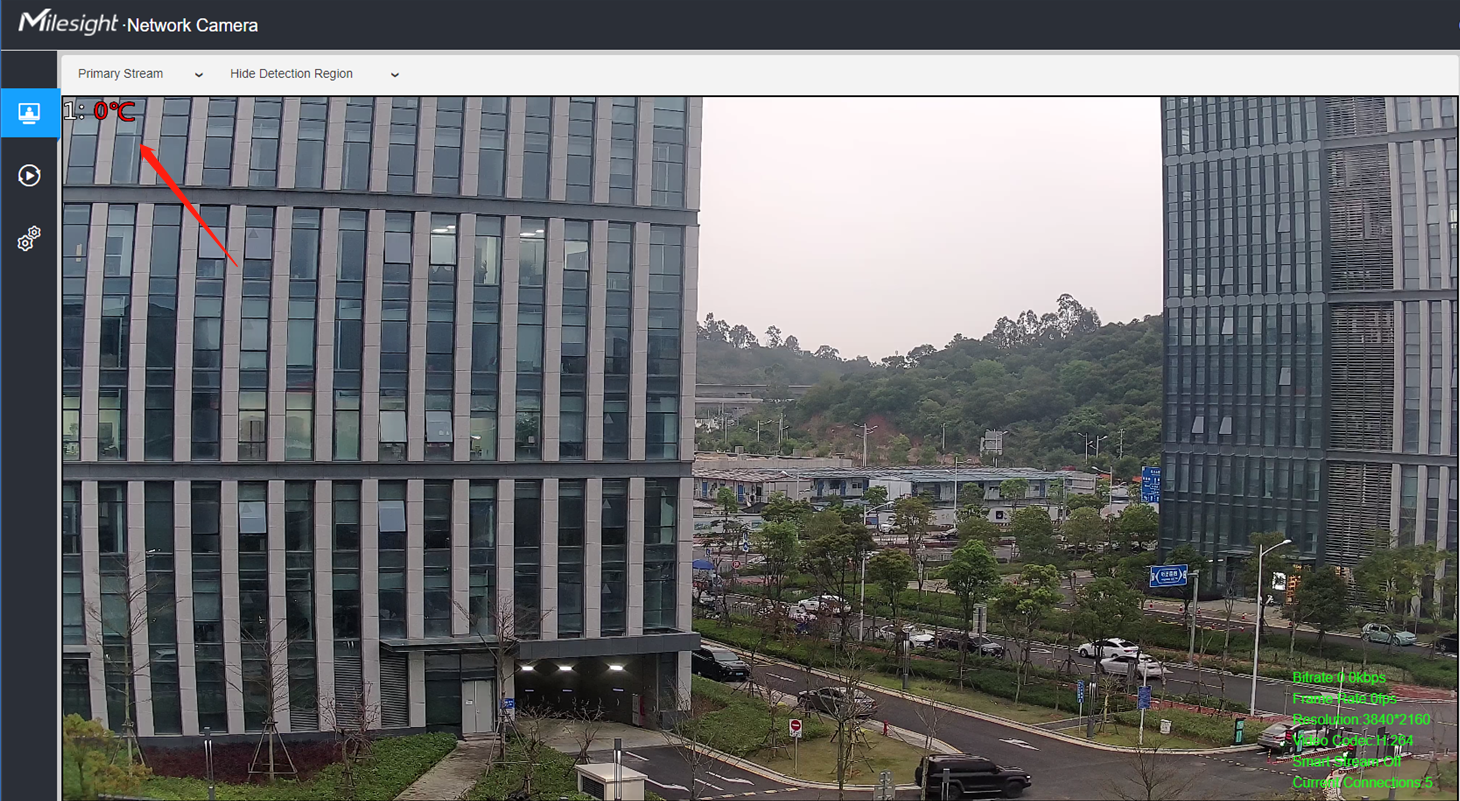
| OSD Blink | If the Show OSD in the page of sensor configuration is checked, the
OSD will blink when alarm is triggered. OSD Blink Time: Support to set the blinking duration of the OSD, 1~10 are Available. For example, the alarm action is set to OSD blinking at an interval of 3 seconds, when the data reaches the critical value, the alarms will be triggered and the OSD blinking on the live view interface.
|