3.6.1 Camera Management
Step 1. Add camera.
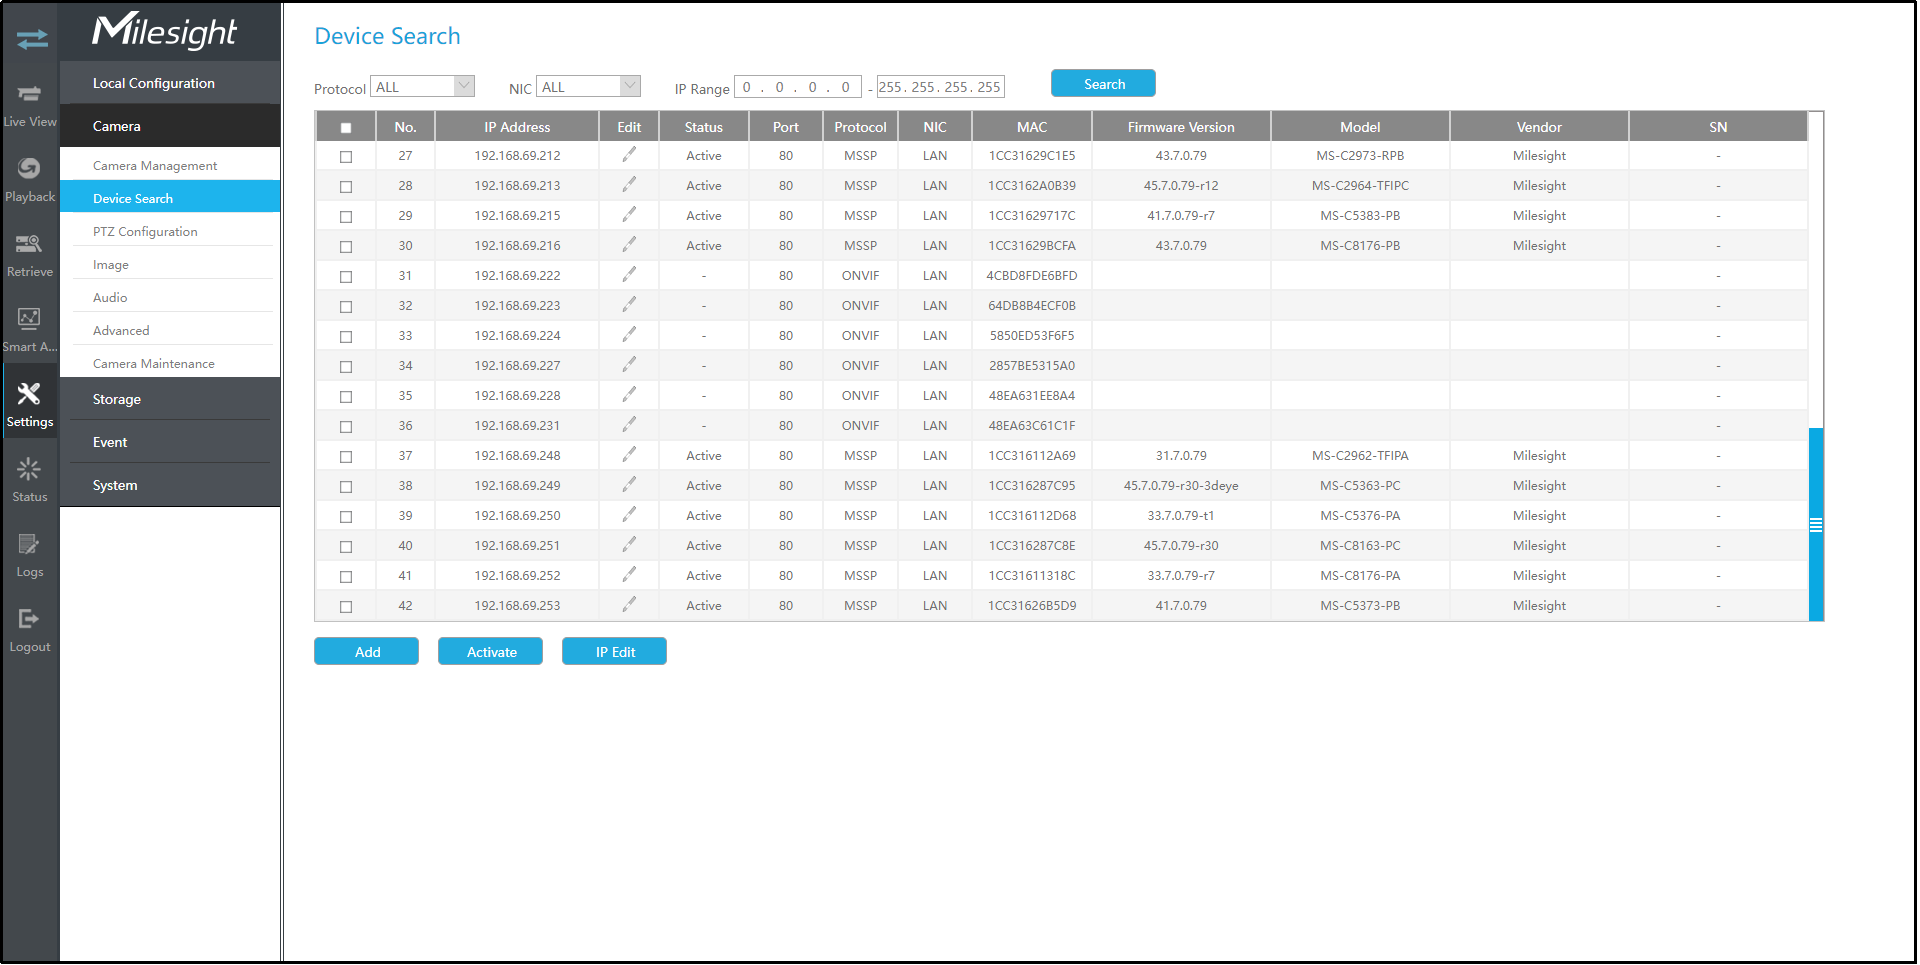
Method 1. Add camera through Device Search interface. ‘Camera’→‘Device Search’.
1. Select IP Range, NIC and Protocol, which includes ALL, ONVIF and MSSP.

2. Click ![]() button to search cameras at the same LAN with NVR.
button to search cameras at the same LAN with NVR.
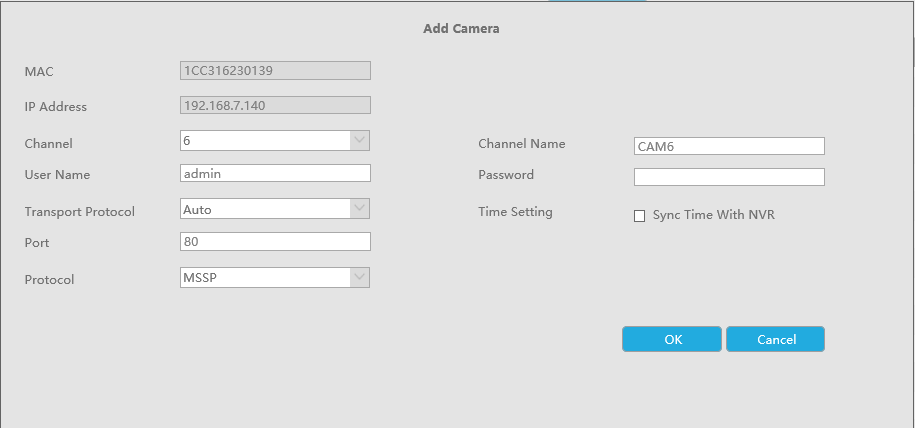
3. Select one channel, click ![]() button, input password and click
button, input password and click ![]() button to
finish.
button to
finish.
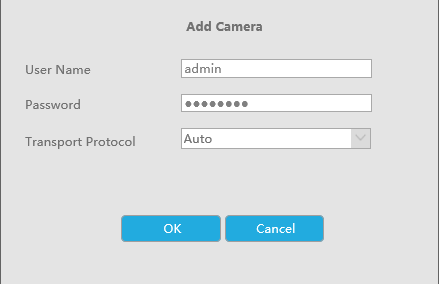
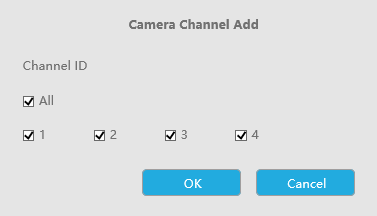
4. Check ![]() to batch adding the
network cameras if they are with the same password, you can choose TCP, UDP or Auto
transport protocol for it. Click
to batch adding the
network cameras if they are with the same password, you can choose TCP, UDP or Auto
transport protocol for it. Click ![]() to finish batch adding.
to finish batch adding.
MSSP: You can search out all Milesight cameras which have different network segment in the LAN.
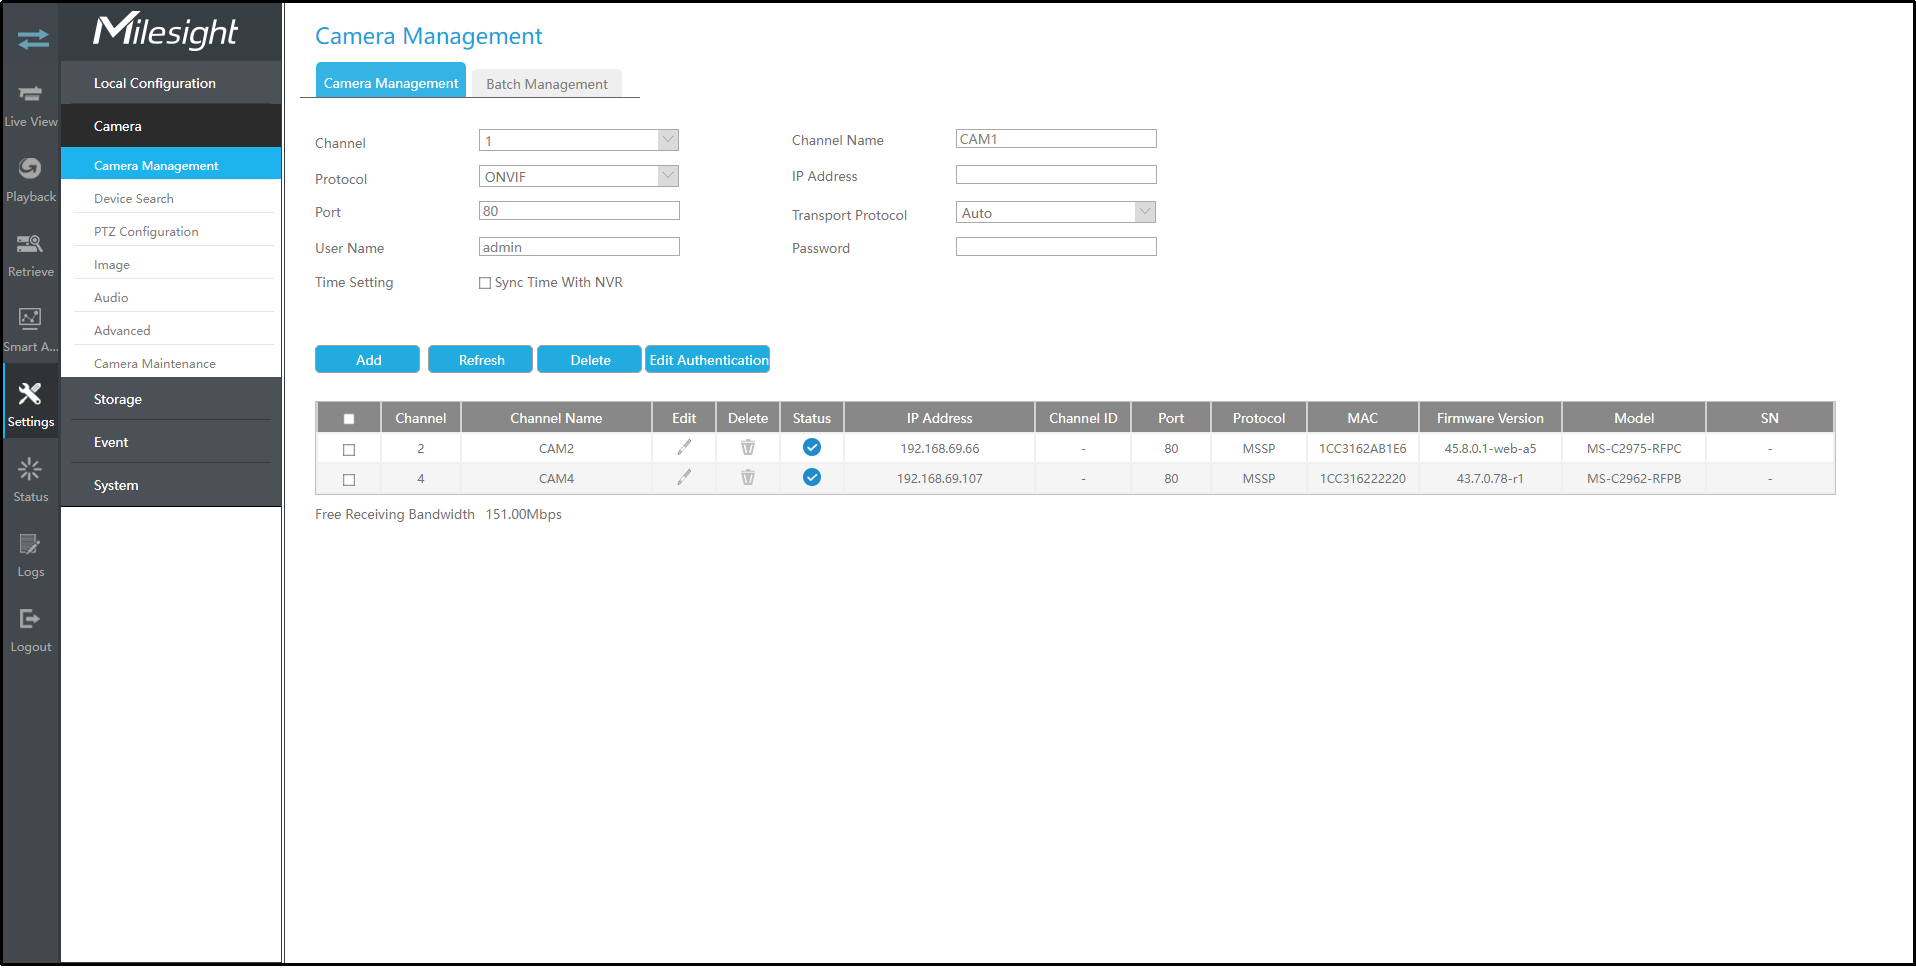
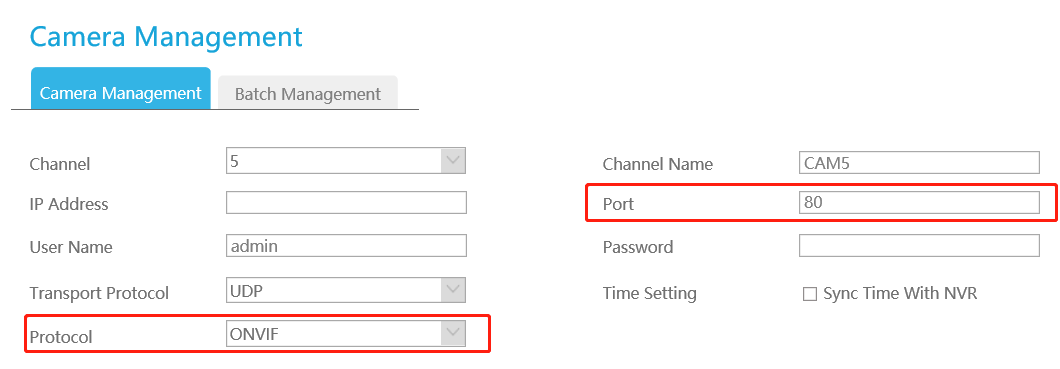
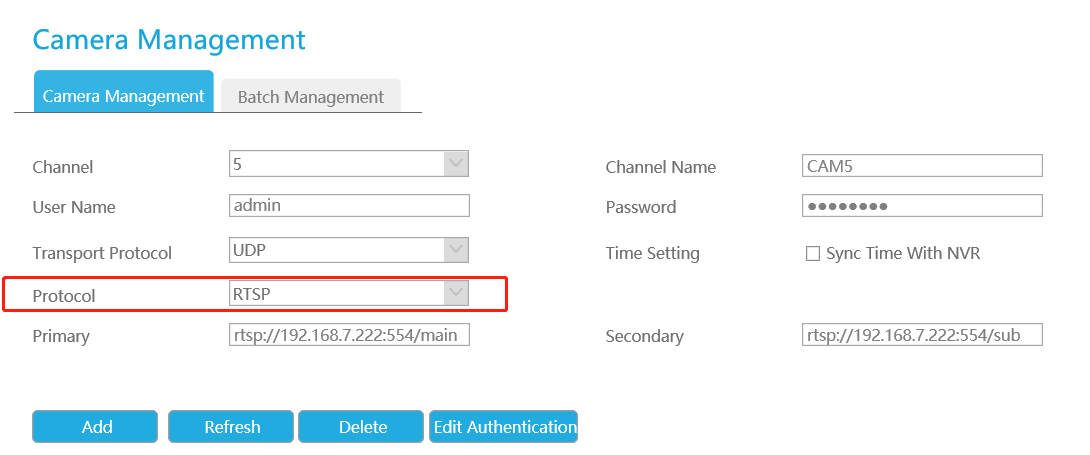
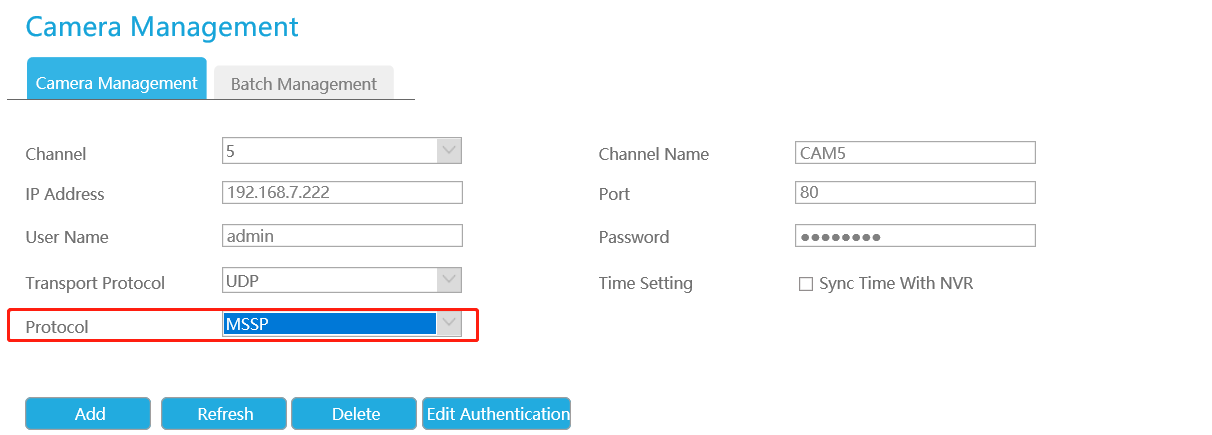
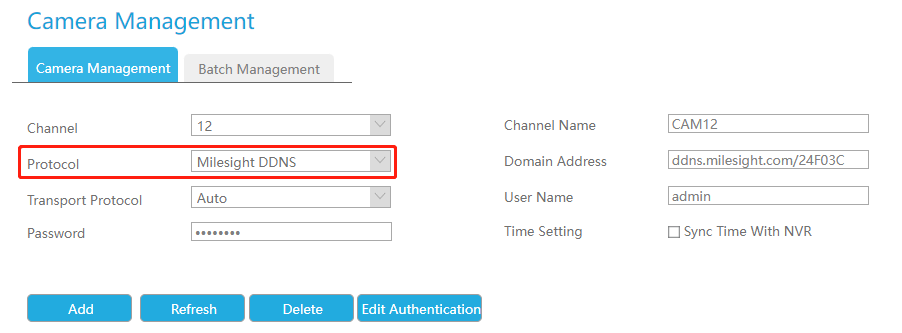
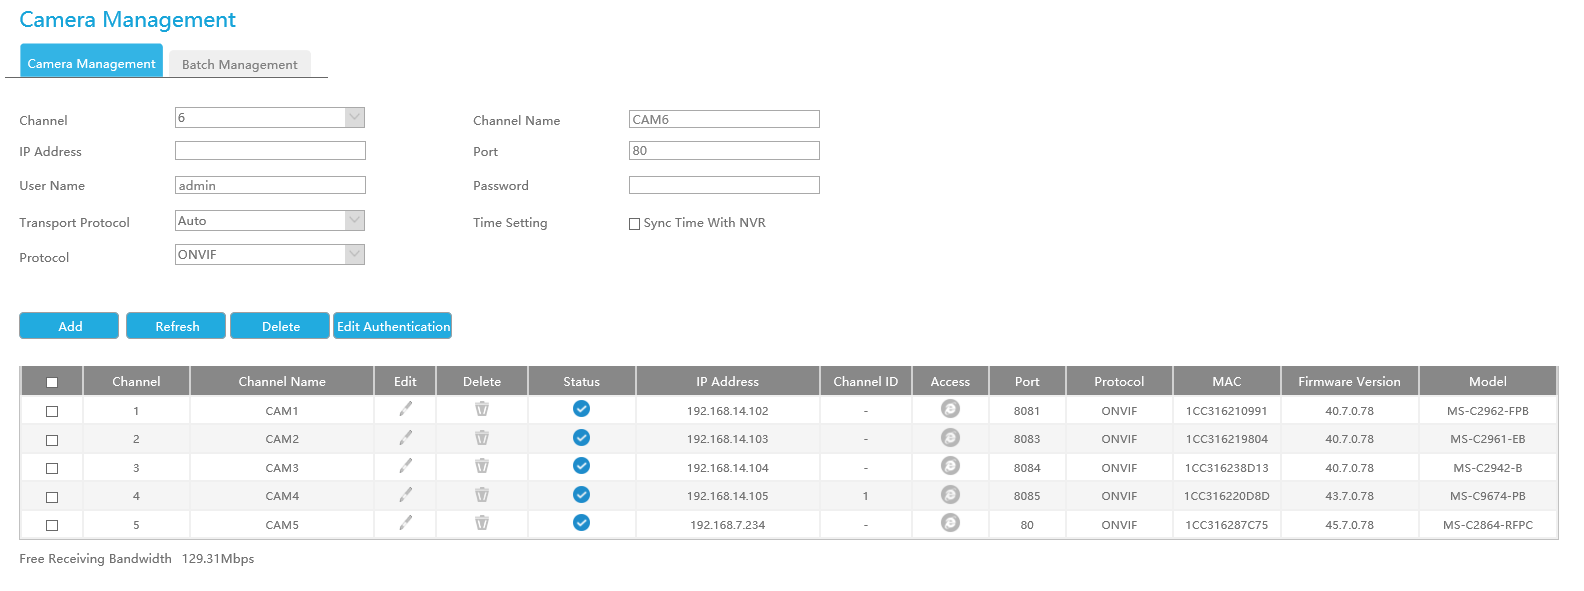
Method 2. Add camera through camera management interface. ‘Camera’→‘Camera Management’.
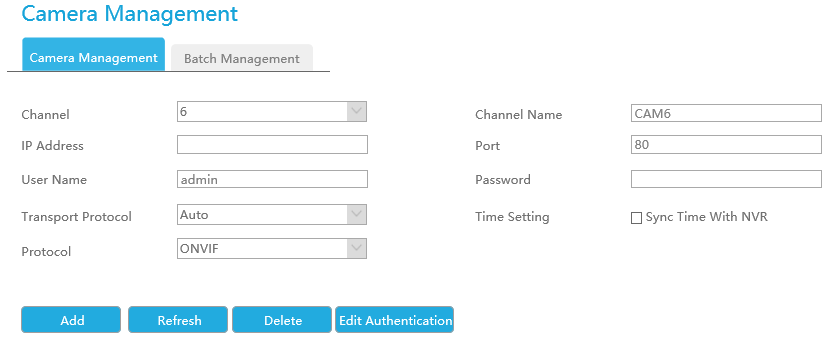
Select channel ID, input complete information, then click [Add] button.
There are three protocols available for camera connection:
- ONVIF: You can add any ONVIF IP cameras with ONVIF protocols.
- RTSP: You can add any IP cameras with RTSP protocol streams (Port: 554). It needs you to input complete resource path of the IP camera to add it. Take Milesight device for example, the resource path of main stream is “rtsp://IP:port/main” and secondary stream is “rtsp://IP:port/sub”. The length of RTSP can be up to 128 bits.
- MSSP:You can add Milesight cameras which are in the same LAN with MSSP protocol.
- Milesight DDNS: You can add Milesight cameras via Milesight DDNS. After enabling DDNS on Milesight camera and selecting “ddns.milesight.com” as provider, you can add the camera via the Domain Address “ddns.milesight.com/MAC address”.
You can add offline cameras to Milesight NVRs by method2. As long as the device information you fill in is correct, NVR will determine whether the device is connected and update the camera status automatically.
1. When adding a fisheye camera in Multi-Stream Mode, NVR would distinguish all of its channels as independent channels for adding, which depends on its Display Mode. For Example, if a Fisheye camera’s Display Mode is 1O3R, there would be 4 Channels to be added. The original view gets Channel ID as 1, and the first region view gets Channel ID as 2, and so on. Thus you can select the ID to add as your demand.
2. Only Fisheye camera has Channel ID.

Step 2.Check the connection status.
After adding the IP channels, click ![]() button on Camera Management interface, then
button on Camera Management interface, then
![]() appears under
Status.
appears under
Status.
If it shows the ![]() icon, users can move the mouse to the corresponding icon in the status bar to check the
reason for the disconnection.
icon, users can move the mouse to the corresponding icon in the status bar to check the
reason for the disconnection.

Step 3.Configure camera.
Configure one camera
After successfully adding the camera, click ![]() to re-edit the
channel info.
to re-edit the
channel info.
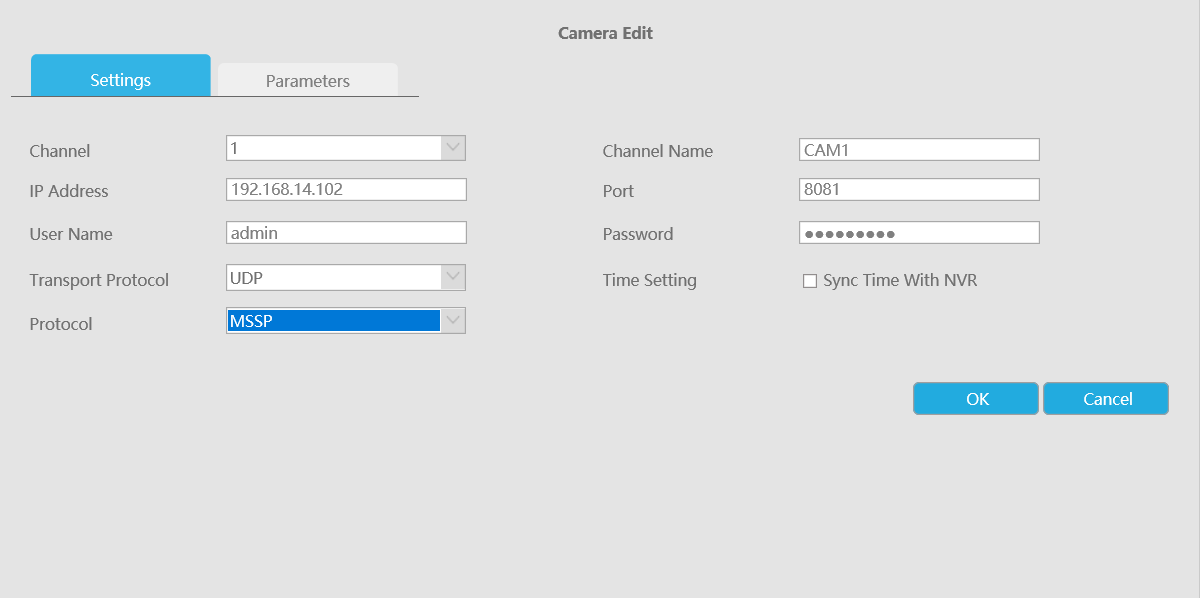
Go to Parameters page to re-edit parameters of this channel, select the Record Stream Type as General or Event to set different parameters separately. It is recommended to set lower parameters for General Stream to save certain storage. Click [OK] to save after your configuration.
- Event Record Stream Configuration includes Events like Motion Detection, VCA, Camera Alarm Input and Smart Analysis.
- For Fisheye camera, you can change its Transfer Mode, Installation Mode, Display Mode and Channel ID through Camera Edit Settings interface.
- Make sure your camera’s firmware version is 4X7.0.75 or above.
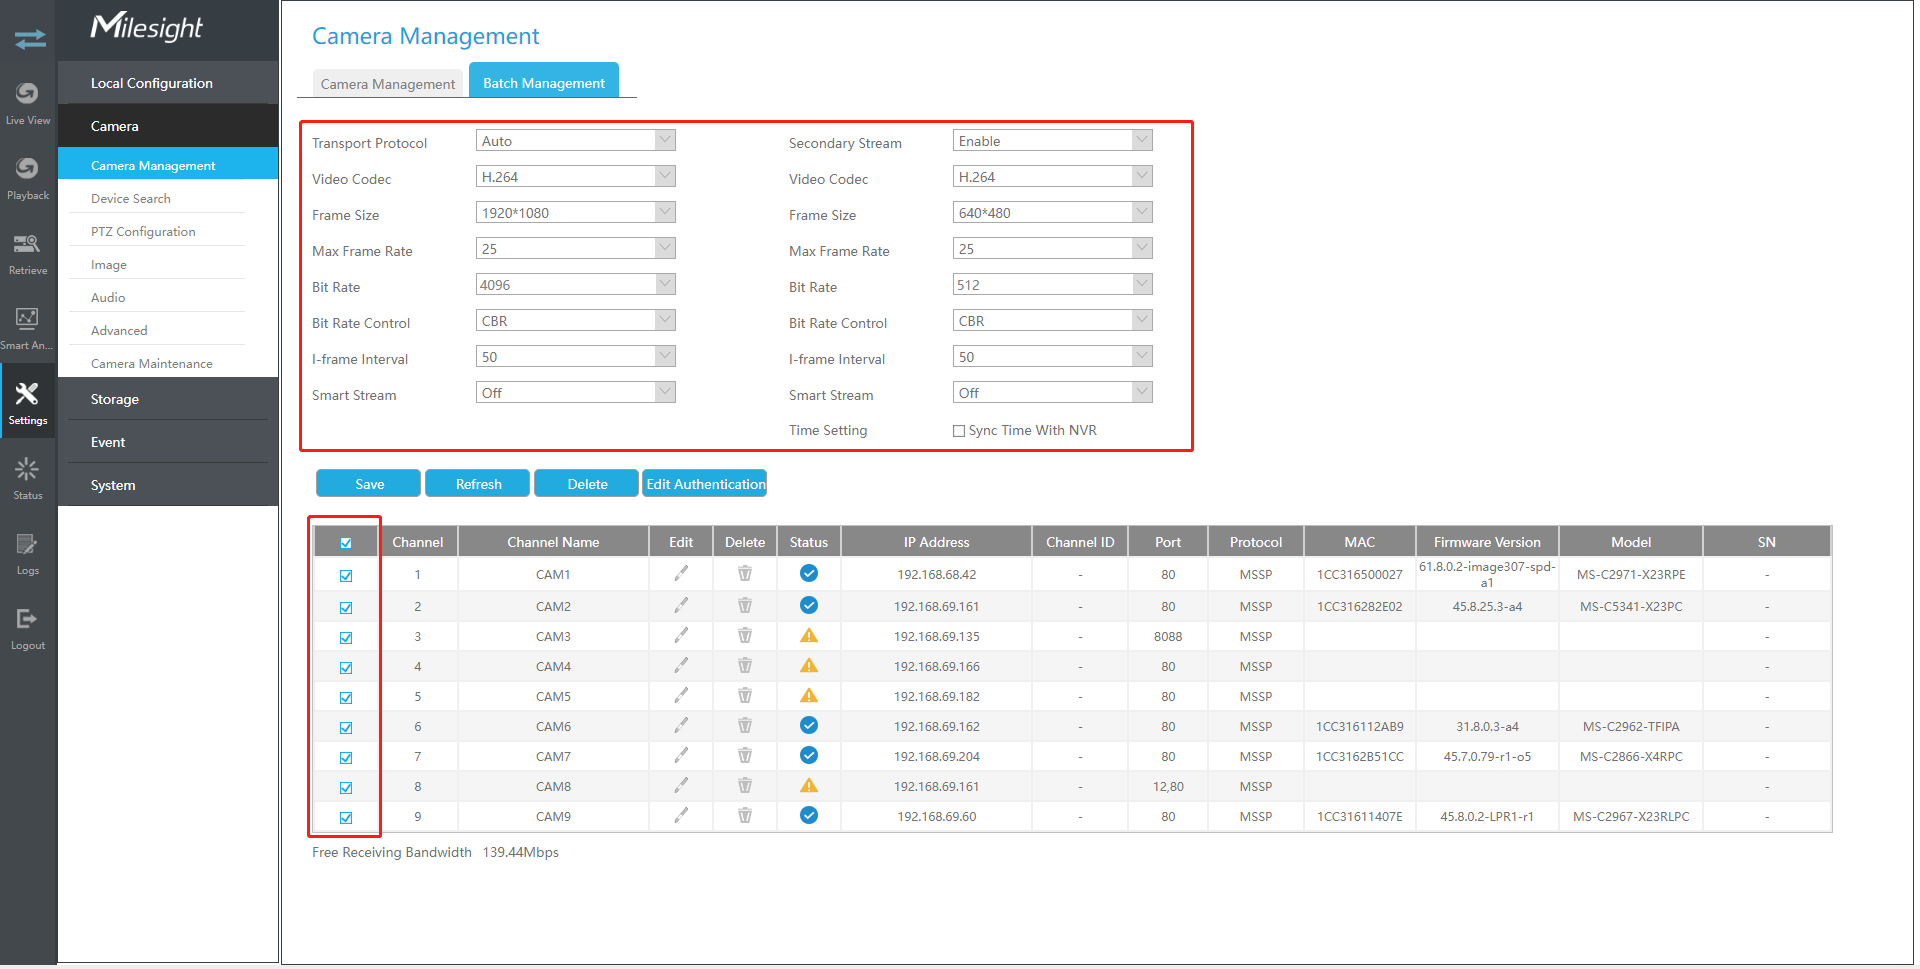
Batch configuring camera
Click ![]() , select
multiple channels and set parameters of cameras.
, select
multiple channels and set parameters of cameras.
Step 4. Delete camera.
You can delete this channel by clicking ![]() , or you can select multiple devices and then click
, or you can select multiple devices and then click![]() to delete.
to delete.

Step 5. Configure PoE Channel(Only for PoE NVR)
1. Connect Milesight camera to PoE port, it will detect the camera automatically.
2. If the camera's password is the same with NVR admin password, it will be successfully authenticated and be changed into the same network segment with internal NIC IPv4 address, then the camera will be connected successfully.
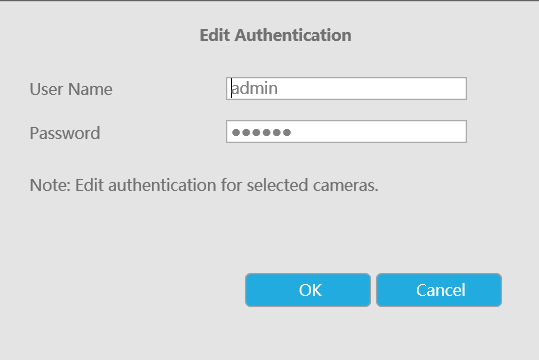
3. If the camera's password is different with NVR admin password, the PoE channel will
show disconnect status. You need to input the camera's password by clicking ![]() to realize
authentication ( you can also multi-select the devices and then click this button). Then
the camera will be changed into the same network segment with internal NIC IPv4 address
and will be successfully connected. Next time, NVR will use the password you input to
authenticate this camera when you re-plug it.
to realize
authentication ( you can also multi-select the devices and then click this button). Then
the camera will be changed into the same network segment with internal NIC IPv4 address
and will be successfully connected. Next time, NVR will use the password you input to
authenticate this camera when you re-plug it.
- When NVR detects the inactive camera connected via PoE port, the camera will synchronize the password of NVR, and then camera will be successfully connected. For Fisheye camera in Multi-stream Mode, it would add all channels by default.
- The steps for adding the third party PoE cameras plugged into The PoE NVR:
- Set camera’s IP segment to the same as NVR PoE NIC before plugging to PoE NVR;
- Select PoE for NIC in Device Search interface, click Search button to search out cameras;
-
Select cameras and click Add button to add them.
4. You can access tocameras website
directly by clicking![]() , which
can save much steps to configure cameras with complete settings which were
unavailable.
, which
can save much steps to configure cameras with complete settings which were
unavailable.
- Please enable Channel Access in Network->More first;
- Please select HTTP as transport protocol for PoE-connected cameras;
- Please upgrade the NVR firmware version to xx.8.0.6 or above.