First Start
This chapter describes the required steps to complete the basic setup, and verify that the gateway is ready for deployment.
Prerequisites
Prepare the following items and information before commissioning the gateway.
- Power Supply: A USB 5 VDC/2A power supply, a 5-12 VDC power supply, or an 802.3af PoE source with the optional PoE splitter.
- A network router and an Ethernet cable if Ethernet WAN will be used.
- Computer.
- For the cellular version, an activated Micro (3FF) SIM card. APN and PIN information are provided upon demand.
- (Optional) A working LoRaWAN® network server. Recommended that NS adds the gateway first.
Prepare the Gateway
Complete the minimum hardware preparation required for first-time commissioning.
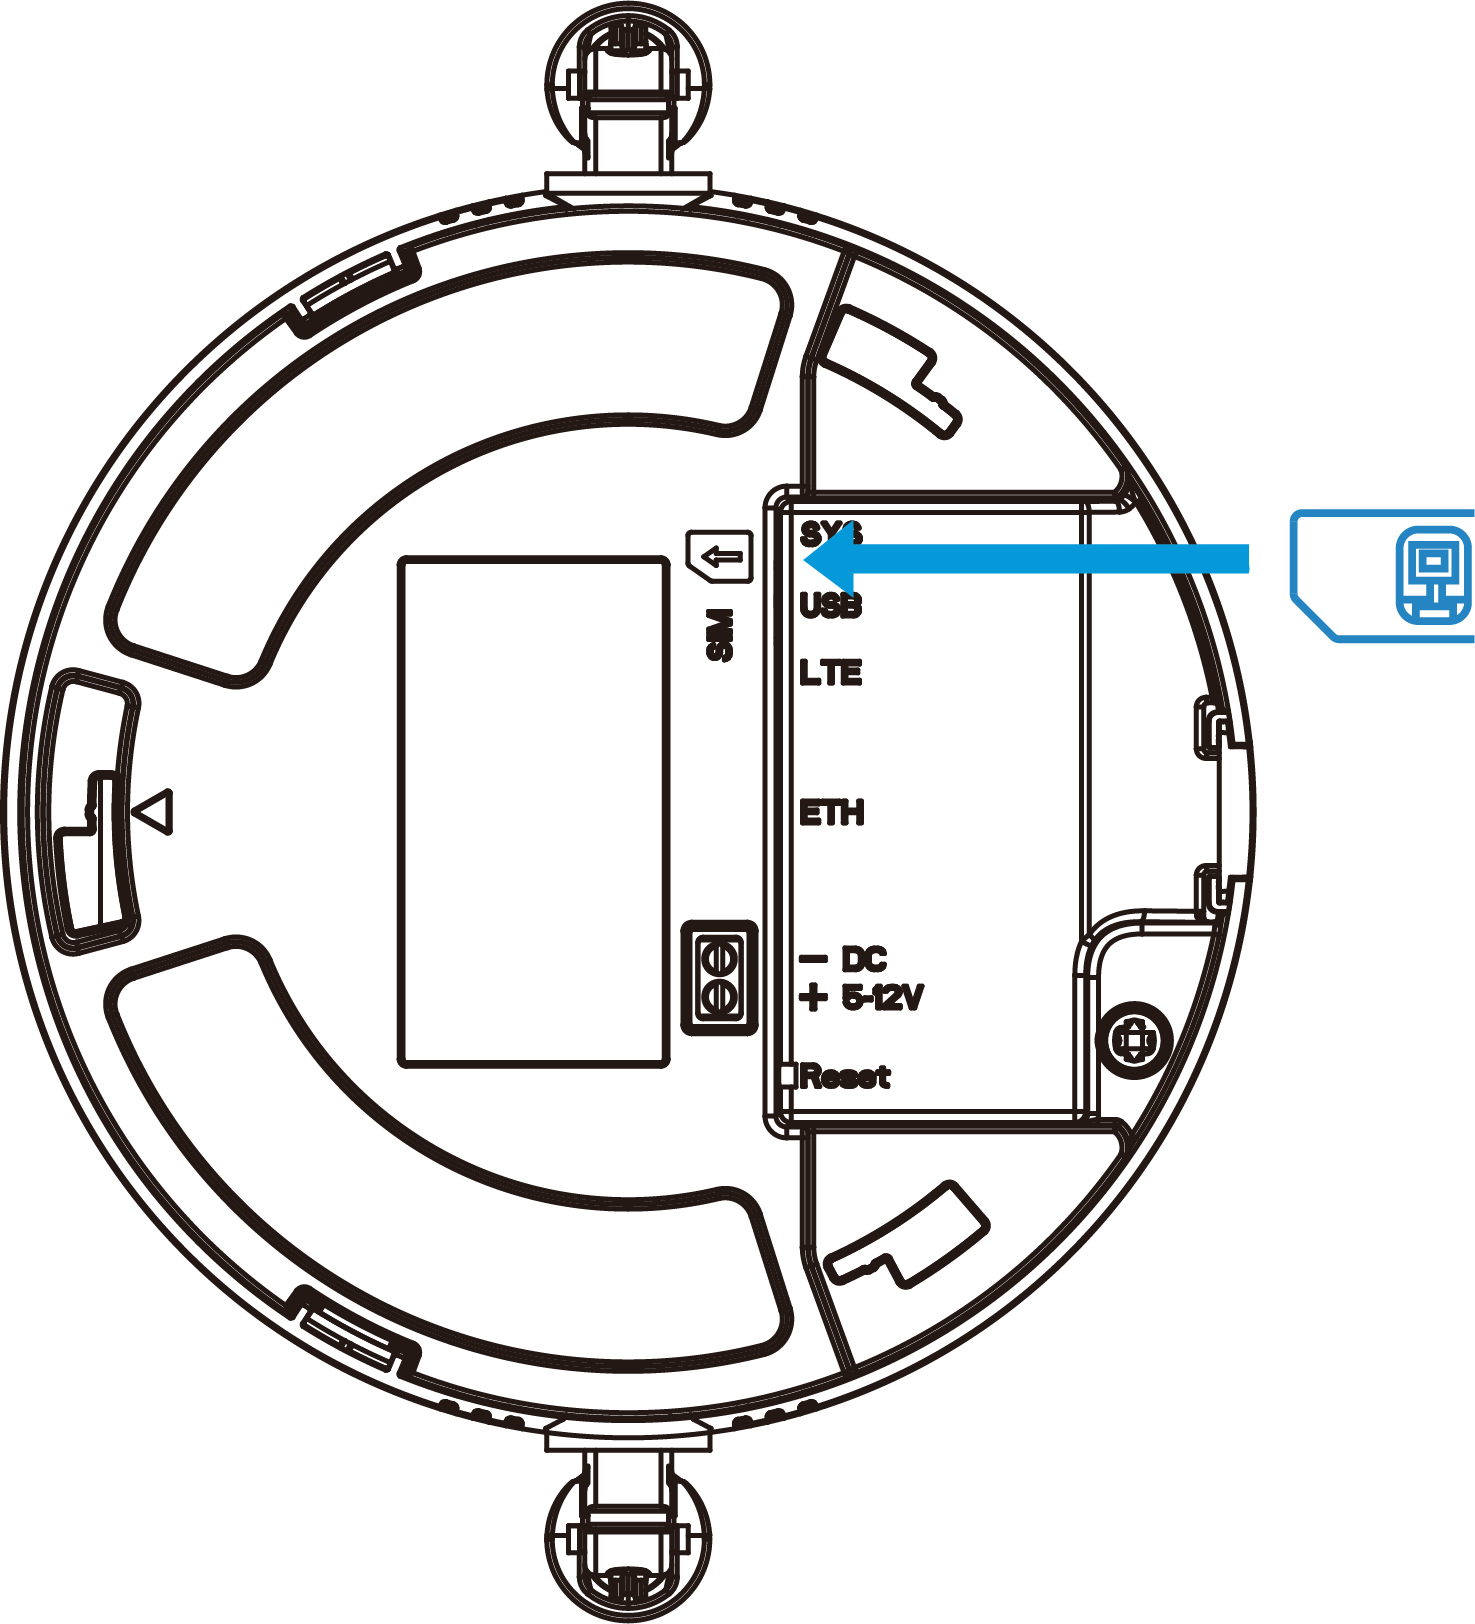
- Insert the SIM Card (Cellular Version Only)
- Insert the micro (3FF) SIM card into the gateway according to the direction indicated
on the device. To remove the SIM card, press the card and it will pop out
automatically.
- Connect Ethernet (If Required)
- If Ethernet WAN will be used, connect the Ethernet port to a router.
- Connect the Power Supply
-
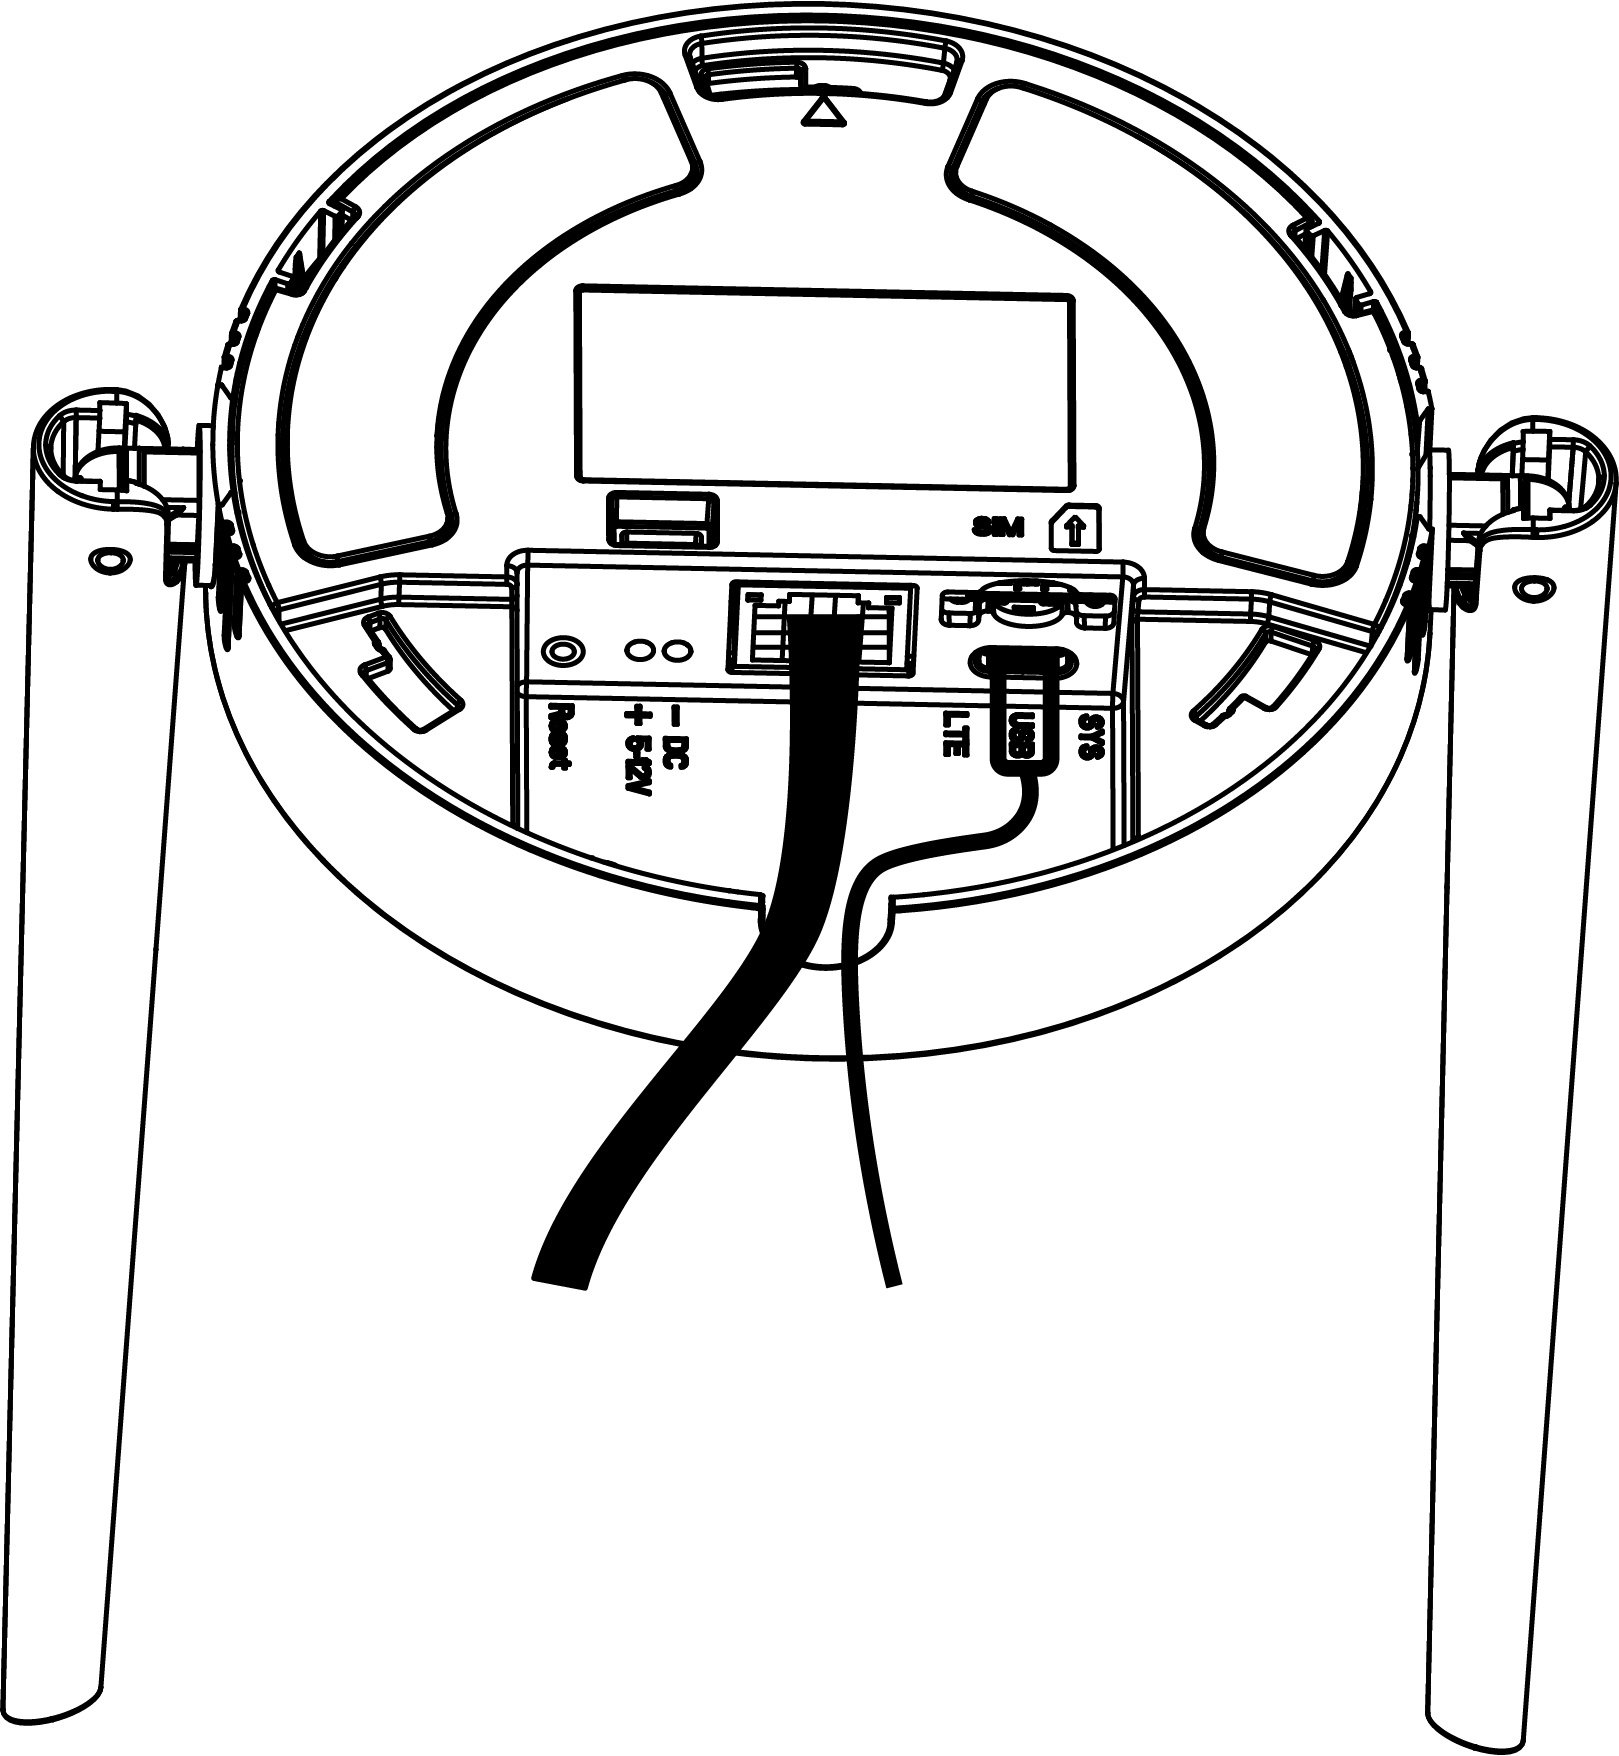
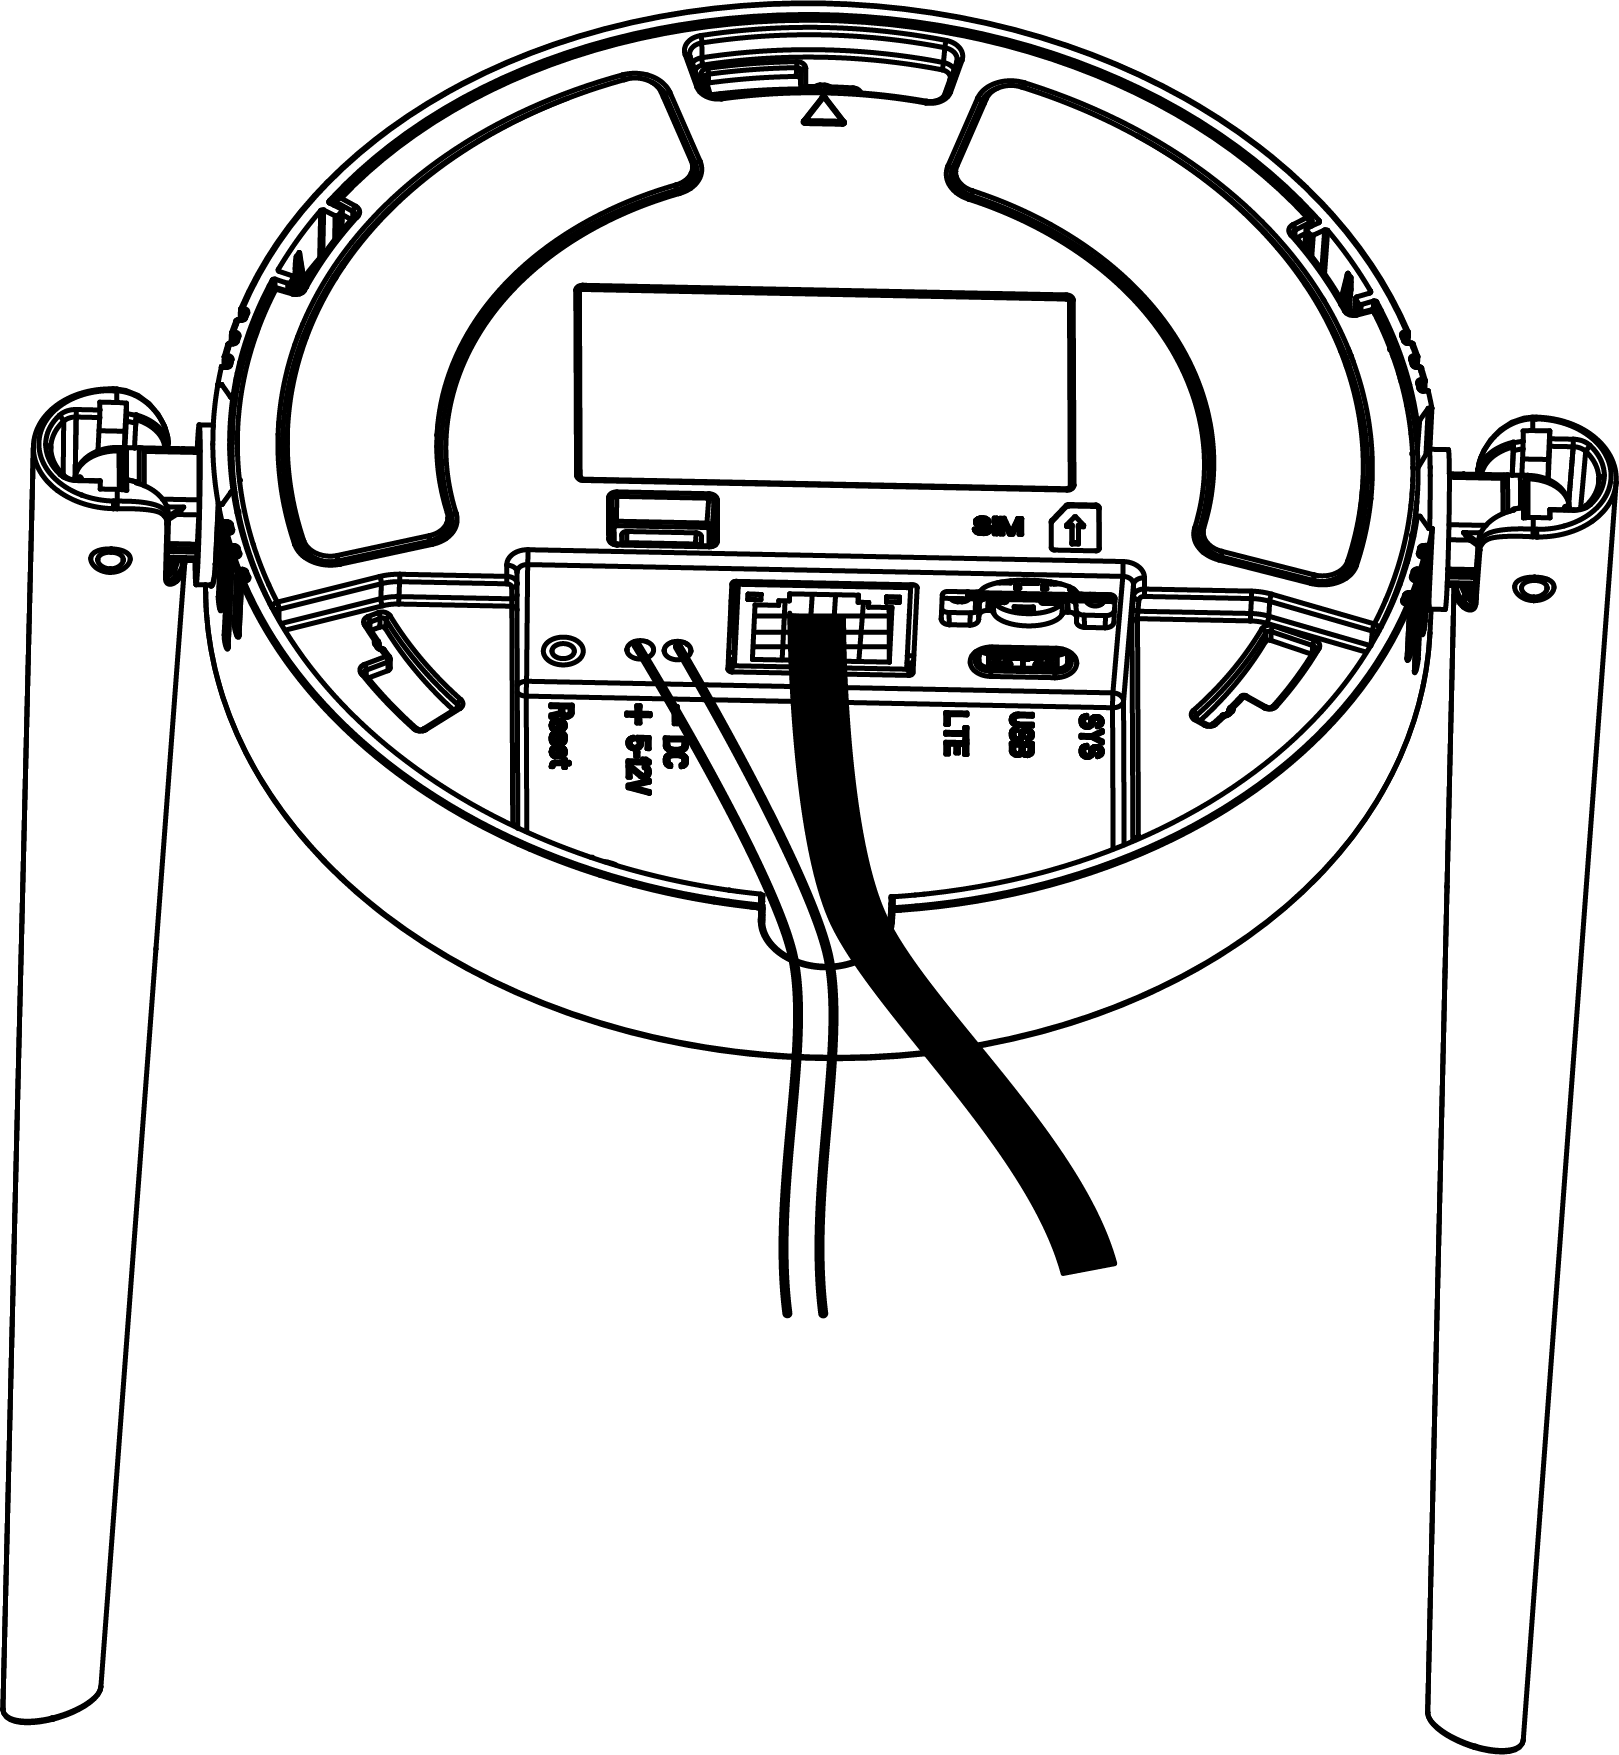
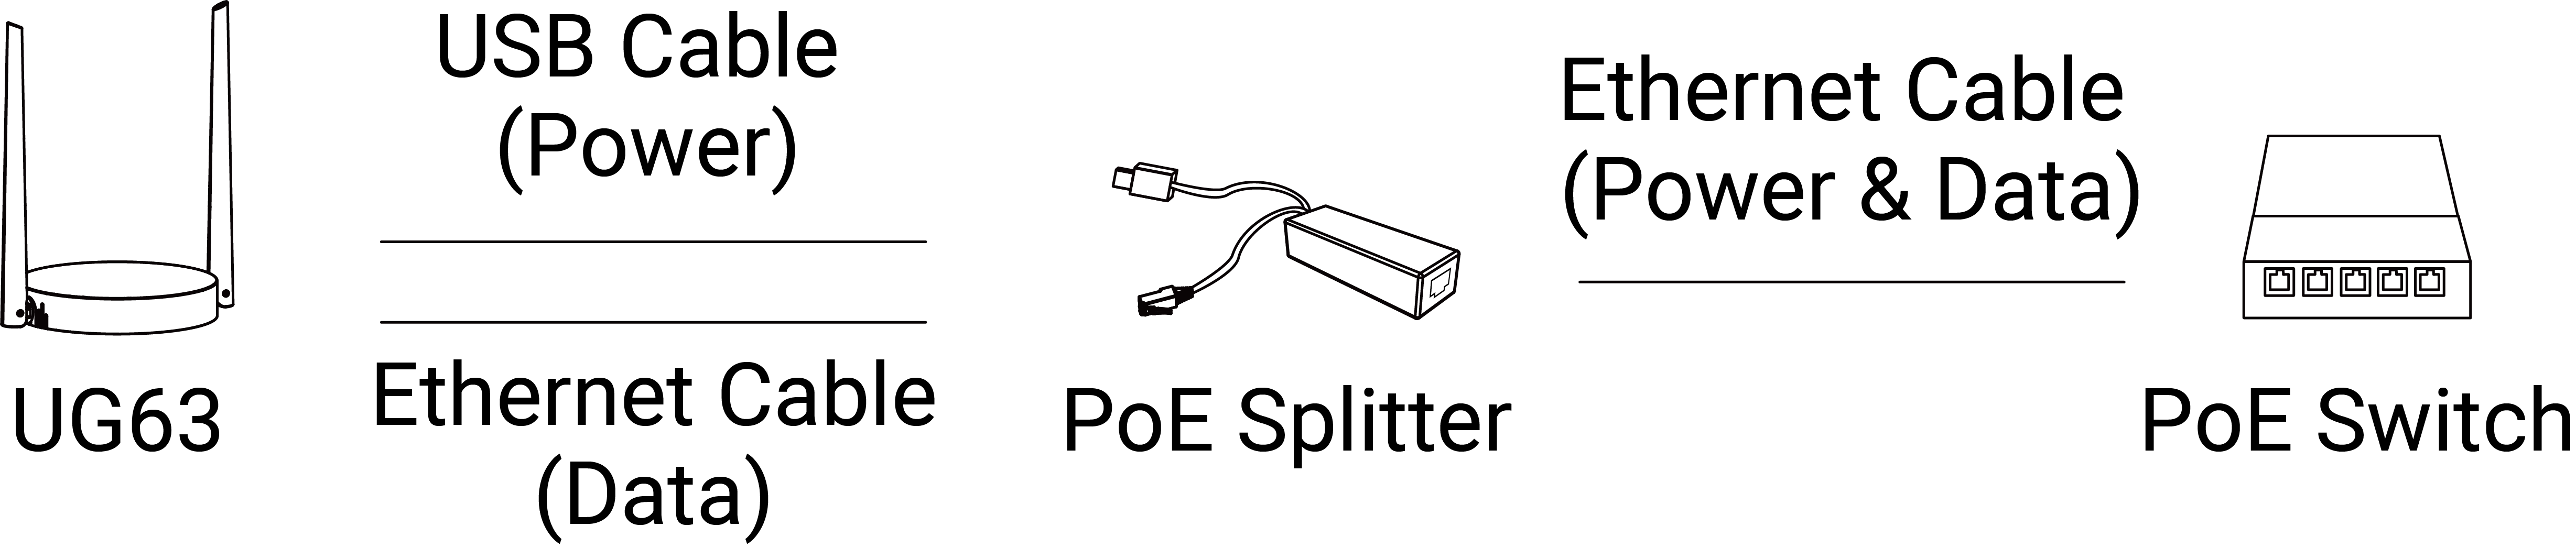
- Use one of the supported power supply methods:
- USB: 5 VDC/2A.
- DC power supply: 5-12 V.
- 802.3af PoE source through the optional PoE splitter.
- USB: 5 VDC/2A.
- Wait for the gateway to start. The startup status can be checked via LED
indicators.
LED Expected Status SYS A green light indicates that the system is running properly. LTE For the cellular version, a static green light indicates that the SIM card has registered and cellular dial-up has completed successfully. Ethernet Port A green connection indicator means that the Ethernet port is connected. A yellow blinking link indicator means that data is being transmitted.
- Use one of the supported power supply methods:
Access the Web GUI
- Enable Wi-Fi on the computer and connect to the gateway default access point: Gateway_XXXXXX. The SSID can be found on the gateway label.
- Open a web browser (Chrome is recommended) and enter https://192.168.1.1.
- Enter the default credentials to log
in.
Username: admin
Password: password - Change the default password when prompted. The new password must contain at least one
letter and one number.
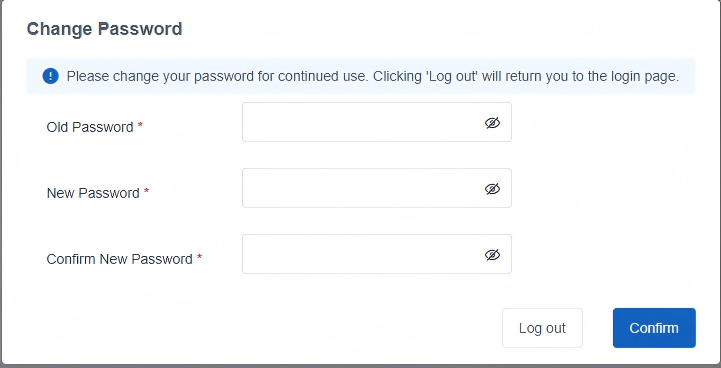
- Log in to the web GUI using the new credentials.
Complete the Setup Wizard
Follow the setup wizard to complete the basic settings. The wizard can also be skipped or exited if you want to configure the gateway manually.
- Configure the link failover to select the main network link and configure ping detection as required.
- Configure the Ethernet WAN settings as required.
- For the cellular version, configure the cellular settings. In most cases, enter the APN required by the cellular operator.
- Configure the correct system time.
- Configure the gateway to connect to the required LoRaWAN® network server.
- Configure packet filtering if required.
- Configure the WLAN settings.
Note: Detailed Link Backup, WAN, Cellular, Packet Forward, Packet Filters, and WLAN parameters
are described in their corresponding configuration chapters.
Verify the Commissioning Result
After completing the basic configuration, open the Status page and check the gateway
information.
- Check the configured LoRaWAN® region.
- Check the Ethernet connection status if used.
- For cellular version, check the cellular network information and IP address.
- Check the LoRaWAN® Packet Forward connection status.
- Add a LoRaWAN® end device to the network server and check if it can join the network.