Gateway Installation
This chapter describes the preparation and installation procedures for mounting the gateway at the deployment site.
Warning: Before installation, ensure the device is powered
off!
Prerequisites
- Check the Accessories
-
The gateway can be mounted on a desktop, a wall or a ceiling. Select the required mounting method and prepare the corresponding mounting accessories.
- Check Installation Requirement
- For wall or ceiling mounting, the wall structure shall be sufficiently solid and stable to ensure firm screw fixation and overall mounting stability. Besides, screw mounting positions must avoid internal wall electrical wiring, water pipes and other concealed utilities to prevent structural damage and potential safety hazards.
- Check the SIM Card (Cellular Version Only)
- Make sure the micro (3FF) SIM card is installed if cellular connectivity will be used. See Insert the SIM Card.
- Prepare the Power Supply and Required Cables
- Make sure the power supply is ready and required cables have been installed. When installing the power cables, pass them together with the Ethernet cables through the groove. See Connect the Power Supply.
Desktop Installation
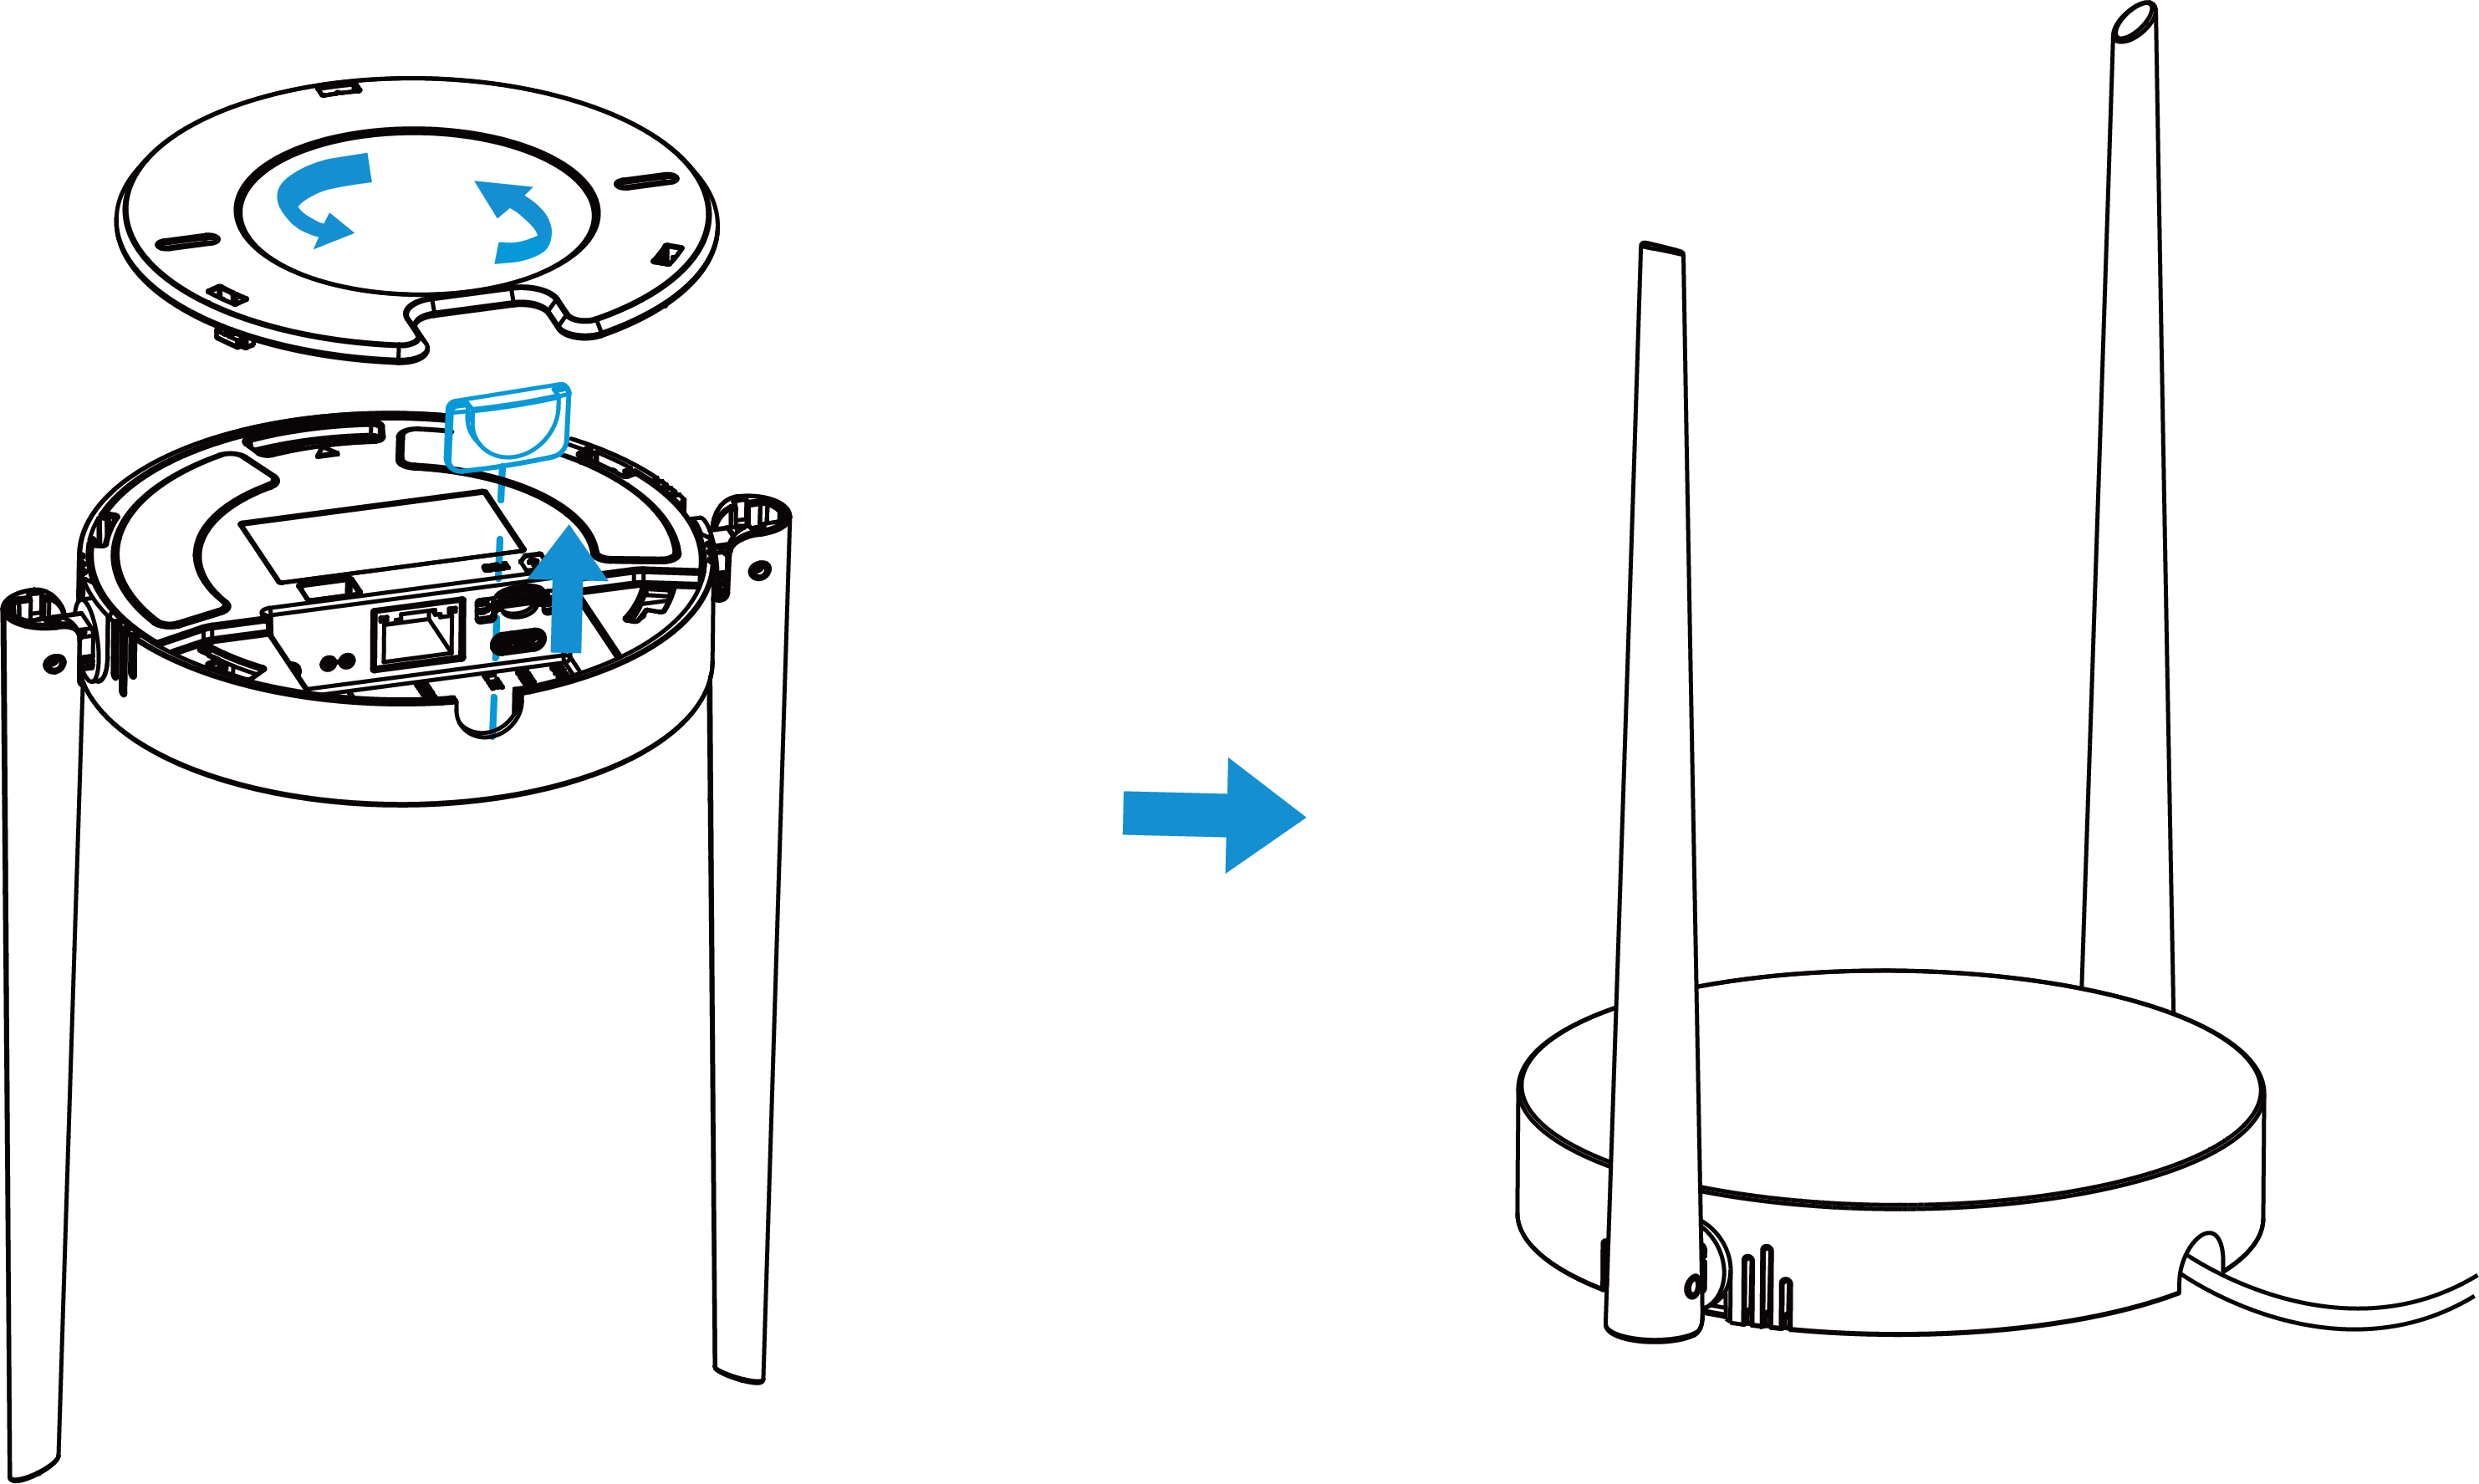
- Remove the baffle and the mounting plate from the back of the gateway.
- Place the gateway on the desktop.
Wall/Ceiling Installation
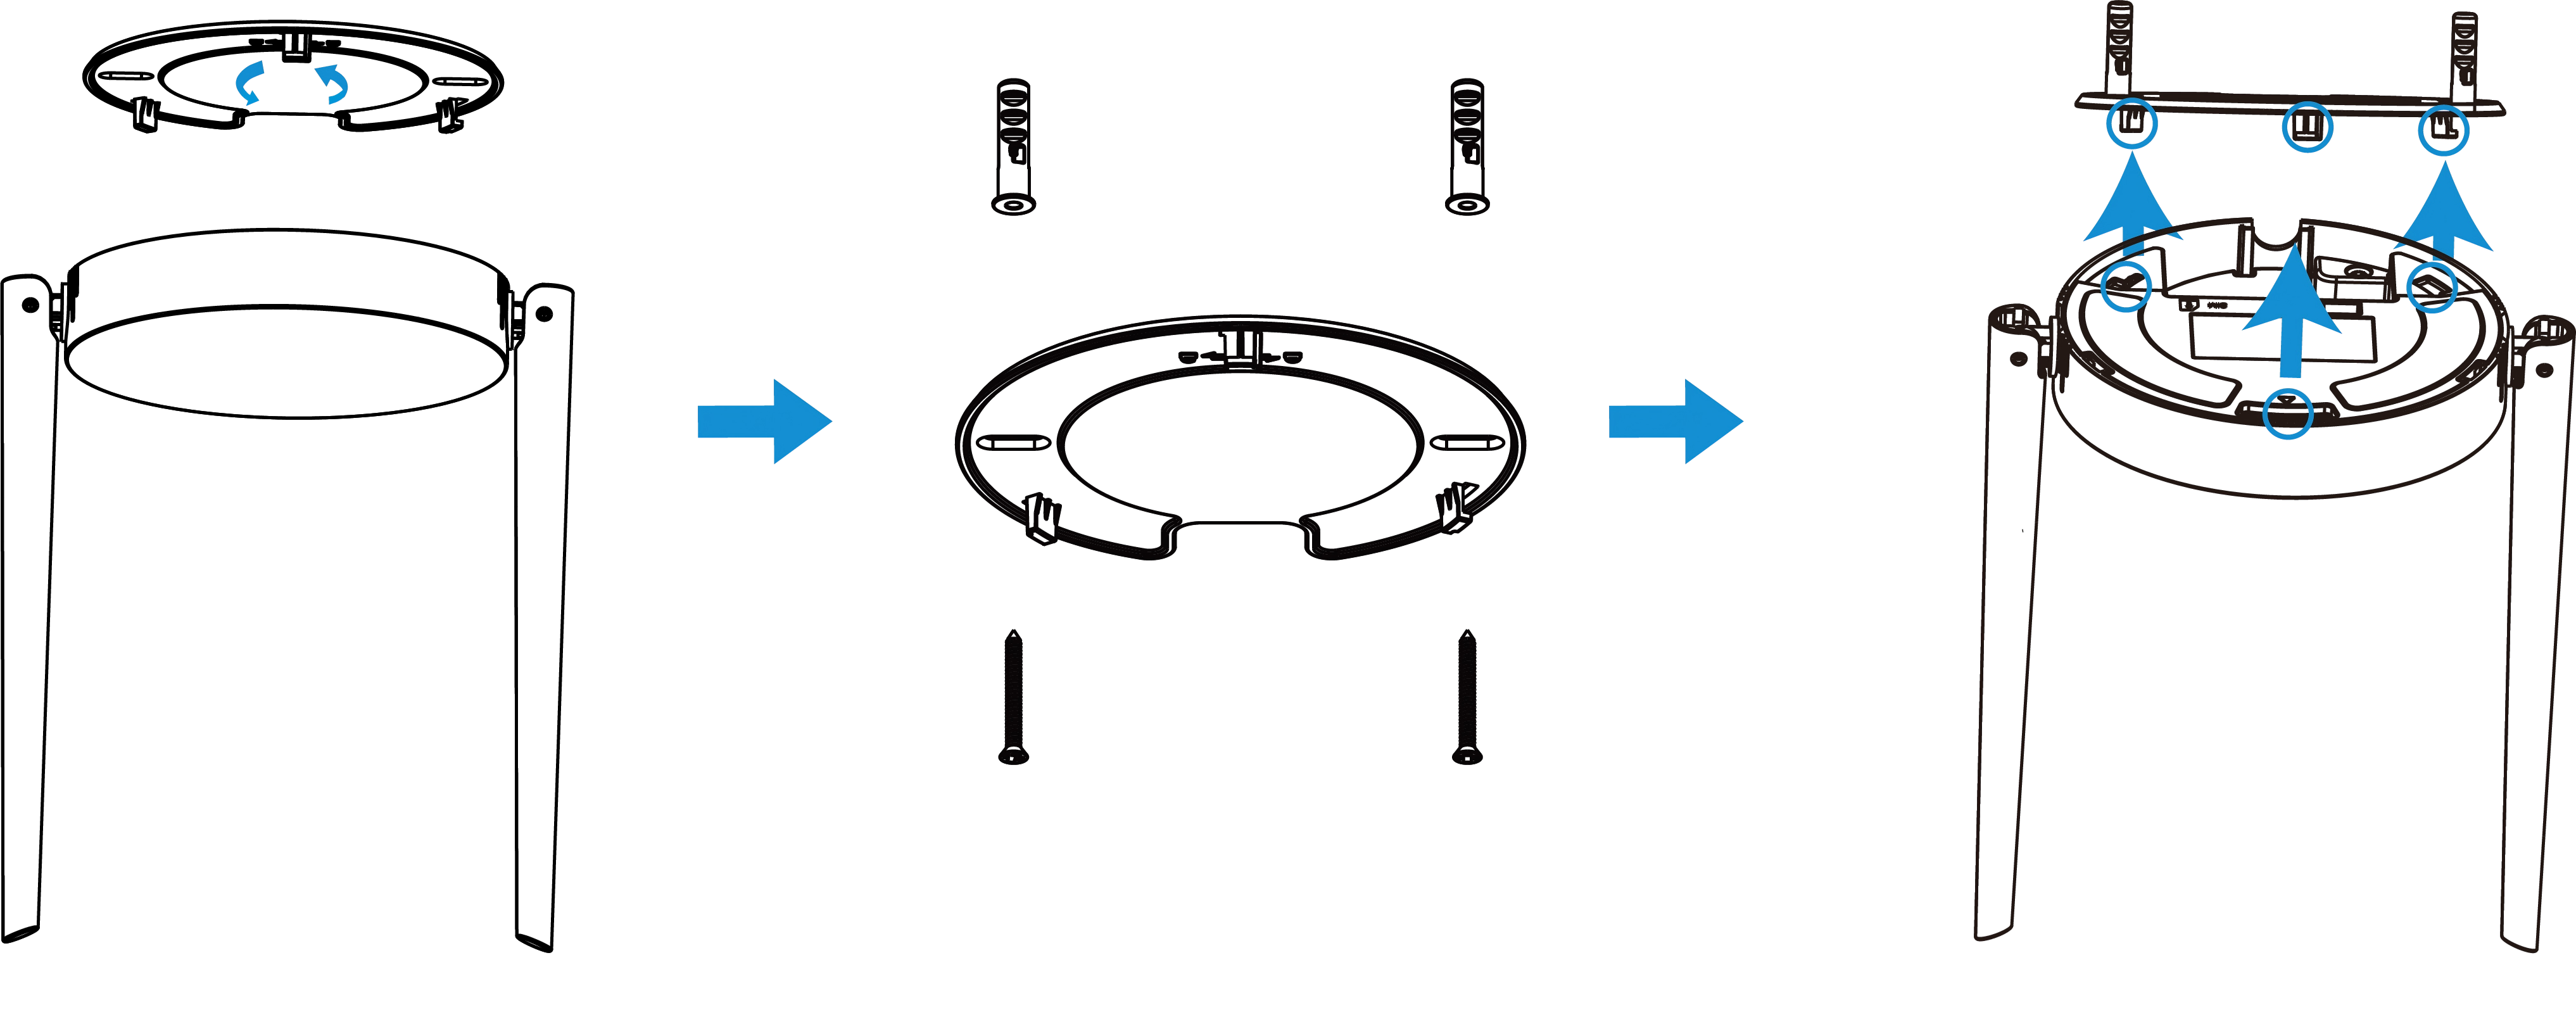
- Remove the mounting plate from the back of the gateway.
- Align the mounting plate horizontally at the desired position on the wall or ceiling and mark two mounting holes.
- Drill two holes at the marks and insert the wall plugs into the holes.
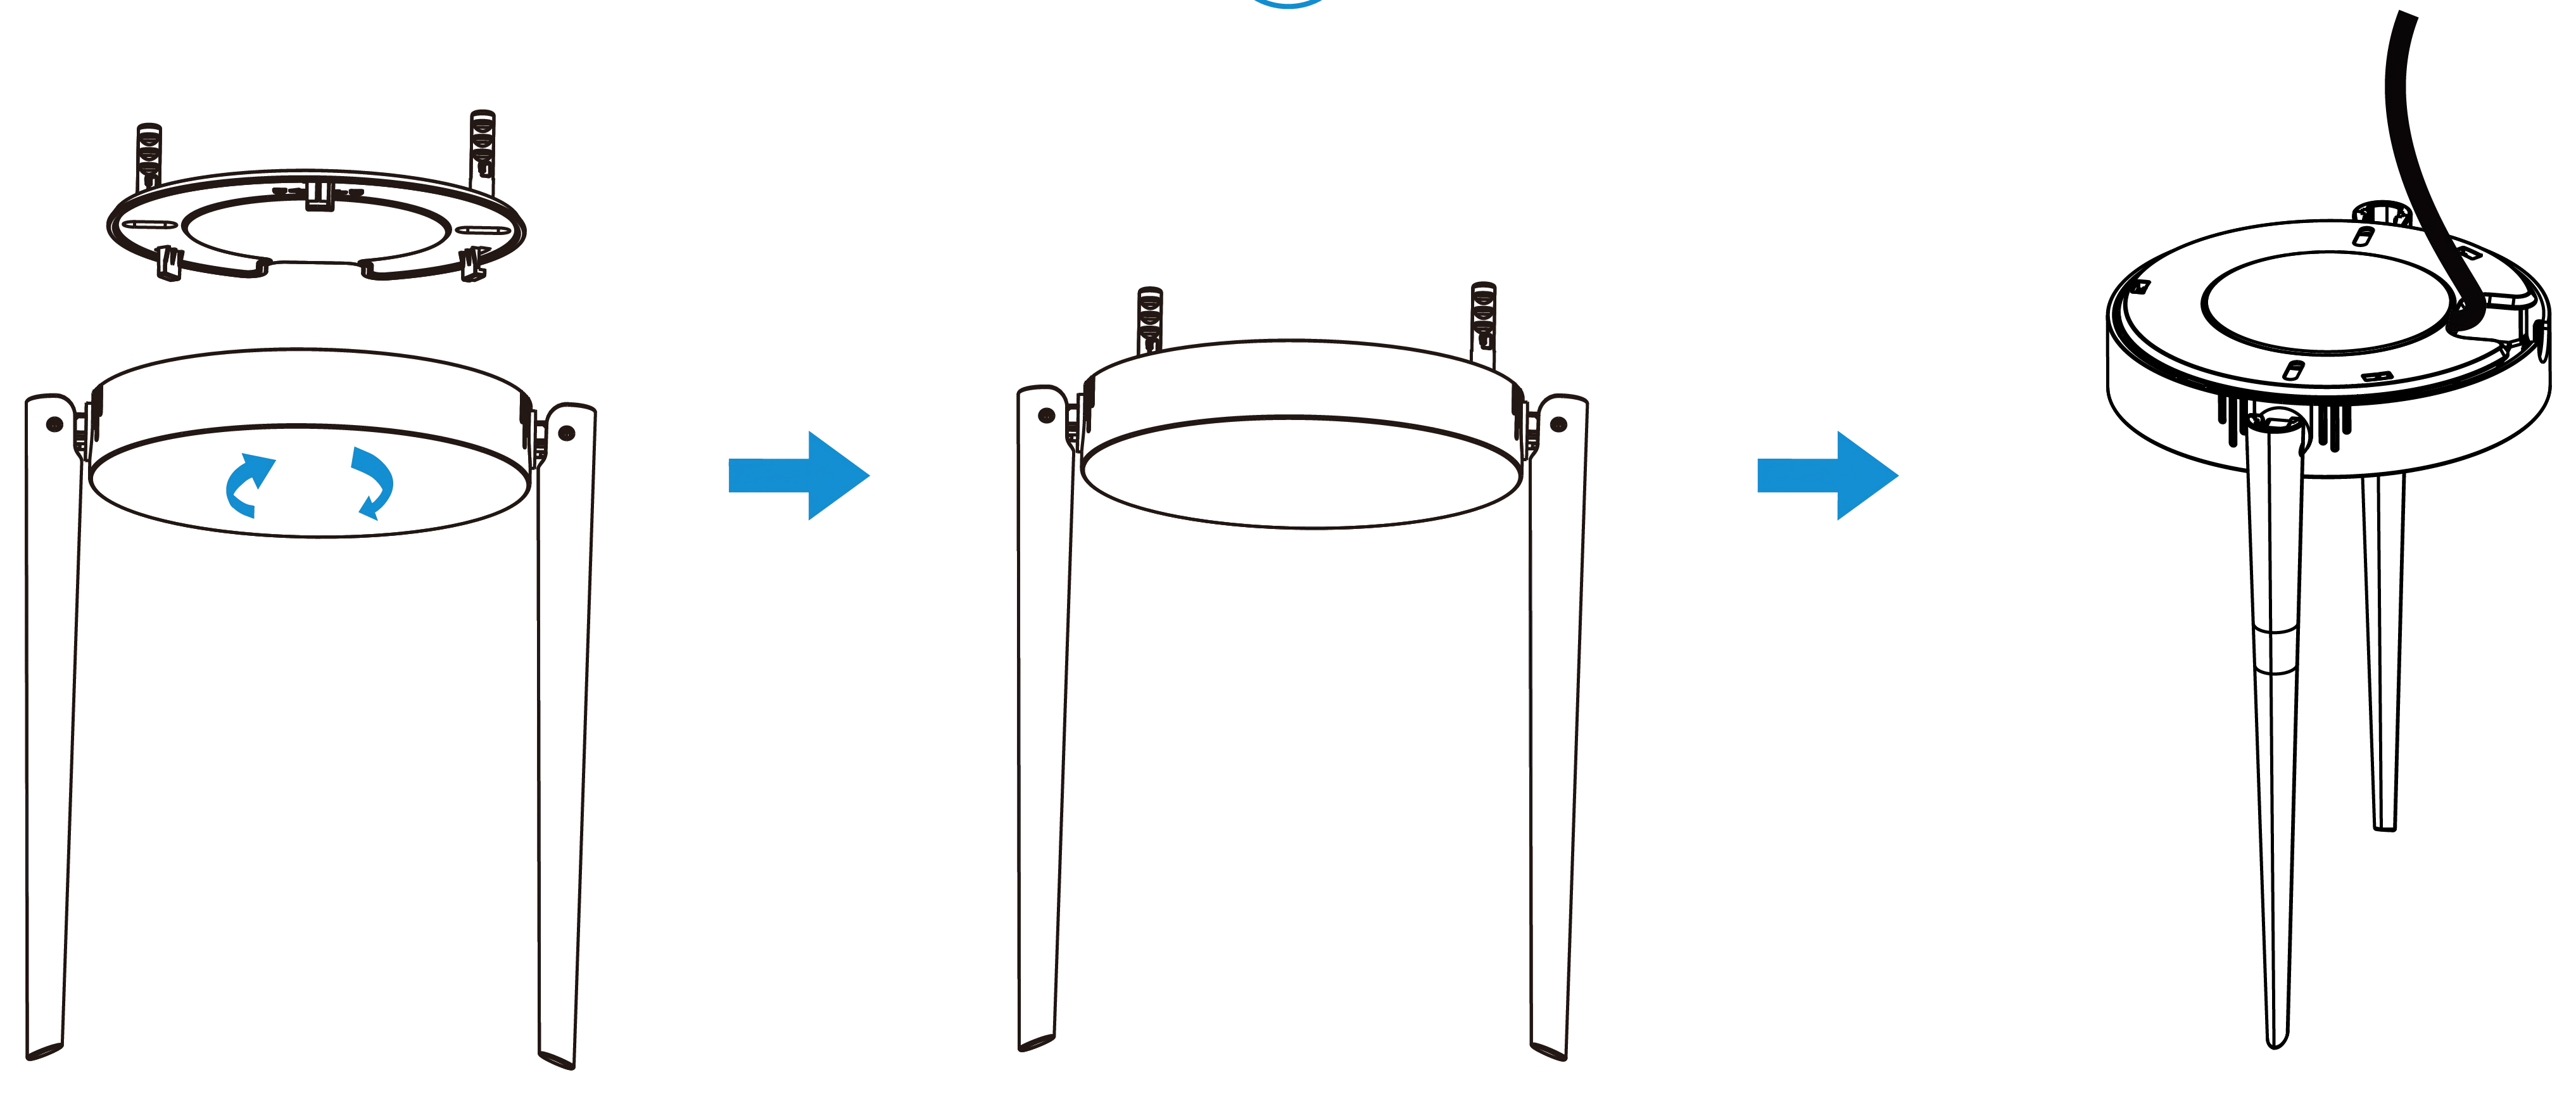
- Secure the mounting plate to the wall plugs with screws.
- Turn the gateway clockwise to lock it to the mounting plate.