First Start
This chapter describes the required steps to complete the basic setup, and verify that the gateway is ready for deployment.
Prerequisites
Prepare the following items and information before commissioning the gateway.
- An activated Nano (4FF) SIM card. APN and PIN information are provided upon demand.
- SIM Card Ejector Tool
- Battery Pack
- LoRaWAN® Antenna
- Solar Panel or supported 12-24 VDC external power supply with the M12 cable
- Computer
- (Optional) A working LoRaWAN® network server. Recommended that NS adds the gateway first.
Prepare the Gateway
Complete the minimum hardware preparation required for first-time commissioning.
- Insert the SIM Card
-
- Remove the SIM cover.
- Use the SIM card ejector tool to open the SIM card tray.
- Insert the Nano (4FF) SIM card and put the tray back into the gateway.
- Rotate the SIM cover back into position.
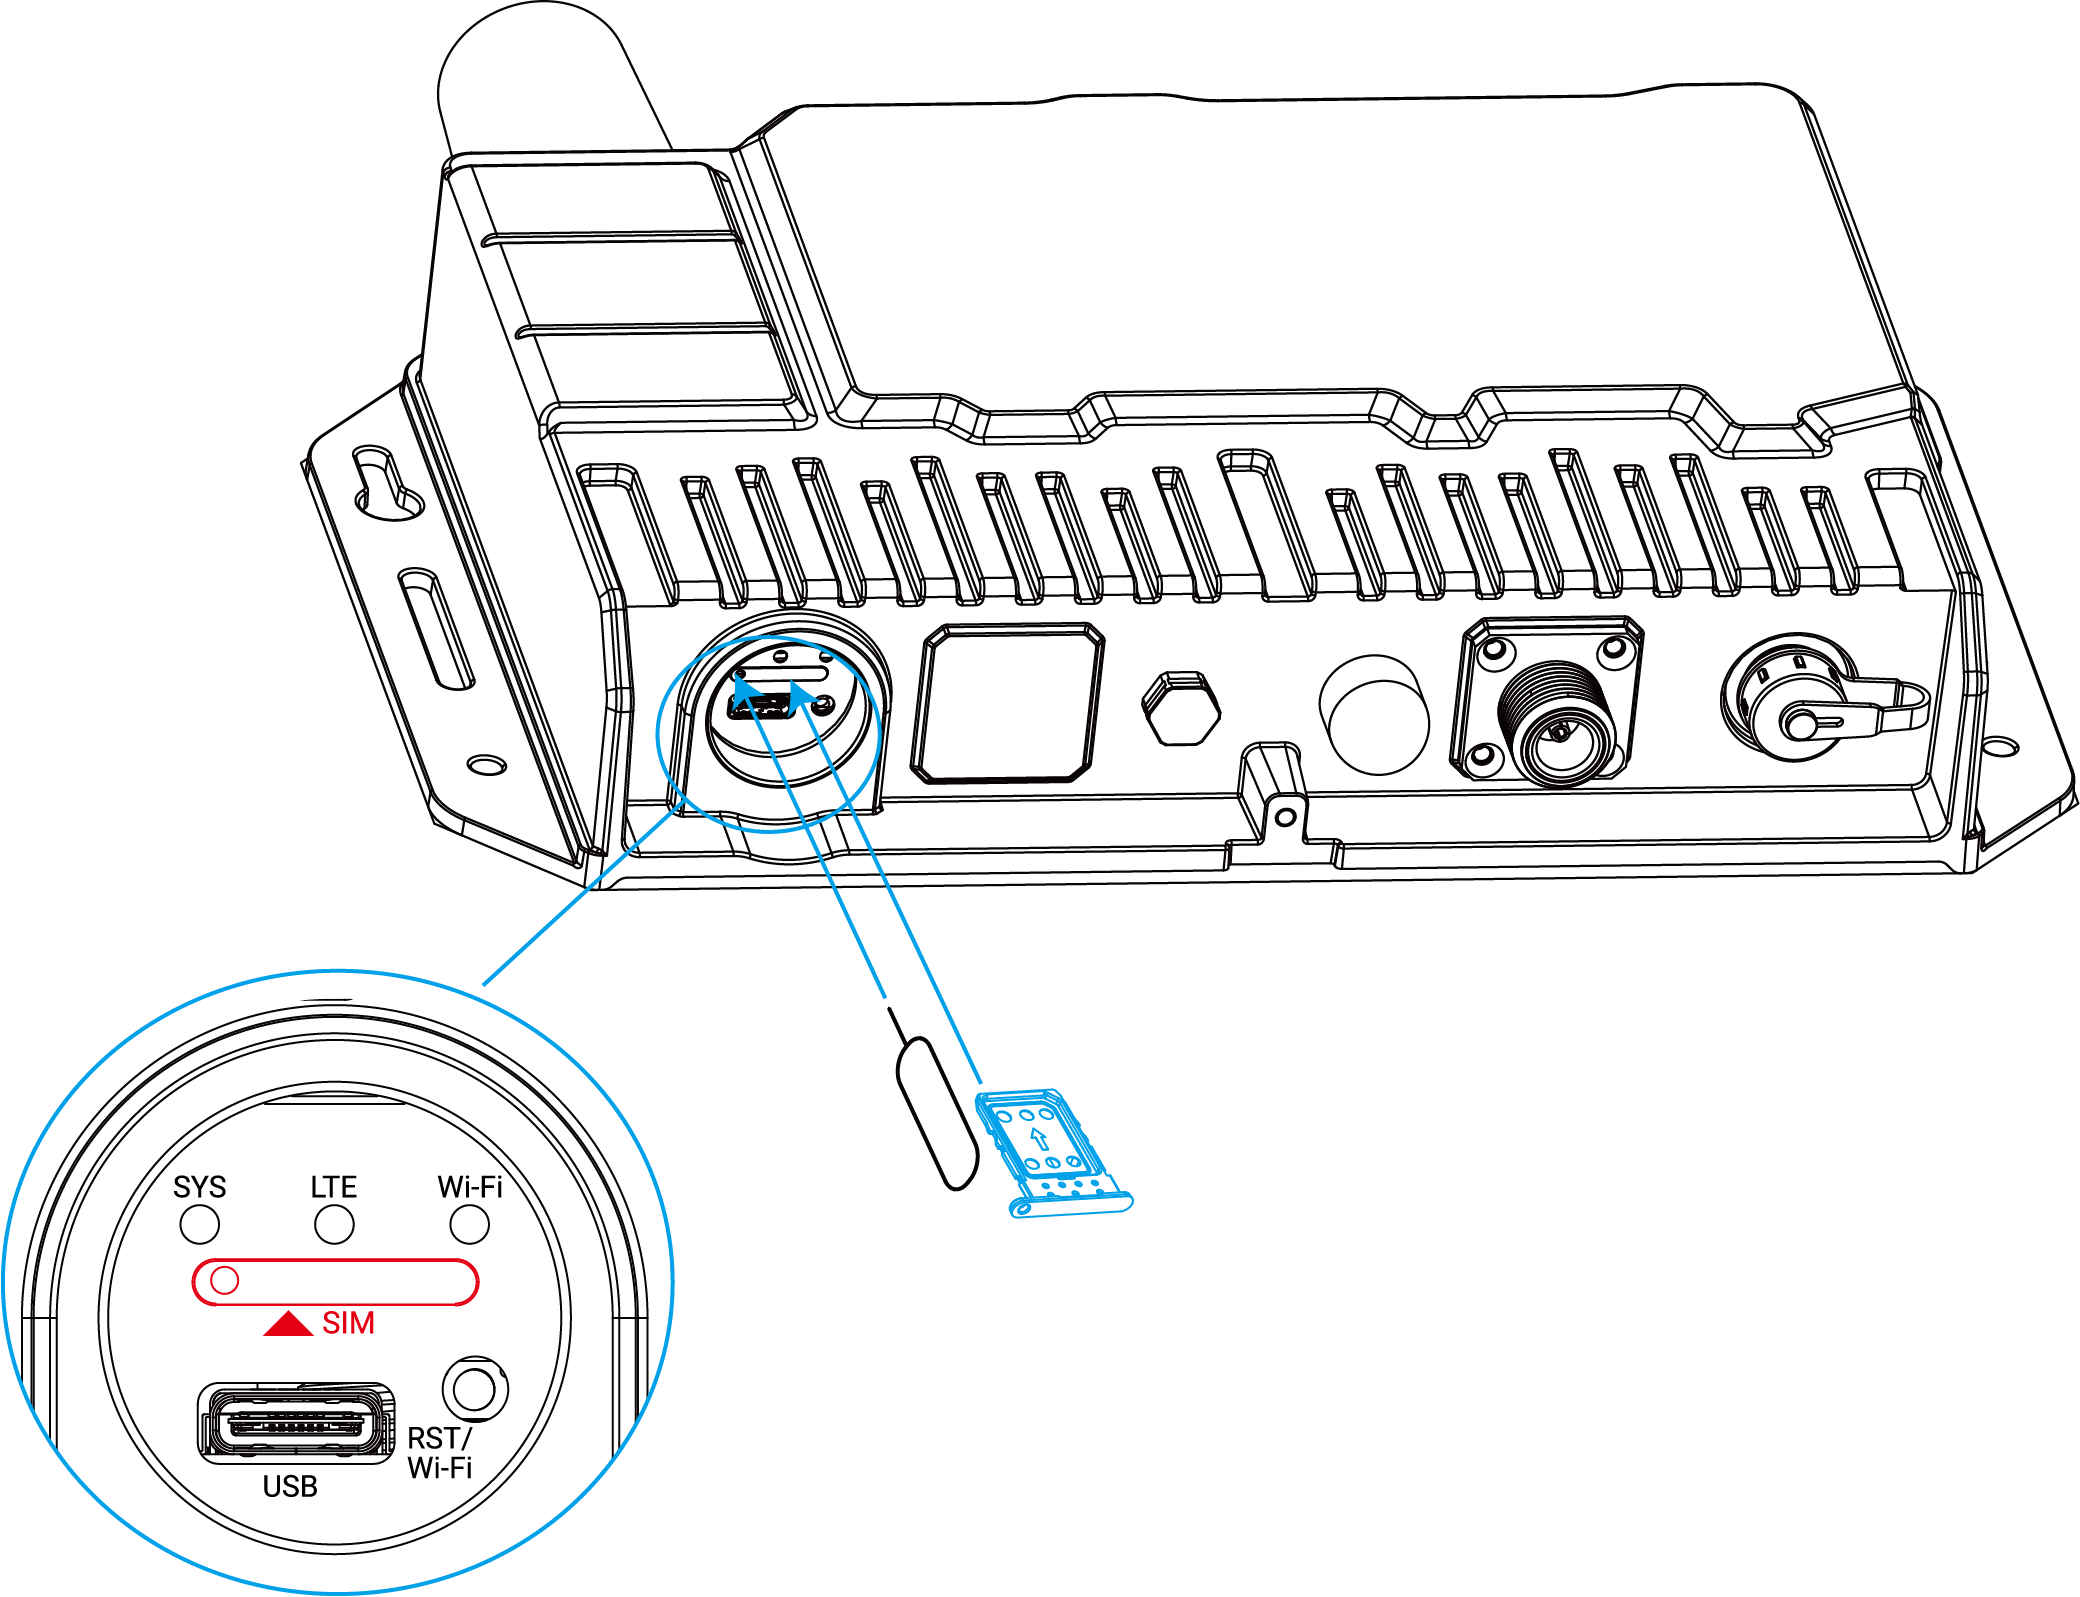
- Install the Battery Pack
-
- Release the fixing screw on the side of the gateway and remove the battery compartment cover.
- Push the battery pack into the battery compartment.
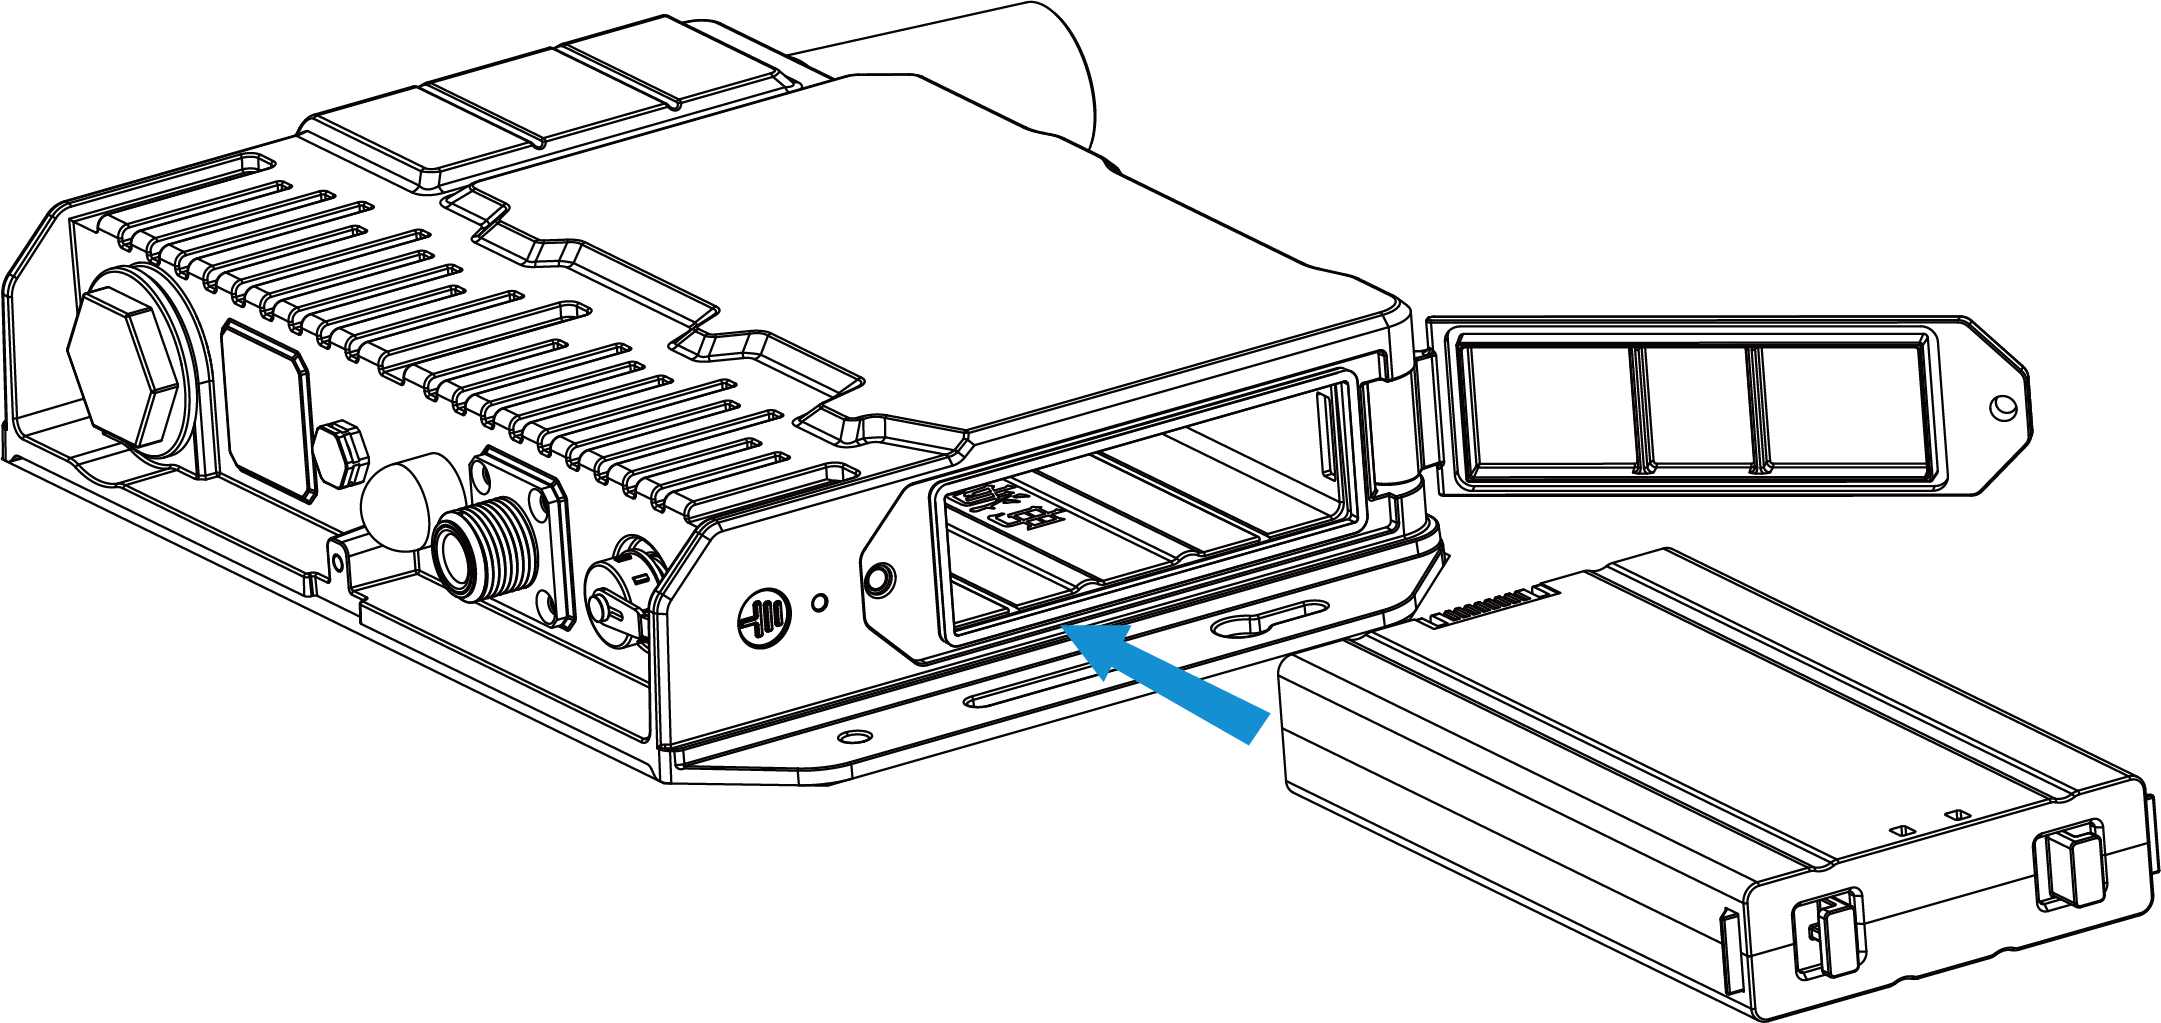 To remove the battery pack, hold on the latches on the battery.
- Reinstall the battery compartment cover and secure it with the fixing screw.
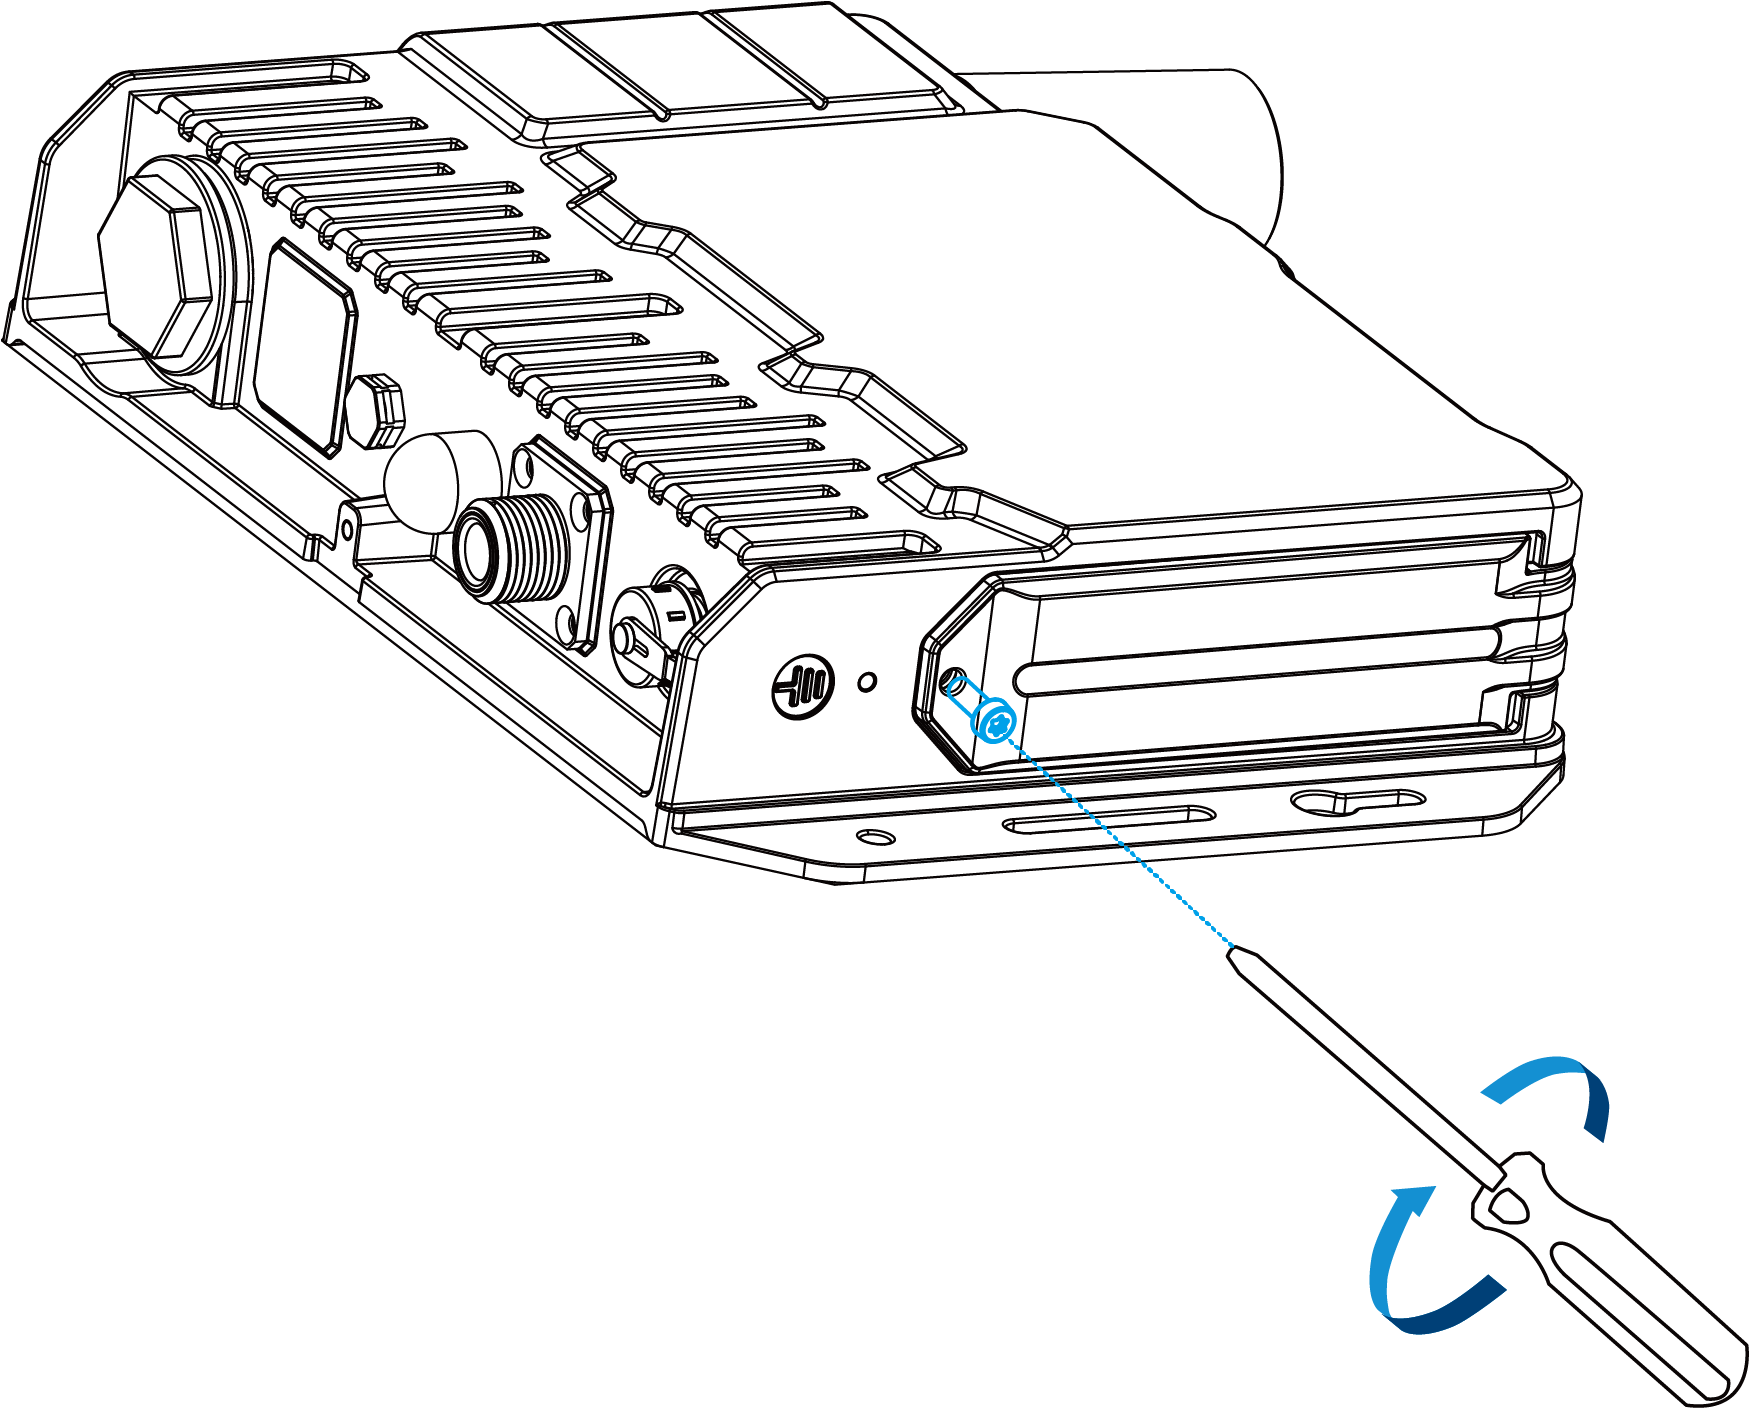
Tip:- Installing the battery pack does not power on the gateway automatically.
- The battery can only be charged through the DC power connector. USB charging is not supported.
- Connect the LoRaWAN® Antenna
- Connect the LoRaWAN® antenna to the LoRaWAN® antenna connector for end device communication testing.
- Power On the Gateway
-
- Connect the M12 power cable of the solar panel to the DC power connector.
- Wait for the gateway to start. The startup status can be checked via LED
indicators.
LED Expected Status SYS A green light indicates that the system is running properly. Wi-Fi A static green light indicates that Wi-Fi is on. LTE A static green light indicates that the SIM card has registered and cellular dial-up has completed successfully. Note: If Wi-Fi is disabled, quickly press the button once to turn on Wi-Fi for 10 minutes.
Access the Web GUI
- Enable Wi-Fi on the computer and connect to the gateway default access point: Gateway_XXXXXX. The SSID can be found on the gateway label.
- Open a web browser (Chrome is recommended) and enter https://192.168.23.1.
- Enter the default credentials to log
in.
Username: admin
Password: password - Change the default password when prompted. The new password must contain at least one
letter and one number.
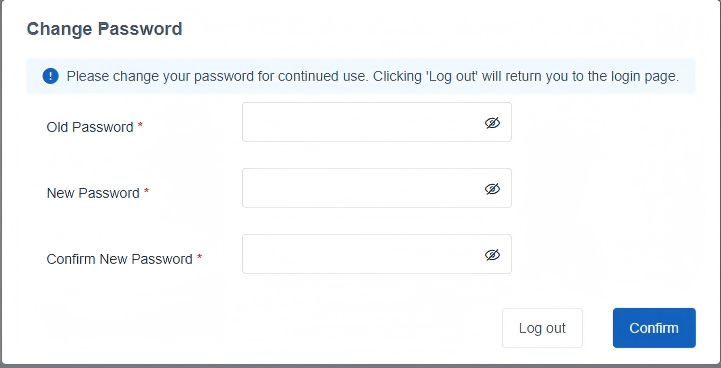
- Log in to the web GUI using the new credentials.
Complete the Setup Wizard
Follow the setup wizard to complete the basic settings. The wizard can also be skipped or exited if you want to configure the gateway manually.
- Configure the cellular settings. In most cases, enter the APN required by the cellular operator.
- Configure the correct system time.
- Configure the gateway to connect to the required LoRaWAN® network server.
- Configure packet filtering if required.
- Configure the WLAN settings.
Note: Detailed Cellular, Packet Forward, Packet Filters, and WLAN parameters are described in
their corresponding configuration chapters.
Verify the Commissioning Result
After completing the basic configuration, open the Status page and check the gateway information.
- Check the configured LoRaWAN® region.
- Check the cellular network information and IP address.
- Check the LoRaWAN® Packet Forward connection status.
- Add a LoRaWAN® end device to the network server and check if it can join the network.
Note: To power off the gateway after commissioning, remove the M12 power
cable from the DC power connector.