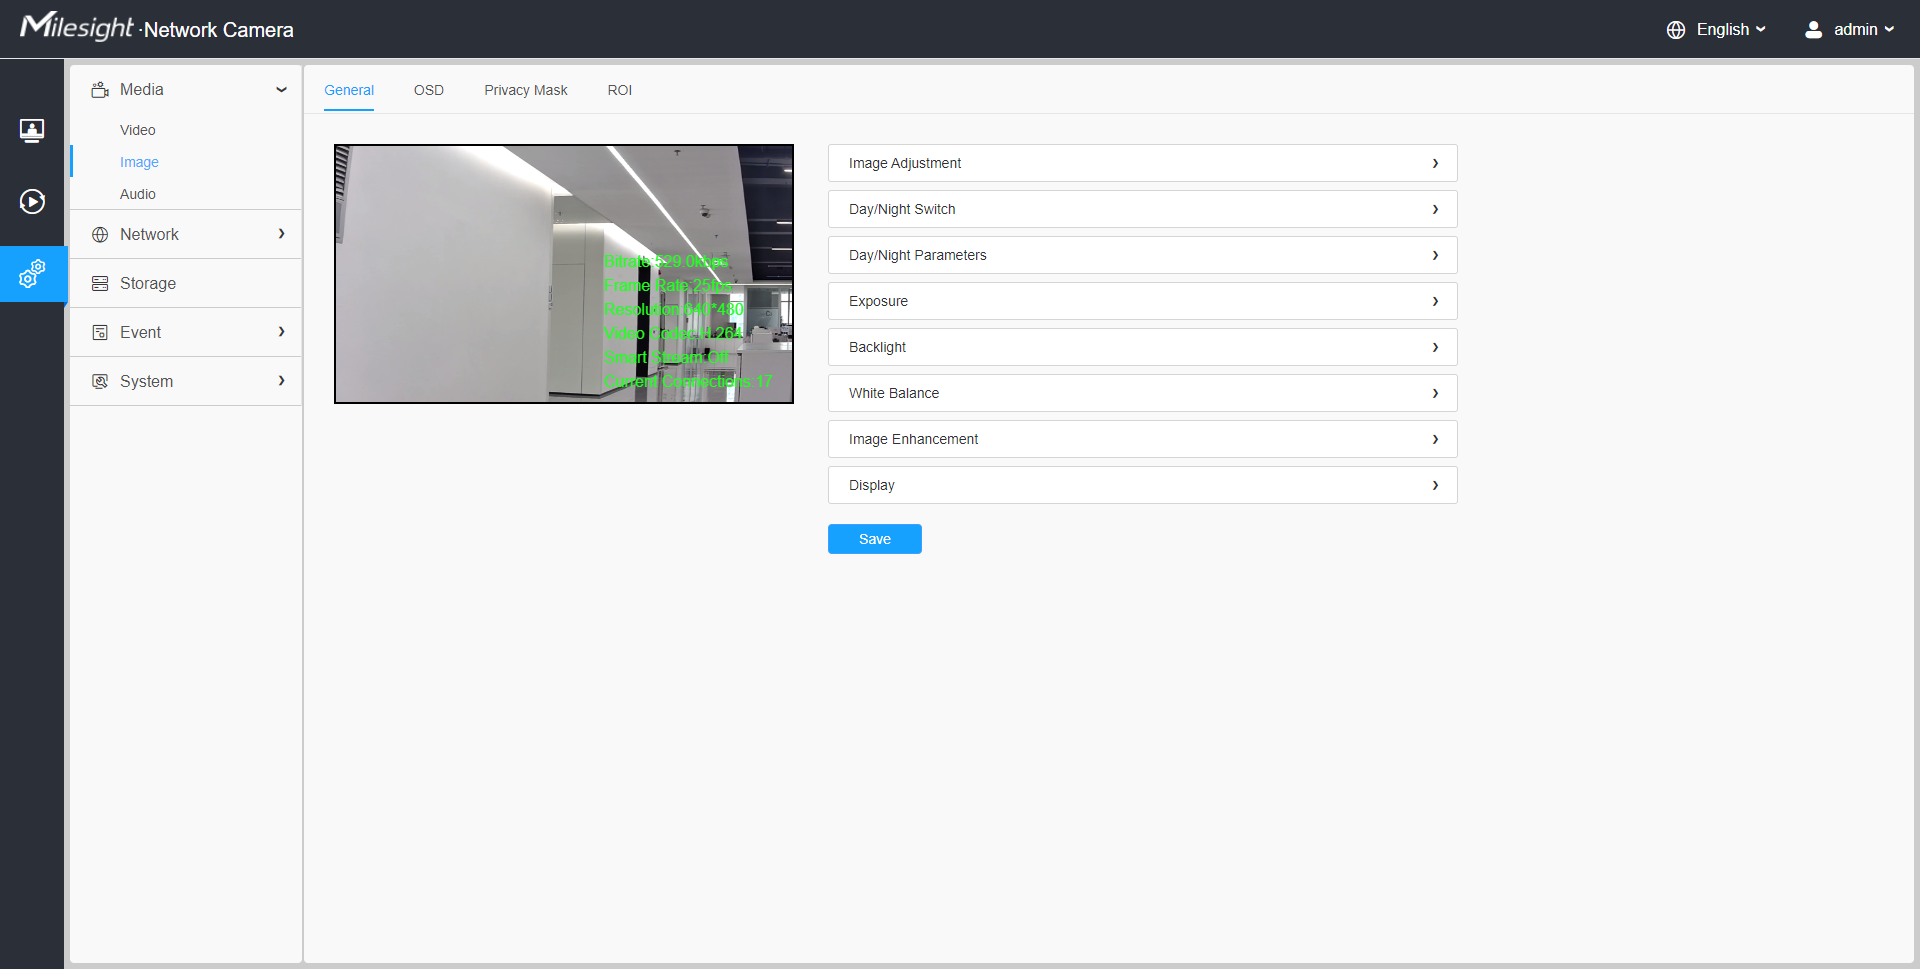
8.1.2.1 General
General settings of image including the Image Adjustment, Day/Night Switch, Day/Night Parameters, Exposure, Backlight, White Balance, Image Enhancement and Display can be set in this module.
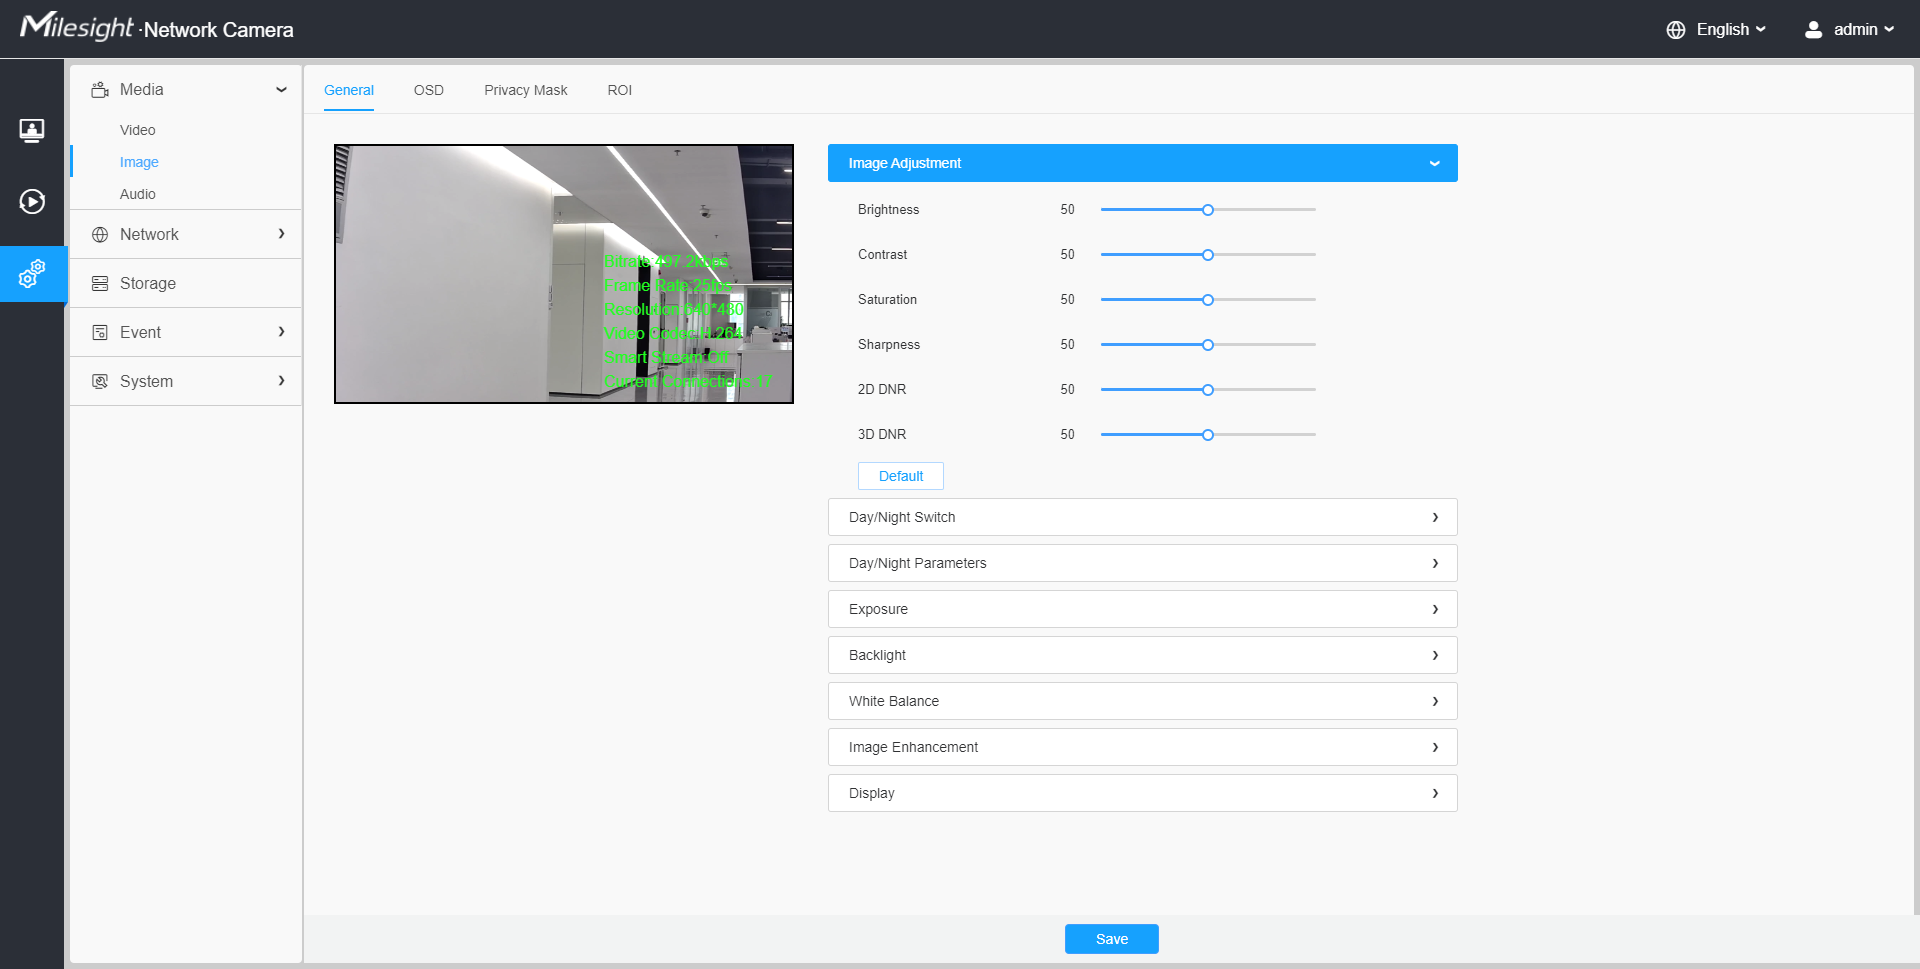
[Image Adjustment]
| Parameters | Function Introduction |
|---|---|
| Brightness | Adjust the Brightness of the scene. |
| Contrast | Adjust the color and light contrast. |
| Saturation | Adjust the Saturation of the image. Higher Saturation makes colors appear more "pure" while lower one appears more “wash-out”. |
| Sharpness | : Adjust the Sharpness of image. Higher Sharpness sharps the pixel boundary and makes the image looks “more clear”. |
| 2D DNR | Adjust the noise reduction level. |
| 3D DNR | Restore brightness, contrast and saturation to default settings. |
| Adjust the Brightness of the scene. |
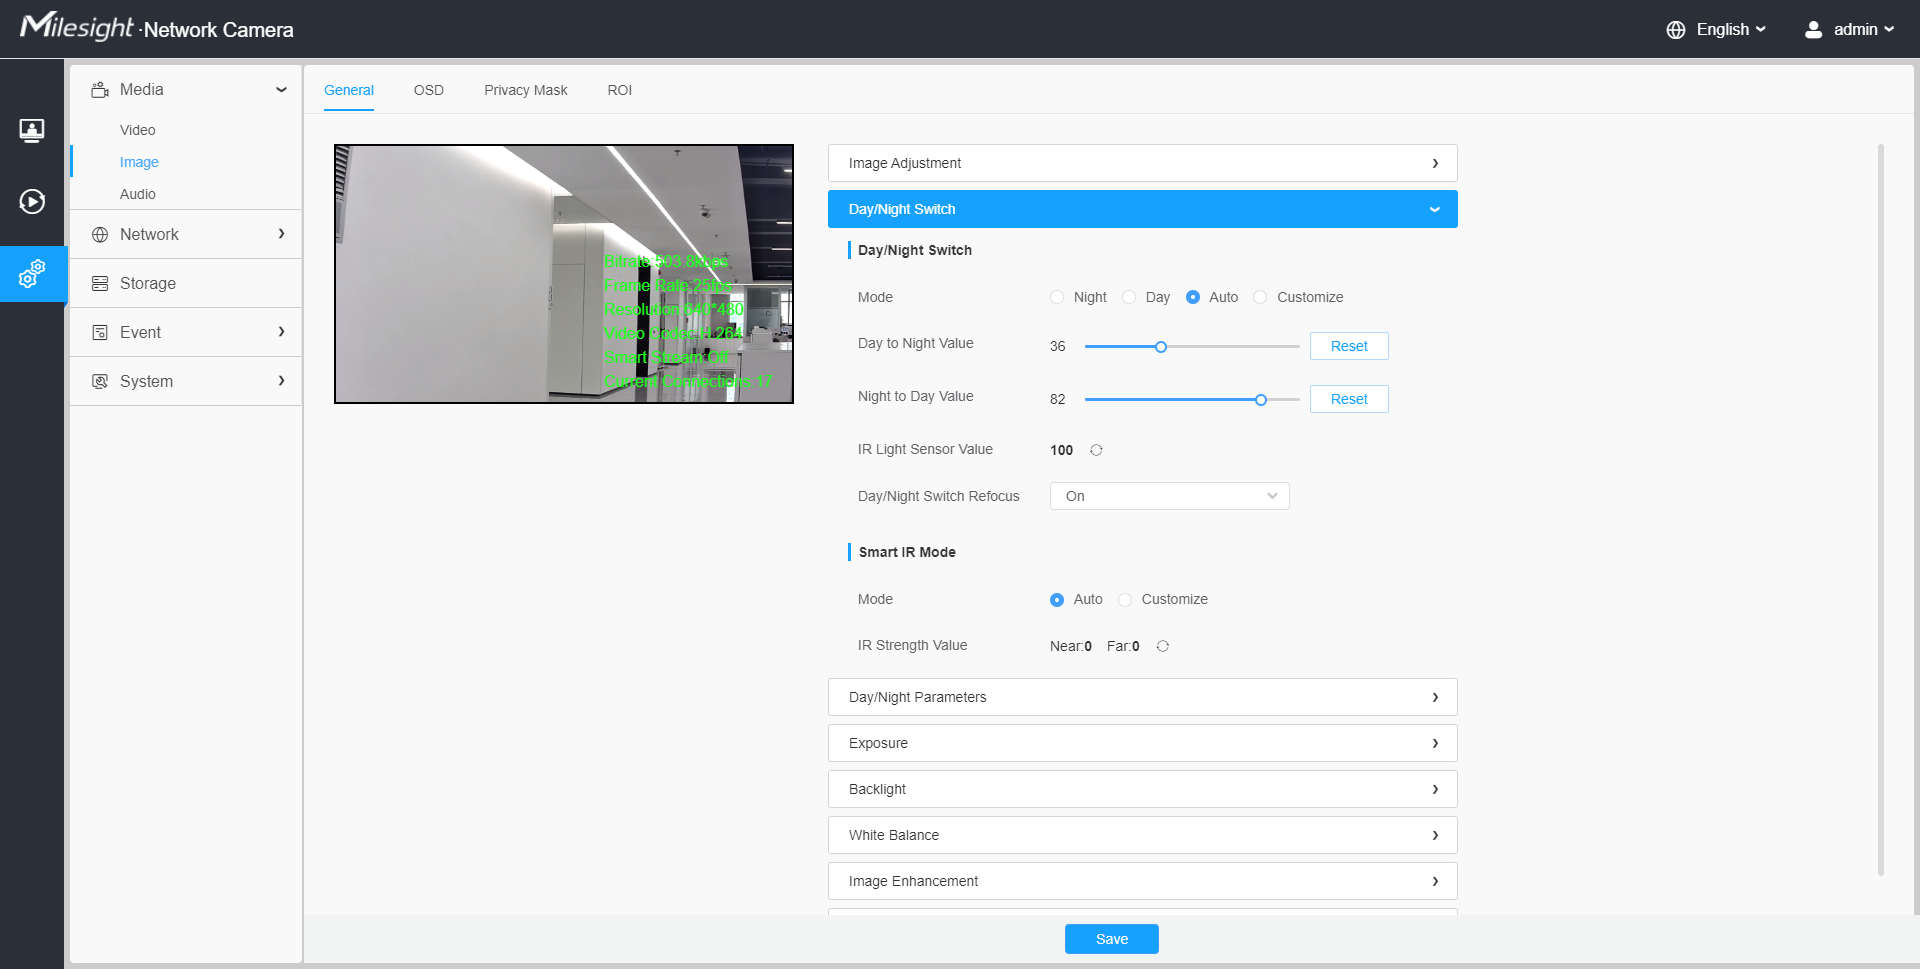
[Day/Night Switch]
| Parameters | Function Introduction |
|---|---|
| Day/Night Switch |
Night Mode: Shown in live view based on Night Mode settings. Day Mode: Shown in live view based on Day Mode settings. Auto Mode: Shown in live view based on environment, set the sensitivity for switching Day Mode to Night Mode, or Night Mode to Day Mode. Customize: Shown in live view based on your own settings’ time to start/end Night Mode. Note: There are several parameters such as Exposure Level, Maximum
Exposure Time and IR-CUT Interval, etc, associated with the
modes.
|
| Day/Night Switch | Day/Night Switch Refocus: With this option enabled, the camera will refocus when switching between day mode and night mode. |
| Day/Night Switch | Day to Night Value: You can set the sensitivity for switching
Day Mode to Night Mode. When IR Light Sensor Current Value is lower than
this value, it will switch Day Mode to Night Mode. You can click Night to Day Value: This is the
sensitivity for switching Night Mode to Day Mode. When IR Light
Sensor Current Value is higher than this value, it will switch Night
Mode to Day Mode. You can click IR Light Sensor Value: The current value of the IR light sensor. Note: The three buttons are optional only if you select Auto
Mode.
|
| Day/Night Switch | Start Time of Night: You can set the time for start the Night
Mode. End Time of Night: You can set the time for start the Day Mode. Note: Start/End Time of Night are optional only if
you select Customize Mode. |
| Smart IR Mode | Support to set the strength of the IR to Auto Mode or
Customize to achieve the best effect. With the combination of the High Beam and Low Beam, the IR LEDs technology has been upgraded to provide better image clarity and quality regardless of the object distance. Also, the Low Beam and High Beam's brightness can be adjusted manually or automatically on the basis of the Zoom ratio. Moreover, with the IR anti-reflection panel, the infrared light transmittance is highly increased. |
| Near View IR Level: Adjust the light strength of Low-Beams LED
light level from 0 to 100. Far View IR Level: Adjust the light strength of High-Beams LED light level from 0 to 100. Note:
|
|
| IR Strength Value: The current value of Low-Beams LED and High-Beams LED light value. |
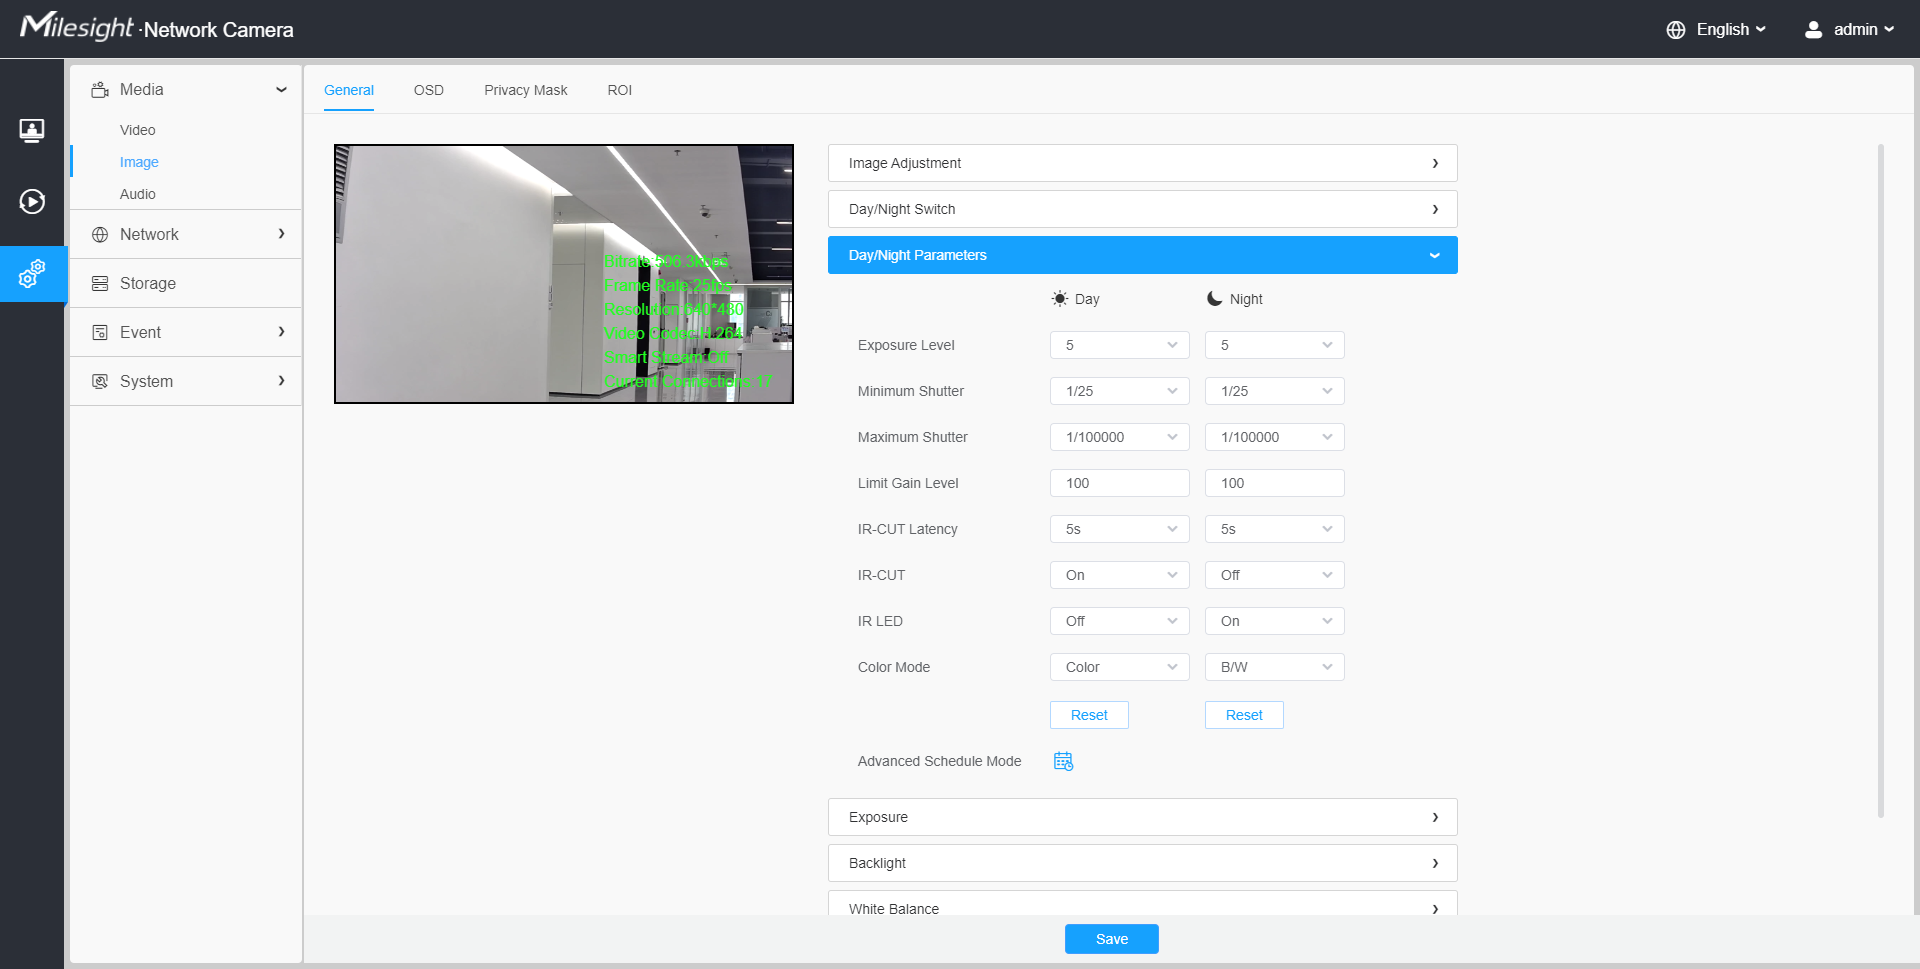
[Day/Night Parameters]
| Parameters | Function Introduction |
|---|---|
| Exposure Level | Level 0~10 are available to meet your need. |
| Minimum Shutter | Minimum Shutter is the same as Maximum Exposure Time. Set the minimum Shutter to 1~1/100000s. |
| Maximum Shutter | Maximum Shutter is the same as Minimum Exposure Time. Set the maximum Shutter to 1~1/100000s. |
| IR-CUT Latency | The interval time of switching one mode to another. |
| Limit Gain Level |
Set the Limit Gain Level to 1~100. |
| IR-CUT | Turn on/off IR-CUT. |
| IR LED | Turn on/off IR-LED. |
| Color Mode | Select B/W or Color mode. |
|
Here you can customize your special demands for different time, then
the Day mode and Night mode will switch automatically according to your
settings.
|
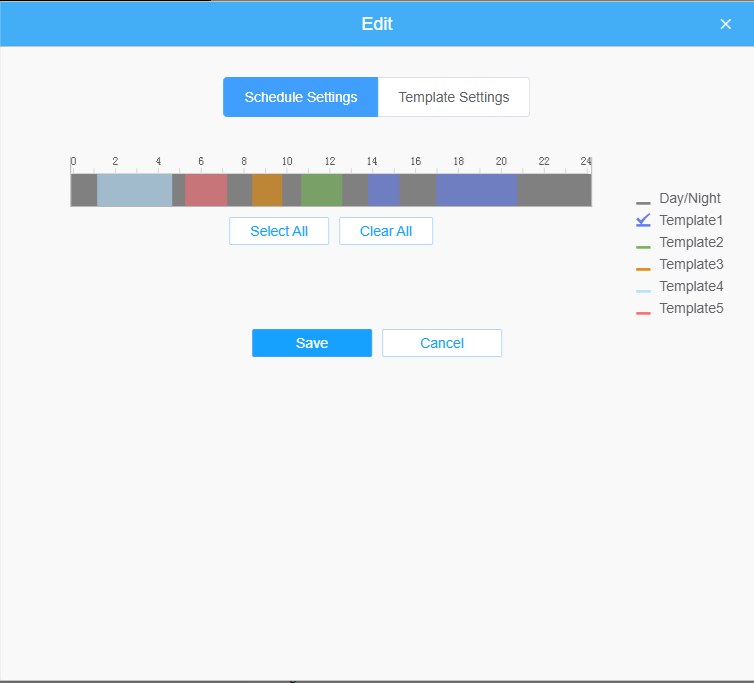
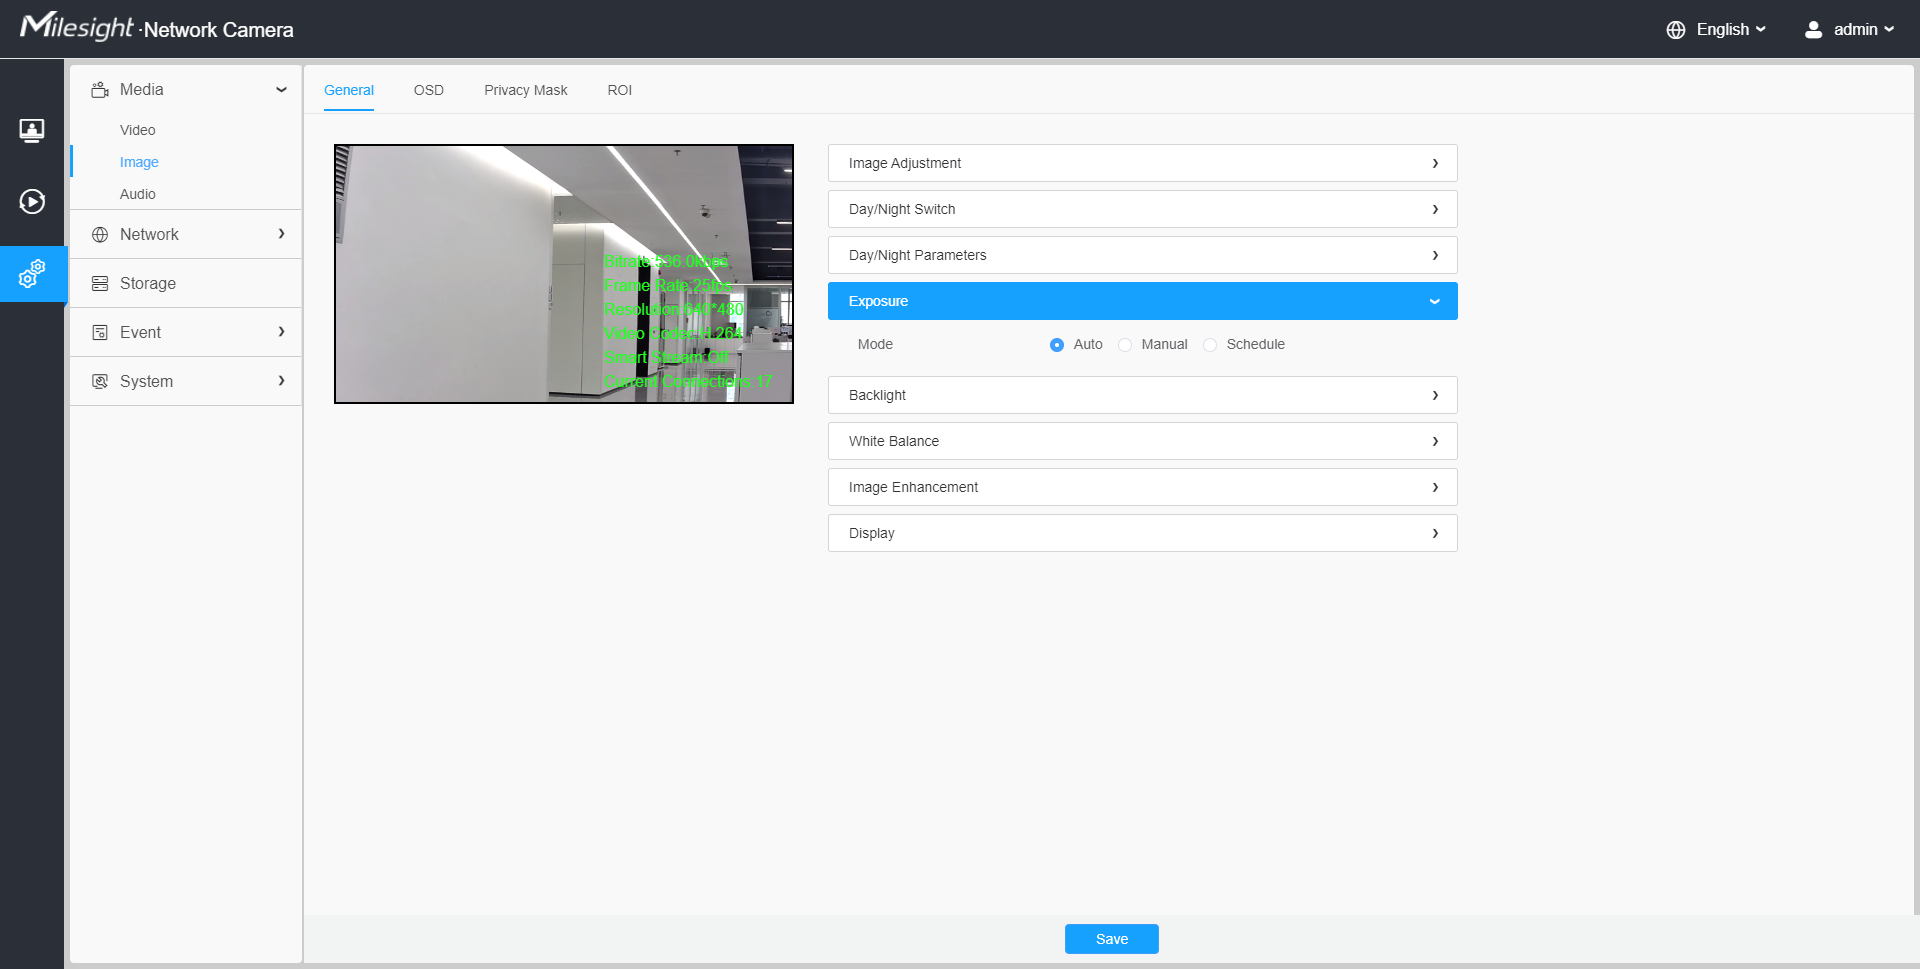
[Exposure]
| Parameters | Function Introduction |
|---|---|
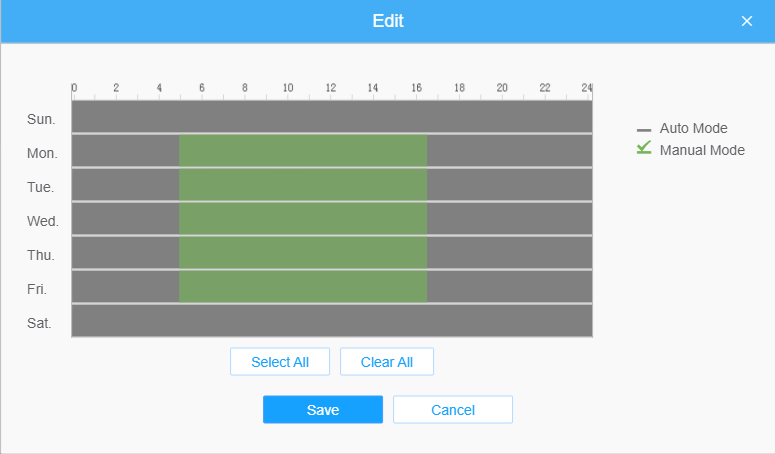
| Exposure Mode | Auto Mode, Manual Mode and Schedule Mode are available. Auto Mode: The camera will adjust the brightness according to the light environment automatically. Manual Mode: The camera will adjust the brightness according to the value you set, you can set the exposure time from 1~1/100000s, the higher the value is, the brighter the image is. Schedule Mode: You can customize the schedule to enable/disable Auto Mode and Manual Mode.
|
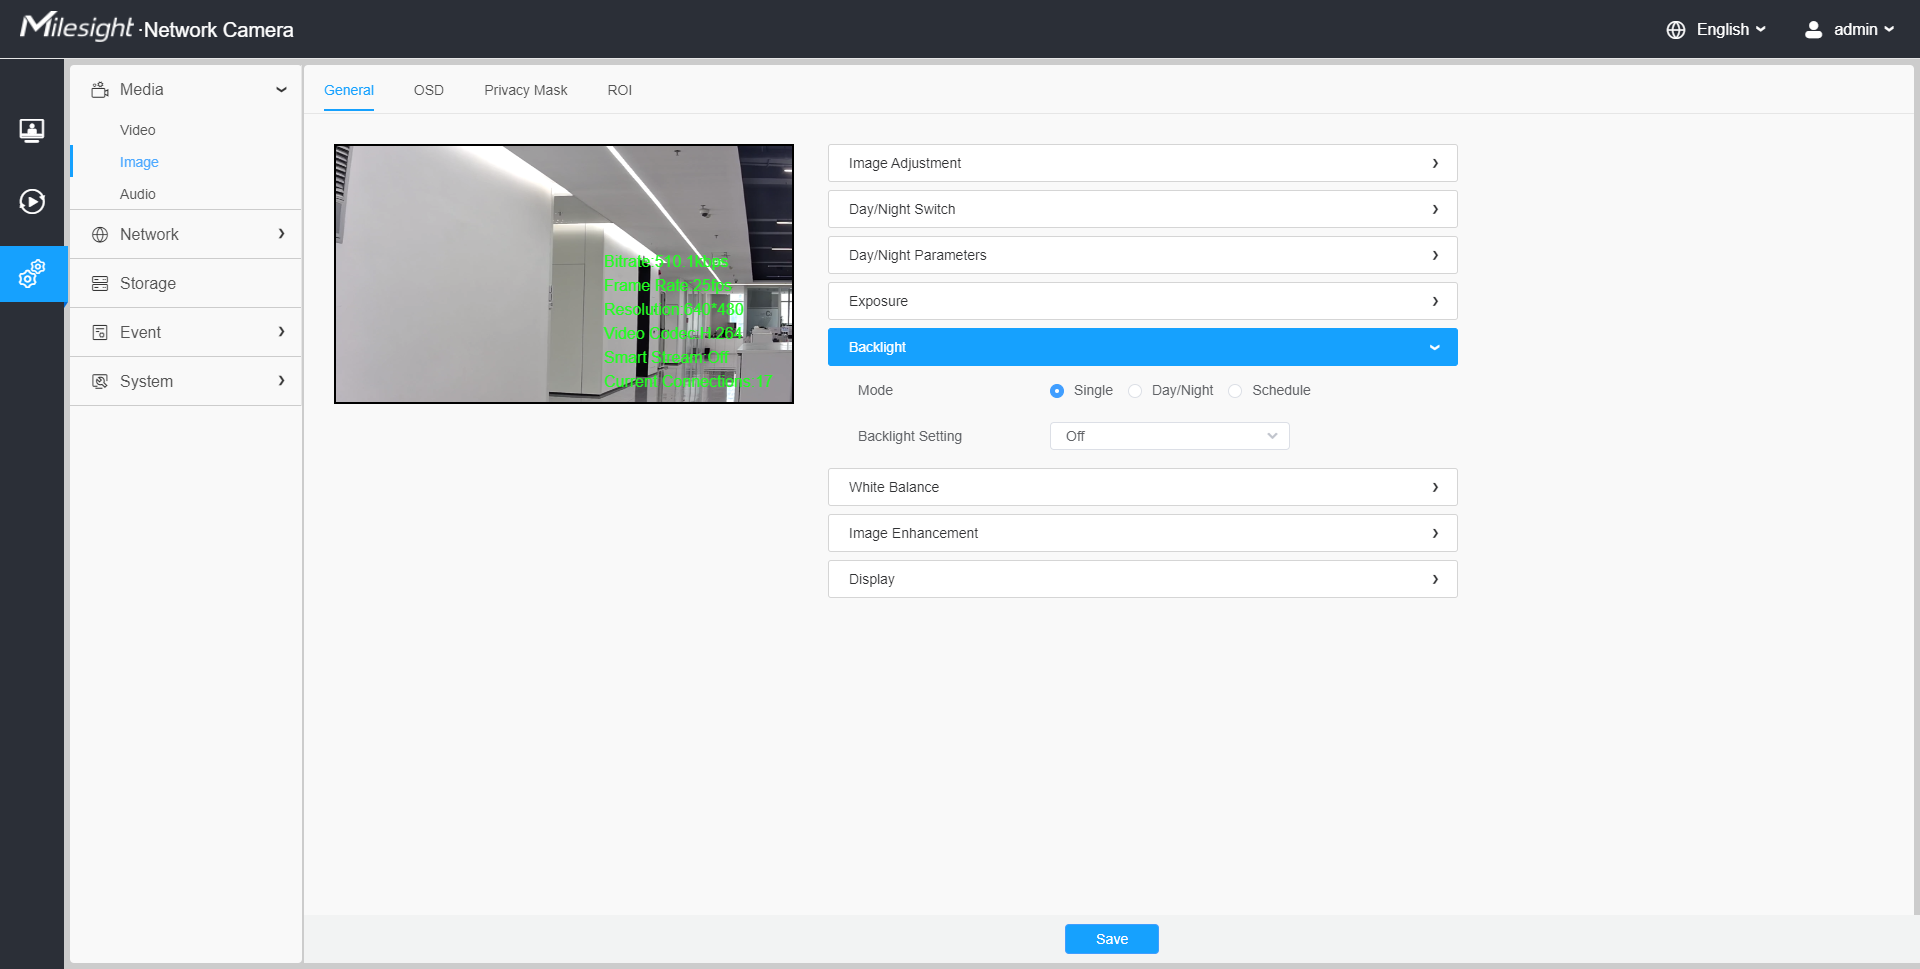
[Backlight]
| Parameters | Function Introduction |
|---|---|
| Backlight Mode | Single Mode: Set single mode for BLC/WDR/HLC. Note: Do not support WDR and General HLC while High Frame Rate is
enabled. Day/Night Mode: Support BLC/WDR/HLC on Day Enhancement Mode/Night Enhancement Mode separately. Schedule Mode: Set schedule mode for BLC/WDR/HLC. You can customize the schedule to enable/disable BLC/WDR/HLC mode.
|

- For more details about Milesight WDR on & off Video, you can click to the YouTube:
- For more details about Milesight Ultra Low-light Video Demo - HLC, you can click to the YouTube:
- For more details about Milesight Super WDR Pro, you can click to the YouTube:
- For more details about Milesight Super WDR Performance, you can click to the YouTube:
[White Balance]
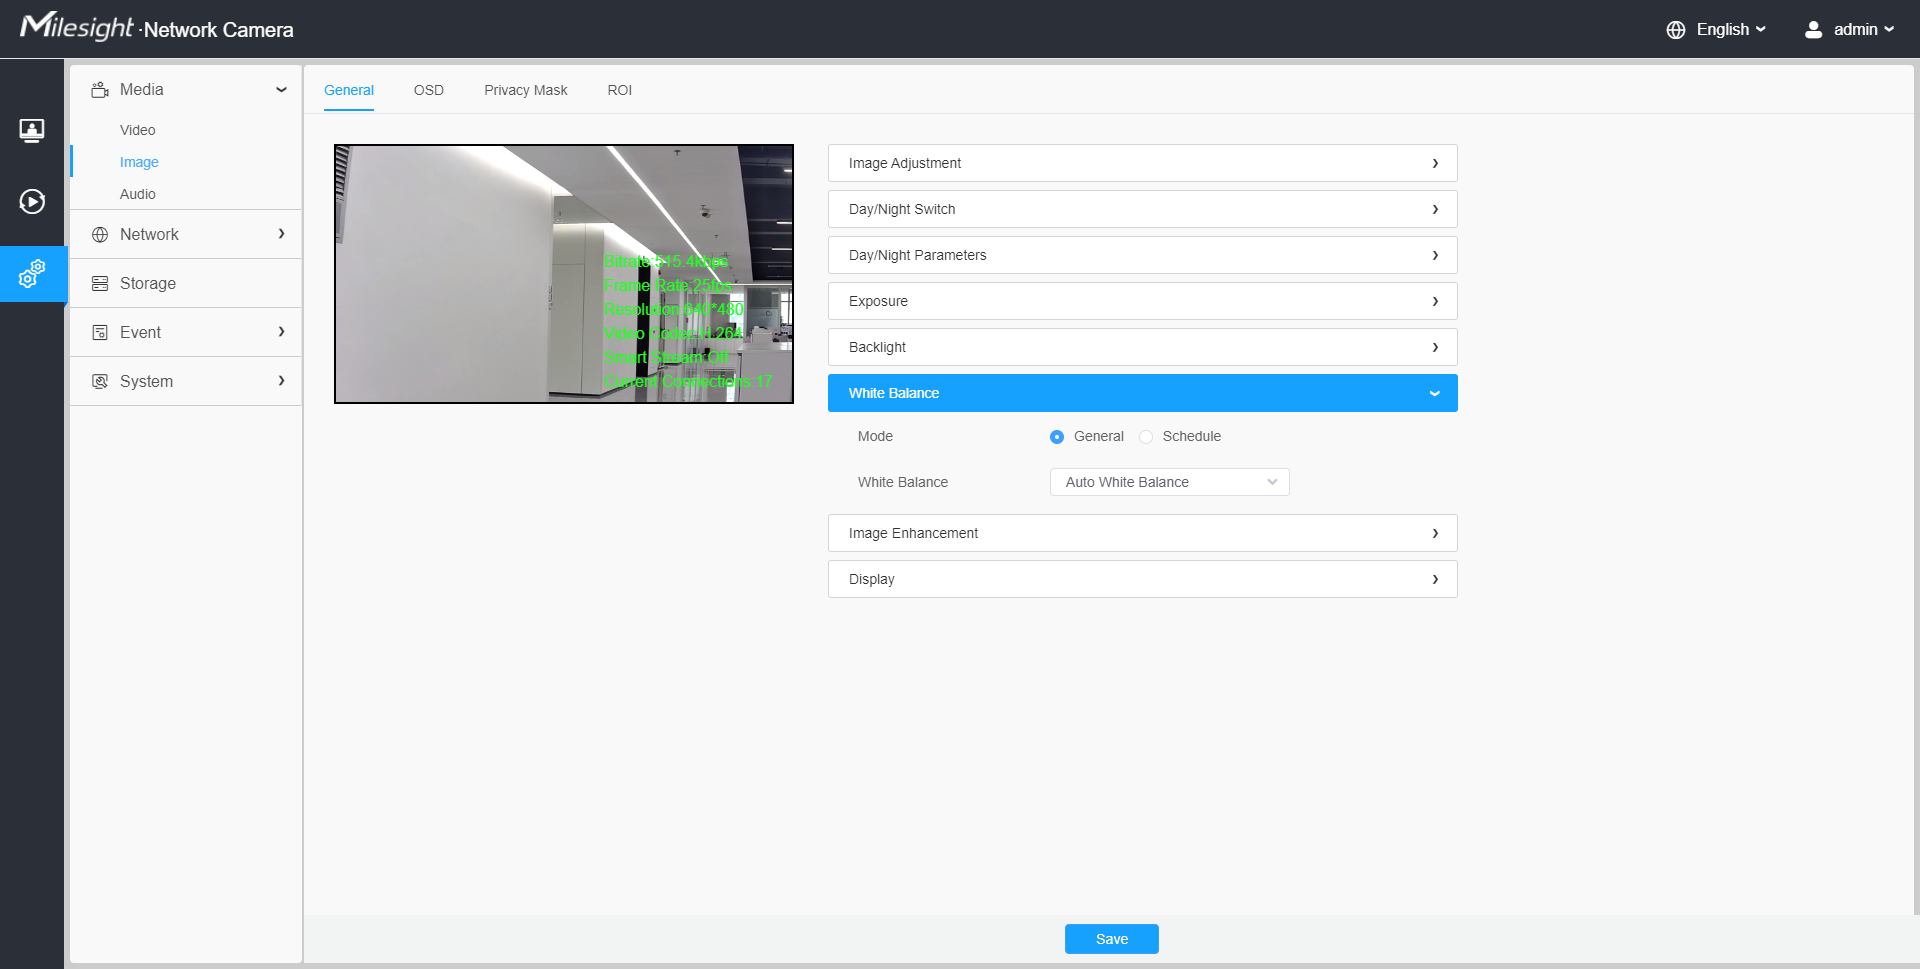
| Parameters | Function Introduction |
|---|---|
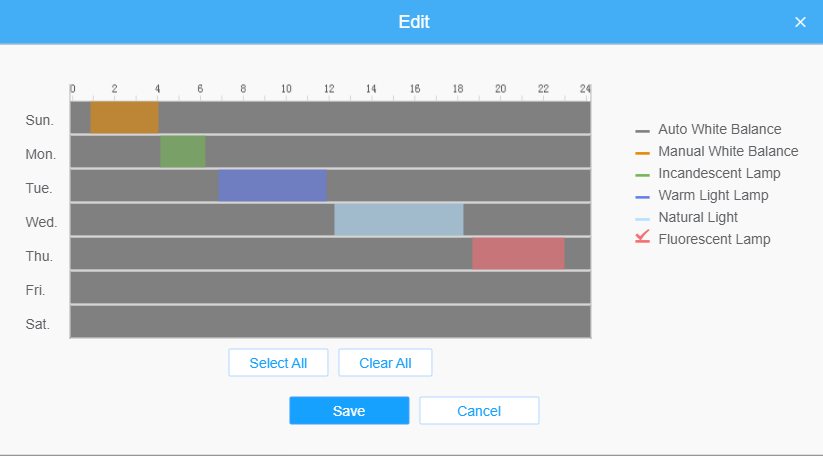
| White Balance | To restore white objects, removed color distortion caused by the light of the environment. Mode: General and Schedule are available. |
General Mode: Select a white balance mode as required
|
|
|
Schedule Mode: Select this option that you can customize the schedule to enable/ disable above modes.
|
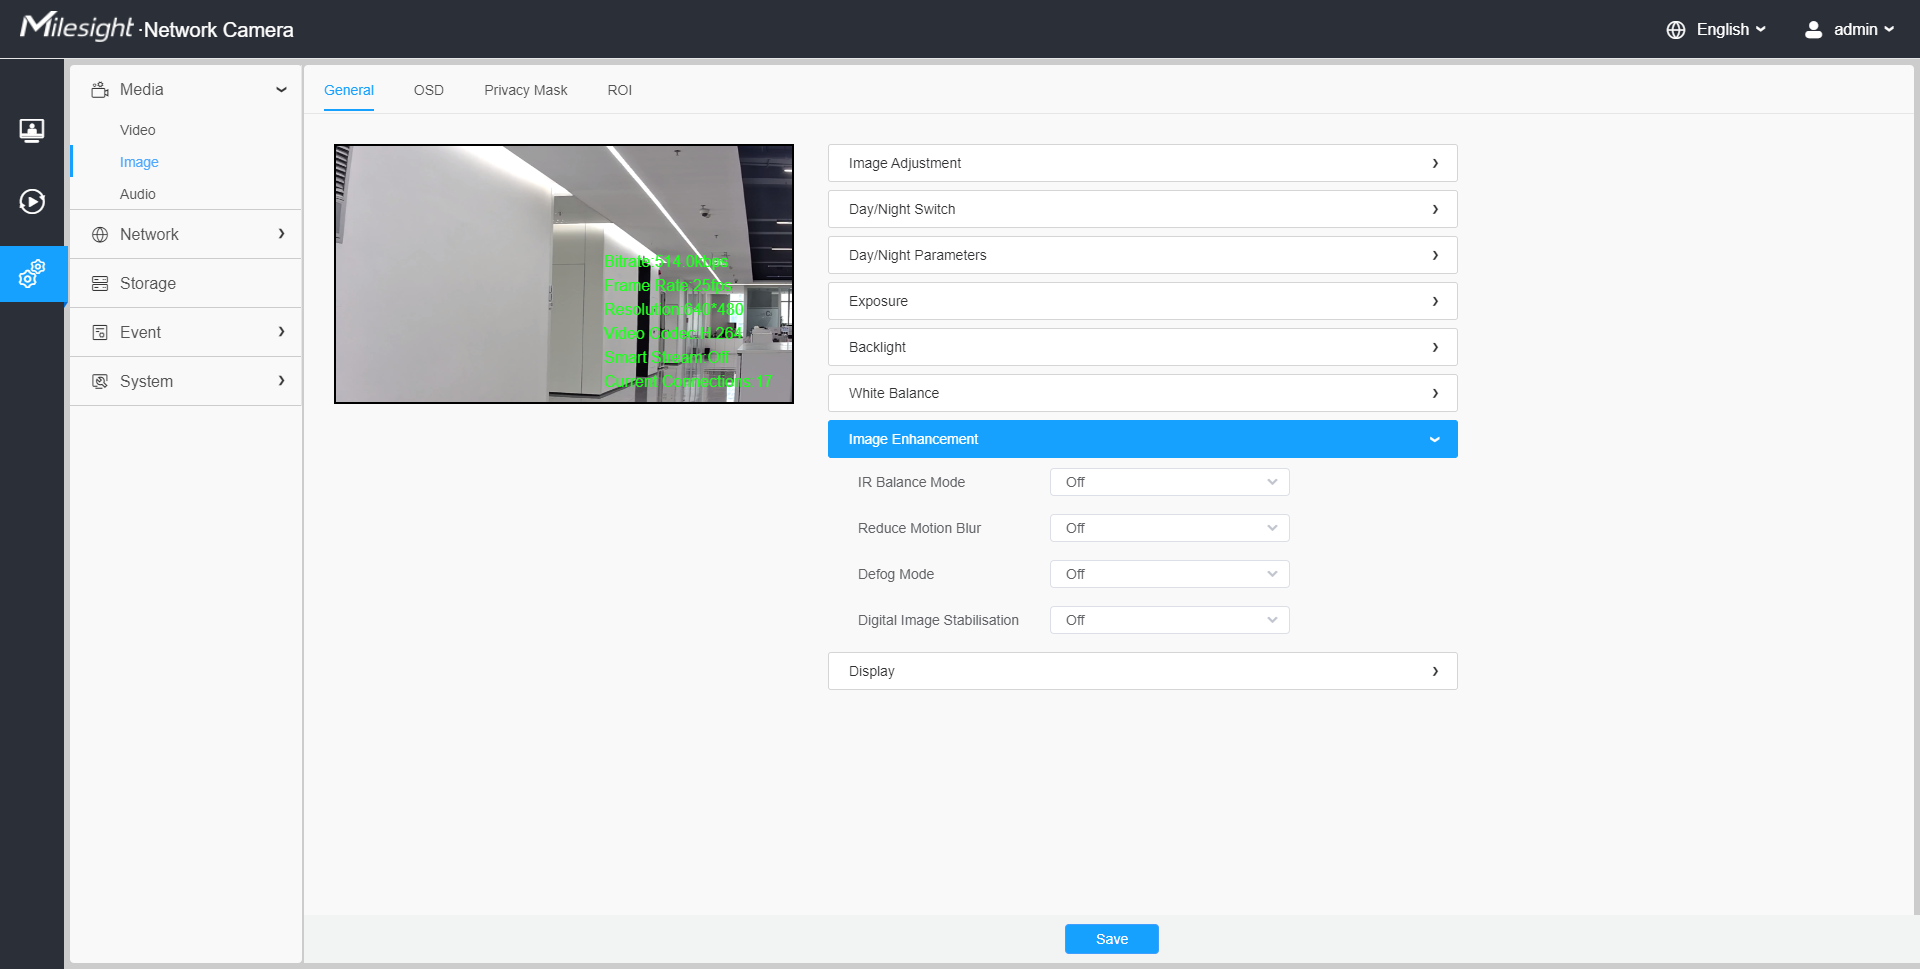
[Image Enhancement]
| Parameters | Function Introduction |
|---|---|
| IR Balance Mode | There is an option to turn On/Off the IR LED. IR Balance Mode would avoid the problem of overexposure and darkness, and the IR LED will change according to the actual illumination. |
| Reduce Motion Blur | Enable this function to reduce the motion blur of objects
effectively. You can adjust the deblur level from 1 to 100. Note: For more
details about Milesight Deblur, you can click to the
YouTube:
|
| Defog Mode | Better image effect in foggy weather. Note:
|
| Digital Image Stabilisation | Decrease the blur and shakiness of the image. |
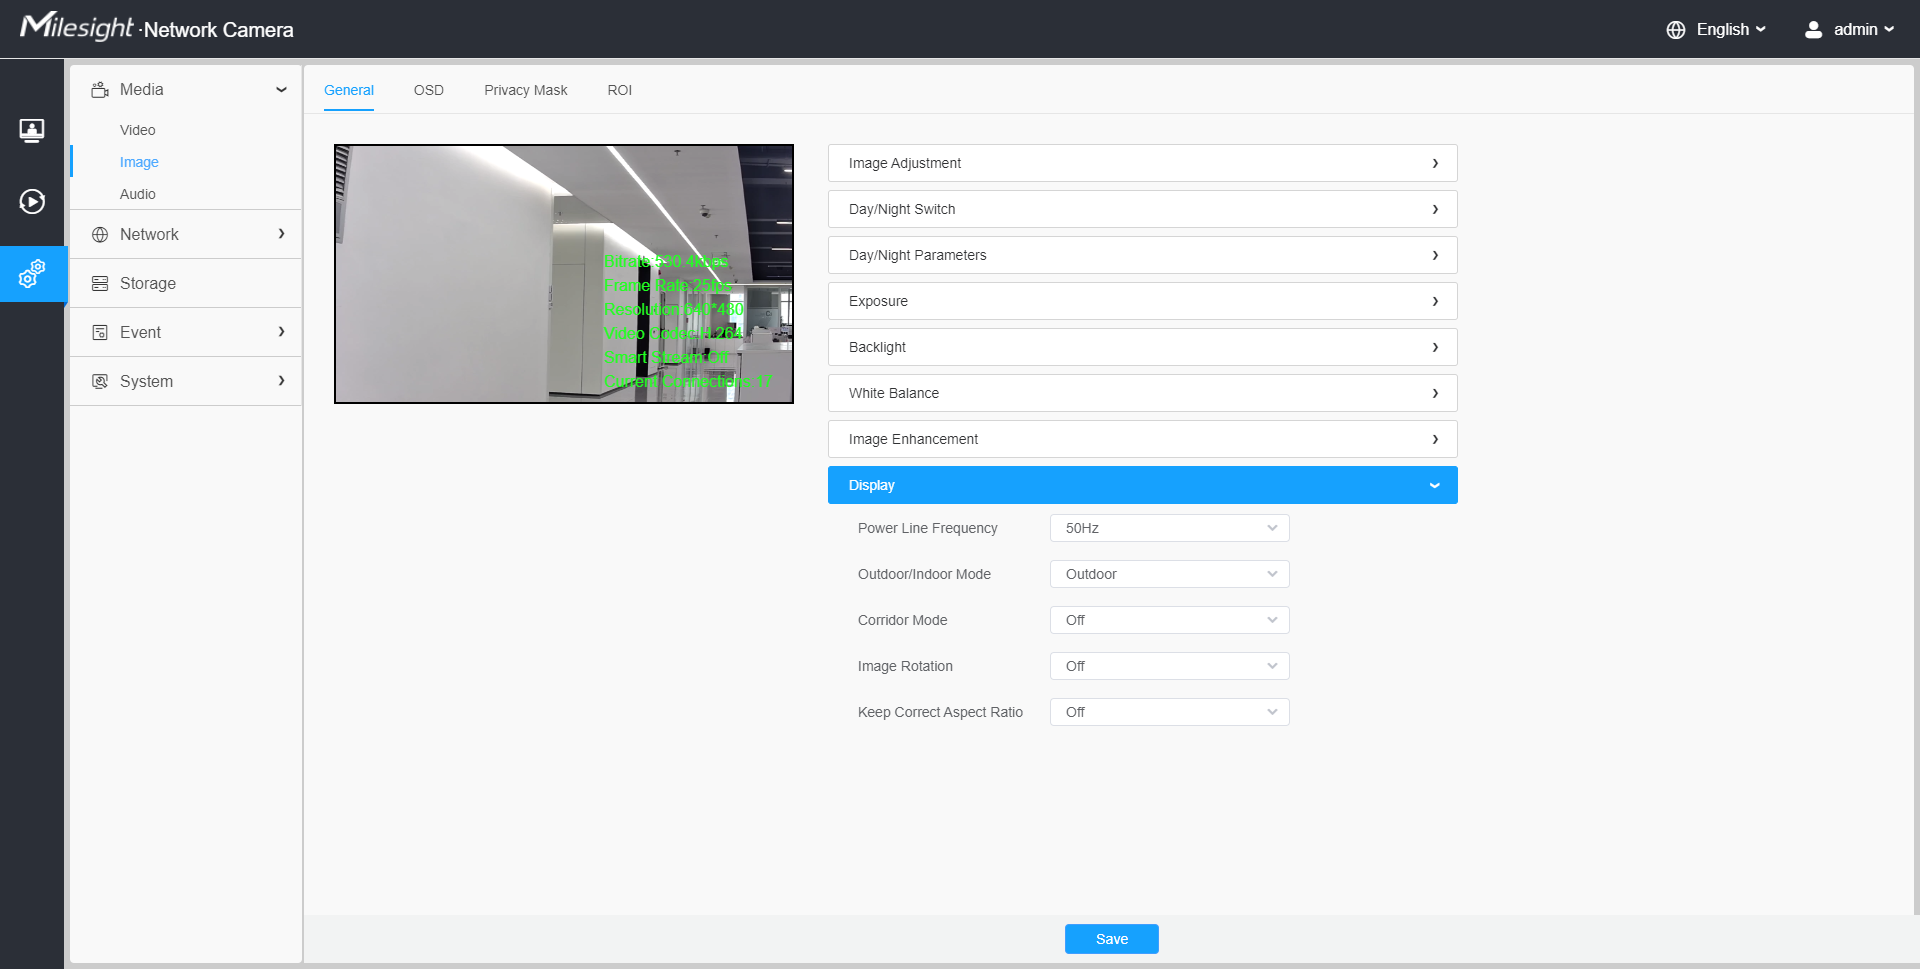
[Display]
| Parameters | Function Introduction |
|---|---|
| Power Line Frequency | 60Hz and 50Hz are available. |
| Outdoor/Indoor Mode | Select indoor or outdoor mode to meet your needs. |
| Corridor Mode | There are three options available, you can select one to meet your
need. Off: Keep the image in normal direction. Clockwise 90°: Rotate the image by 90° clockwise. Anticlockwise90°: Rotate the image by 90° anticlockwise. |
| Image Rotation | There are four options available, you can select one to meet your
need. Off: Keep the image in normal direction. Rotating 180°: Upside down the image. Flip Horizontal: Flip the image horizontally. Flip vertical: Flip the image vertically. |
| Keep Correct Aspect Ratio |
With this option enabled, the camera will prevent the image from distortion when resolution ratio is changed. |
| Zoom Limit | Set the Zoom Limit. Note: Only for the
PTZ Network Camera with optical zoom of 20X or above. |
| White LED Level |
Set the White LED Level to 1~100. Note: Only for PTZ Bullet.
|
| Smoked Dome Cover | This function is only for Pro Dome. If
Pro Dome is equipped with a Smoked Dome Cover, enable this function to
display a normal image. Note: Only for Pro Dome. |