5.1.2 Assign An IP Address via Browser
If the network segment of the computer and that of the camera are different, please follow the steps to change the IP address:
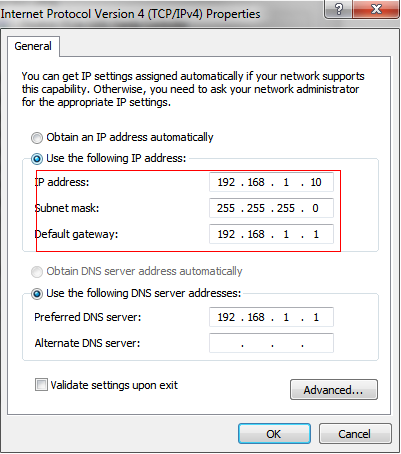
Step1: Change the IP address of computer to 192.168.5.0 segment, here are two ways as below:
a. Start→Control Panel→Network and Internet Connection→Network Connection→Local Area Connection, and double click it;
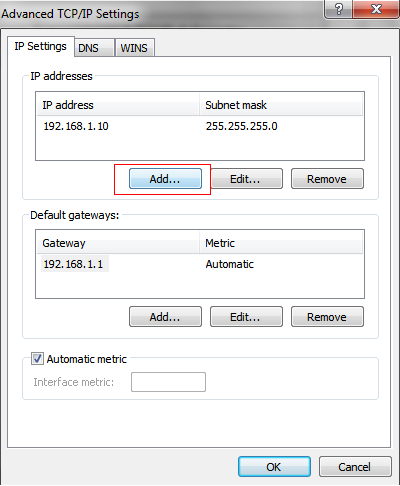
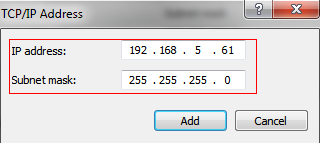
b. Click “Advanced”, and then click “IP settings”--> “IP address”--> “Add”. In the pop-up window, enter an IP address that in the same segment with Milesight network camera ( e.g. 192.168.5.61, but please note that this IP address shall not conflict with the IP address on the existing network);
Step2: Start the browser. In the address bar, enter the default IP address of the camera:http://192.168.5.190;
Step3: You need to set the password first when using it for the first time. And you can also set three security questions for your device after activation. Then you can log in to the camera with the user name (admin) and a custom password.
- Password must be 8 to 32 characters long, contain at least one number and one letter.
- You can click the “forget password” in login page to reset the password by answering three security questions when you forget the password, if you set the security questions in advance.
Step4: After login, please select “Settings” → “Network” → “Basic” → “TCP/IP”. The Network Settings page appears (Shown as below Figure);
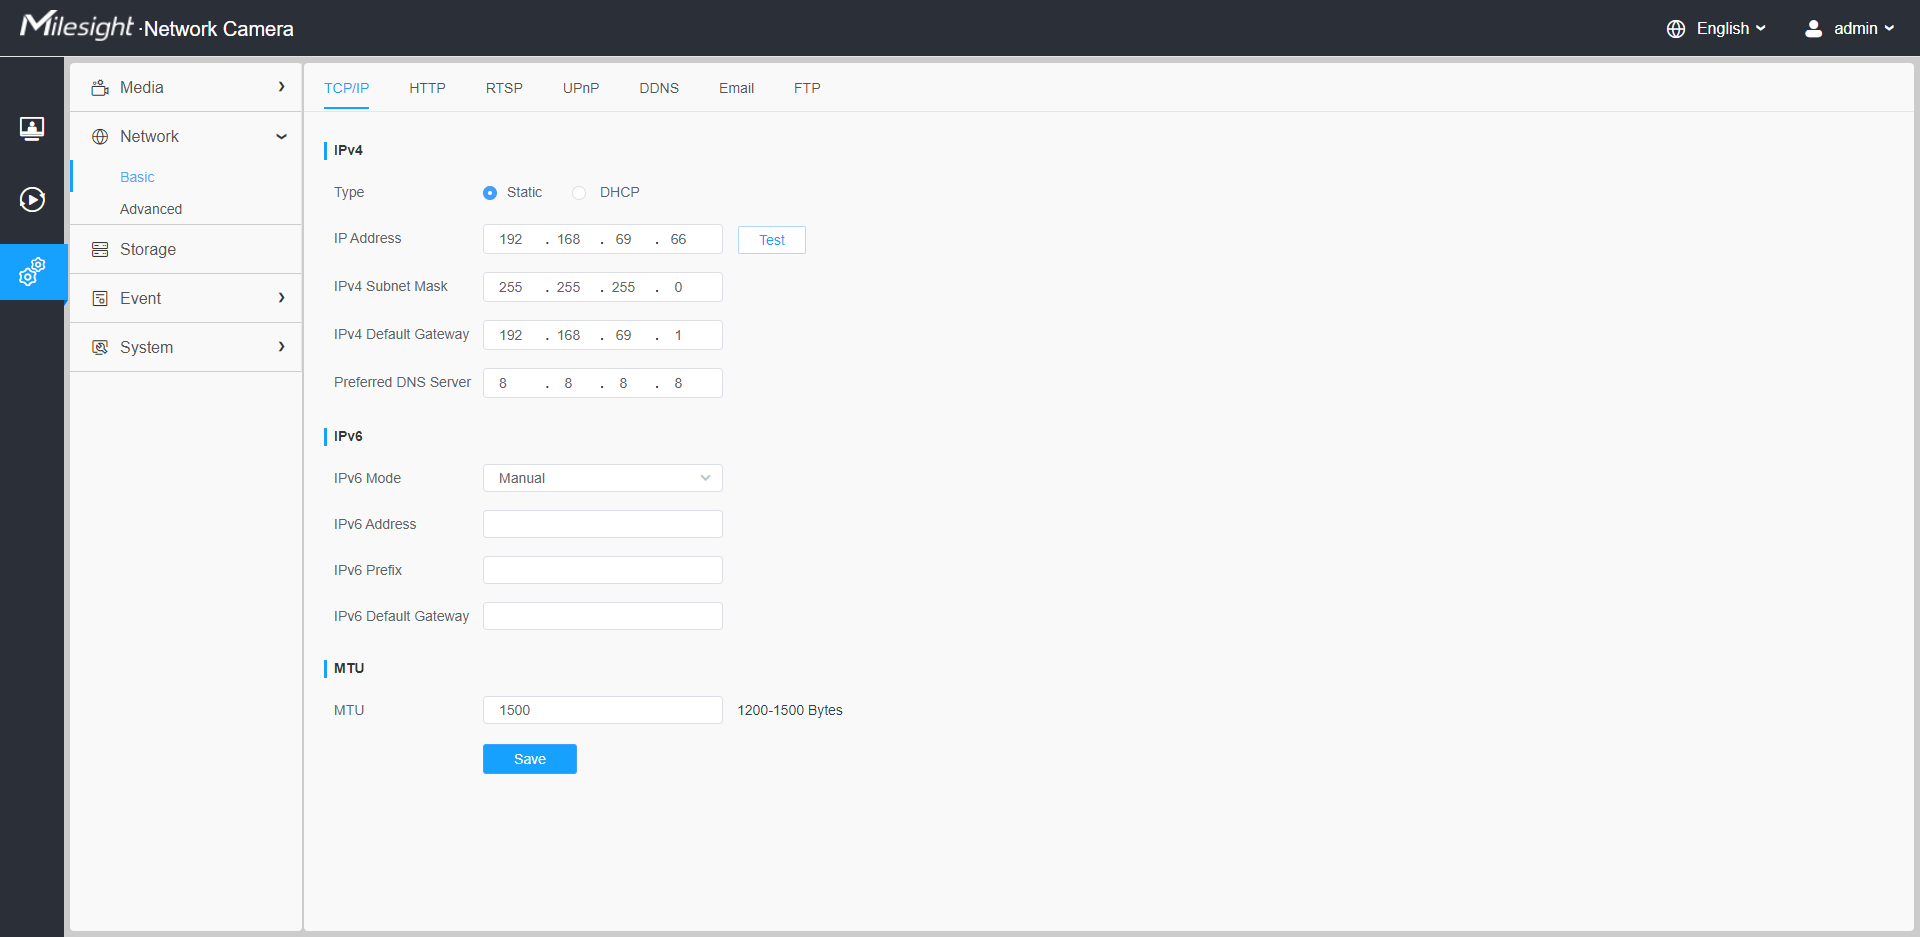
Step5: Change the IP address or other network values. Then click “Save” button;
Step6: The change of default IP address is completed.