5.1.1 Assigning An IP Address Using Smart Tools
Smart Tools is a software tool which can automatically detect multiple online Milesight network cameras in the LAN, set IP addresses, and manage firmware upgrades. It’s recommended to use when assigning IP addresses for multiple cameras.
Step1: Install Smart Tools (The software could be downloaded from our website);
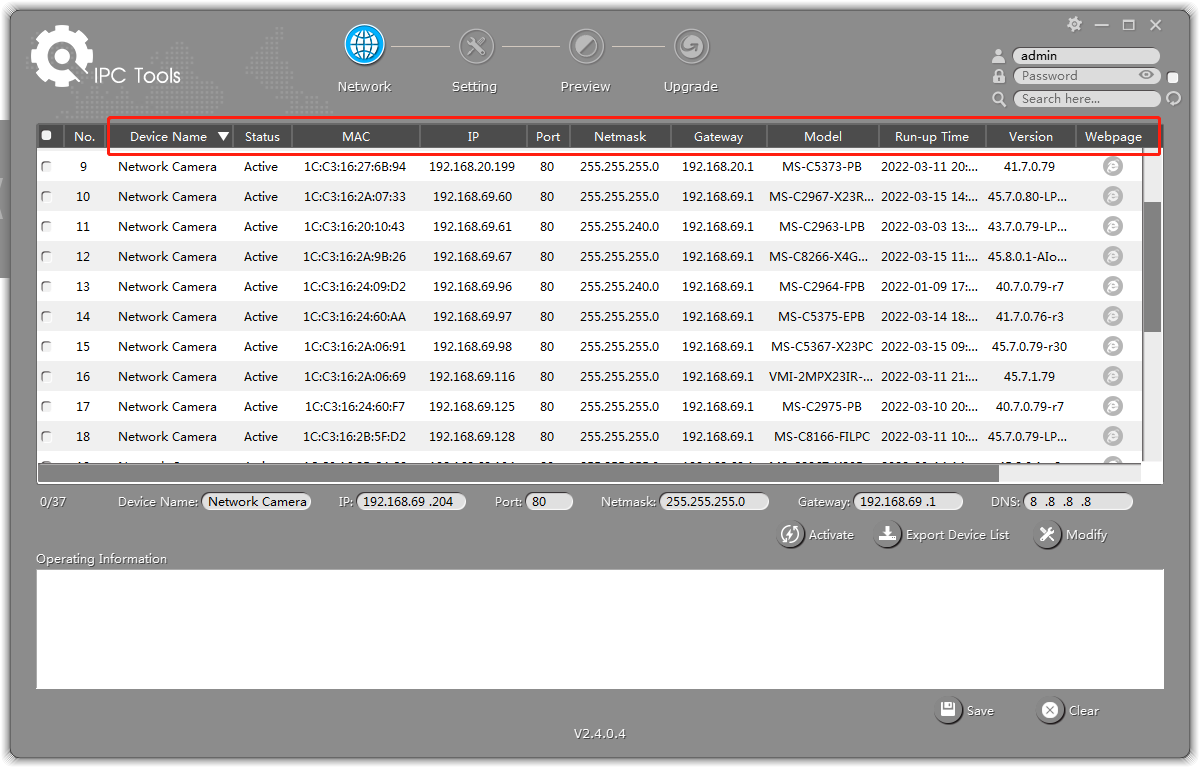
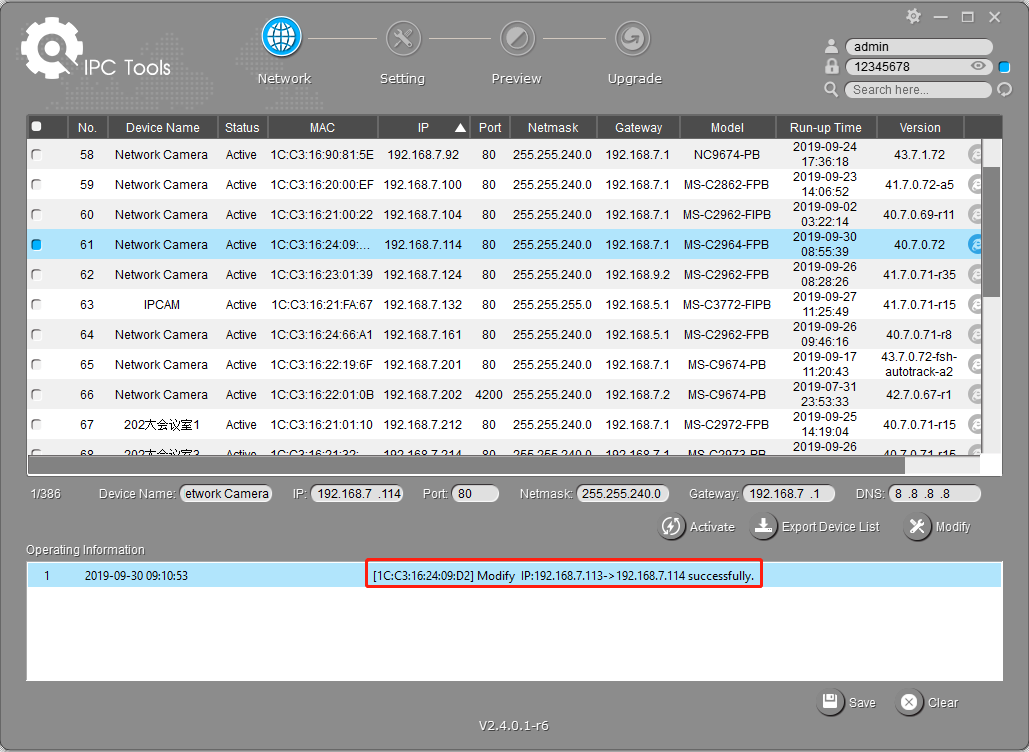
Step2: Start Smart Tools, click the IPC Tools page, then enter the device information, such as IP address, MAC address, Status, Port number, Netmask, and Gateway, then all related Milesight network camera in the same network will be displayed. Details are shown as the figure below;
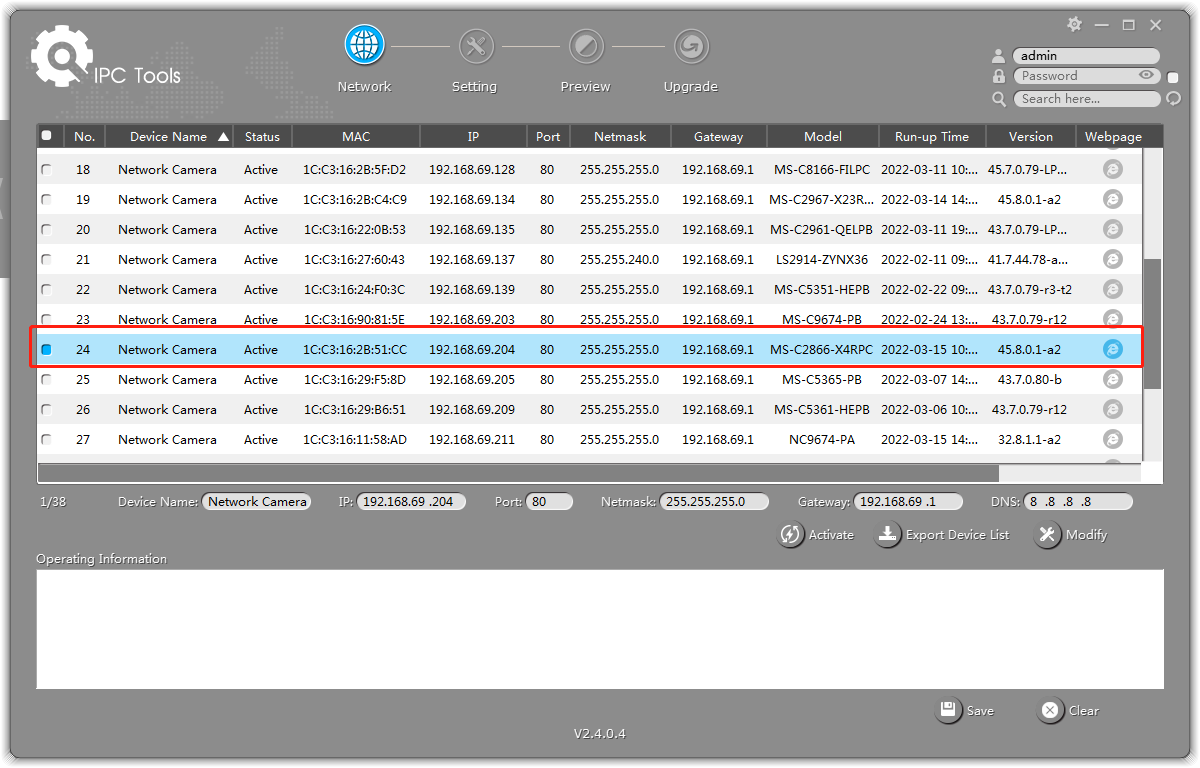
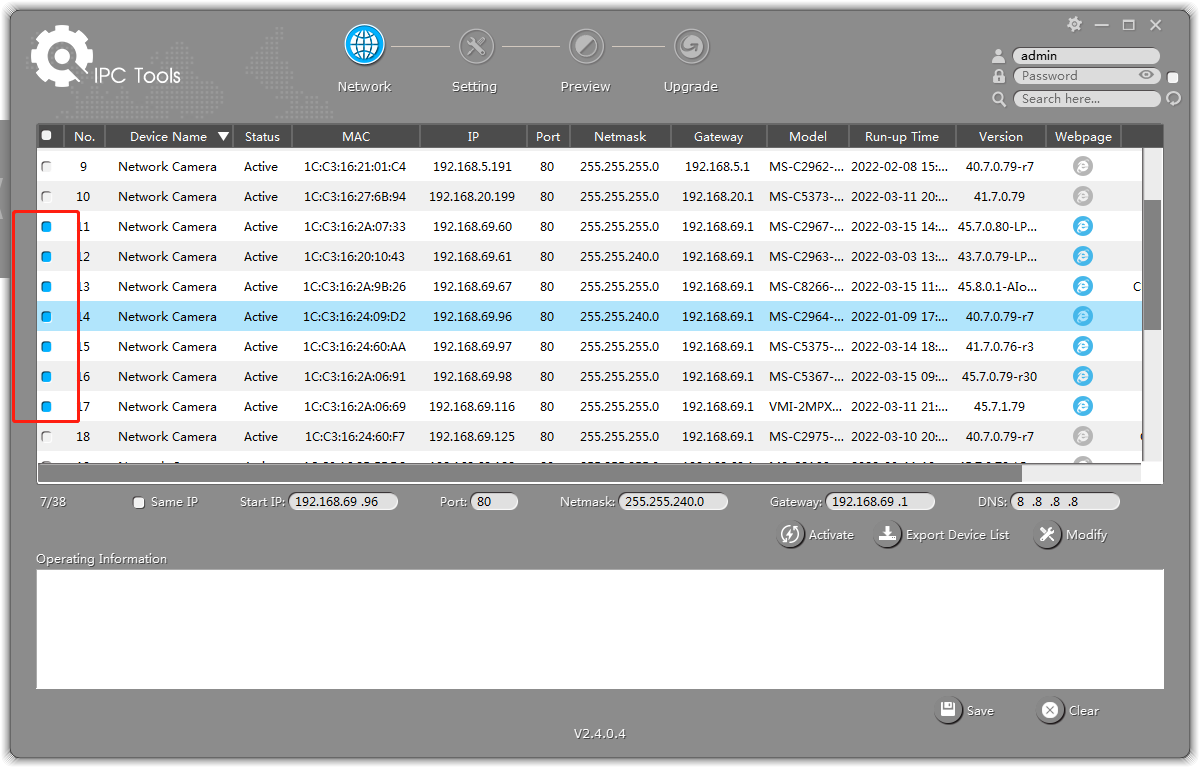
Step3: Select a camera or multiple cameras according to the MAC addresses;
Select single camera:
Select multiple cameras:
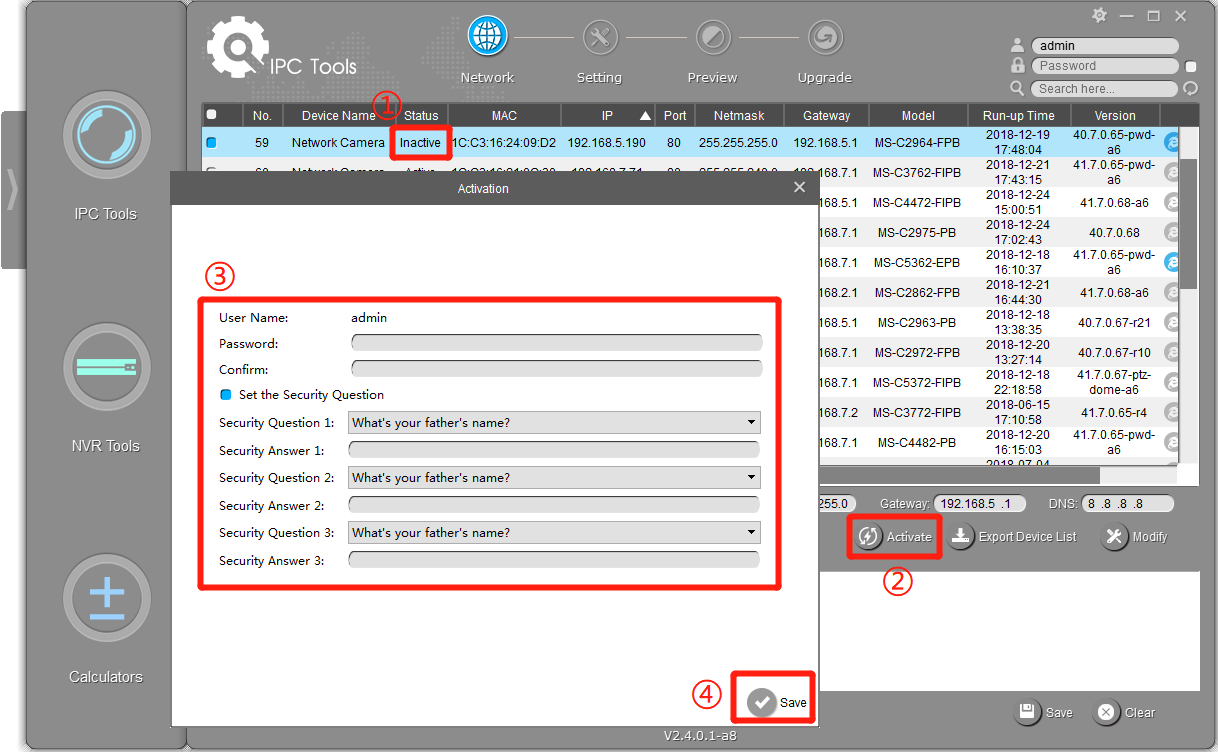
- Password must be 8 to 32 characters long, contain at least one number and one letter.
- You need to upgrade Smart Tools version to V2.4.0.1 or above to activate the camera.
Step5: After activation, you can change the IP address or other network values, and then click “Modify” button.
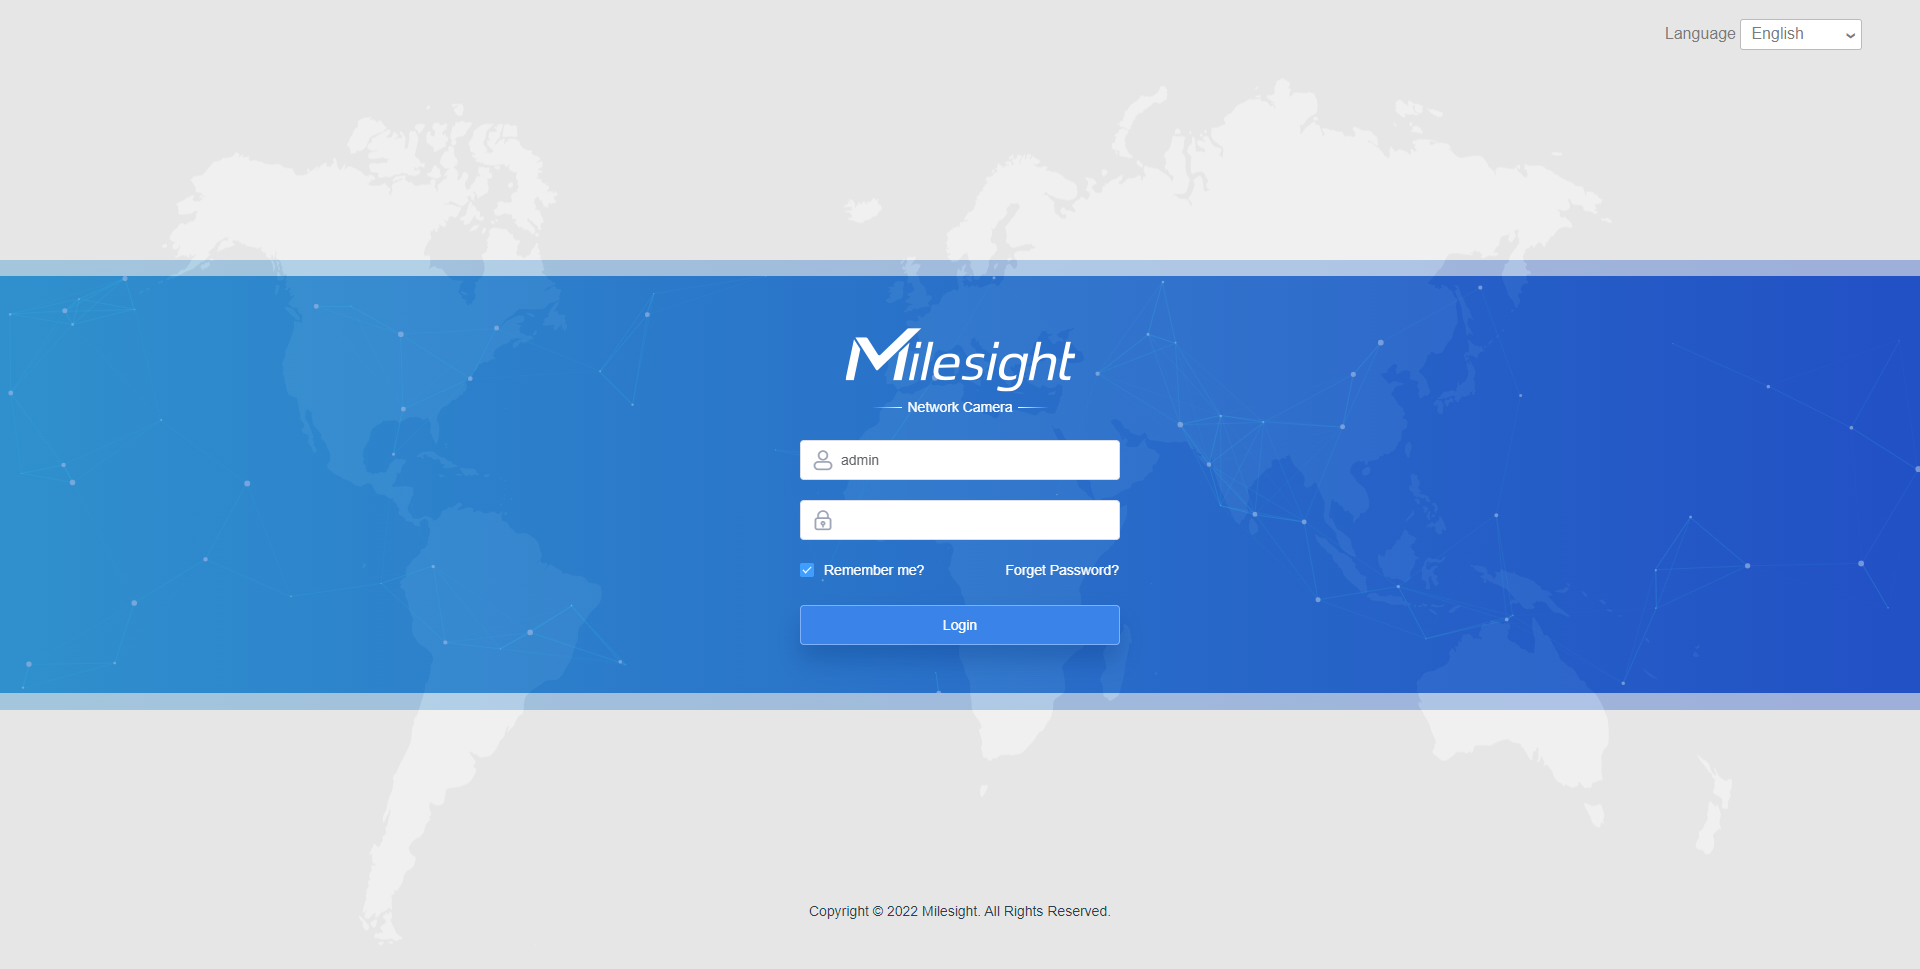
Step6: By double clicking the selected camera or the browser of interested camera, you can access the camera via web browser directly. The Internet Explorer window will pop up.
More usage of Smart Tools, please refer to the Smart Tools User Manual.