3.8.1 Motion Detection
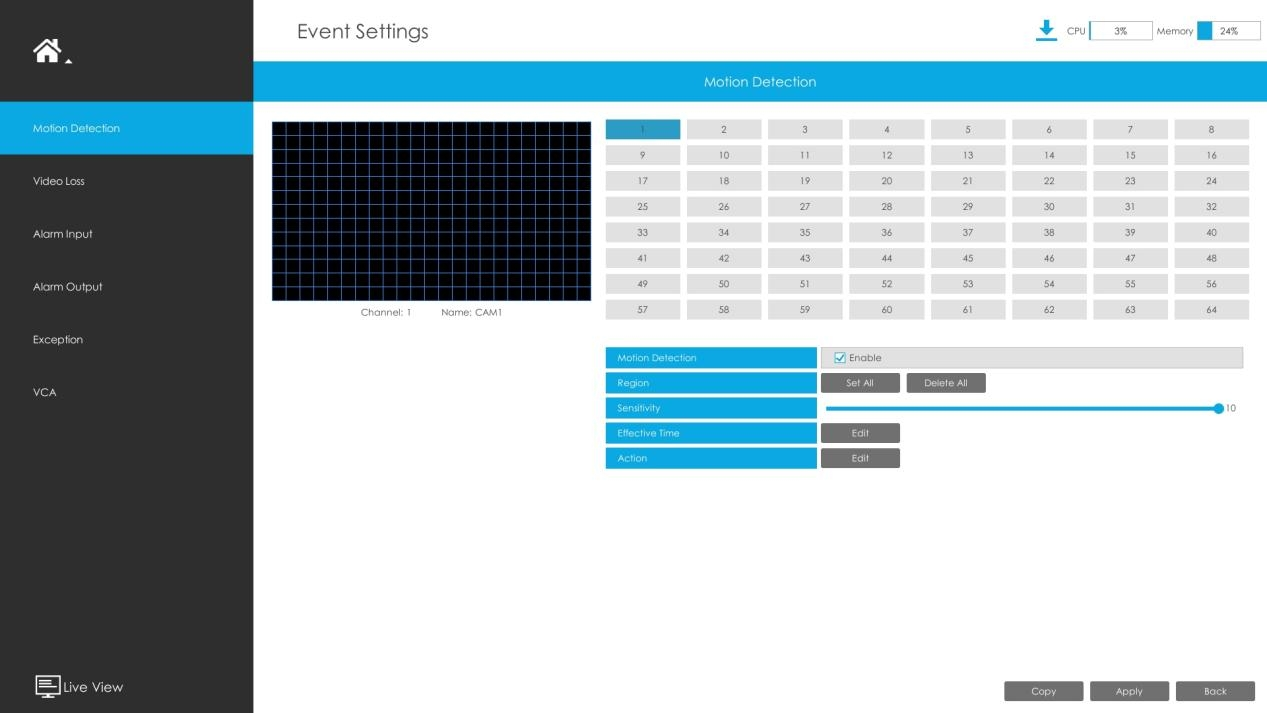
Step 1. Enable Motion Detection.
Select channel , Sensitivity and click ![]() to enable Motion Detection.
to enable Motion Detection.
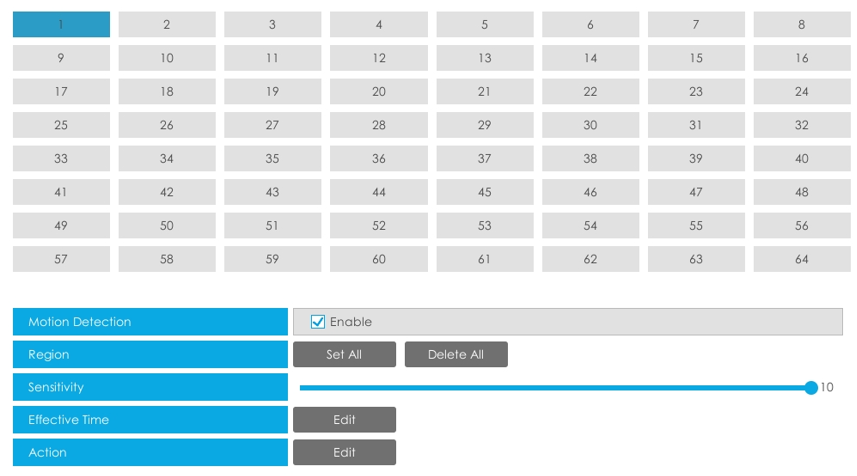
Step2: Set the area for triggering motion detection.
You can set the area by dragging a square on live view window.

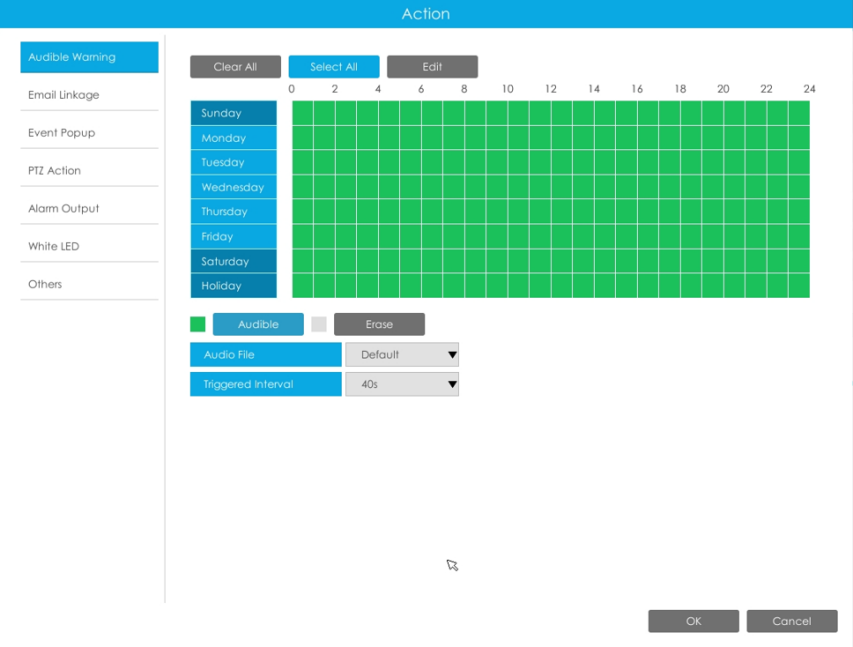
Step3. Set Effective Time of motion detection by clicking "Edit".
NVR receives the alarm when effective time has been set. It will be more convenient by clicking "Select All" or "Clear All" to set or clear all time settings.
Step 4. Set Action for motion detection alarm by clicking"Edit".
Audible Warning:NVR will trigger an audible warning when event is detected.
The user can set effective schedule as following two ways:
- Select the operation type: Audible or Erase. Then drag a square on the time
table for time setting. It will be more convenient by clicking
 or
or  to set or clear all time settings.
 - Click
 to edit record effective time manually.
Audio File: Users can select the audio file as needed for audible warning. The default is an audible beep.
Triggered Interval:The effective interval between two actions when event triggered.
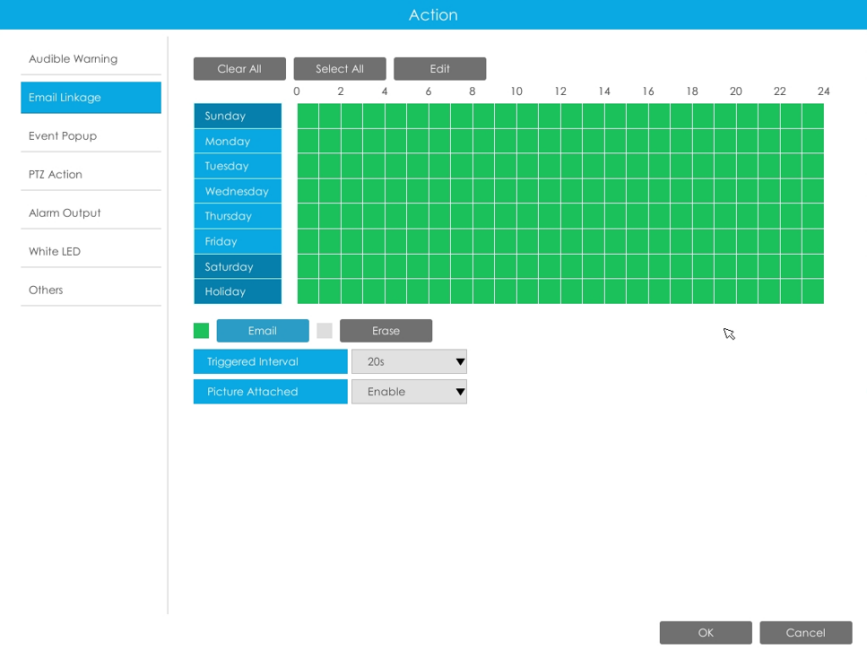
Email Linkage:NVR will send an email to the address you set before.
The user can set effective schedule as following two ways:
- Select the operation type, Email and Erase. Then drag a square on the time table
for time setting. It will be more convenient by clicking or to set or clear all time settings.
- Click to edit effective time manually.
Triggered Interval:The effective interval between two actions when event triggered.
Picture Attached: Select whether to attach picture when sending Emails. If you enable it, you will receive alarm emails with one event captured picture attached.
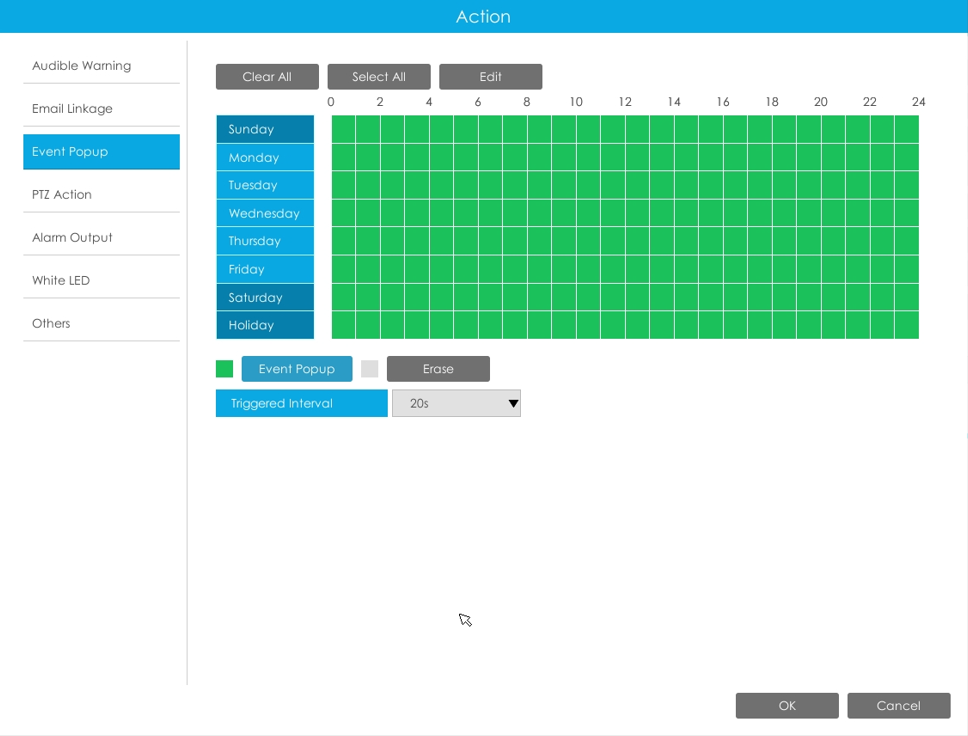
Event Popup:Trigger alarm screen popup to full screen when alarm is triggered. And you can set display duration time of all triggered channel in ‘Settings’->’General’->’Device’->’Event Popup Duration Time’. Then triggered channel will be shown one by one as duration time.
- Select the operation type, Event Popup and Erase. Then drag a square on the time
table for time setting. It will be more convenient by clicking or to set or clear all time settings.
- Click to edit effective time manually.
Triggered Interval:The effective interval between two actions when event triggered.
PTZ Action:Trigger PTZ action when alarm is triggered. PTZ action includes Preset and Patrol.
User can set effective schedule as following two ways:
- Select the operation type: PTZ or Erase. Then drag a square on the time table
for time setting. It will be more convenient by clicking or to set or clear all time settings.
- Click to edit effective time manually.
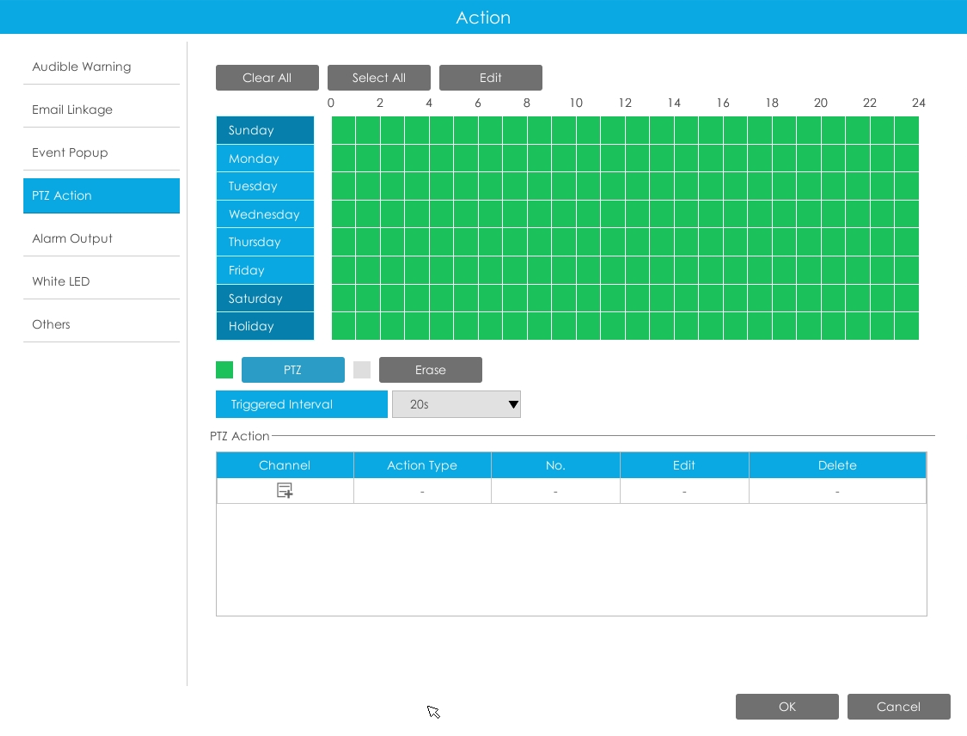
And you can add PTZ Action by clicking ![]() .
.
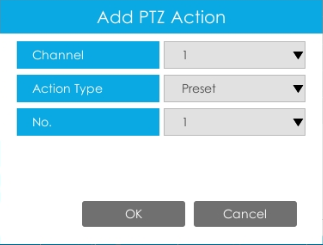
Channel: Select the channel which supports this function.
Action Type: Preset and Patrol are available.
No.: Select the number of Preset or Patrol.
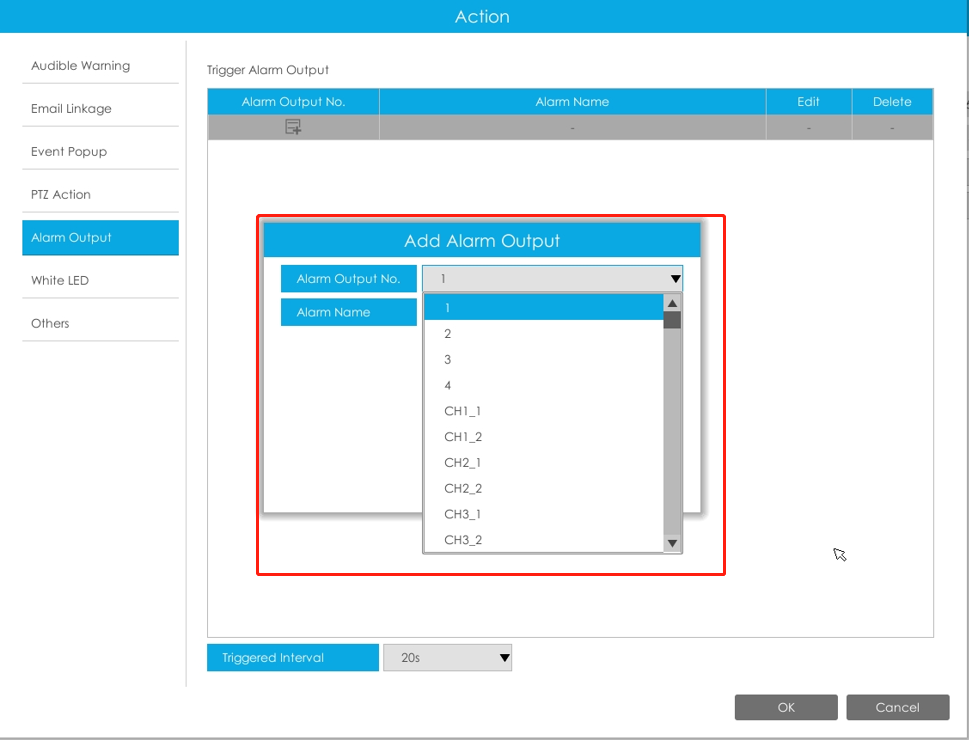
Alarm Output:Trigger alarm output when alarm is triggered. For NVR Alarm Output, the relevant alarm output will be firstly listed, such as, 1, 2.etc. As for camera Alarm Output, it will display as CHx_x (such as CH1_1) according to the camera channel and corresponding alarm number.
Triggered Interval:The effective interval between two actions when event triggered.
White LED:Trigger White LED flashing when alarm is triggered.
The user can set effective schedule as following two ways:
User can set effective schedule as following two ways:
- Select the operation type, White LED and Erase. Then drag a square on the time
table for time setting. It will be more convenient by clicking or to set or clear all time settings.
- Click to edit effective time manually.
Triggered Interval:The effective interval between two actions when event triggered.
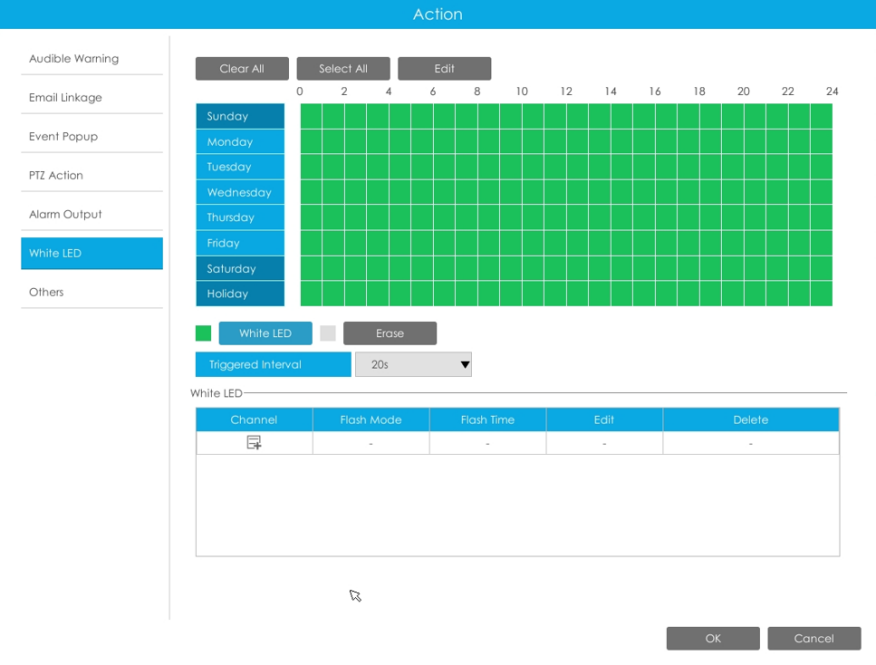
And you can add White LED by clicking ![]() .
.
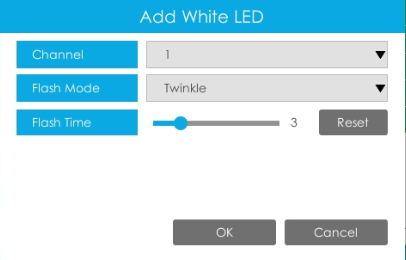
Channel: Select the channel which supports this function.
Flash Mode: Twinkle and Always are available.
Flash Time: Set the time for White LED flashing. When the Flash Mode is Twinkle, the range of Flash Time is 1~10 and the default value is 3. When the Flash Mode is Always, the range of Flash Time is 1~60 and the default value is 5.
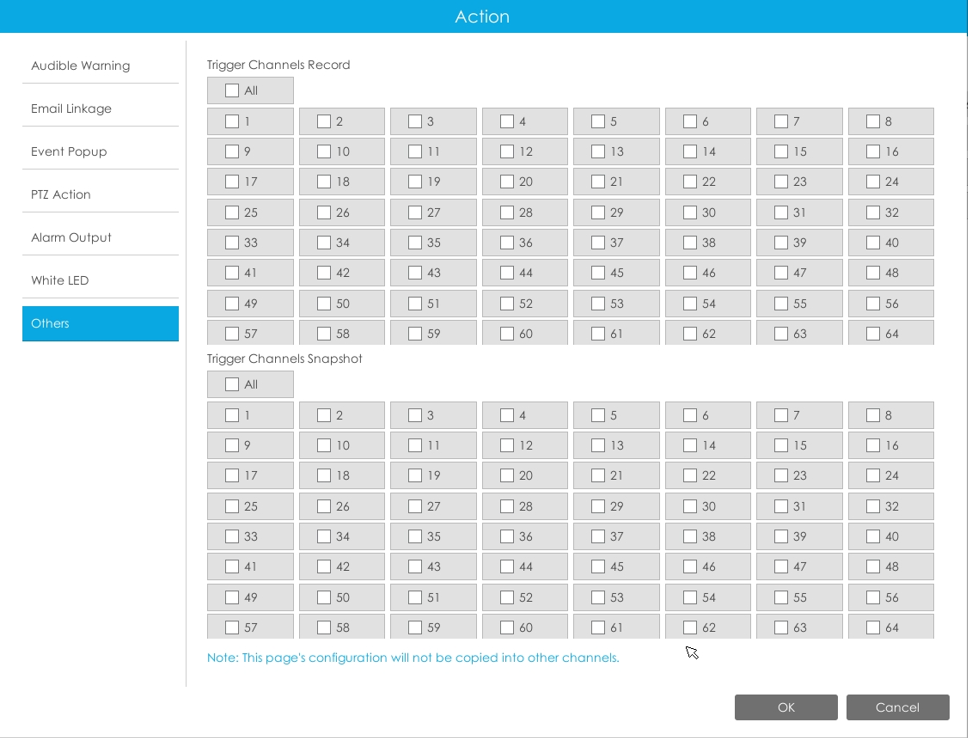
Others:Trigger selected channels to record when alarm is triggered.
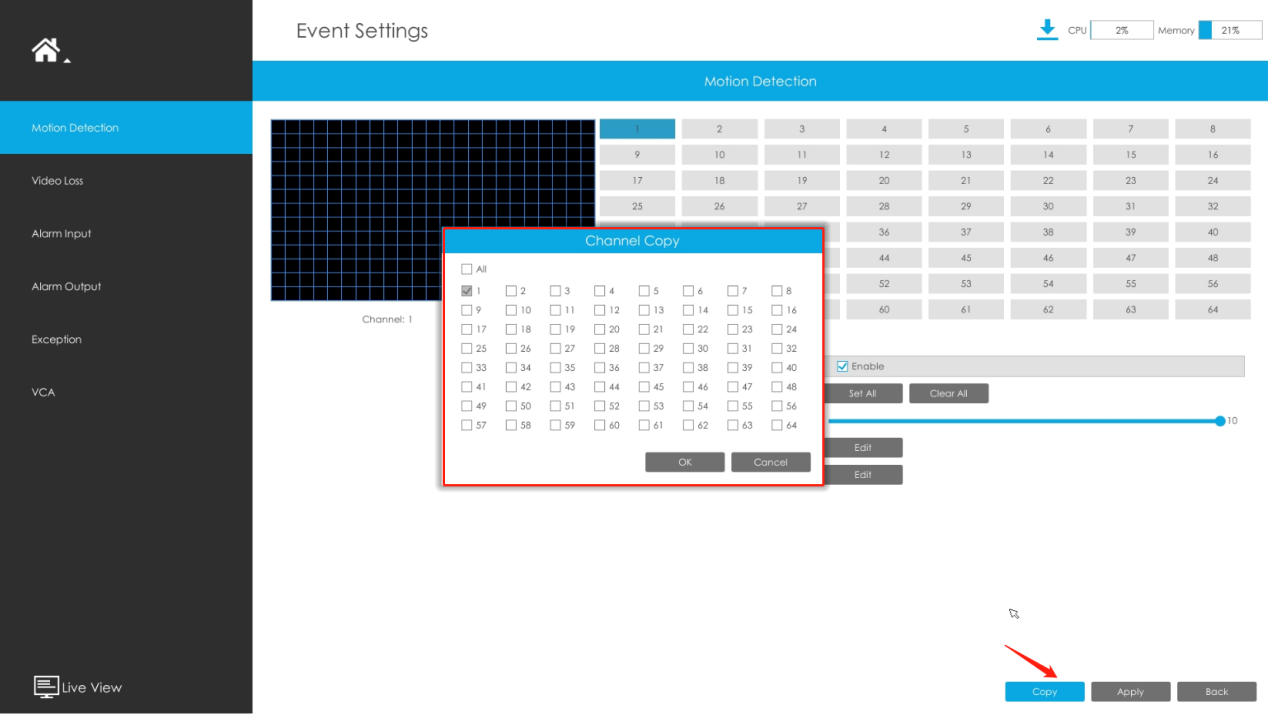
Step5. Click"Copy" and ![]() to copy the same configuration to other
channels.
to copy the same configuration to other
channels.