3.3.6 File Management
It would list all the operation you did this time until exit the Playback interface.
Operation includes clip video, snapshot, lock file and tag. Besides, you can export clipped video, playback snapshot and locked file to USB drives and eSATA.

Take clip video as example.
Step 1. Cut recorded files.
Select the channel and date you want to backup, then select the time at timeline and
click ![]() , then drag the
timeline to select the start time and end time of video.
, then drag the
timeline to select the start time and end time of video.

Step 2. Click ![]() to pop up File Management interface. Select the video you clipped and
click
to pop up File Management interface. Select the video you clipped and
click ![]() to export video.
to export video.

Step 4. Select the device to storage exported video and then click ![]() .
.

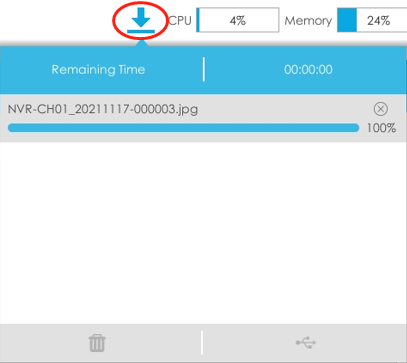
An information pop up to prompt you to check download status in Download Progress panel.

You can view the file download process in the Download Process panel,
including the remaining time required for all files to be downloaded. Click![]() to delete all
download records in the panel. Click
to delete all
download records in the panel. Click ![]() to view the device status and perform the following
operations: New Folder, Format and Refresh.
to view the device status and perform the following
operations: New Folder, Format and Refresh.
- Download file can not exceed 100,000 at a time.
- Only one file can be downloaded at a time, and files are downloaded in the order.