2.4.1 How to Execute VMS Enterprise
Step1: Start “Milesight VMS Enterprise Server” first;
Double click the icon ![]() to start the server after installation, then all the cameras on
the server will load automatically.
to start the server after installation, then all the cameras on
the server will load automatically.
Step2: Then, start “Milesight VMS Enterprise Client”;
Double click the icon ![]() to start the software after starting the Milesight VMS Enterprise Server. There is a dynamic
icon as shown below, and please wait for a few seconds, then a window will pop up as
below:
to start the software after starting the Milesight VMS Enterprise Server. There is a dynamic
icon as shown below, and please wait for a few seconds, then a window will pop up as
below:
Before using “Milesight VMS Enterprise Client” for live view, you need to create VMS system first. Then you are able to add the cameras via different servers. Only after adding the server and cameras, can you use functions like Live View, playback, E-map, etc.
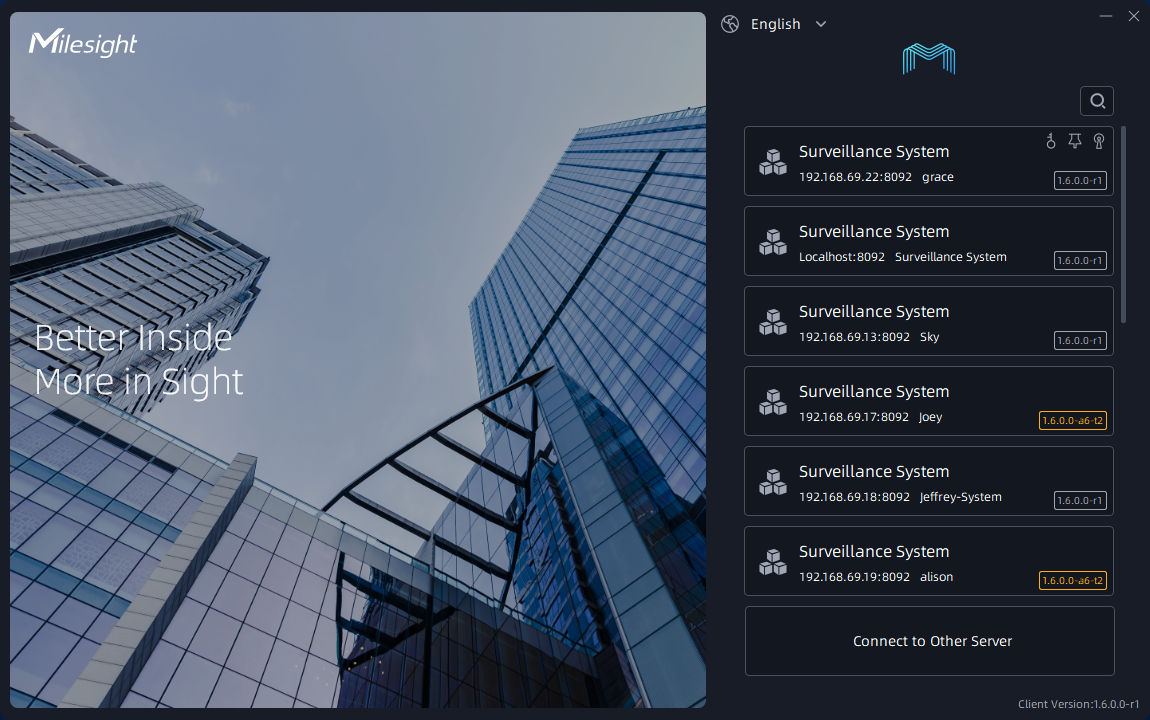
There are three ways to login in the Milesight VMS system:
- Directly connecting existing system in the list.
- Login VMS client interface by adding undefined server to a new system or a existing system in the list.
Step1: Choose undefined servers which can be searched automatically in the local network;
Step2: Click the “Undefined Server” and the window will show as below:
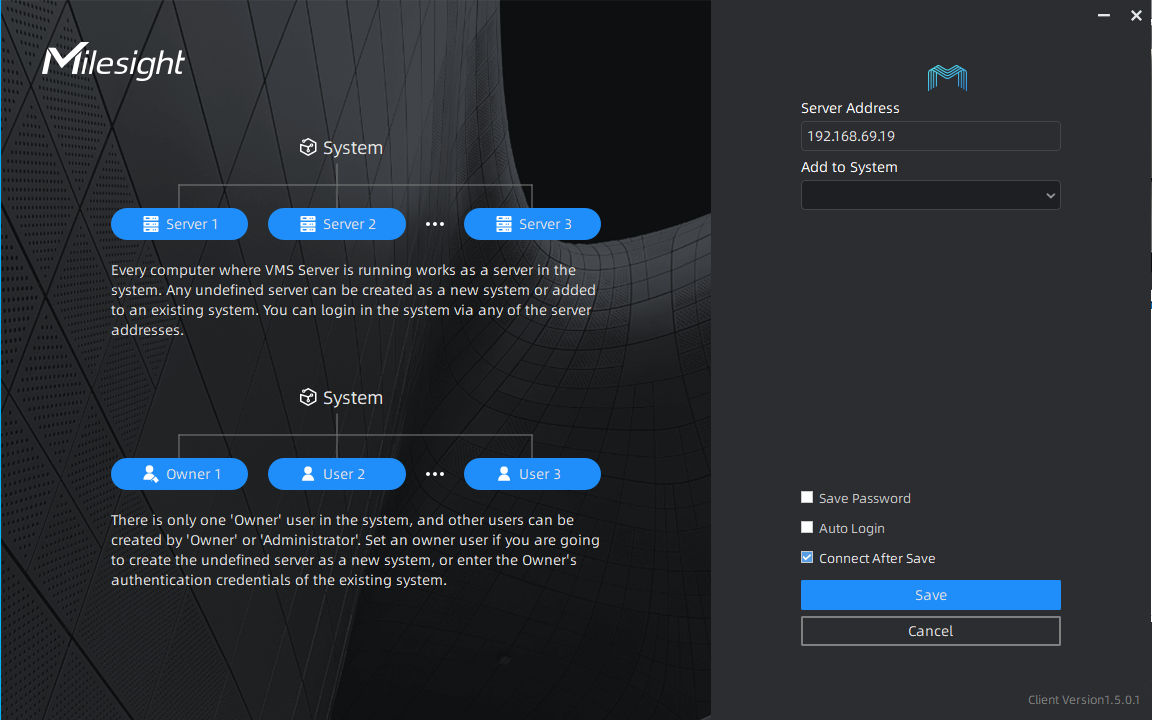
Step3: Select to add undefined server to a new system or an existing system;
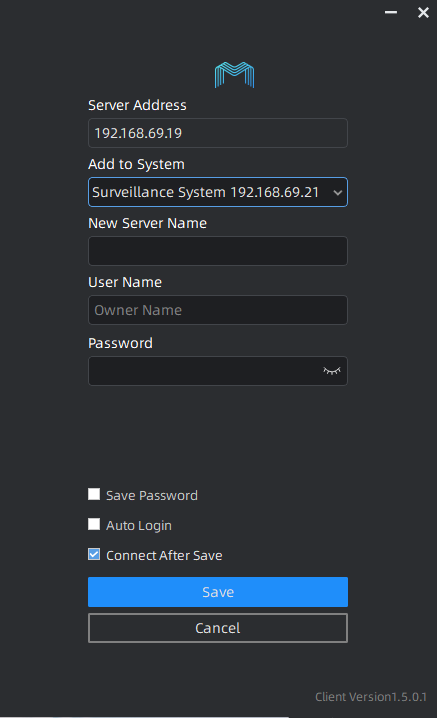
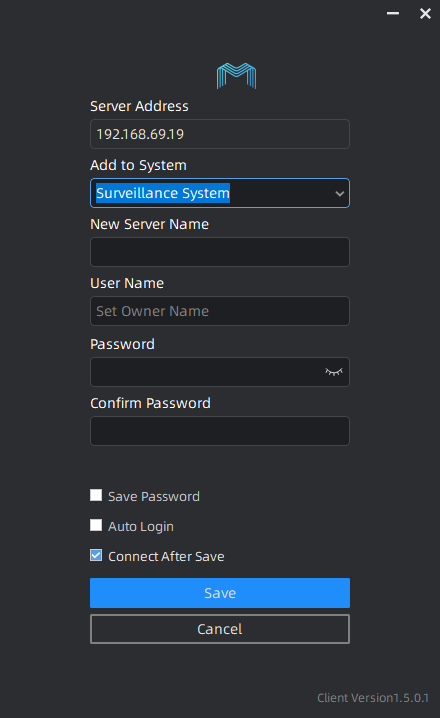
Step4: After configuring the settings, click Save button to connect. The servers will be added to VMS system successfully.
3. Manually connecting other systems which have been created in other network.
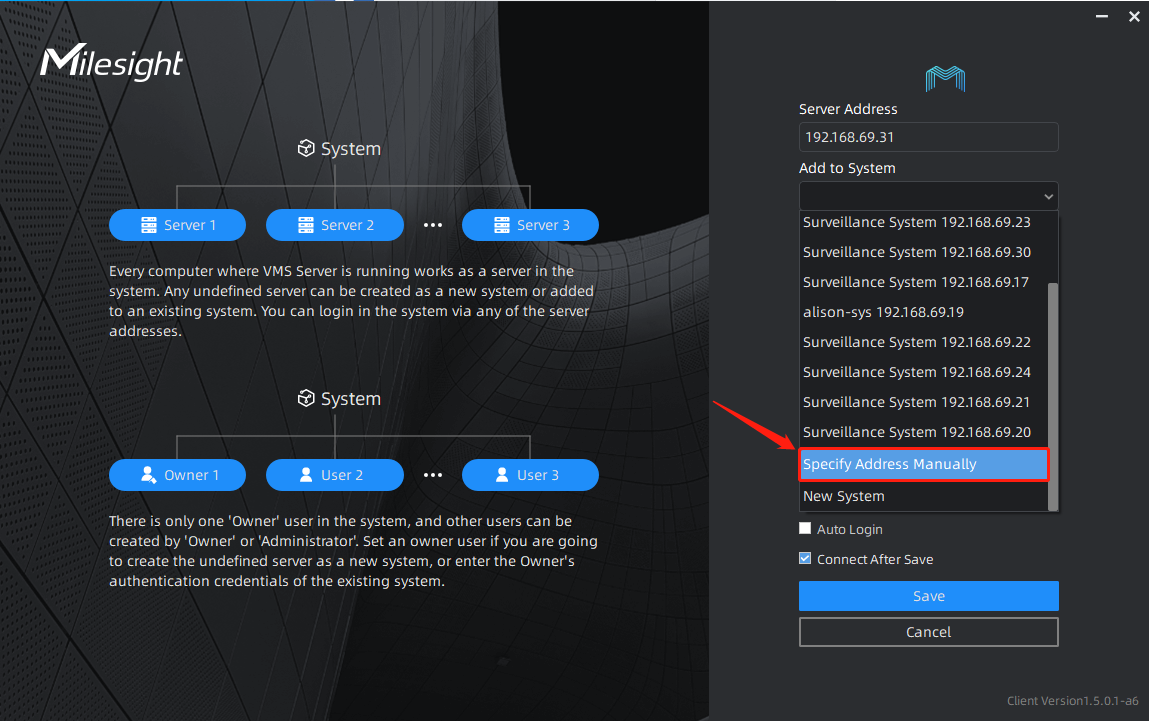
Step1: Click ![]() and a window page show as below:
and a window page show as below:

Step2: Enter server address, user name and password, and click the “Connect” button, then system which the server is added to will show in the list of login window.
- A VMS system can add multiple servers, but there is only a master server.
- The created systems and undefined servers in the current local network can be automatically searched and show in the list as above. User can scroll down to choose other systems or servers in the list.
Step3: Select a system, then enter the user name and password to connect;
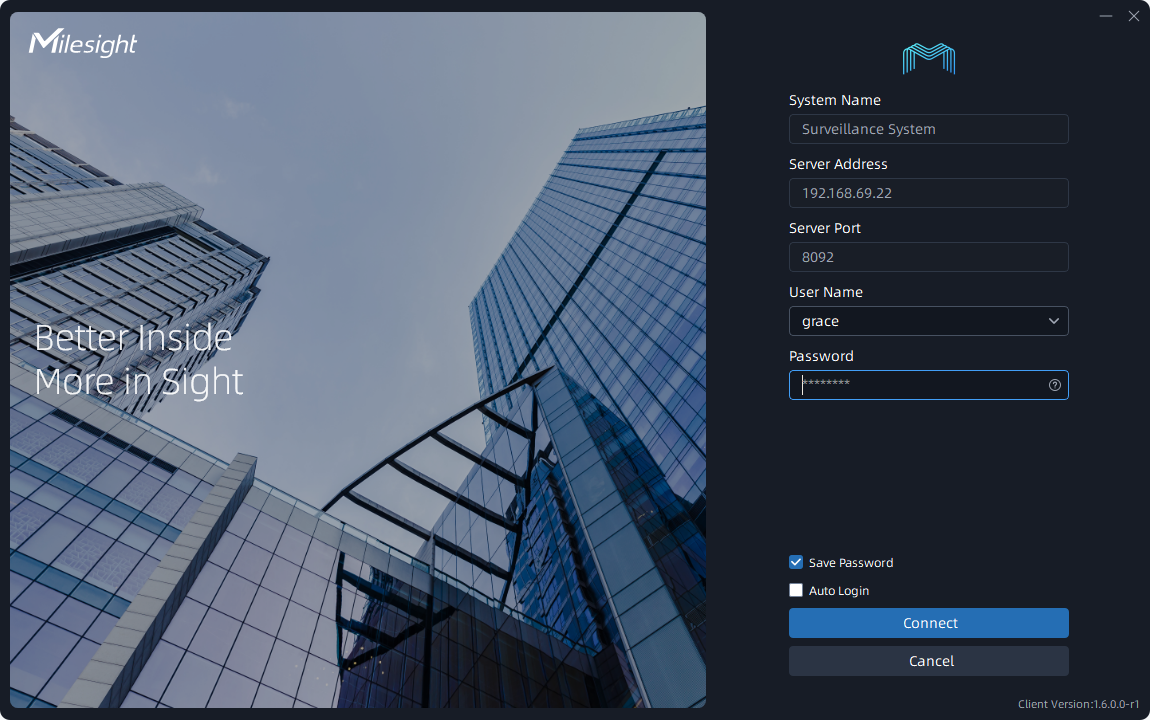
- If the Save Password optionis checked, “Milesight VMS Enterprise Client” will log in without keying in the user name and password next time. As it supports remembering multiple accounts and passwords, you can choose one of them in the user name.
- If you forget the password, you can click
 to reset it through Security Question or
Email Reset. To implement Email Reset, you need to complete the Email Service
settings first.
to reset it through Security Question or
Email Reset. To implement Email Reset, you need to complete the Email Service
settings first.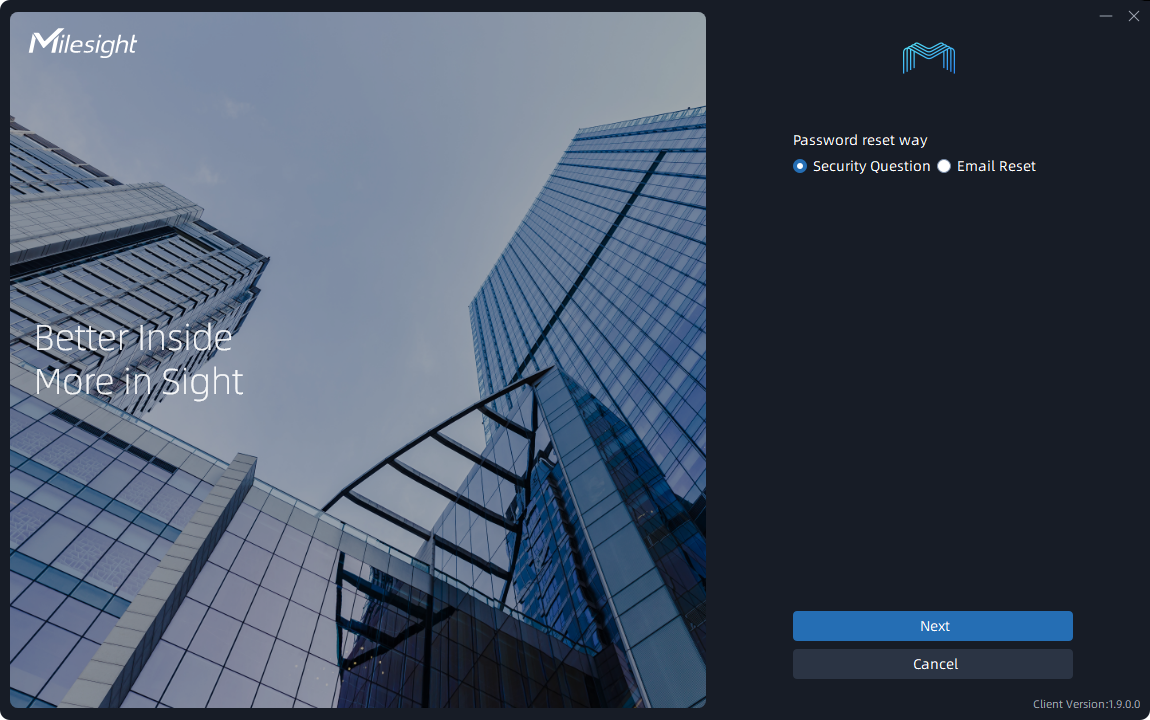
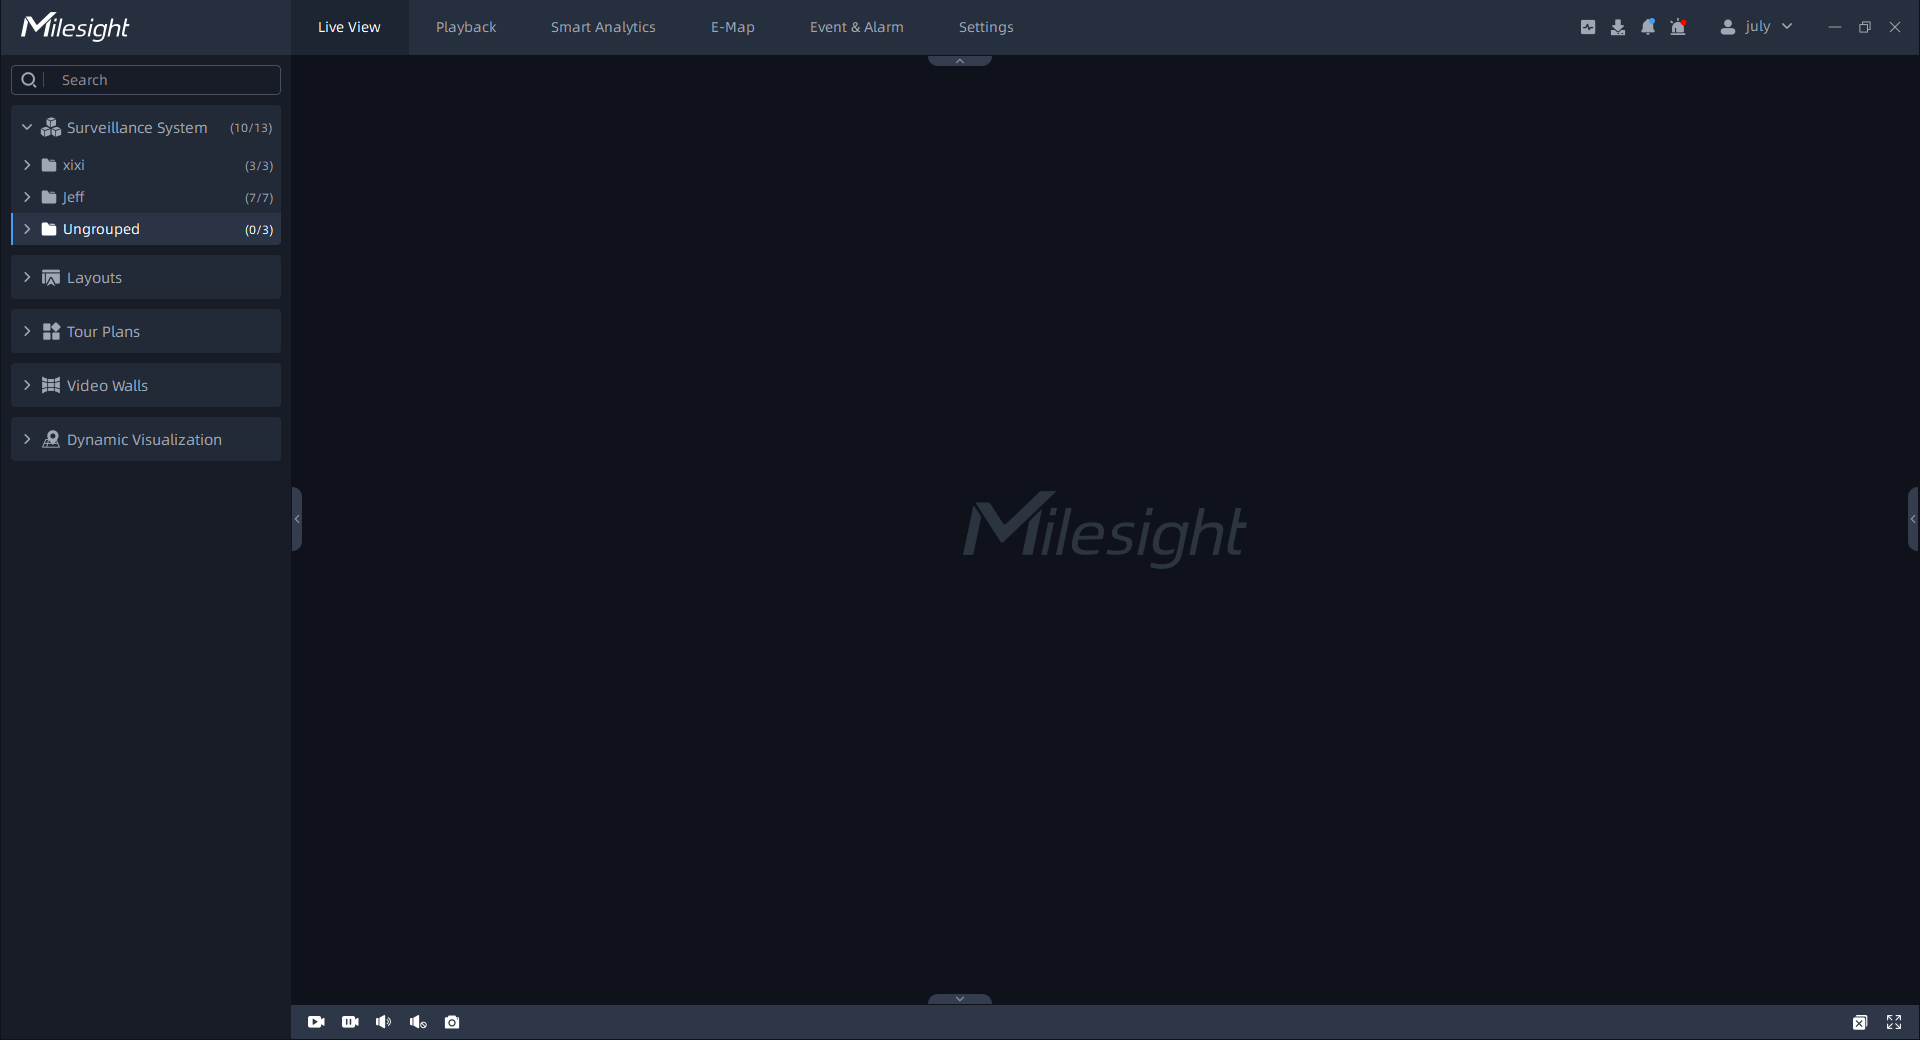
Step4: After login the system, the VMS system client interface will show as below. If you create Owner user and first login the VMS system, there is a wizard window displayed in the client interface. More wizard details can refer to Login Wizard.
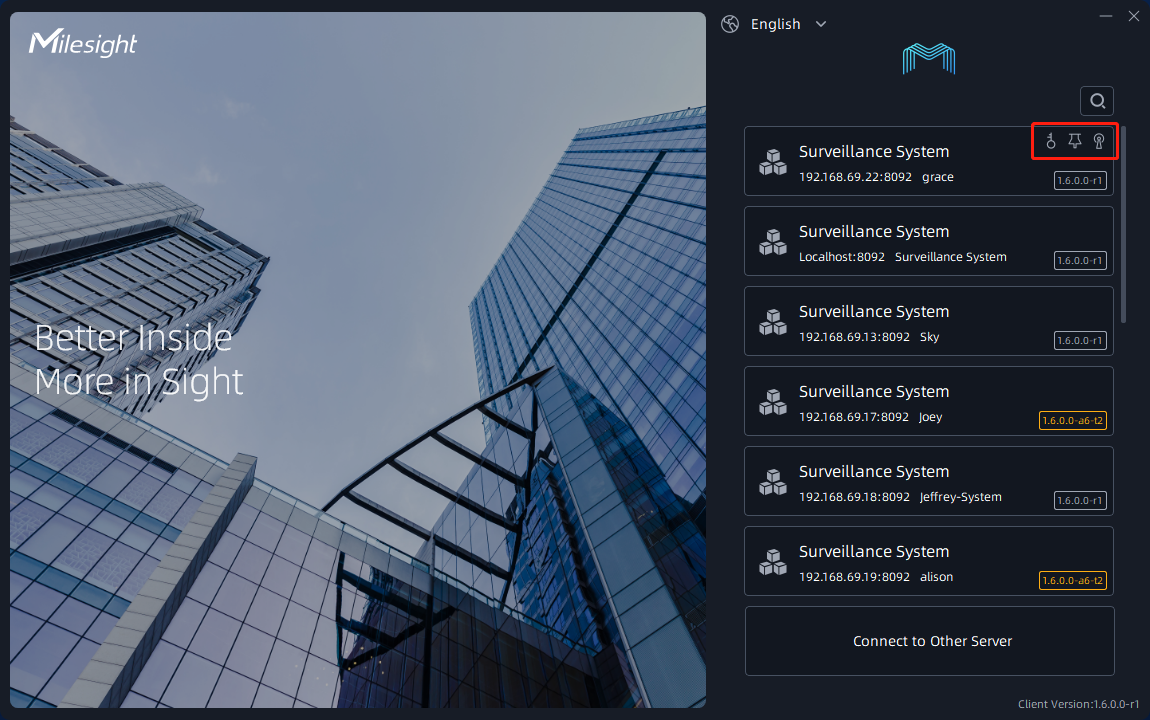
The three icons on the login page indicate the corresponding actions that have been set up by the user. For example:
![]() means that you have chosen to remember this system's
password so that you don't have to enter it on the next login.
means that you have chosen to remember this system's
password so that you don't have to enter it on the next login.
![]() means
that you have place this system on top, and the later you top the system, the closer it
gets to the top of the list.
means
that you have place this system on top, and the later you top the system, the closer it
gets to the top of the list.
![]() means that you have connected to this system manually.
means that you have connected to this system manually.
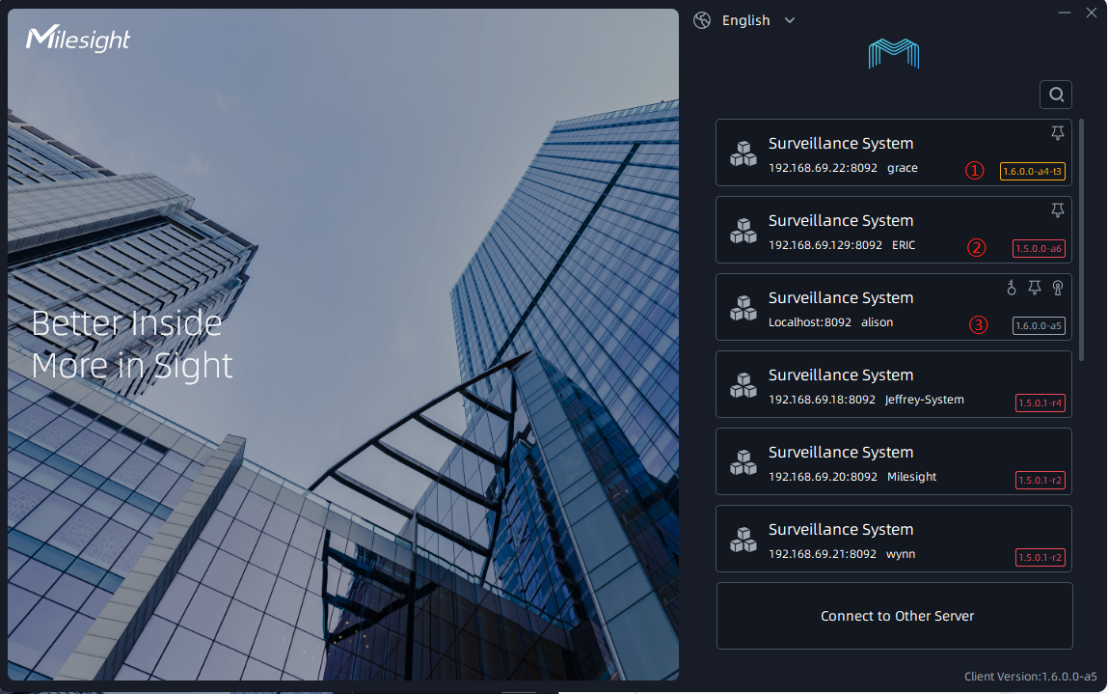
- When the client version is different from the system version but belongs to the same major version, it will display a yellow version number and remind the user to upgrade the version for a better user experience.
- When the major version of the client version and the system version are different, the red version number will be displayed, and it is required to upgrade the version to login into the program.
- When the client version is the same as the system version, it will display the white version number without any prompt.