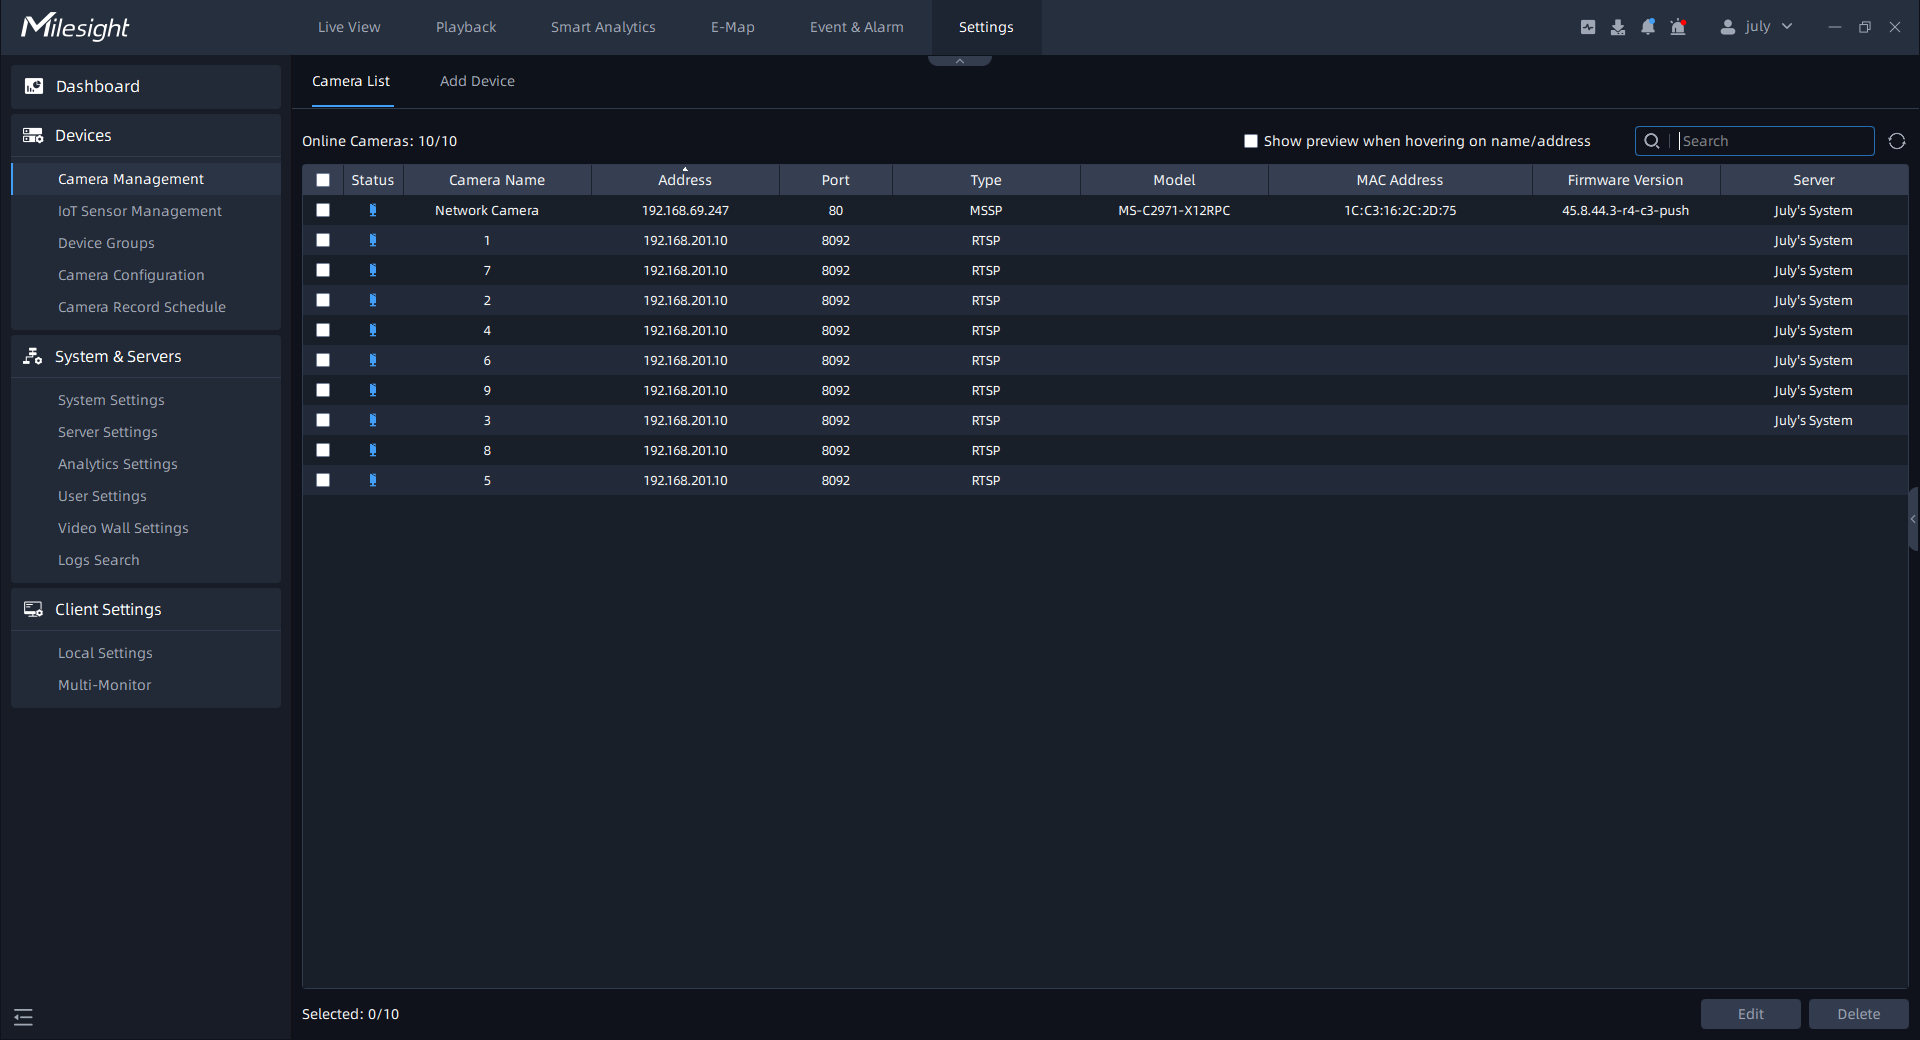
3.2.1 Camera Management
This VMS supports to add cameras to get an efficient and convenient management. The devices also can be edited or deleted from the VMS Enterprise at any time.
When you click the “Settings->Devices-> Camera Management” button, the window will show as below:
1. Add Device
- Search Camera
Click “Add Device” button, the page is as below:
This VMS can search devices which are in the same network automatically, and you can also input device information in the Search box to filter out mismatching devices and get demanded ones only to be displayed in the Device List.
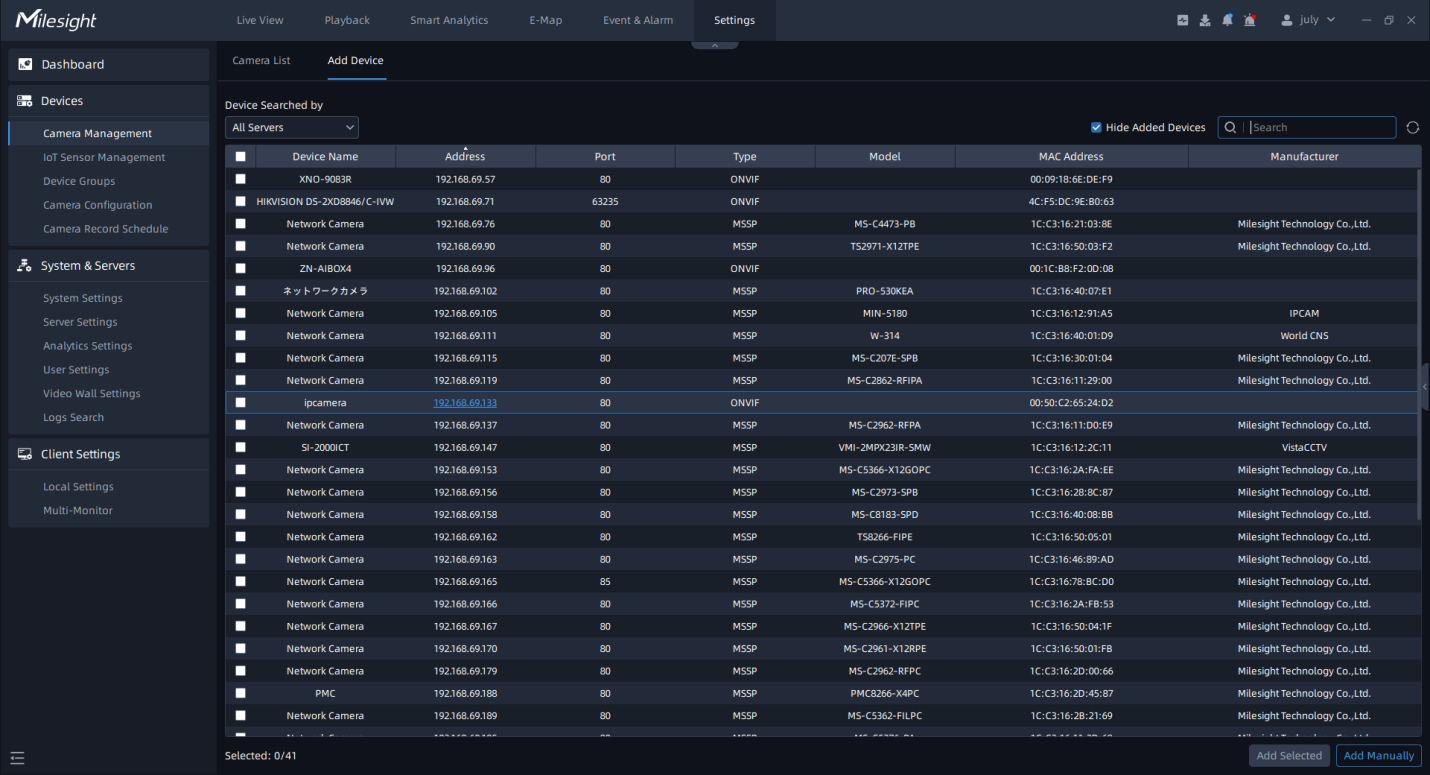
Add Camera
There are two methods available to add devices.
(1) This VMS provides “Add Selected” to add devices. Please refer to the steps as below:
Step1: Input device information in the Search box to search out the device which is going to be added in the same LAN;
Step2: Check the device box;
Step3: Click
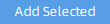 button and the pop-up window is as
below;Step4: Enter password of the selected device and the server which the cameras will be added to;
button and the pop-up window is as
below;Step4: Enter password of the selected device and the server which the cameras will be added to;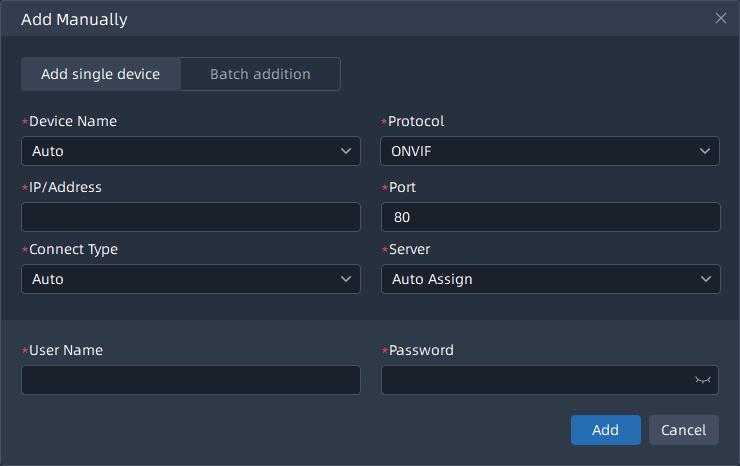
Step5: Click
 button, a window will pop up to
inform you whether the device is added successfully or not. The pop-up
window is as shown below:
button, a window will pop up to
inform you whether the device is added successfully or not. The pop-up
window is as shown below:
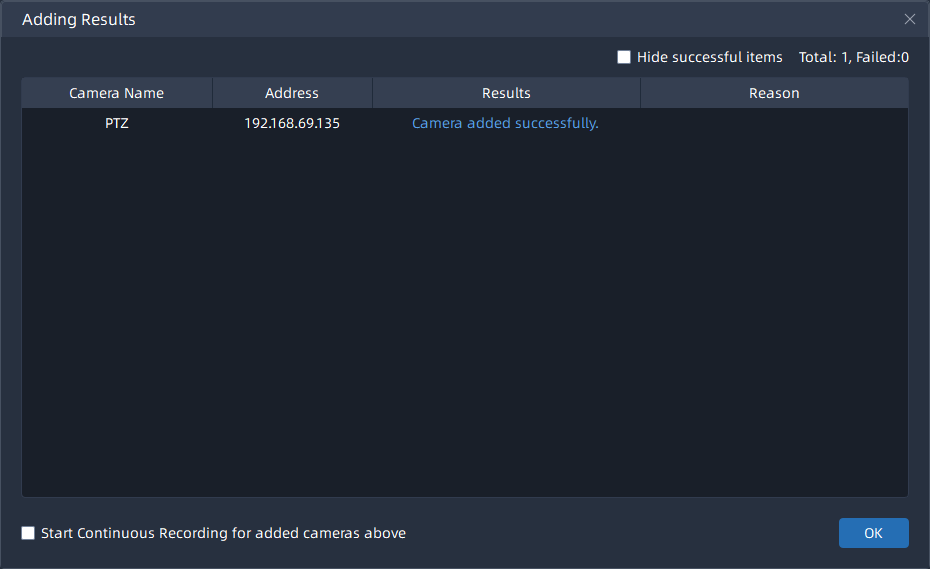
Note: You can select the check box at the bottom to start continuous recording for added cameras.Step6: Click
 button.
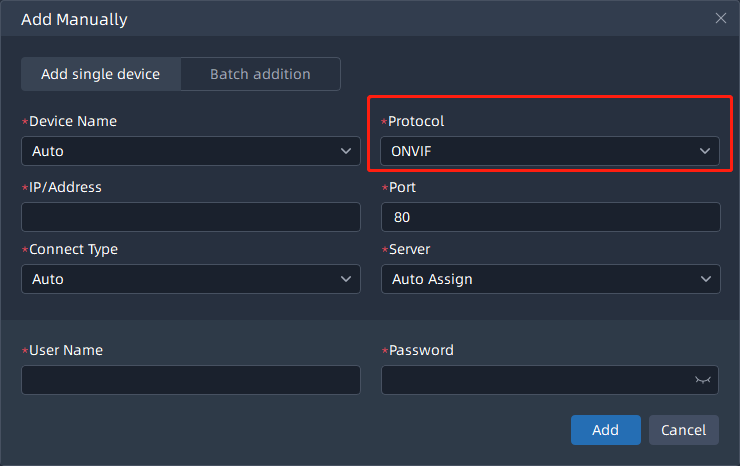
(2) You can also add the camera manually, steps follow as below:
Step1: Click
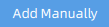 button, a window will pop up as
shown below:
button, a window will pop up as
shown below:
Step3: Click ![]() button, a window will pop up to inform you
whether the device is added successfully or not;
button, a window will pop up to inform you
whether the device is added successfully or not;
Step4: Click ![]() button.
button.
Through Protocol you can add Milesight cameras via IP/Domain, P2P or Milesight DDNS, cameras supporting ONVIF or other cameras supporting RTSP.
-
ONVIF Protocol page:
-
MSSP Protocol page:
-
RTSP Protocol page:

-
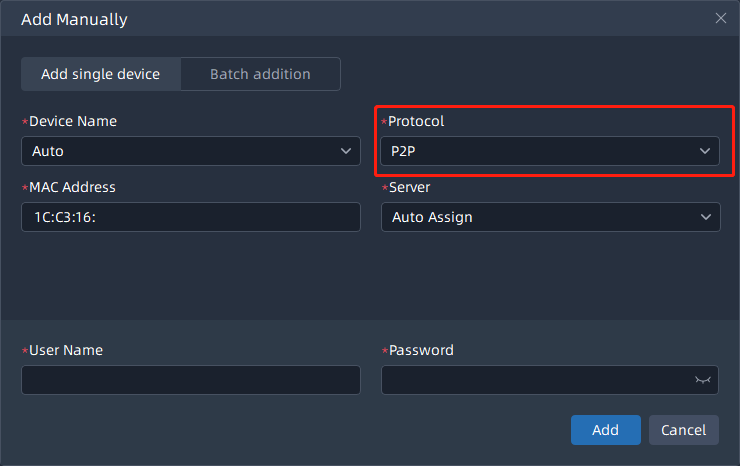
P2P Protocol page:
-
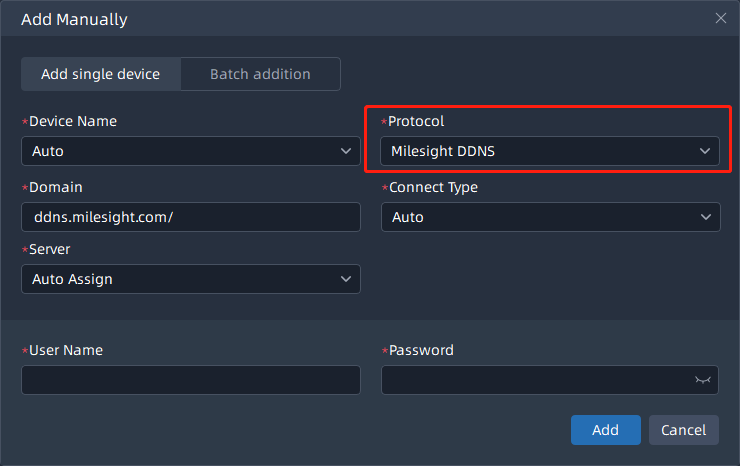
Milesight DDNS page:
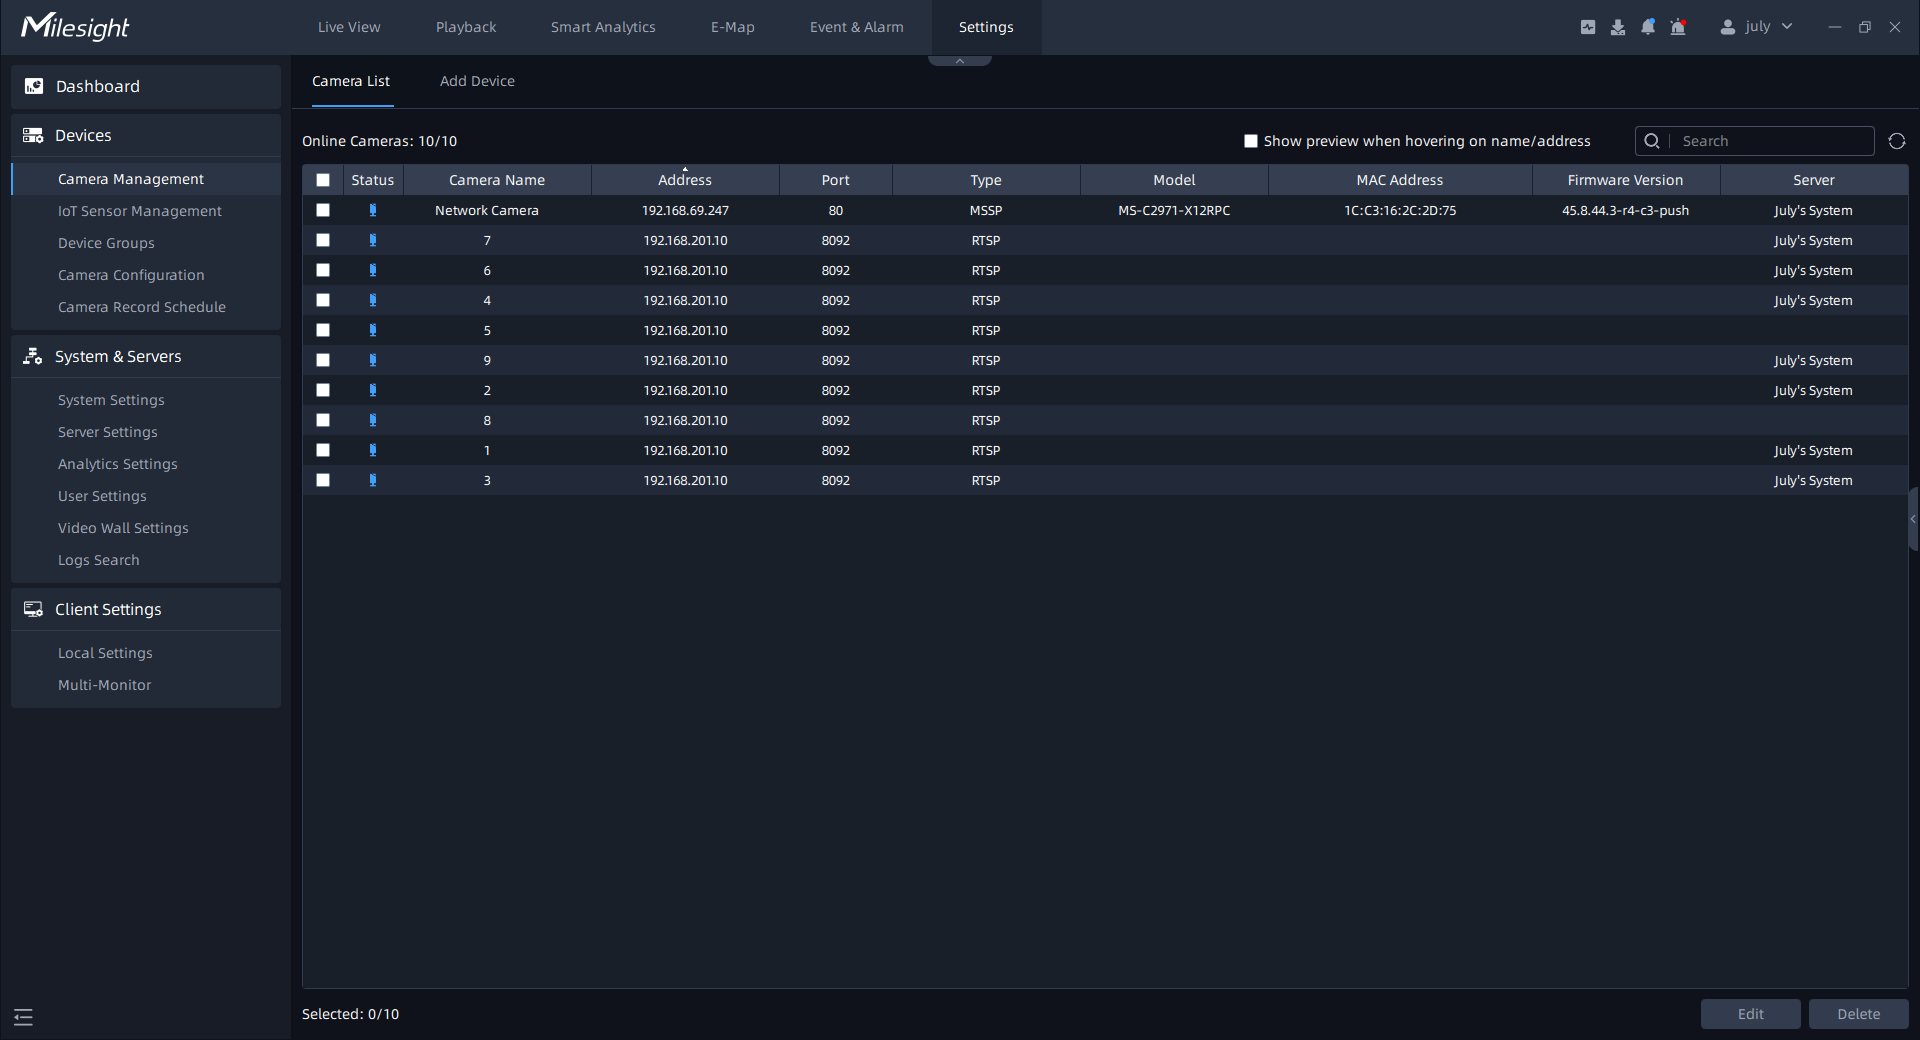
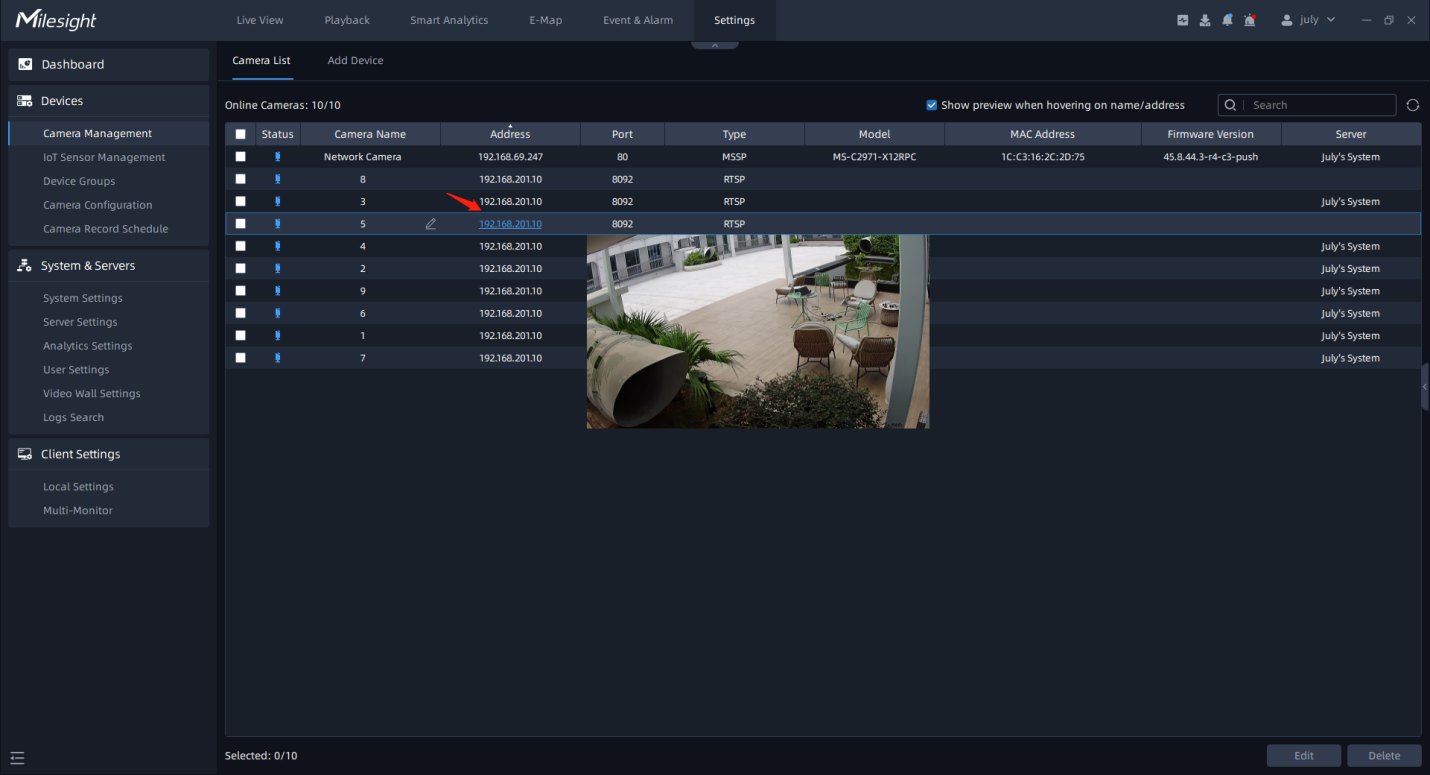
2.Camera List
The devices which are added will display in Camera List page.
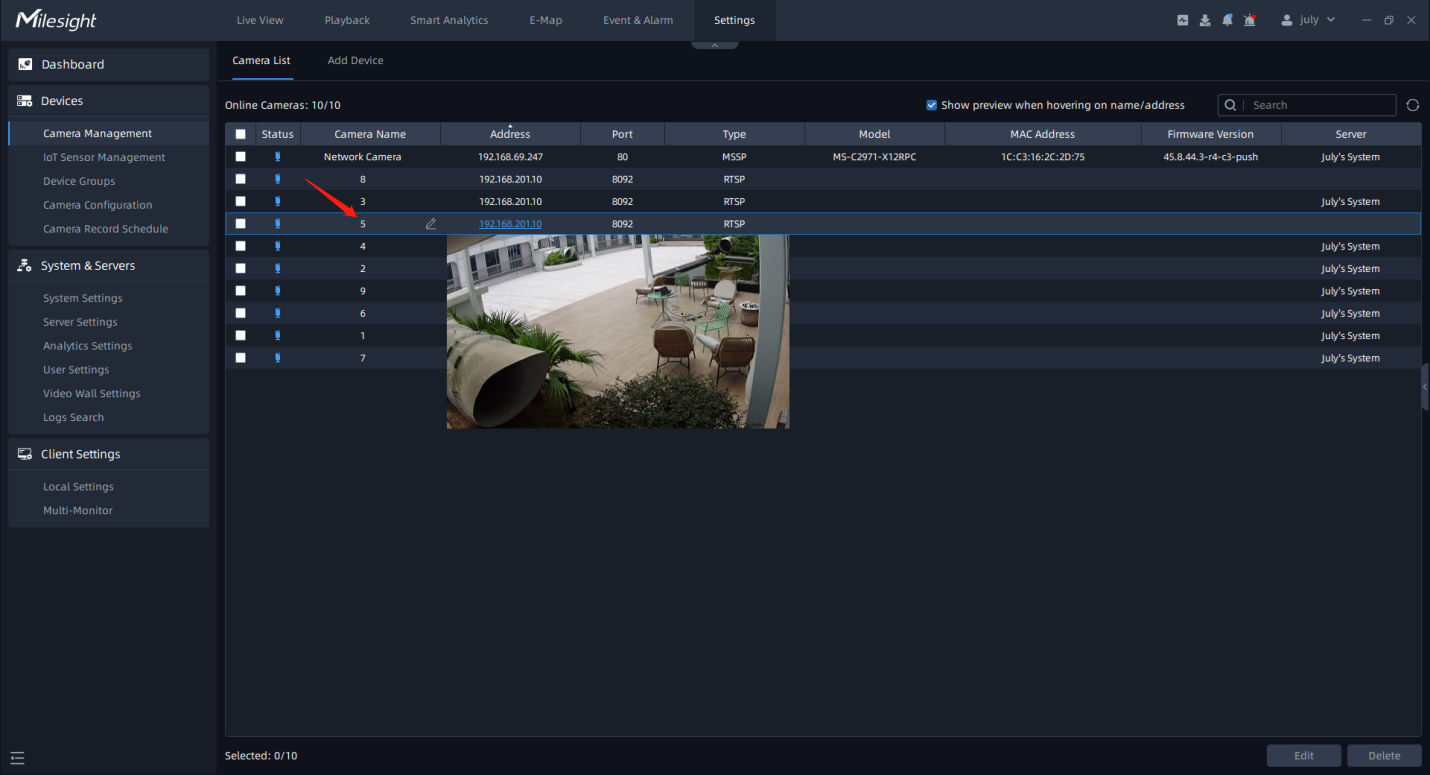
Click ![]() to check the checkbox, it will show preview
window of the camera when your mouse hovers on camera name or IP. The interface is as
below:
to check the checkbox, it will show preview
window of the camera when your mouse hovers on camera name or IP. The interface is as
below:
-
Show preview when hovering on name:
-
Show preview when hovering on IP:
-
Edit Camera
Click the “Edit” button to edit the added devices. All parameters can be edited except the Port, IP/Address and Mac Address. See as below:
Camera added by IP/Address:
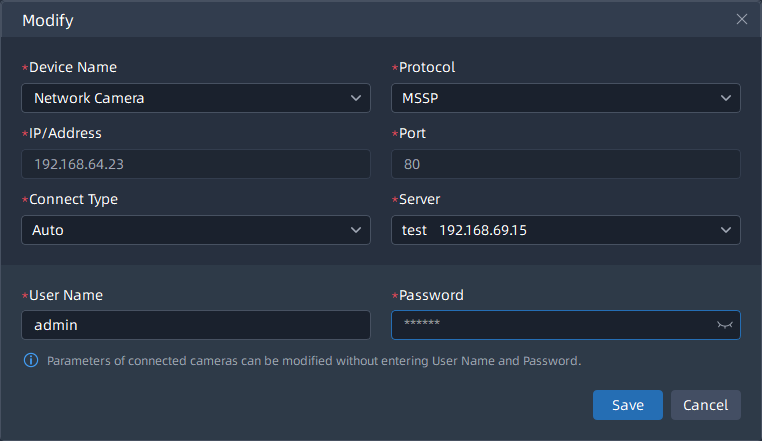
Camera added by P2P:

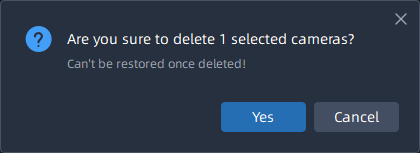
- Delete Camera
Click the “Delete” button to delete the added device, a window will pop up to inform you whether to delete the selected cameras. The pop-up window is as below:
Note: -
Only check the added device, the “Edit” button and “Delete” button will be clicked.
-
If the device you want to add has already been added, the name of the device that you have already set can be remained. In addition, you can still find it in the search list. Please make sure that you don’t check “Hide Added Devices” .
