Installation
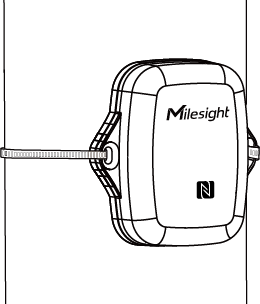
EM300 Device Installation
- Installation Location
- Keep the device away from metal objects and obstacles.
- Wall Mounting
Step 1: Attach EM300 device to the wall and mark the two holes on the wall. The connecting line of two holes must be a horizontal line.
Step 2: Drill the holes according to the marks and screw the wall plugs into the wall.
Step 3: Mount the EM300 to the wall via mounting screws.
Step 4: Cover the mounting screws with screw caps.
Besides, it can also be mounted to the wall via a 3M tape.
- Pole Mounting
- Pass the cable tie through the mounting holes of the device and wrap the
device to the pole.
Membrane Installation
- Installation Locations
- Usually the membrane can be placed under the electrical appliances (refrigerator, washing machine, etc.), while the EM300-MLD and connector can be fixed on the adjacent wall.To ensure the most sensitive effect, ensure the installation location is a flat surface without debris, dust and deep gaps. If the membrane needs to be pasted to installation location, the surfaces should be cleaned and free from dirt, adhesive residue, water drops and other things.
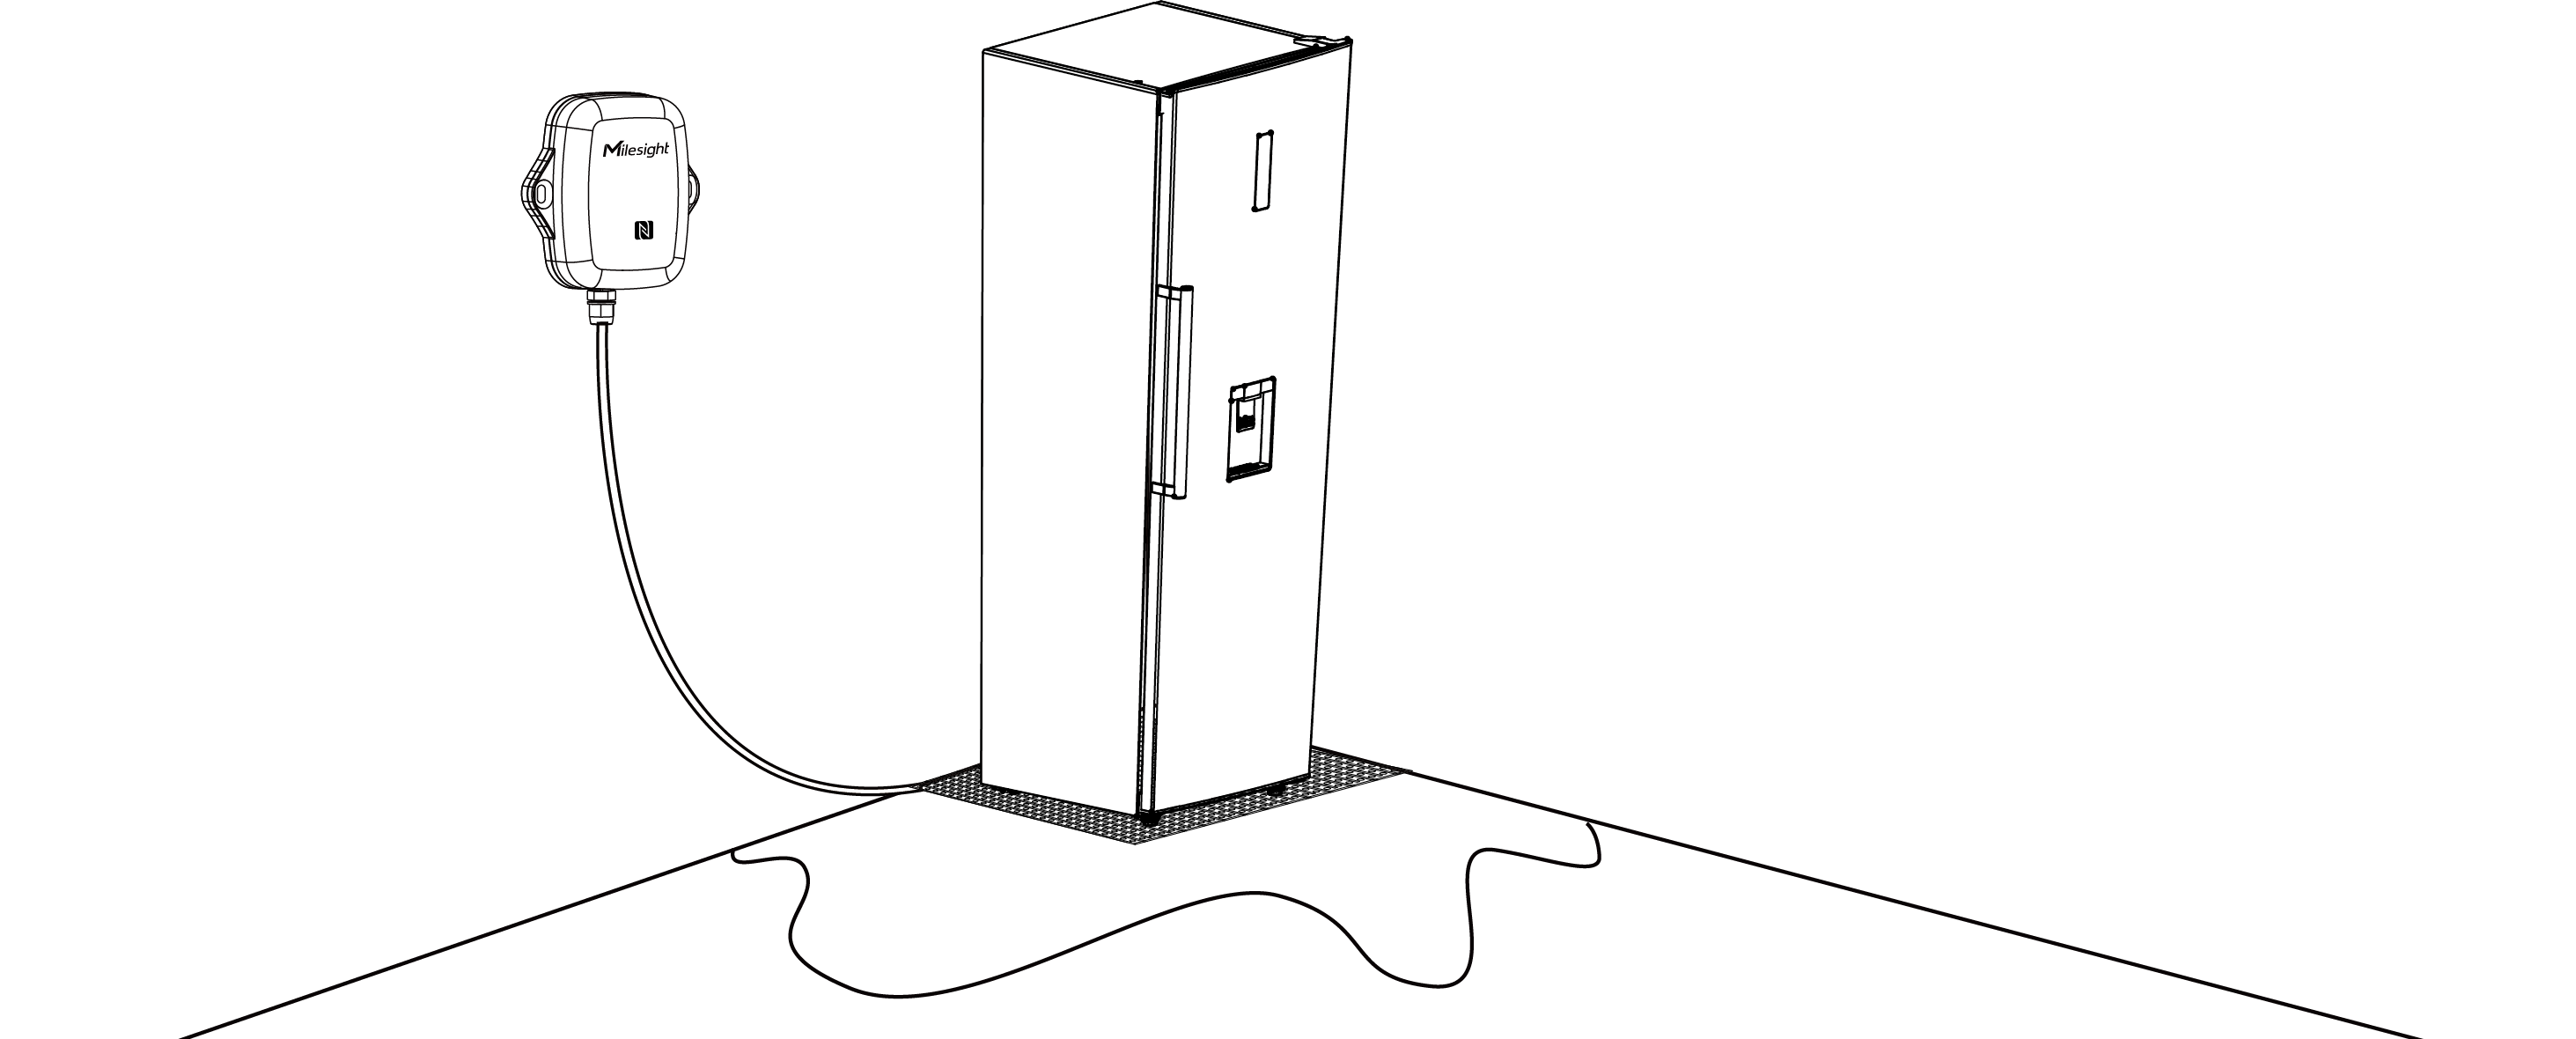
- Connect the Membrane to EM300 Device
-
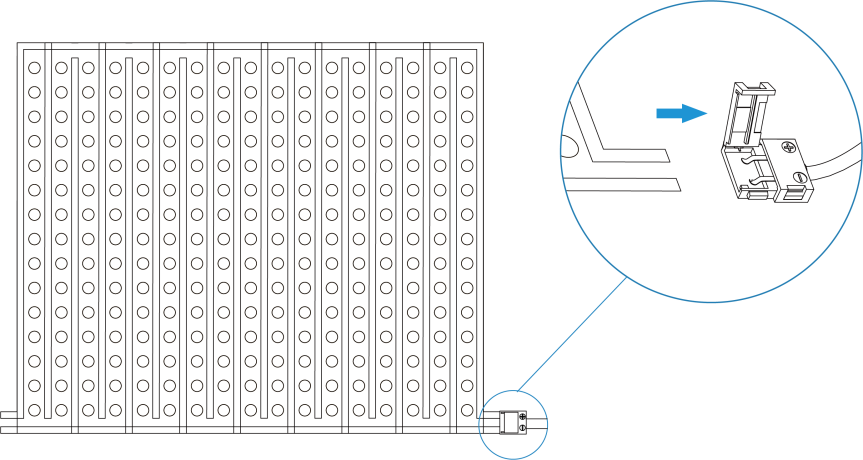
Slide one of the tabs sticking out from the membrane into the connector of EM300-MLD device, ensure the black lines touch the two metal parts of the connector, then restore the connector cover back to fix the membrane into device.
- Install the Membrane
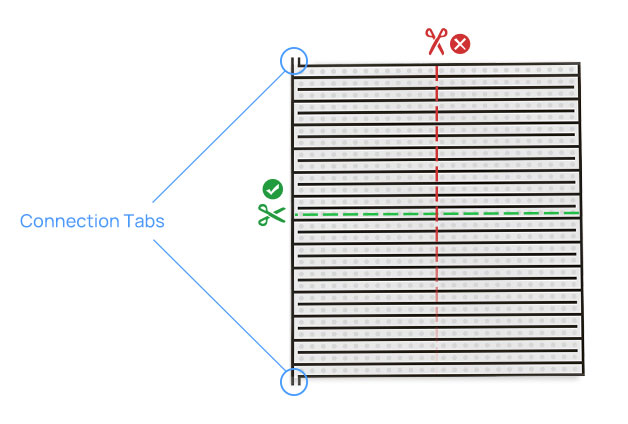
- Step 1: Cut the membrane to suit the detection area or keep the whole membrane without cutting. It is necessary to cut the membrane as below direction to avoid the black lines disconnected.Step 2: Remove the protective film on the detection side.Note: One membrane has two connection tabs and supports to be cut as two pieces for two EM300-MLD devices. If you only use one tab and the other tab is useless, you can also cut it.
Step 3: Put the membrane on the installation location, ensure the detection side touches the detection area or detection object, the membrane is placed flat without crimping.
Besides, you can tear the other side to paste the membrane to the wall via 3M tape.
- Maintenance
- After removing the membrane from the leakage location, dry the detection
side with a soft cloth and ensure the leakage status back to “No Leak”.
The membrane can be reused in other places.Note: Do not rub off the black lines on the detection side, as this can reduce leakage detection sensitivity or even disable the leakage detection feature.