Installation
EM500 Transceiver Installation
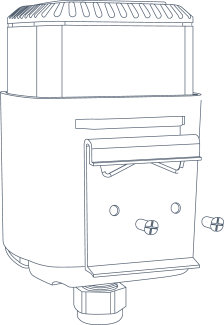
- Wall Mounting
-
- Drill two holes in the wall according to the mounting bracket, then secure the wall plugs into the wall.
- Fix the mounting bracket to the wall via screws.
- Place the device onto the mounting bracket, then secure it to the bracket with two fixing screws.

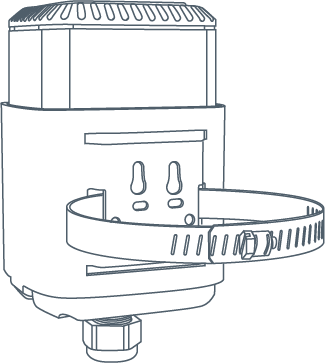
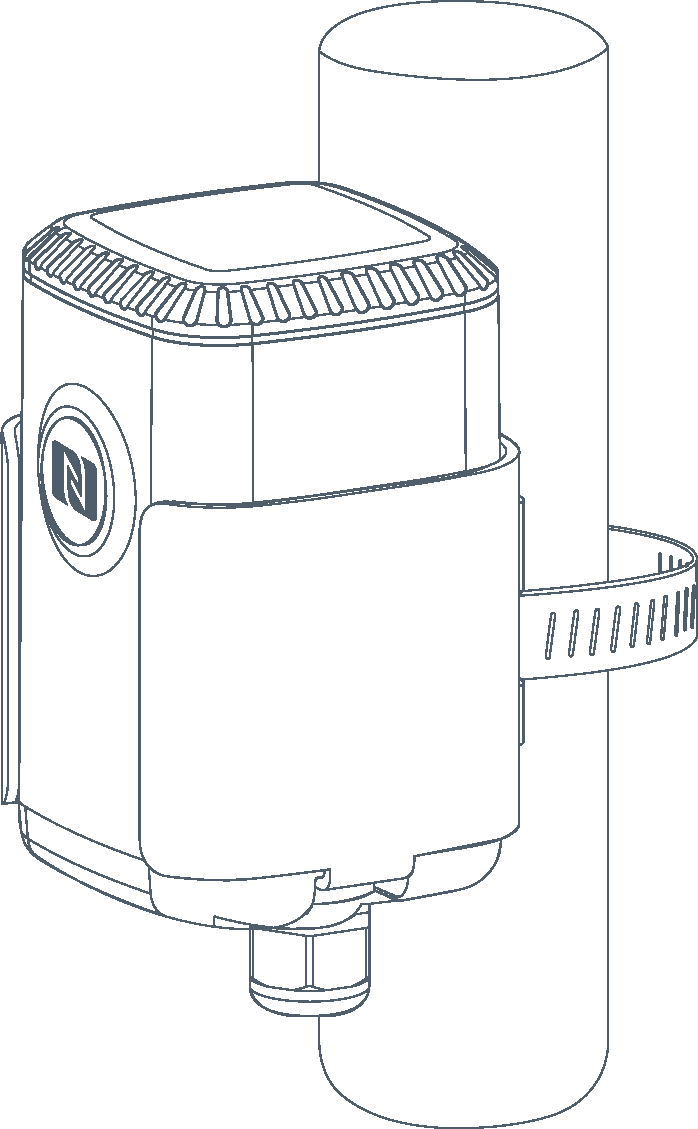
- Pole Mounting
-
Straighten out the hose clamp and slide it through the rectangular holes in the mounting bracket, and wrap the hose clamp around the pole. After that, use a screwdriver to tighten the locking mechanism by turning it clockwise.
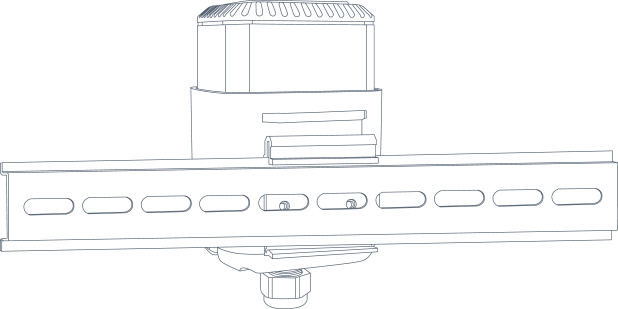
- DIN Rail Mounting
-
Use 2 pcs of M3 × 6 flat head Phillips screws to fix the mount clip to the bracket, and then hang the device on the DIN rail. The width of the DIN rail is 3.5 cm.
Soil Sensor Installation
- Installation Locations
-
- Place sensors in a representative area with the major soil type, typical terrain and average yield.
- Two or more sensors are recommended to measure the different depths in deeper rooting crops.
- Keep the sensor away from field edge for some distances to avoid edge effects.
- Do not install the sensor adjacent to large metal objects.
- When installing the sensor in a lightning-prone area, please check your lightning protection.
- Horizontal Installation
-
-
Excavate a hole or trench a few centimeters deeper than the depth at which the sensor is to be installed.
-
At the installation depth, shave off some soil from the vertical soil surface, exposing undisturbed soil.
-
Insert the sensor prong into the undisturbed soil surface until the entire sensor is inserted. The tip of each prong has been sharpened to make it easier to push the sensor into the soil. Be careful with sharp tips!Note:
-
Put the prongs totally into the soil to ensure accurate measurement. If the sensor prongs are exposed to the air, abnormal data may show up.
-
If there is difficulty inserting the sensor, loosen or wet the soil.
- Be careful when inserting the sensor into dense soil, as the prongs will break if excessive sideways force is used.
-
It is possible to get sticks, bark, roots, or other material stuck between the sensor prongs, which will severely affect the sensor data readings. Any air gaps or excessive soil compaction around the sensor can also influence the readings.
-
-
Backfill the trench, taking care to pack the soil back to natural bulk density around the sensor body.Note: When removing the sensor from the soil, do not pull it out of the soil by cable. Doing so may break internal connections and make the sensor unusable.
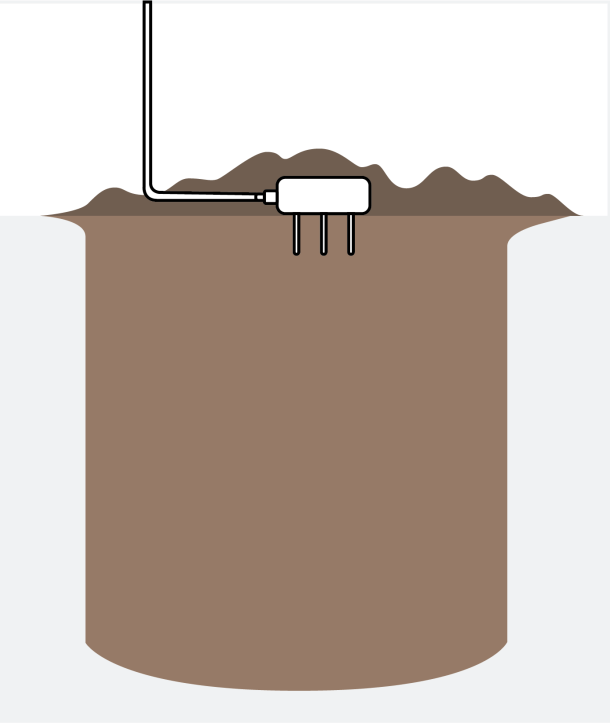
-
- Vertical Installation
-
-
Drill a hole to the depth at which the sensor is to be installed.
-
Insert the sensor into the undisturbed soil at the bottom of the drilled hole using a hand or any other implement that will guide the sensor into the soil at the bottom of the hole.Note:
-
Put the prongs totally into the soil to ensure accurate measurement. If the sensor prongs are exposed to the air, abnormal data may show up.
-
If there is difficulty inserting the sensor, loosen or wet the soil.
- Be careful when inserting the sensor into dense soil, as the prongs will break if excessive sideways force is used.
-
It is possible to get sticks, bark, roots, or other material stuck between the sensor prongs, which will severely affect the sensor data readings. Any air gaps or excessive soil compaction around the sensor can also influence the readings.
-
-
After inserting the sensor, backfill the hole, and take care to pack the soil back to natural bulk density while not damaging the over molding of the sensor and the sensor cable in the process.Note: When removing the sensor from the soil, do not pull it out of the soil by cable. Doing so may break internal connections and make the sensor unusable.
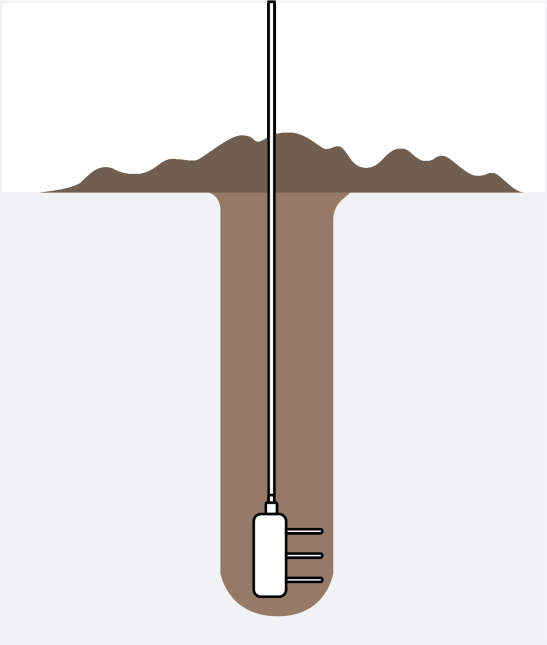
-