Installation
Installation Preparations
- Adjust the installation direction according to the detection area requirement.
- Ensure the detection area does not have moving objects like waving trees and fans.
- Ensure the detection area is not blocked by curtains or barriers.
- Do not expose the device to direct infrared (including sunlight, light, etc.), or the PIR detection will be affected.
- The recommended installation location is 2 m in height on the wall with the half PIR cover to avoid room light inference.
- Avoid the device to face a transparent plate (like glass) within 5m since the PIR will detect through it.
PIR Cover Installation
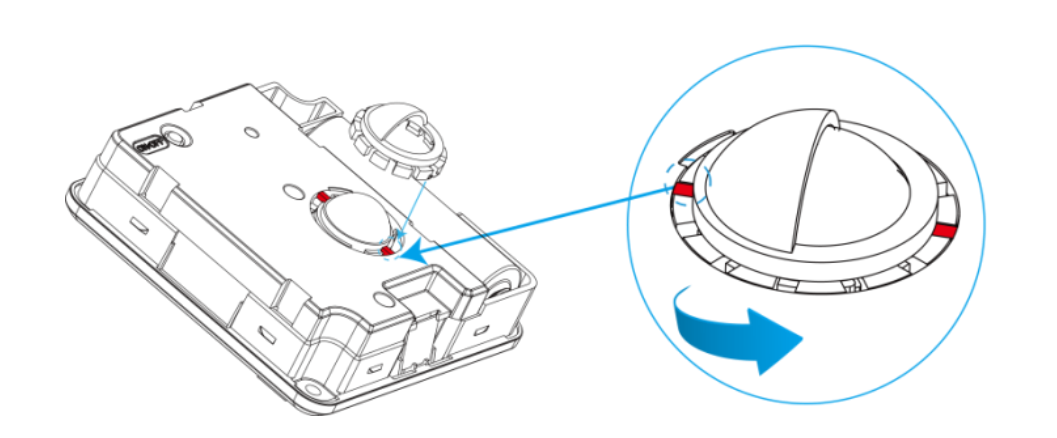
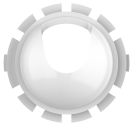
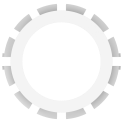
Take off the front cover of the device, then select the PIR cover as required and put it on the PIR sensor with groove alignment. The adjustable angle of every groove is 30°.
PIR cover reference guidance(wall mount and installation height=2m):
| PIR Cover | Detection Area |
|---|---|
 |
Maximum: 120 ° Horizontal, 50 ° Vertical, 6
m Recommend: 98 ° Horizontal, 44.4° Vertical, 5 m |
 |
Maximum: 38 ° Horizontal, 50 ° Vertical, 6
m Recommend: 38 ° Horizontal, 44.4° Vertical, 5 m |
 |
Maximum: 38 ° Horizontal, 100 ° Vertical, 6
m Recommend: 38 ° Horizontal, 88.8° Vertical, 5 m |
 |
Maximum: 120 ° Horizontal, 100 ° Vertical, 6
m Recommend: 98 ° Horizontal, 88.8° Vertical, 5 m |
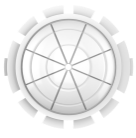 |
Support to be tailored as required |
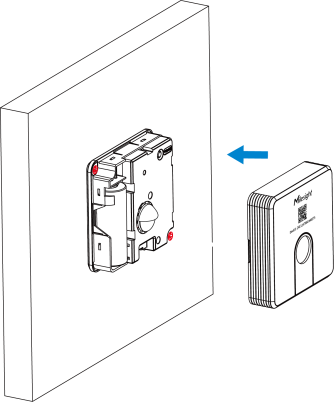
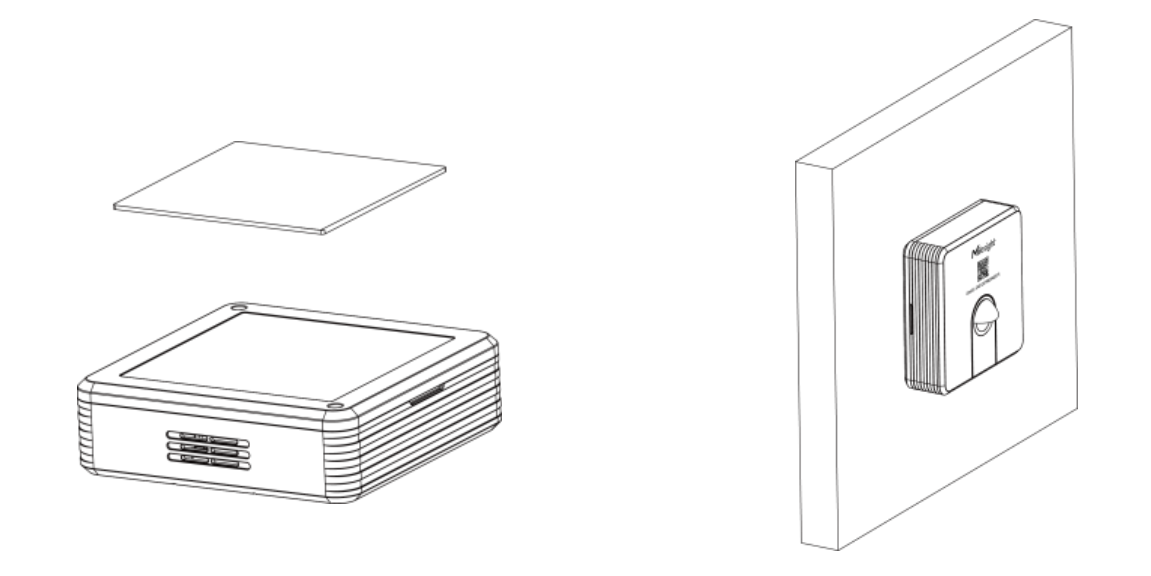
Device Installation
- Fixed by 3M Tape
-
Note: To ensure the devices are securely installed and prevent them from falling due to adhesive peeling, please strictly adhere to the following requirements:Attach 3M tape to the back of the sensor, then tear the other side and place it on a flat surface. Please adjust the installation direction according to the detection area.
- Install the device on a dry, smooth, sturdy, grease-free wall.
- Do not install the device on rough, damp, crumbling, greasy, or wallpapered walls.
- Before installation, wipe the wall with a clean cloth to ensure it is free of dust and grease.
- After adhering the device to the wall, press firmly to ensure it is fully adhered. Allow 24 hours for the best adhesion results.
- If the wall conditions do not meet the above requirements, choose an alternative installation method, such as screw fixation.
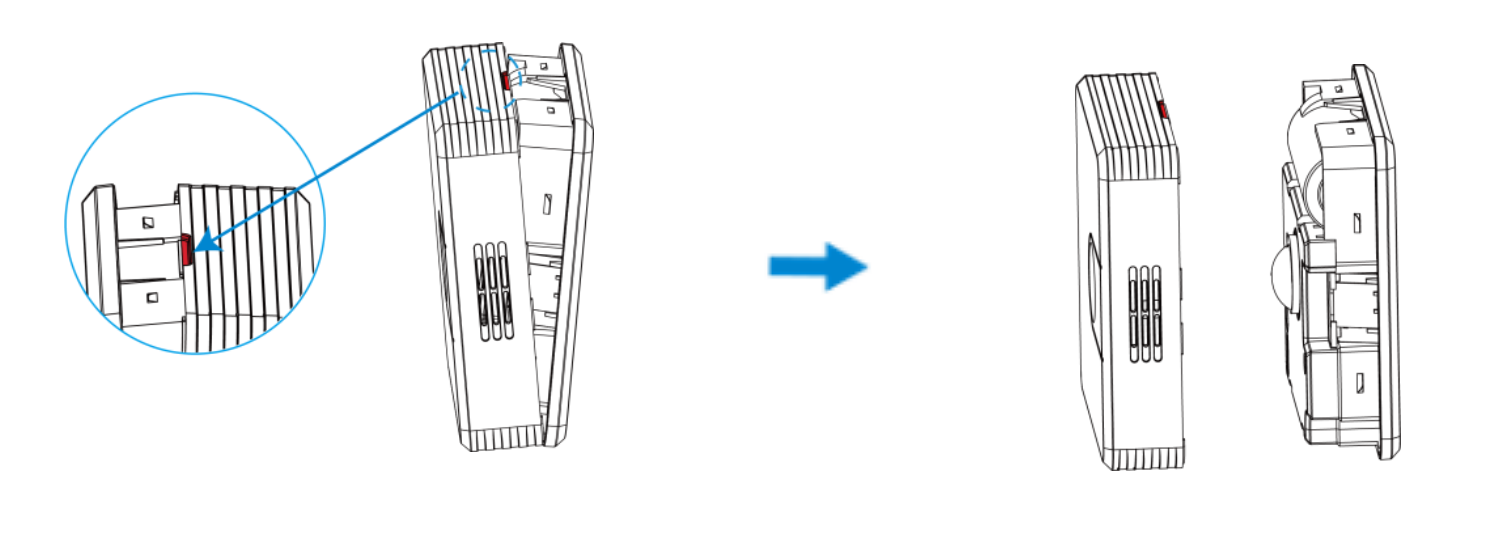
Note:- Since the default 3M tape has a high viscosity, please tear the device down via a screwdriver.
- If it is necessary to tear the device down easily, please divide the 3M tape into several parts and only tear one part to the device.
- Fixed by Mounting Kits
-
Note:
- Wall materials must have sufficient strength and stability to ensure that screws are securely fastened and the overall structure is sturdy.
- Screws should be fastened in locations that avoid electrical wiring, water pipes, and other elements within the wall to prevent damage to the wall structure or safety hazards.
- Take off the front cover of the device, then fix the wall plugs to a flat surface
according to the device mounting holes. Finally, secure the device to the wall plugs
using screws. Please adjust the installation direction according to the detection
area.
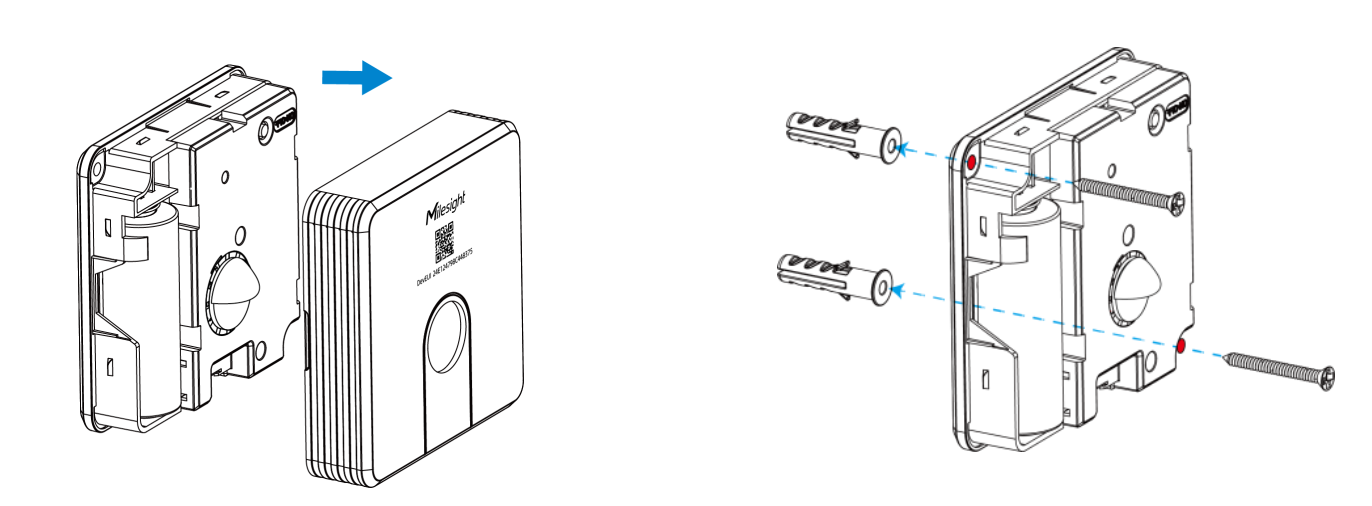
- Restore the front cover back to the device.