Evidence
This function can bind other cameras as evidence cameras to assist in capturing the entire monitoring scene of the LPR camera to facilitate forensics and help law enforcement.
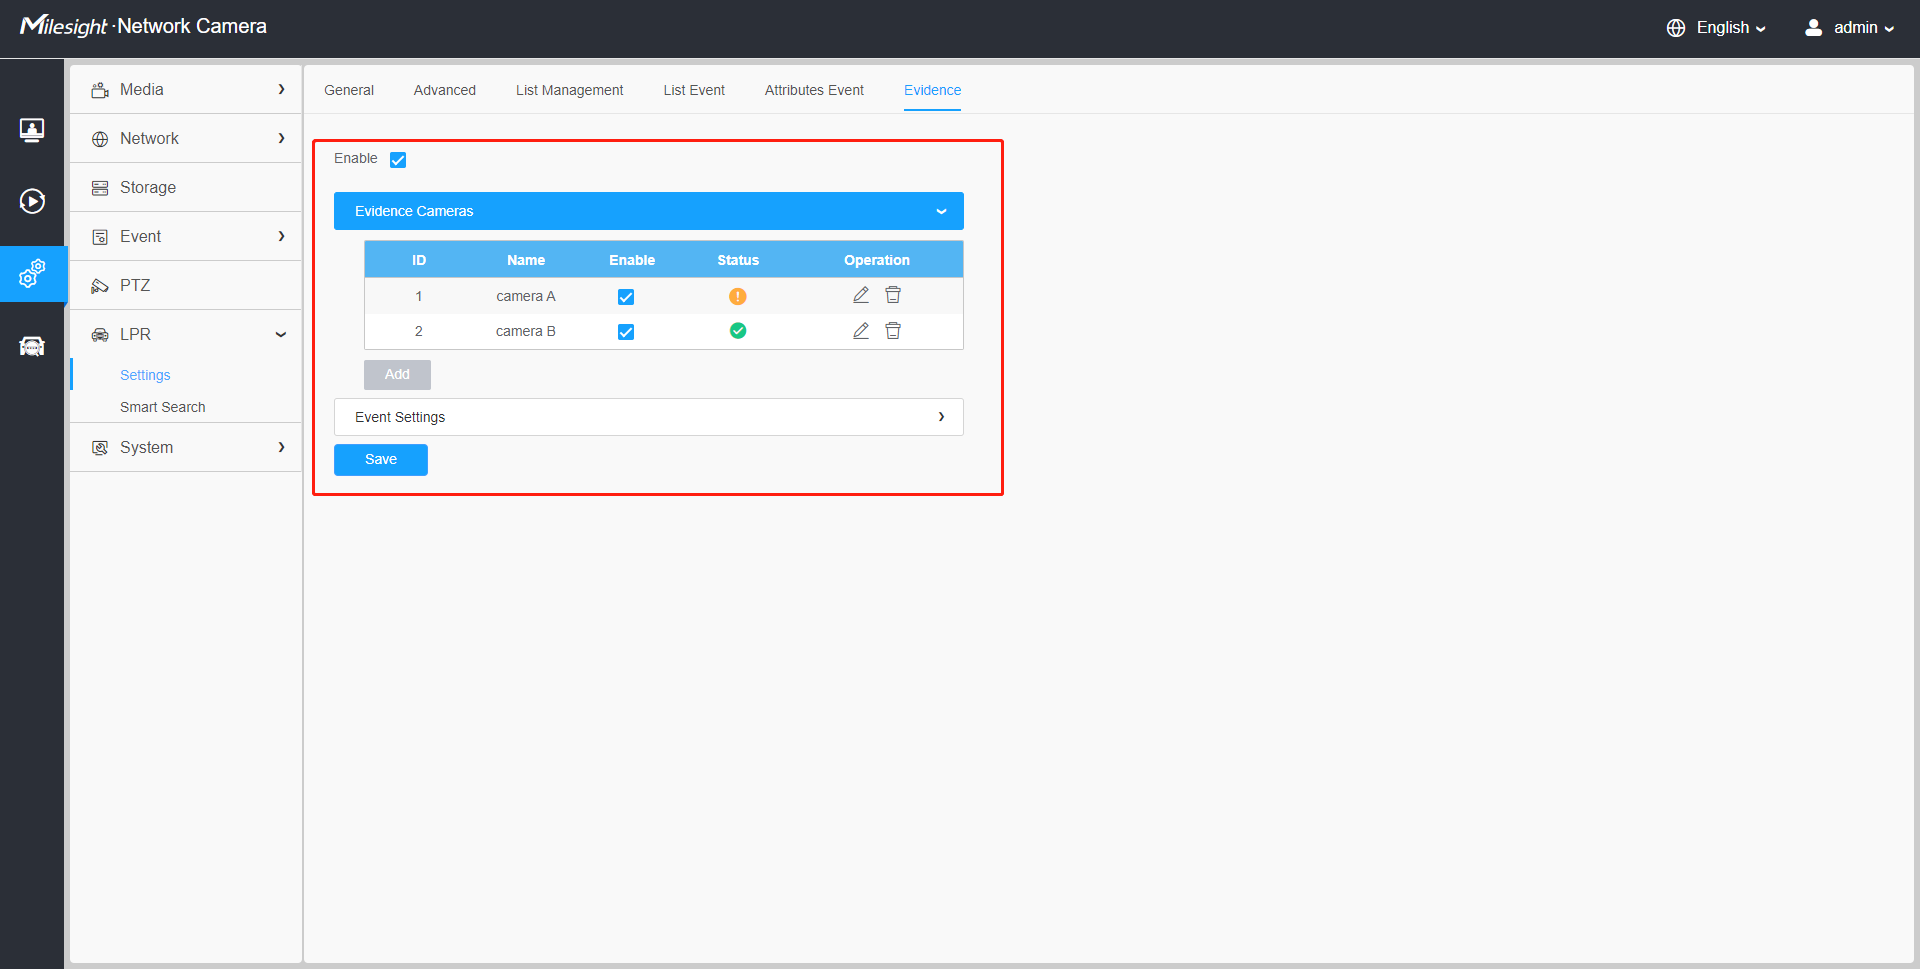
Settings steps are shown as follows:
Step1: Check the checkbox to enable this function.
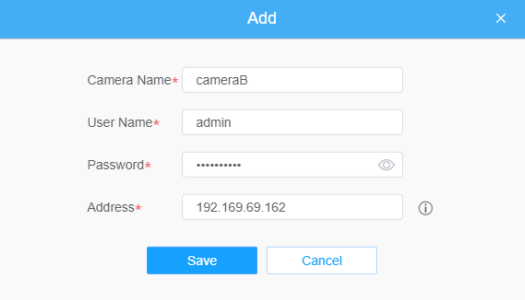
Step2: Click ![]() button to add the evidence camera by entering the user name, password,
and Address. And the camera name of the evidence camera can be customized.
button to add the evidence camera by entering the user name, password,
and Address. And the camera name of the evidence camera can be customized.
- Up to 2 evidence cameras can be added.
- Evidence camera captures primary stream picture by default.
-
For the Address, input evidence camera IP directly for Milesight camera, and snapshot URL is supported for third-party camera.
Step3: The added evidence cameras will be listed in the interface, and users can edit these cameras separately.
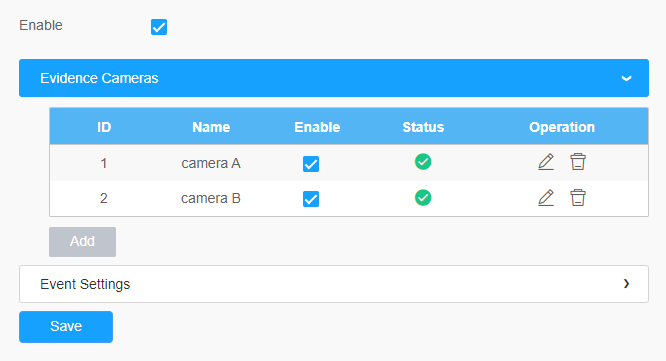
For the meaning of the buttons on the interface, please refer to the following table.
| Parameters | Function Introduction |
|---|---|
| Enable or disable the evidence camera. | |
| Check the connection status of the
evidence camera.
|
|
| Edit the evidence camera. | |
| Delete the evidence camera. |
Step4: Set Capture Conditions. Currently it only supports the always option, which means that as long as the camera recognizes the license plate, the evidence camera will be triggered to capture a picture of the entire scene.

Step5: After completing the above settings, the evidence camera will work together to capture the scene when the LPR camera captures the license plate, which can be viewed on the Live View interface of LPR Mode.
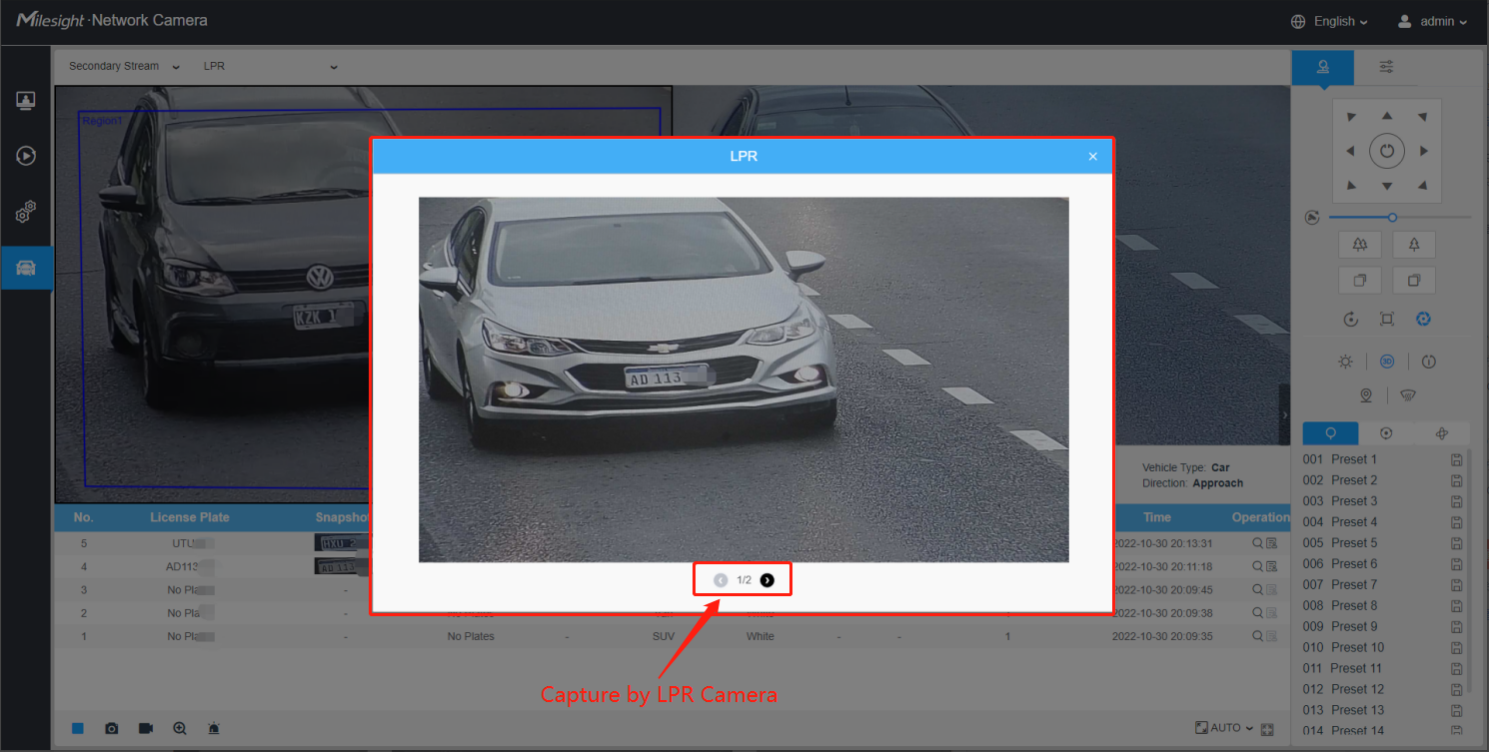
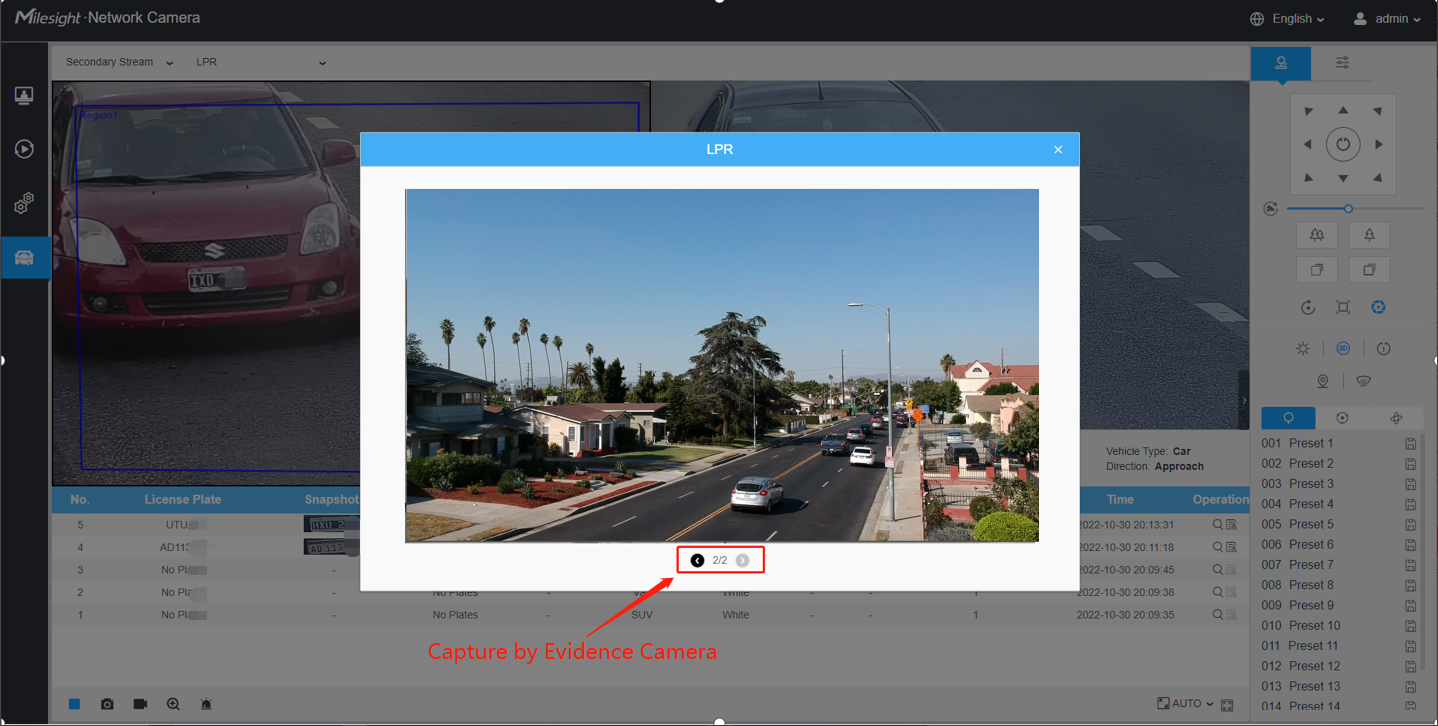
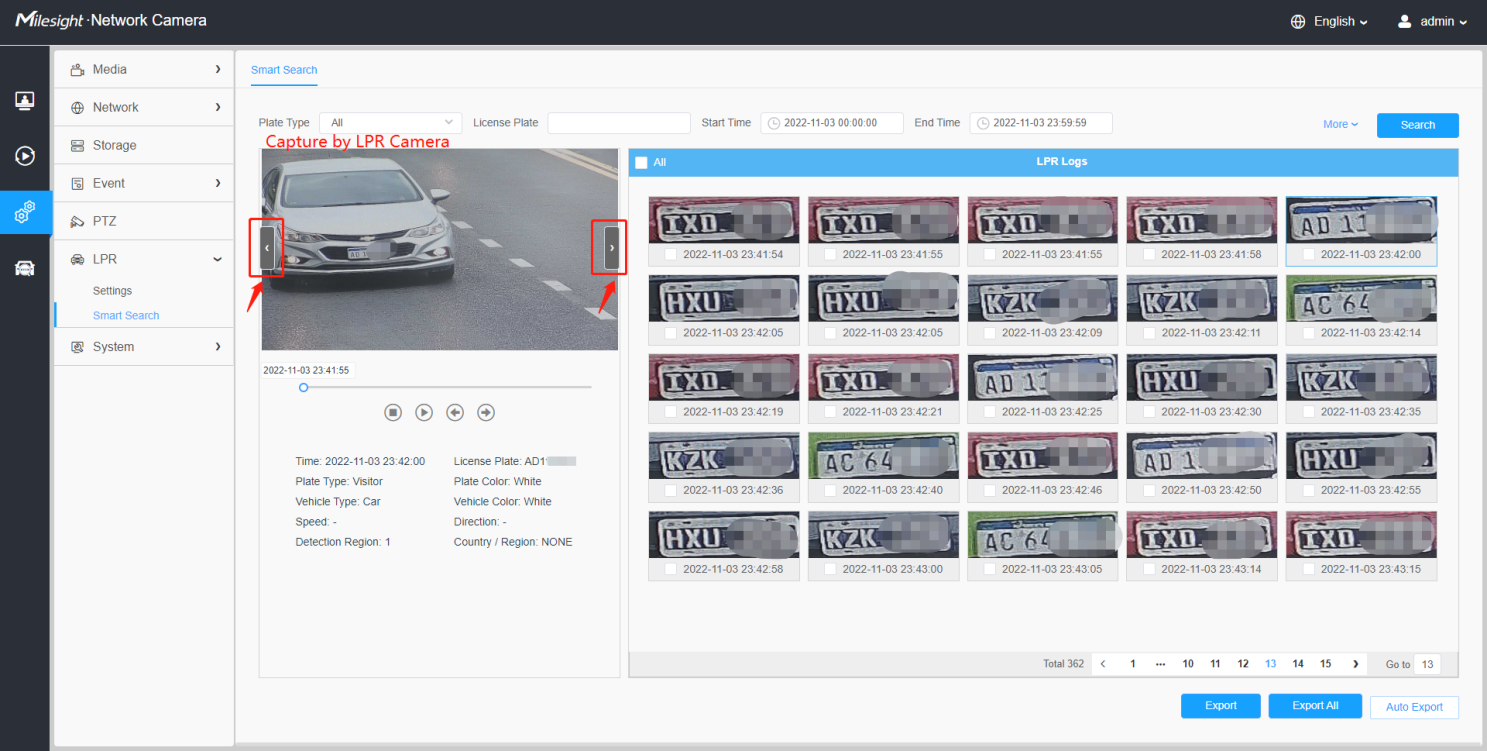
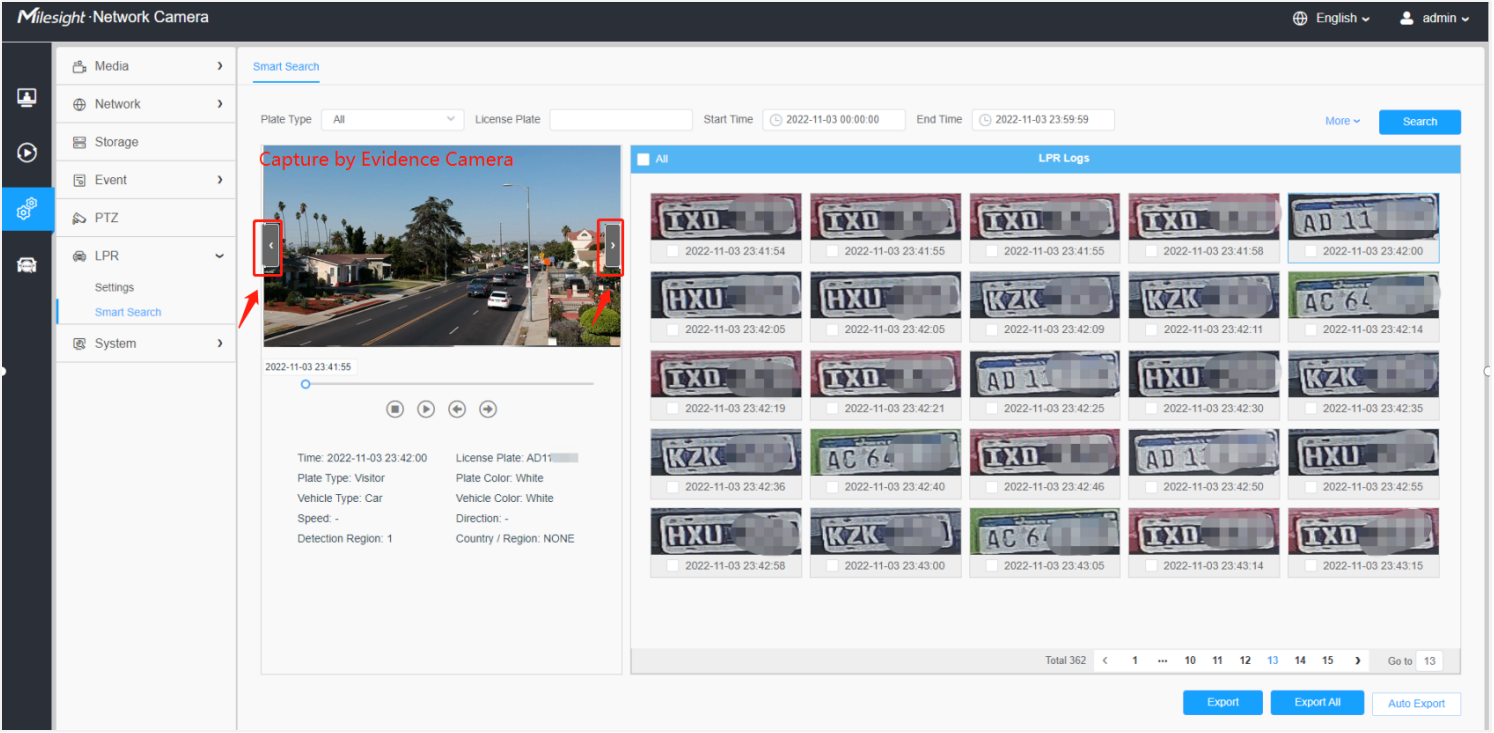
Users can also search and export the image captured by evidence camera in the Smart Search interface.