General

| Parameters | Function Introduction |
|---|---|
| Enable Detection | Enable/disable the LPR detection function. |
|
Country/ Region (Only for LPR1, LPR4, LPR_AP and LPR_AM) |
Select country/ region to detect the license plate. |
|
Effective Region (Only for PTZ series) |
Normal: configure the LPR detection regions for the current area. Advanced: configure different LPR detection regions for different PTZ presets(Only support Preset 1~4 so far). |
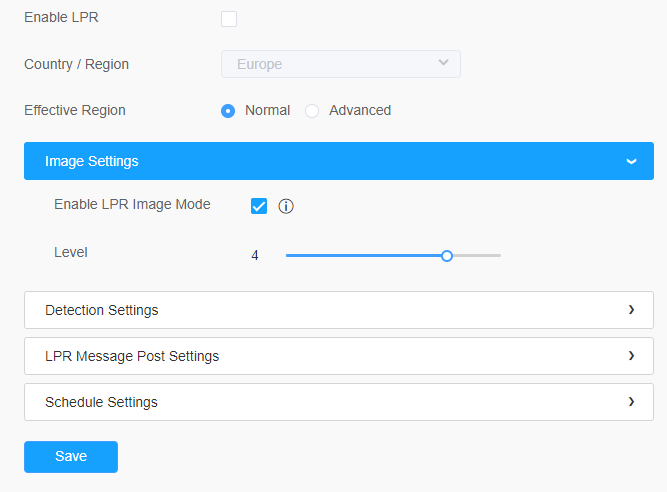
Step1: Check the check box to enable the LPR detection function. Select country/ region to detect the license plate.
[Image Settings]
Step2: The LPR Night Mode supports the optimal LPR night recognition effect by adjusting different parameter levels. You can choose Customize to set effective time manually, or choose Auto Mode which can automatically switch to night mode according to illumination intensity.
| Parameters | Function Introduction |
|---|---|
|
Enable LPR Image Mode |
To enable LPR Image Mode, parameters of Backlight, Exposure and Day/Night Switch will be set to special values. |
| Level |
Level 1~5 are available. Note: Minimum Shutter of each Level : 1- 1/250, 2- 1/500, 3- 1/750,
4- 1/1000, 5- 1/2000.
|
[Detection Settings]
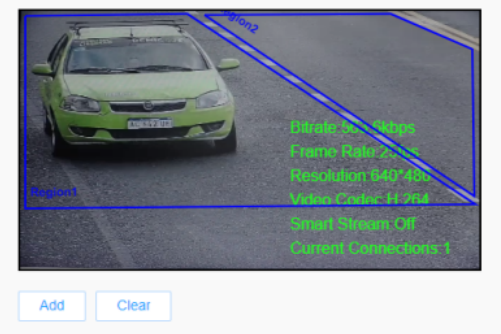
Step3: Check the check box “Enable License Plate Recognition”, you can draw the screen to select area interested.
| Parameters | Function Introduction |
|---|---|
|
Add |
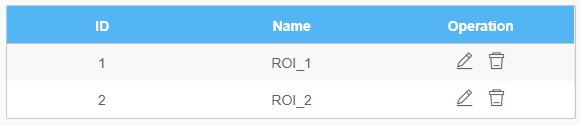
Draw the screen to select the area interested, then click “Add” button to add the area, only four recognition areas can be added. You can edit the name of the area or delete the area in the list below.
Note: Only license plates larger than 150 pixels can be
recognized.
|
| Clear | Click the "Clear" button to clear the area being drawn. |
| Delete All | Click the "Delete All" button to delete all the added areas. |
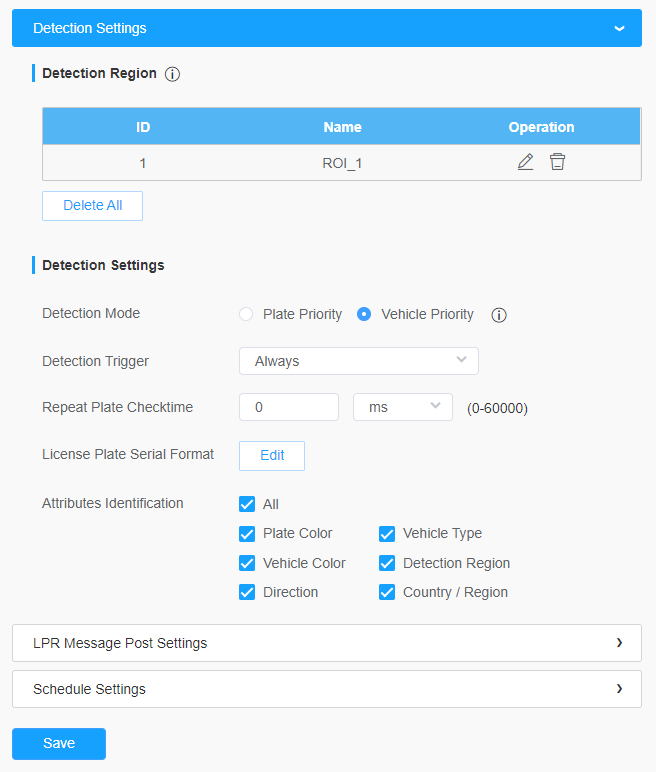
Step4: Set Detection Settings.
| Parameters | Function Introduction |
|---|---|
| Detection Mode | Plate Priority: Under this mode, the camera will first
recognize the license plate and then locate the target as a vehicle with
less delay. Vehicle Priority: Under this mode, the camera will first locate the target vehicle and then recognize the license plate to avoid some false detection. Note: Vehicle priority mode can identify vehicles without license
plates.
|
| Processing
Resolution (Only for LPR1, LPR2, LPR3 and LPR4) |
Resolution of the stream for LPR analysis, including 1920*1280, 1280*720, 640*360, 320*176. |
| Detection Trigger |
Always: in this mode, camera will always detect license plates. Alarm Input: in this mode, camera will only detect license plates during Alarm Input is being triggered. |
| Confidence Level (Only for LPR1, LPR2, LPR3 and LPR4) |
You can set the confidence level from 1 to 10. When the confidence level of the license plate is higher than the set confidence level, it will push the license plate image to the logs interface. |
| Repeat Plate Checktime |
Set the time interval for repeatedly reading license plates to effectively avoid duplicate identification of parking vehicles. You can set Repeat Plate Checktime from 0 to 60min or 0 to 60000ms. |
| License Plate Serial Format | License Plate Serial Format function supports formulating
identification rules and can automatically do further processing, filter
license plates in non-compliant formats to achieve more intelligent and
accurate license plate recognition. Note: It supports up to 10 license plate characters.
|
| Attributes Identification | Check Plate Color, Vehicle Type, Vehicle Color, Detection Region,
Direction,
Country/Region(Only for LPR2 and LPR_EU), orAll
to enable Attributes Identification, it will display the
corresponding information on the Smart Search interface.
|
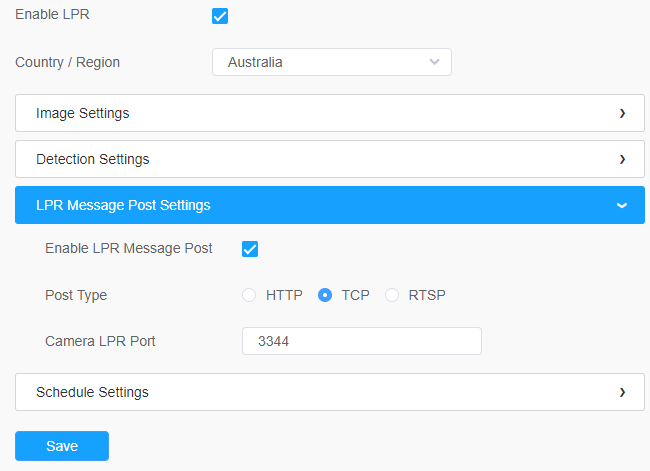
Step5: Set LPR Message Post Settings.
| Parameters | Function Introduction |
|---|---|
| Enable LPR Message Post | Check the checkbox to enable LPR Message Post. It will push information to some third-party devices or software that are compatible with ours. |
| Post Type | Information can be pushed by RTSP, TCP or HTTP. |
| HTTP Method | There are two HTTP push methods, including Post and Get. |
| Snapshot Type |
Three kinds of snapshot can be chosen: All, License Plate and Full Snapshot. When you choose All, License Plate Snapshot and Full Snapshot will be pushed. Note: This option is available just for Post HTTP Method. |
| HTTP Notification URL |
LPR camera can use the API URL to send LPR information to back-end devices when the license plate is recognized. API URL format fills as below: |
| User Name | Receiver name |
| Password | Receiver Password |
[Schedule Settings]
Step6: Schedule Settings.

| Parameters | Function Introduction |
|---|---|
|
|
Copy the schedule area to another date. |
| Select all schedule. | |
| Clear all schedule. |