4.1.1 Live View interface
1. Device
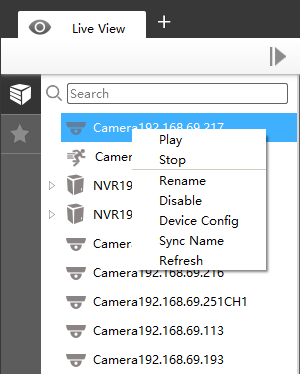
Device column in the Live View shows what kind of devices are connected to the CMS:
| Item |
Function Introduction |
|---|---|
|
Play |
Play the Live View of the chosen device |
|
Stop |
Stop the Live View of the chosen device |
|
Rename |
Rename the device on the list |
|
Disable |
Disable the device |
|
Device Config |
Jump to the Device Config interface to configure the device |
|
Sync Name |
Synchronize device name with the device |
|
Refresh |
Refresh the status of the chosen device |
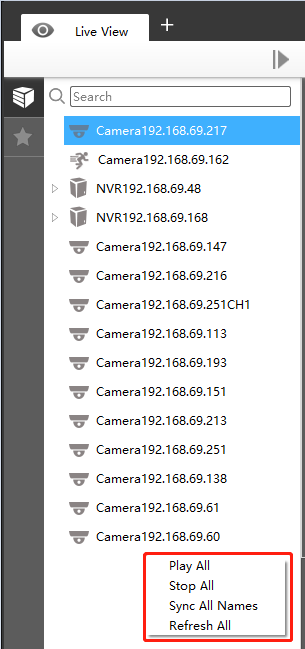
Right-click on the blank space of the device list:
| Item |
Function Introduction |
|---|---|
|
Play All |
Play all the Live View |
|
Stop All |
Stop all the Live View |
|
Sync All Names |
Synchronize names with all devices |
|
Refresh |
Refresh the status of all devices |
There are steps to display device under the Device mode:
Step1: Make sure the device is available;
Step2: Select one window to display;
Step3: Right click a camera and choose [Play] to display the camera. When you choose a NVR, there is a [Play] to display all cameras linked with the NVR. You can also double click the device or drag it into the selected window.
| Item | Function Introduction |
|---|---|
| Search the target device in the added device list quickly. | |
|
Camera, which is playing |
|
|
Camera/NVR, which is connected |
|
|
Camera/NVR, which is not connected |
|
|
Camera/NVR, which logs out |
|
|
List Button, click the button to list/hide all cameras linked with the NVR |
|
|
Triggered Motion Detection Status |
|
|
Triggered VCA events Status |
|
|
Triggered Audio Alarm Status |
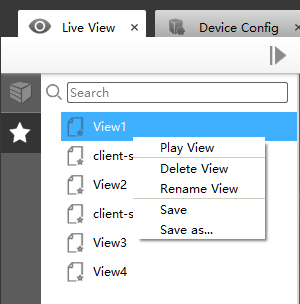
2. View
Right-click on View:
| Item | Function Introduction |
|---|---|
|
Play View |
Play the View |
|
Delete View |
Delete the View |
|
Rename View |
Rename the View |
|
Save |
Save the current view and the corresponding stream types of the channels to replace the old view |
|
Save as |
Save the current view and the corresponding stream types of the channels into a new View |
View helps you watch and manage the Live View more efficiently. By set Views, you can save time to manage the Live View:
Step1: Click the New View button![]() to create a new View;
to create a new View;
Step2: Display the cameras according to Device Part;
Step3: Click the Save View button![]() to save the Live View. You can right-click the View and
choose the [Play View].
to save the Live View. You can right-click the View and
choose the [Play View].
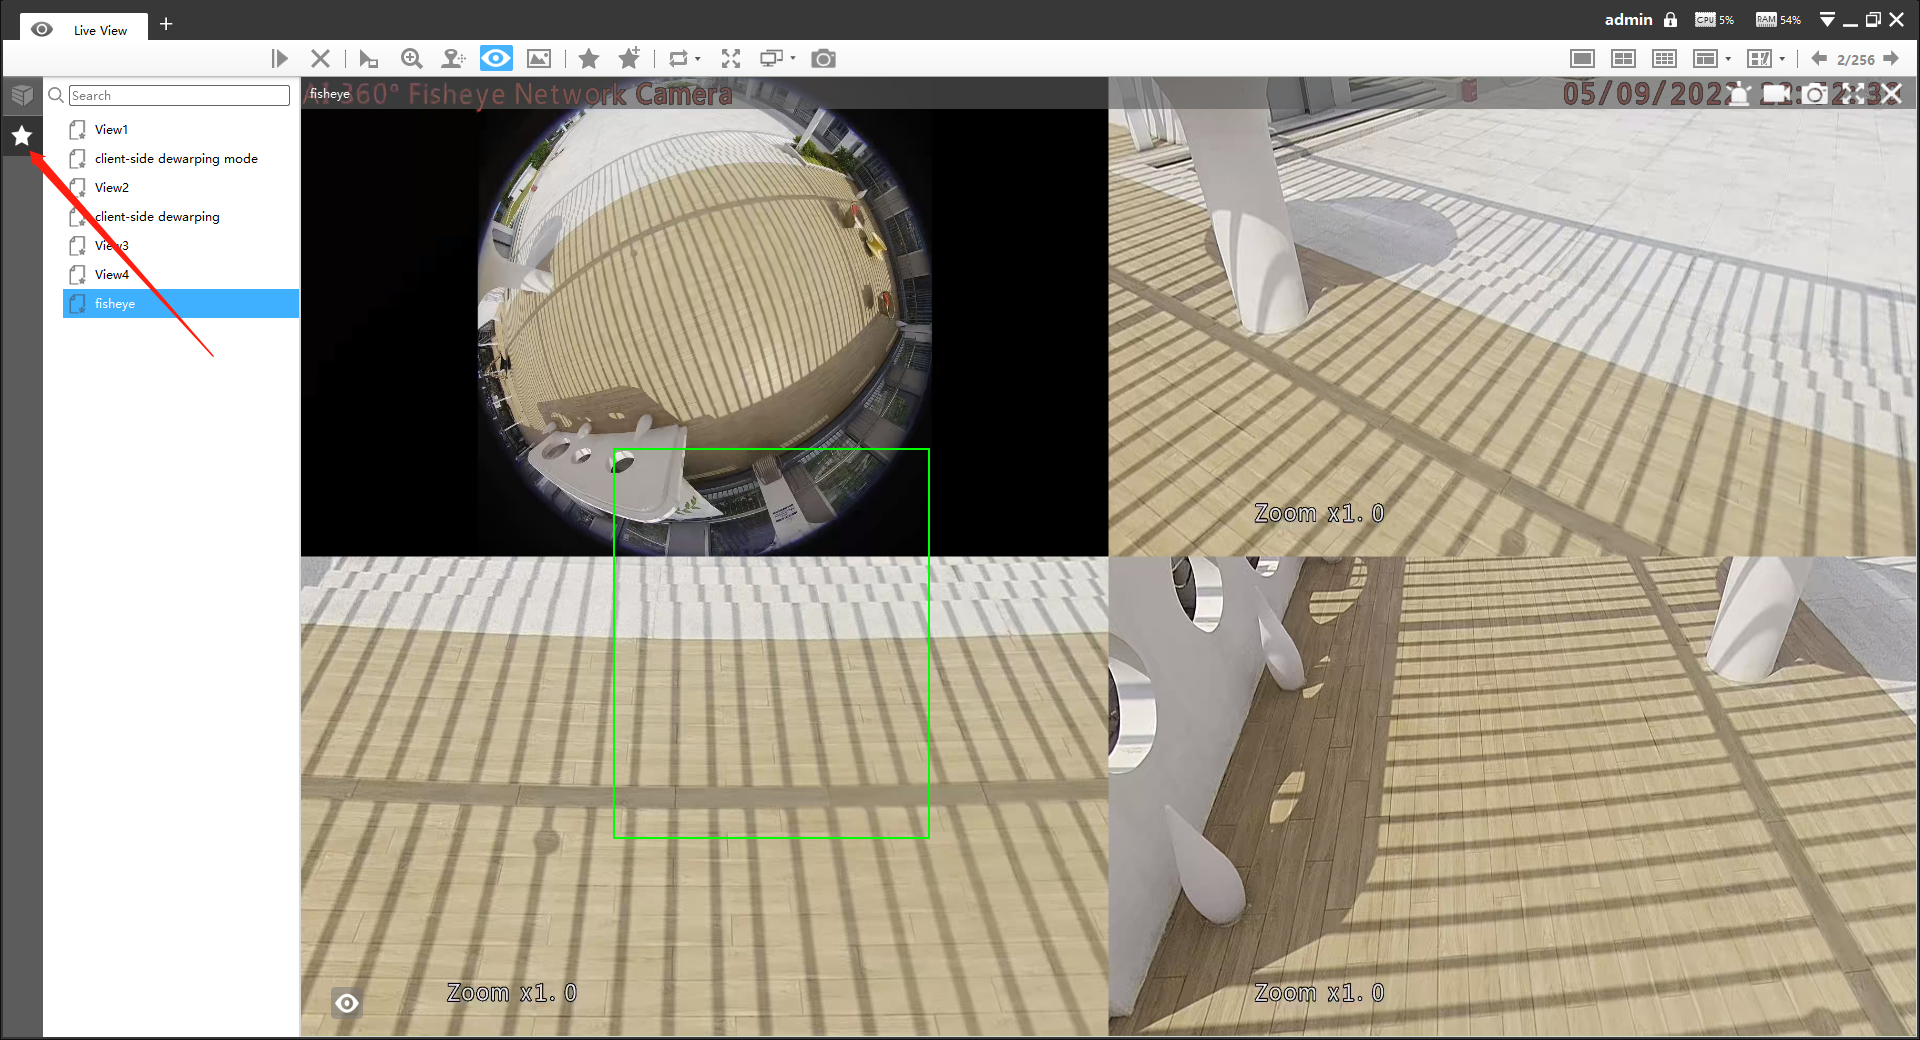
For Fisheye camera, support Saving View of Client-side Dewarping mode. If the user saves the current view as a layout with the client-side dewarping mode that supports dragging the needed area under the fisheye model, it will display this dewarping mode when playing the layout next time.
- Double clicking a NVR will lead to display all the cameras linked with the NVR;
- Once a window is selected, it’s border color will turn into white.
- The View Layout list will keep the order of the last move when the CMS program restarts or covers installation.
3. Custom Layout
Click on the button![]() and click
and click![]() to add a
custom layout, the page is as below:
to add a
custom layout, the page is as below:
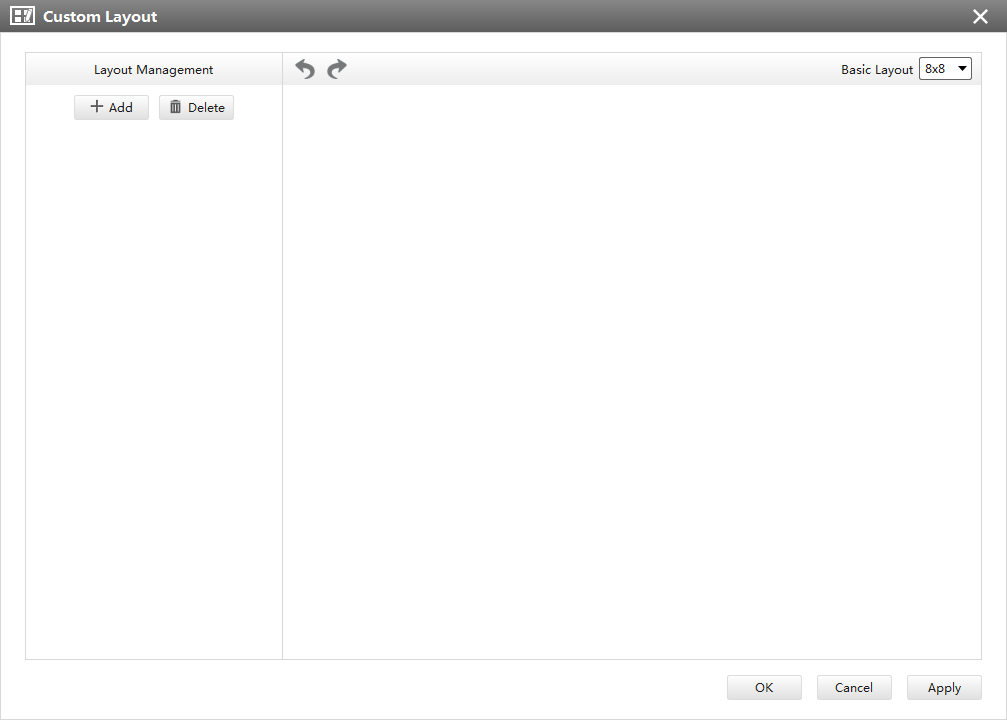
Click ![]() to create a
new layout,it will display a 8x8 layout by default, drag and drop your mouse to combine
the grids into one single box, click OK when finished.
to create a
new layout,it will display a 8x8 layout by default, drag and drop your mouse to combine
the grids into one single box, click OK when finished.
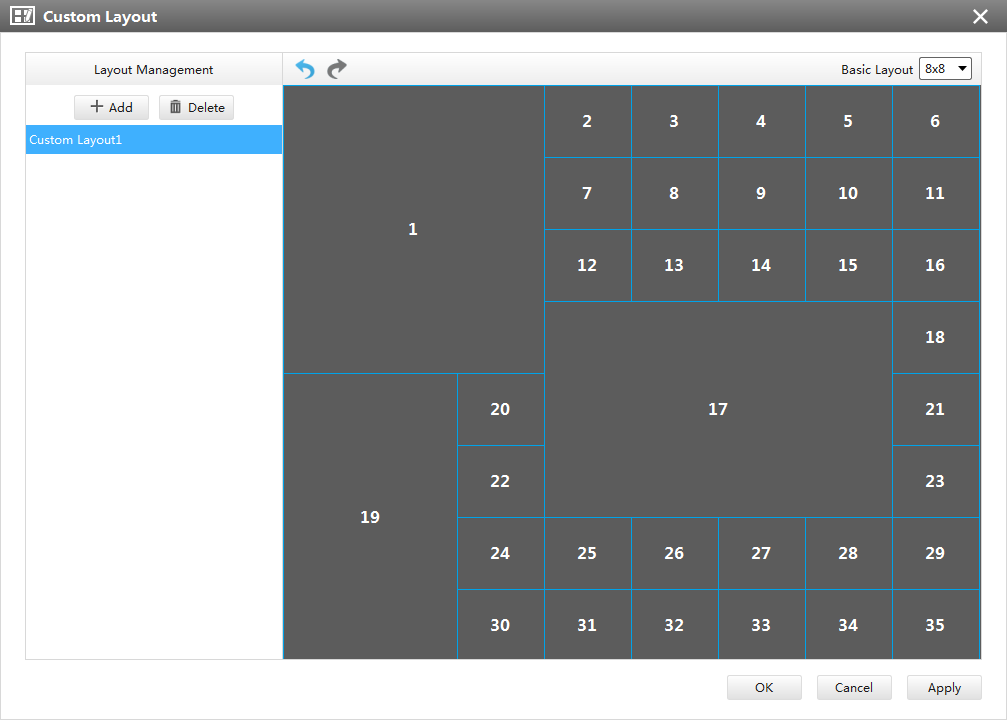
Click redo and undo button to back to the last steps.![]()
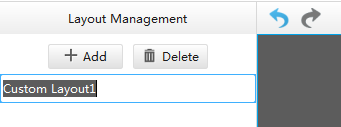
You can double click the name on the left list to rename the layout.
After your modify, click Apply or OK to save the custom layout.
Back to Live View Page, the new layout will appear in the custom layout button![]() .
.