4.1.2 Settings of Display the Live View
The toolbar of the Live View window:
| Item | Function Introduction |
|---|---|
|
Alarm Output |
|
|
Start/Stop recording |
|
|
Snapshot |
|
|
Full screen |
|
|
Stop the Live View |
|
|
Disable/Enable the audio |
|
|
Disable/Enable the Two-Way Audio: Support Two-Way Audio between CMS and NVR. With just one click, users can talk to the NVR's channel or the NVR to which the channel belongs 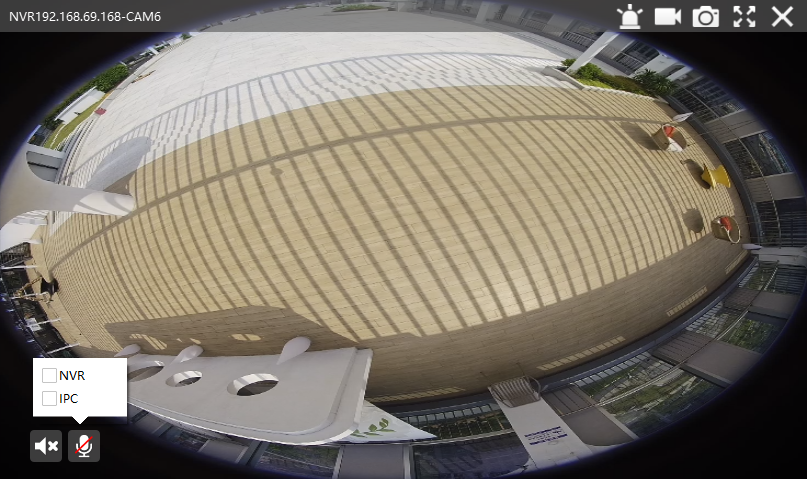 |
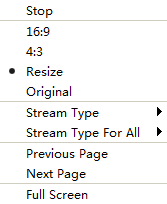
Right-click the Live View window, the interface is as below:
| Item |
Function Introduction |
|---|---|
|
Stop |
Stop playing the Live View |
|
16:9 |
Ratio of length to width is 16:9 |
|
4:3 |
Ratio of length to width is 4:3 |
|
Resize |
Suit the size to the windows |
|
Original |
Keep the size the same as original aspect ratio |
|
Stream Type |
You can choose Primary Stream or Secondary Stream
Note: The Stream
Type can not be edited for 4K Area Cropping camera and other
display modes of fisheye camera under Multi-channel mode except
1O/1P/2P. |
|
Stream Type For All |
You can choose Primary Stream or Secondary Stream for all channels. |
|
Previous Page |
Turn to the previous page |
|
Next Page |
Turn to the next page |
|
Full Screen |
Display windows in full screen |
1. PTZ
Click the PTZ button ![]() , there
will be a same button in the bottom-left corner of the selected window. Click the button
in the window, the PTZ function interface will appear. The interfaces of three network
cameras are as below:
, there
will be a same button in the bottom-left corner of the selected window. Click the button
in the window, the PTZ function interface will appear. The interfaces of three network
cameras are as below:
- PTZ camera

-
Vari-focal lens camera
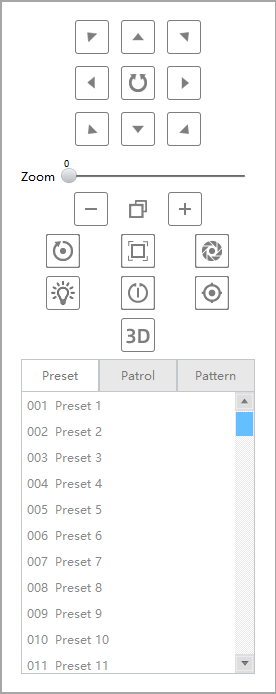
-
Fisheye camera(Bundle Stream)
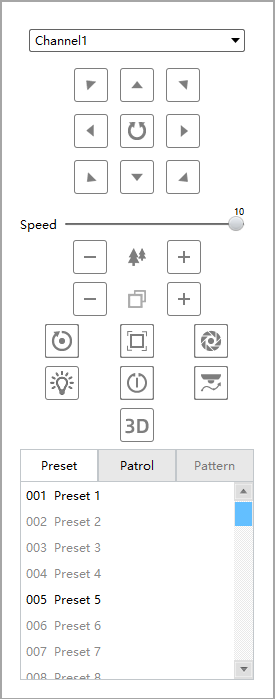
-
Fisheye camera(Multi-channal)
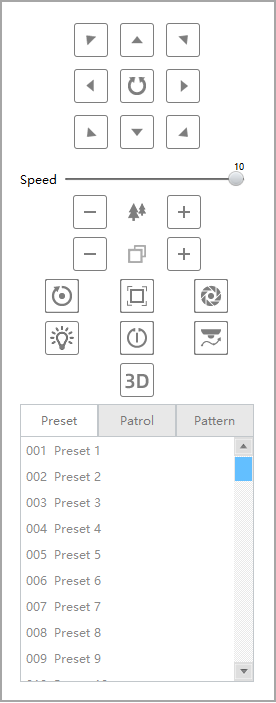
The meanings of the items can be referred to the table below:
| Item |
Function Introduction |
|---|---|
|
Navigation key is used to control the direction. The rotation key is used for auto-rotation. |
|
|
To adjust the speed of pan/tilt movements, from 1 to 10. |
|
|
Click -/+ to zoom in and zoom out. |
|
|
Click to focus near or far of the lens. |
|
|
|
Lens Initialization, Auxiliary Focus and Auto Iris. |
|
Lighting For 30s:Click to open/ close the White LED for lighting 30s. |
|
|
One-touch Patrol: Click to carry out the patrol. |
|
|
Manual Tracking: The camera can track the object only after user frames the moving object on the screen. |
|
|
3D Positioning: For PTZ camera, 3D Positioning function allows users to easily adjust the angle of camera’s view and zoom ratio by just using a mouse to get more details from region of interest. |
|
|
Auto Tracking: With this option enabled, the camera can perform the digital Pan/Tilt/Zoom to track the moving objects automatically. Note:
|
|
|
|
|
|
|
|
|
|
|
2. Fisheye
Click the Fisheye button![]() ,
there will be a same button in the bottom-left corner of the selected window. Click the
button in the window, the Fisheye function interface will appear (Only for Fisheye
Camera). The interface is as below:
,
there will be a same button in the bottom-left corner of the selected window. Click the
button in the window, the Fisheye function interface will appear (Only for Fisheye
Camera). The interface is as below:
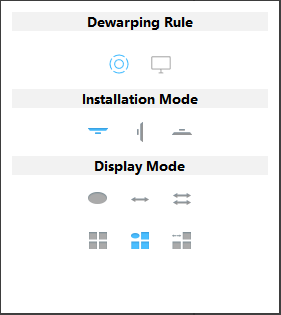
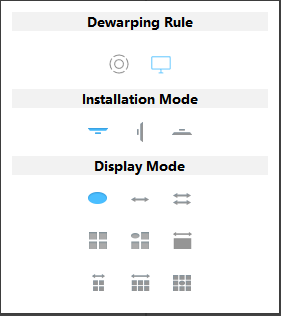
The meanings of the icons can be referred to the table below:
| Item |
Function Introduction |
|---|---|
|
On-board Dewarping |
|
|
Client-side Dewarping |
|
| Click to select ceiling mounting | |
| Click to select wall mounting | |
| Click to select flat mounting | |
| Select live view of original fisheye view | |
| Select live view of 360° panoramic view | |
| Select live view of two180° panoramic views | |
| Select live view of four regional views | |
| Select live view of one original fisheye view and three regional views | |
| Select live view of one 360° panoramic view and three regional views | |
| Select live view of one 360° panoramic view and one regional view | |
| Select live view of one 360° panoramic view and four regional views | |
| Select live view of one 360° panoramic view and six regional views | |
| Select live view of one original fisheye view and eight regional views |
3. Image
Click the Image button![]() ,
there will be a same button in the bottom-left corner of the selected window. Click the
button in the window, the Image function interface will appear. The interface is as
below:
,
there will be a same button in the bottom-left corner of the selected window. Click the
button in the window, the Image function interface will appear. The interface is as
below:
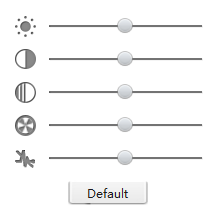
The meanings of the items can be referred to the table below:
| Item |
Function Introduction |
|---|---|
| Brightness | |
| Contrast | |
| Saturation | |
| Sharpness | |
| Noise Reduction |