5.2.1 Video Playback Tool Bar Description

The meanings of the items can be referred to the table below:
|
Icon |
Description |
|---|---|
|
Archive Management, more details can refer to Archive Management. |
|
|
Asynchronous Playing or Synchronous Playing switch button You can click Asynchronous Playing: The timeline only represents the recorded videos of selected channel.
Synchronous Playing: Choose Synchronous Playing to playback the recorded videos of all channels in the center playback panel at the same time.  Note:
 |
|
|
Lock video file for selected cameras, you can set locked time duration and reasons as below:
|
|
|
Add Tags for selected cameras, you can set tag name, reasons and time duration as shown below:
|
|
|
Snapshot for all |
|
| Click this button to enter the Video
Synopsis function. Video Synopsis function supports the simultaneous
display events that occurred at different times to reduce hours of video
footage to a few minutes, which can help users focus on key
events. For more details, please refer to 5.2.2 Video Synopsis |
|
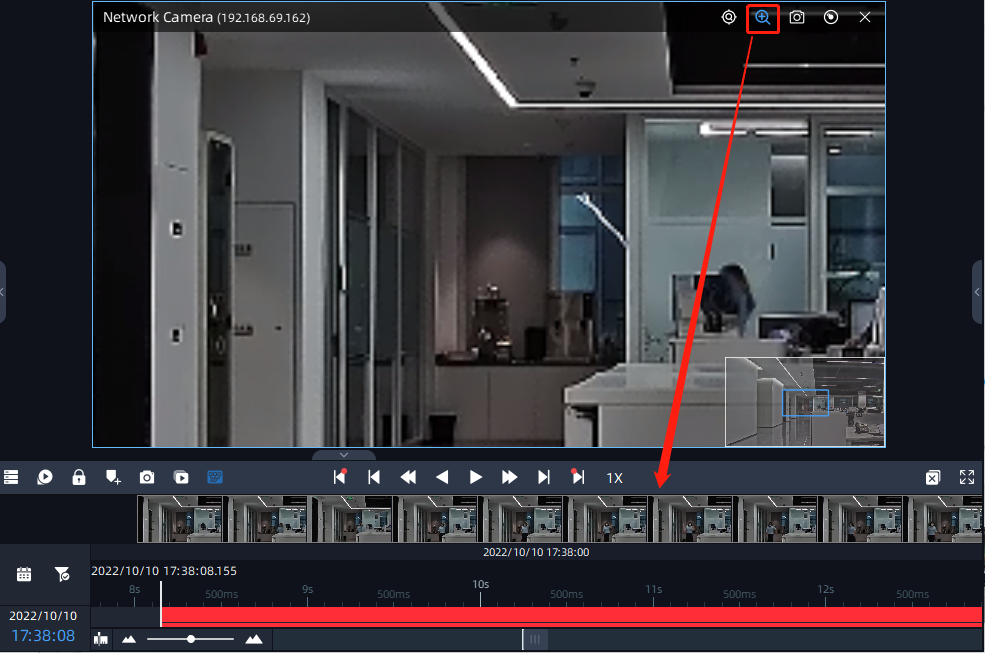
| Click this button to show thumbnail of
the corresponding time as shown below.
The display of a single thumbnail will match the current time point when hovering the playback timeline.
Note: When you enable
Digital Zoom, the thumbnails will zoom in or out in synchronization
with the image.
|
|
|
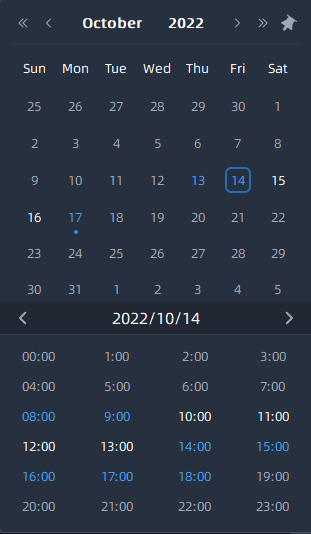
Choose date to search recorded videos of camera, the page is as below:
|
|
Click
Check the
Note: The user can also
check  |
|
|
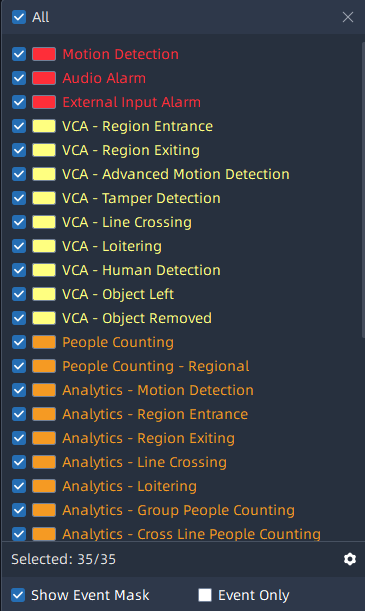
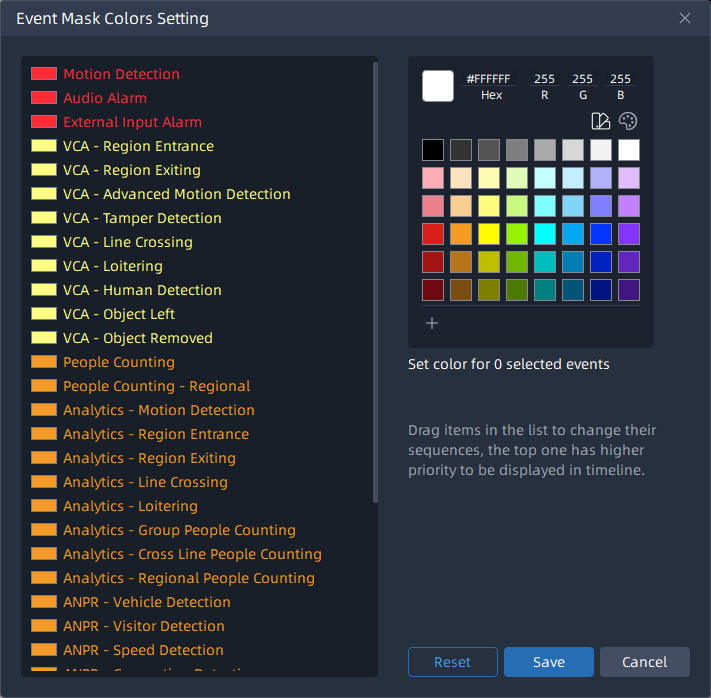
Click the customizing different colors for different events according to the user’s requirement.
And you can use the mouse to drag the corresponding event to adjust its order. When the time of multiple events overlaps, the color of the event with the highest order will be displayed first on the timeline. |
|
|
Drag to zoom in/out timeline. |
|
|
Play previous or next event video. |
|
|
Play previous or next frame of video. |
|
|
Adjust the speed of video playback. Speed Down: Includes 32X, 16X, 8X, 4X, 2X, 1X, 1/2, 1/4, 1/8, 1/16 and 1/32 for Play or Rewind. Speed Up: Includes 1/32, 1/16, 1/8, 1/4, 1/2, 1X, 2X,
4X, 8X, 16X and 32X for Play or Rewind.
Note:
The specific acceleration situation depends on the decoding performance of the Client. |
|
|
Rewind or Play the video. |
|
|
Pause the video. |
|
| Close all Views. | |
| Full Screen. |