Dashboard
Beaver IoT provides intuitive dashboards to process and display data visually.
Add and Edit Dashboard
-
Go to Dashboard page, click "+Add" to add a dashboard.
-
Enter a custom dashboard name, set the cover image and description, then click Save. Cover image requirements: no larger than 5MB, in jpg, jpeg or png format.

-
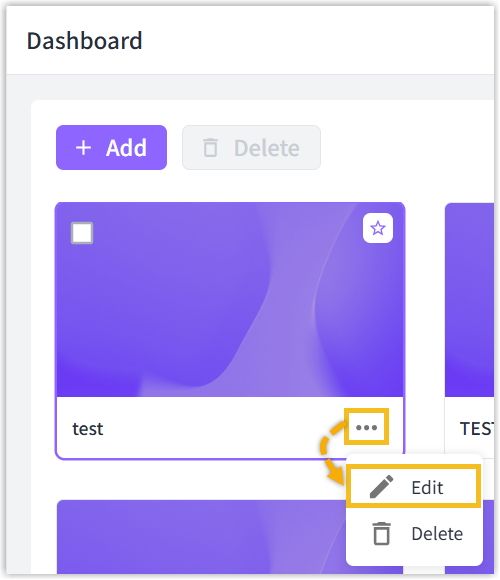
To update the above information, select the dashboard requiring updates and choose the Edit option from the menu.
-
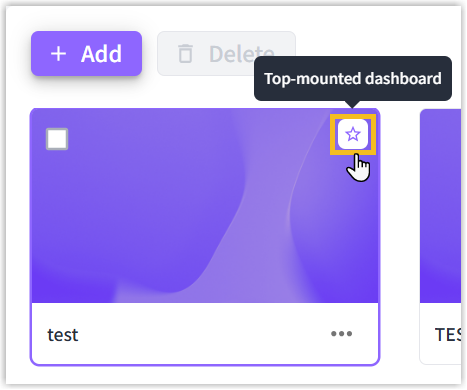
To pin a dashboard, click the top-mounted icon in its top-right corner. Once top-mounted, the dashboard will remain fixed in the first position. When accessing Beaver IoT via a mobile browser, you will be directed directly to this top-mounted dashboard.
Delete Dashboard
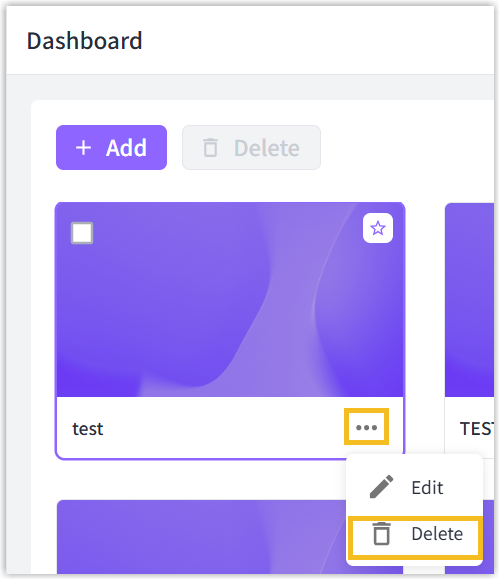
Delete a Dashboard: Select the desired dashboard, then choose the Delete option from the menu.
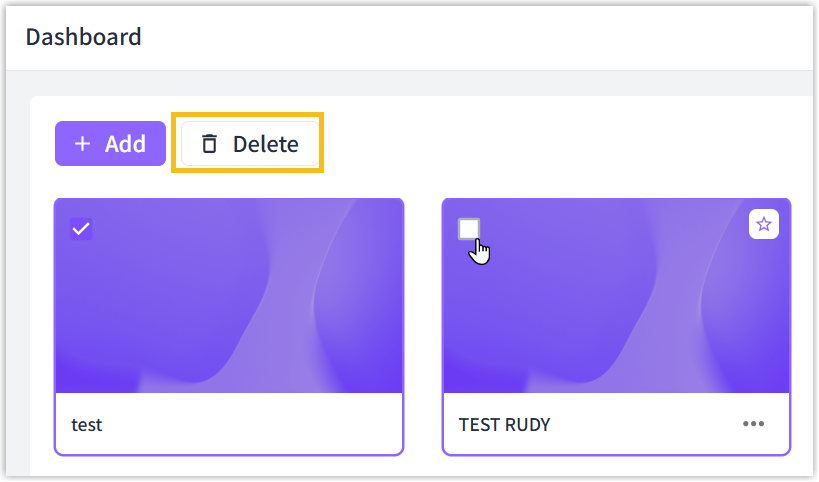
Delete Dashboard in Bulk: Check the boxes of the desired dashboards, then click the Delete button at the top.
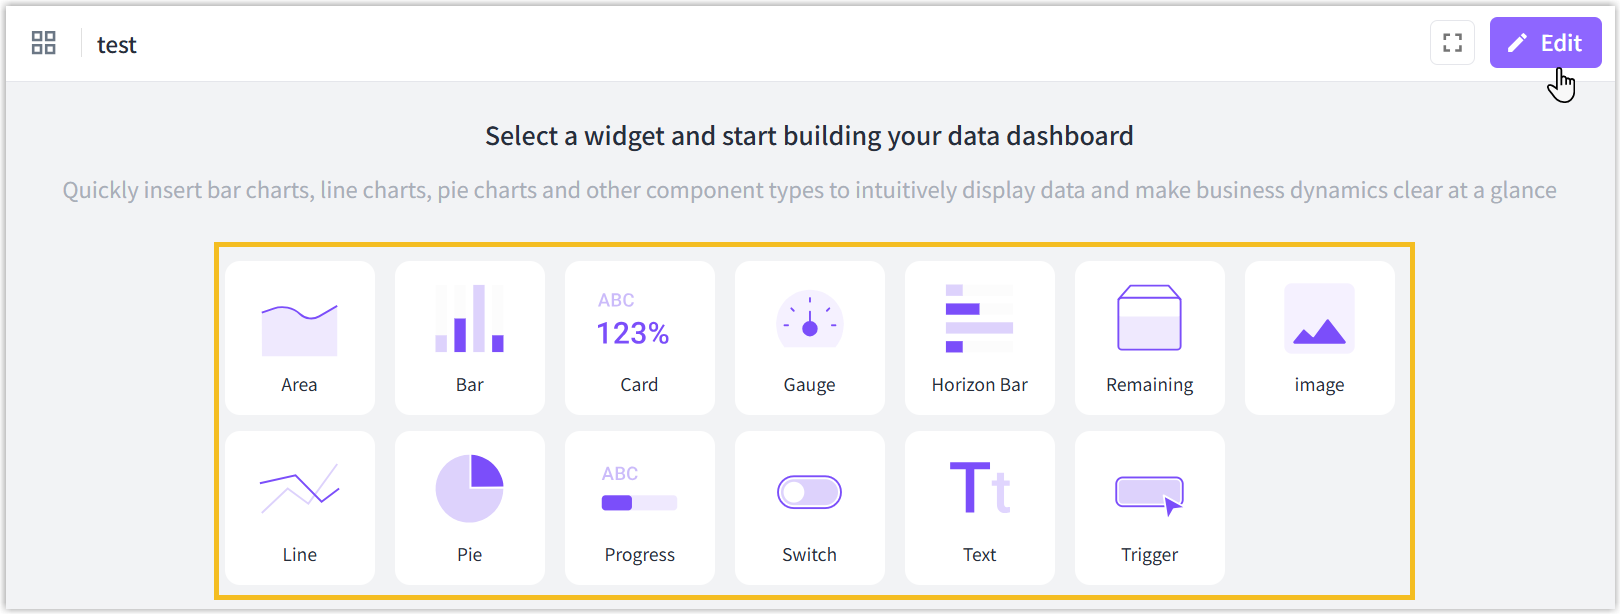
Add Widgets
-
Go to Dashboard page, click the desired dashboard.
-
Click the desired widget button or click Edit and then click +Add widget to add widgets.
-
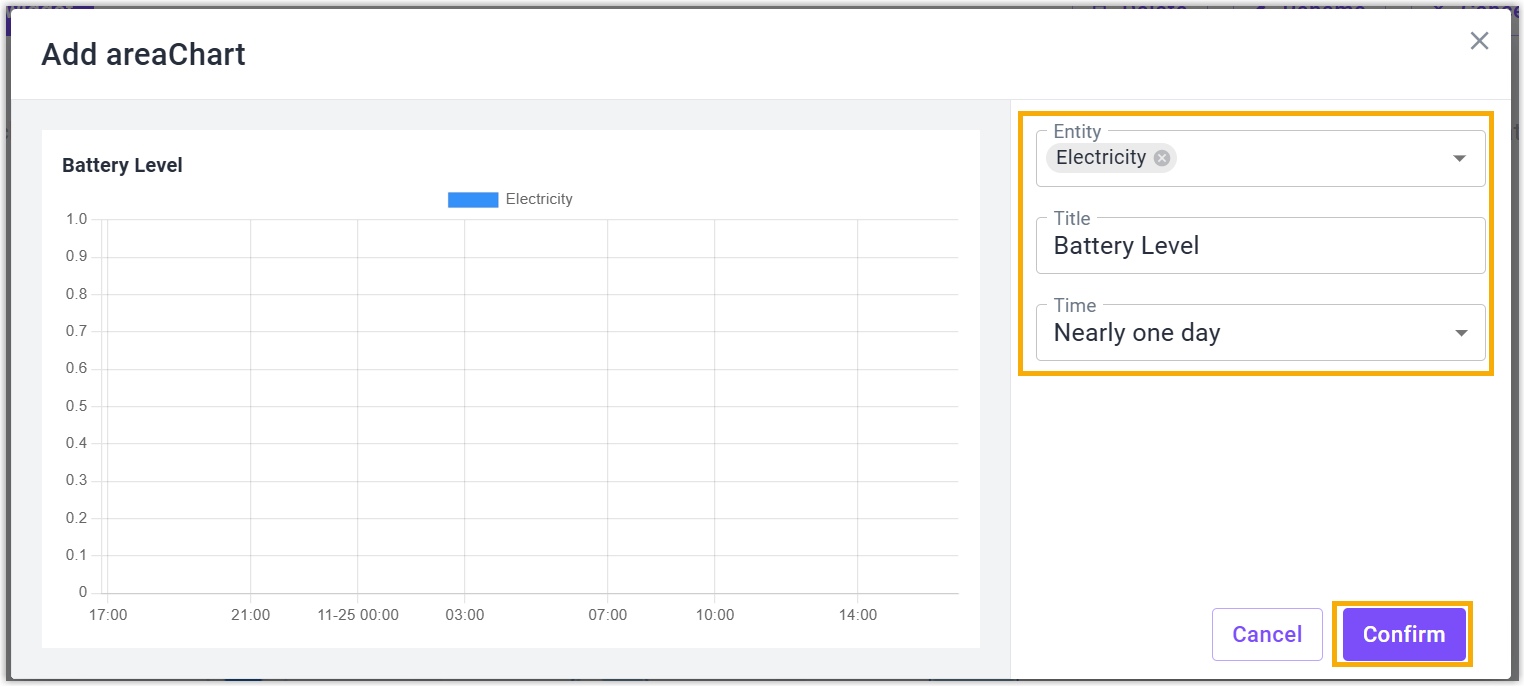
Select the entity which needs to show and customize the name and other parameters of the widget, click Confirm to save the setting.
-
Click Save to save all widgets to this dashboard.
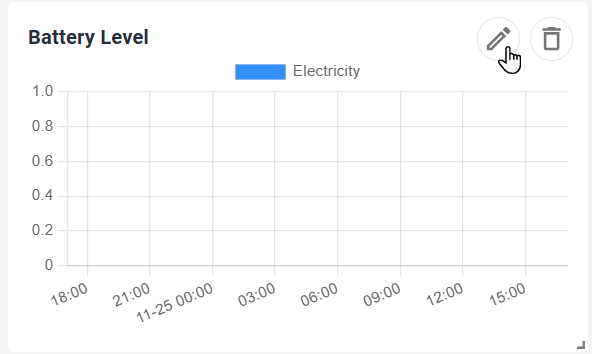
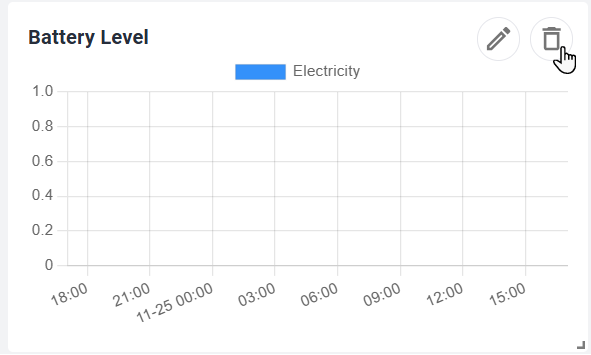
Edit or Delete Widget
- Go to Dashboard page, click the desired dashboard.
- Click Edit button to achieve below operations of widgets:
Edit the widget: edit the entity, name and other parameters of the widget.
Delete the widget: delete the widgets.
Adjust the size: Zoom up or down the widget.
Adjust location: drag the widgets to adjust the layouts of dashboard.
- Click Save to save all settings.