Setting
Enterprise Settings
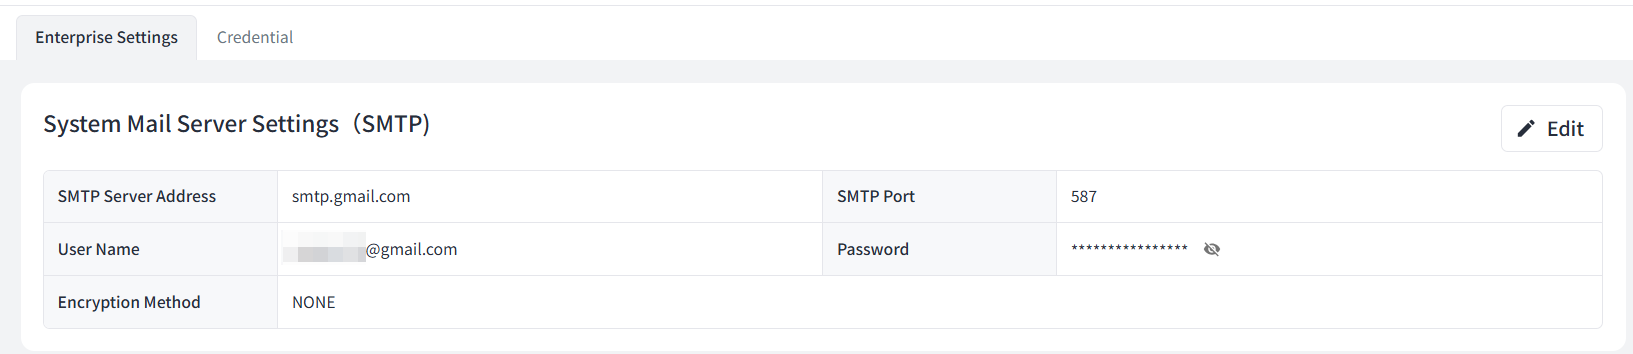
Beaver IoT supports configuring a SMTP server, enabling the use of this email account to send alerts or notification emails.
Credential
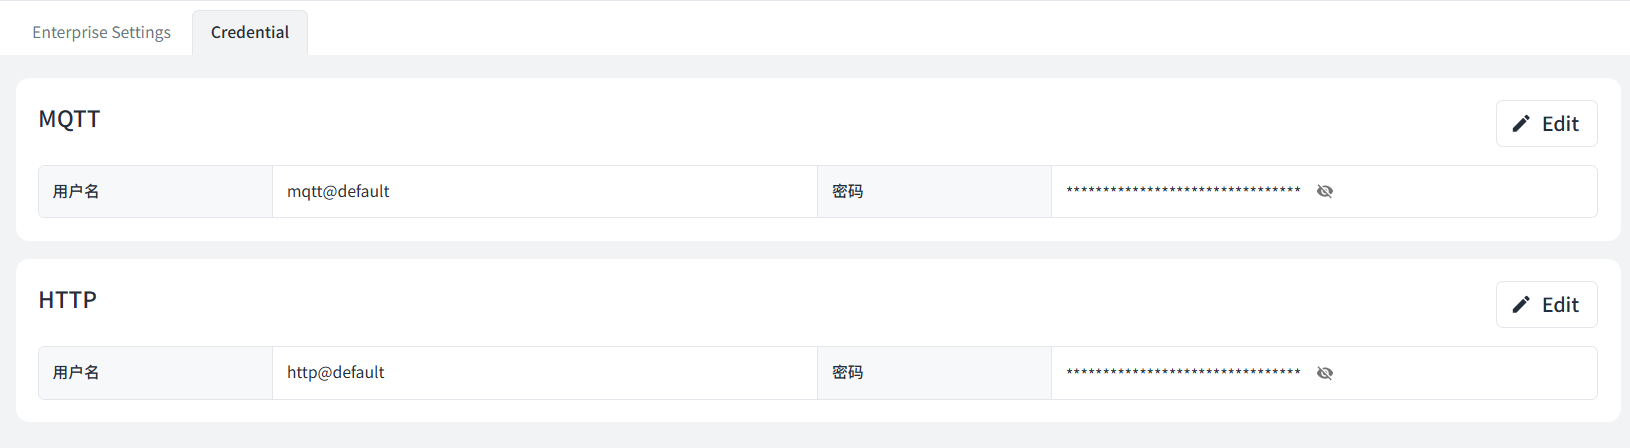
Beaver IoT supports configuring credentials for external clients to connect when set up as an MQTT broker or HTTP server.
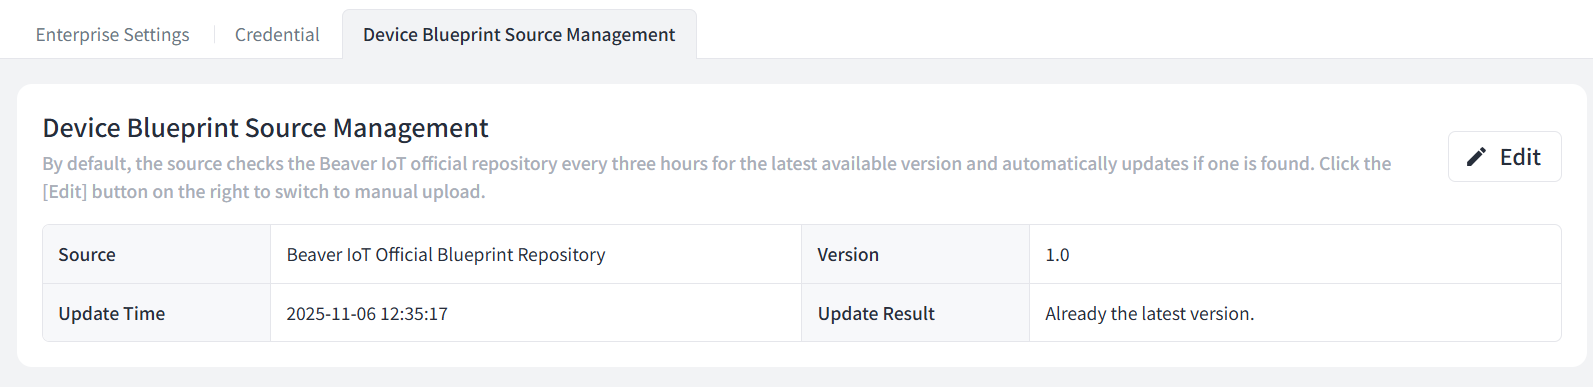
Device Blueprint Source Management
Beaver IoT supports automatic updates to the official blueprint repository or the import of custom repositories for encoding and decoding on Milesight or third-party node devices.
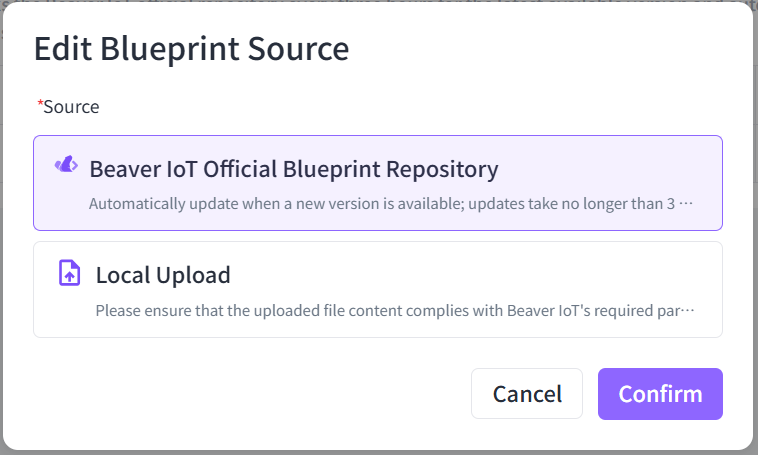
Click Edit to select source:
| Source | Description |
|---|---|
| Beaver IoT Official Blueprint Repository | Regularly check and update the official blueprint repository for Milesight products. This source must ensure that Beaver IoT can access the GitHub website without any block. |
| Local Upload | If Beaver IoT lack access to the GitHub website, please download the repository files from the official blueprint repository and upload them locally to the platform. When managing third-party devices, you may also customize repository files and upload them locally to the platform. Locally uploaded repository files must be in ZIP format. |
Custom Blueprint Repository
Beaver IoT supports importing custom device repository files for encoding and decoding third-party node devices. After importing the repository, when adding or synchronising node devices via the gateway's embedded NS, the custom model may be selected.
-
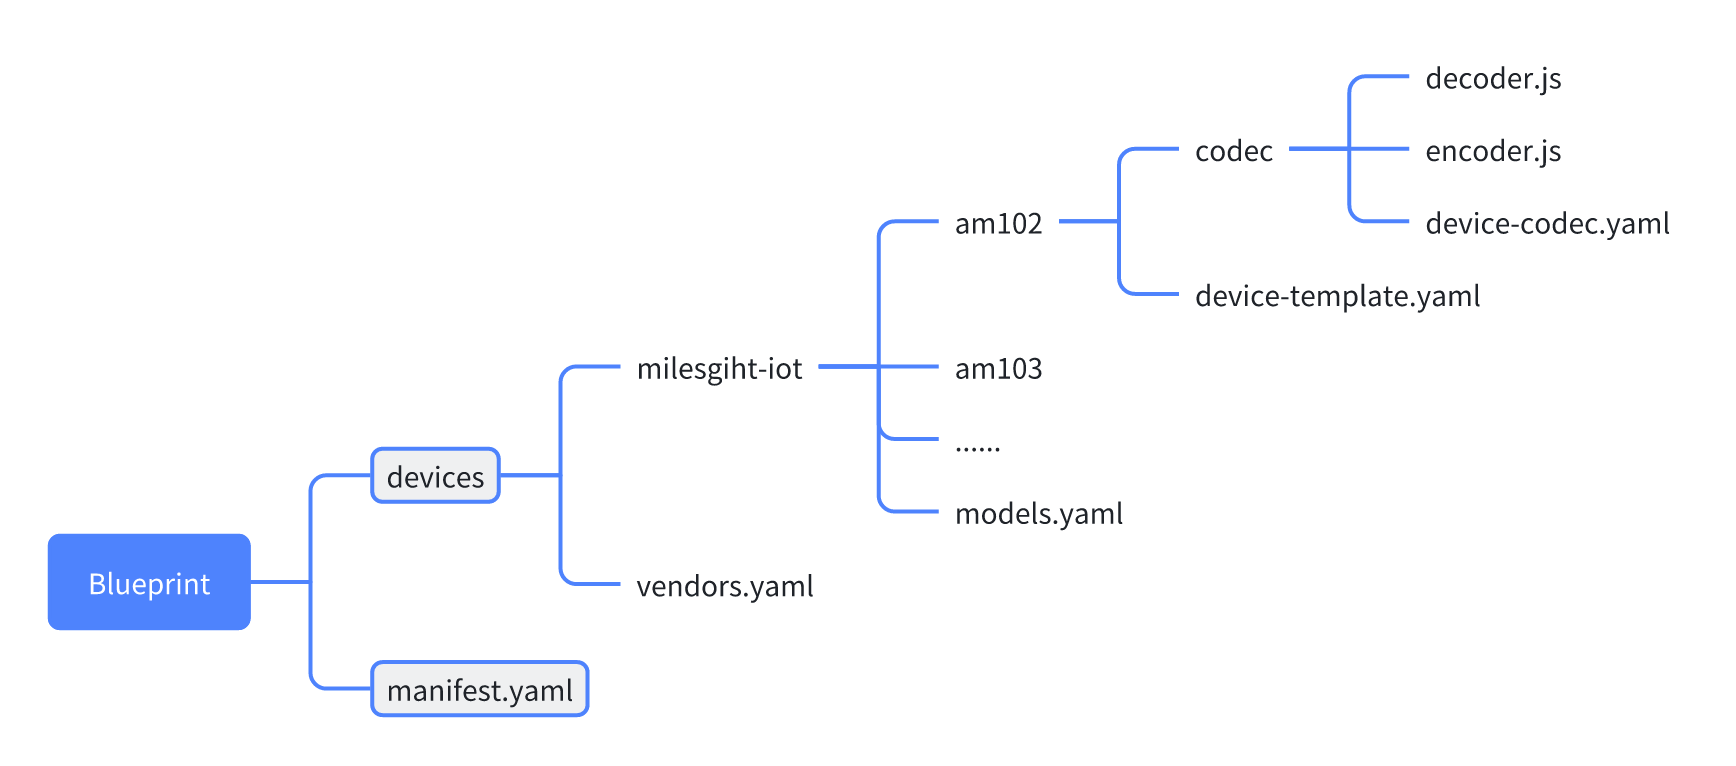
Download the files from the official blueprint repository to a local computer, or fork it to your own repository (GitHub, GitLab, etc.). The basic file structure of the repository is as follows:
-
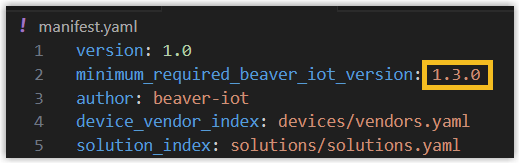
Open the manifest.yaml file within the official blueprint repository and amend the minimum_required_beaver_iot_version to the current Beaver IoT version in use. This ensures the custom repository can be successfully uploaded locally to the Beaver IoT platform.
-
Create a folder for the third-party vendor (e.g., vendor2) under the devices path in the repository. After creation, open the vendors.yaml file in the same directory and enter the folder path for the third-party vendor. Example:
vendors:
  - id: milesight-iot
    name: Milesight IoT
    work_dir: devices/milesight-iot
    model_index: models.yaml
  - id: vendor2
    name: Vendor 2
    work_dir: devices/vendor2
model_index: models.yaml -
Create separate folders for different product models (e.g., model1, model2) within the third-party vendor folder. Then create a model.yaml file containing the product model id, name, and corresponding device template file path. Example:
models:
  - id: model1
    name: Model 1
    template: model1/device-template.yaml
  - id: model2
    name: Model 2
template: model2/device-template.yaml -
Within the folder corresponding to the product model, create a device template file named device-template.yaml to define the device's data and map it to the entity.
Example:
metadata:
  lora_device_profile_class: ClassA-OTAA   #device class type
definition:
  input:
    type: object
    properties:
      - key: device_id
        type: string
        required: true
        is_device_id: true
      - key: battery
        type: long
        entity_mapping: battery
      - key: temperature
        type: double
        entity_mapping: temperature
      - key: humidity
        type: double
        entity_mapping: humidity
  output:
    type: object
    properties:
      - key: reboot
        type: boolean
        entity_mapping: reboot
      - key: report_interval
        type: long
        entity_mapping: report_interval
initial_entities:
  - name: Battery
    type: property
    access_mod: R
    value_type: long
    attributes:
      unit: '%'
    identifier: battery
  - name: Temperature
    type: property
    access_mod: R
    value_type: double
    attributes:
      unit: °C
    identifier: temperature
  - name: Humidity
    type: property
    access_mod: R
    value_type: double
    attributes:
      unit: '%r.h.'
    identifier: humidity
  - name: Reboot
    type: service
    access_mod: W
    value_type: boolean
    attributes:
      enum:
        'false': 'no'
        'true': 'yes'
    identifier: reboot
  - name: Report Interval
    type: property
    access_mod: RW
    value_type: long
    attributes:
      unit: s
    identifier: report_interval
codec:
  id: default
  ref: am102/codec/device-codec.yaml
Device template parameter:
Parameter Required Description metadata Yes lora_device_profile_class Yes Define LoRaWAN device join type and class type definition Yes input Yes Define the JSON format of the uplink content type Yes The value is fixed as object properties Yes key Yes JSON data item name type Yes JSON data type,Options: object, long, double, boolean, string required No Whether is key definitely be reported,Options: true, false entity_mapping No The identifier value mapped to the entity is_device_id No Whether this key value is device id, Options::true, false is_device_name No Whether this key value is device name Options: true, false properties No When the key type is object, the define the next level parameters output No Define the JSON format of the downlink content type Yes The value is fixed as object properties Yes key Yes JSON data item name type Yes JSON data type,Options: object, long, double, boolean, string entity_mapping No The identifier value mapped to the entity value No The fixed value of this key properties No When the key type is object, the define the next level parameters initial_entities Yes Define the format of device entities identifier Yes Entity unique identifier name Yes Entity name value_type Yes Entity data type,Options: object, long, double, boolean, string type Yes Entity type,Options: property, service, event access_mod Yes Type of access,Options: R,W,RW attributes No Entity attributes unit No Unit fraction_digits No Decimal places, double type use only max No Maximum value, long or double type use only min No Minimum value, long or double type use only max_length No Maximum length, string type use only min_length No Minimum length, string type use only enum No Enumeration values,the value is a list which the format is key: valueformat No When the value is HEX, the content is HEX characters; when the value isIMAGE: BASE64orIMAGE: URL, the content is picturedefault_value No default value optional No Options: true, false children No Children entity list codec Yes id Yes The value is fixed as default ref Yes device-codec.yaml file path -
If the third-party devices require encoding/decoding, a codec folder must be created within the corresponding product model's directory to store the relevant encoding/decoding files. Additionally, a device-codec.yaml file must be created to declare the configuration for the device's encoding/decoding operations, supporting chained invocation. Example:
codecs:
  - id: default
    decoder:
      chain:
        - script: am102/codec/decoder.js  #file path
          entry: Decode    #decoder function name
          args:            #decoder function in parameter
            - id: fPort
            - id: bytes
              is_payload: true  #Whether this parameter is payload
    encoder:
      chain:
        - script: am102/codec/encoder.js  #file path
          entry: Encode    #encoder function name
          args:            #encoder function in parameter
            - id: fPort
            - id: obj
is_payload: true #Whether this parameter is payload -
After completing the custom repository files according to the above steps and saving it, package it into a ZIP file and upload it locally to Beaver IoT.