Access the Gateway
The device provides a web GUI for configuration. This chapter describes how to access the device's web GUI for the first time.
Tutorial Video
Prerequisites
- A computer
- Optional: a network cable, a network router or switch with DHCP server enabled
Steps
The device can be accessed via wireless (Wi-Fi) or wired (Ethernet Port).
- Select one of the following methods to connect to the gateway and access the web
GUI.
Method Step Access via Wi-Fi - Enable the Wireless Network Connection on your
computer, search for the corresponding for Wi-Fi
SSID, and connect to it. Default Wi-Fi
credentials:
SSID: Gateway_XXXXXX (last 6 digits of the Wi-Fi MAC address)
Password: iotpassword - Open a web browser (Chrome is recommended) and type in https://192.168.2.1 to access the web GUI.
Access via a LAN Port - Connect the ETH2 port of the device to your computer using a network cable.
- Configure the computer's IP address either manually
or automatically. Take Windows 10 as an example:
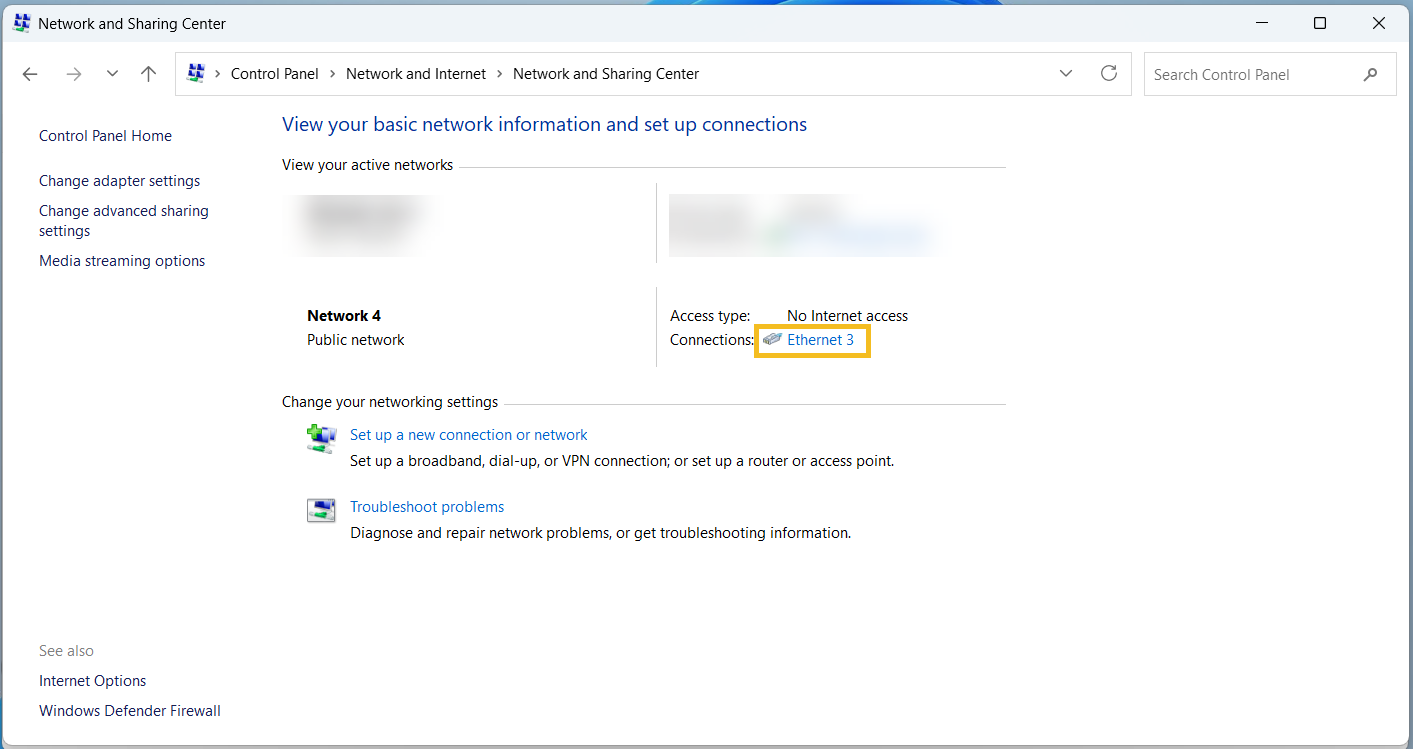
- Navigate to
Control Panel > Network and Internet > Network
and Sharing Center and select “Ethernet” (It
may have a different name).
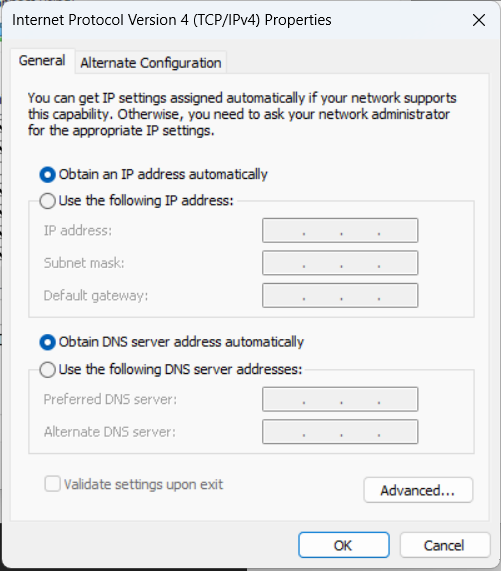
- Navigate to Properties > Internet Protocol
Version 4 (TCP/IPv4) Properties, then select
either Obtain an IP address automatically
or Use the following IP address to manually
assign a static IP address within the same subnet
as the gateway.
- Navigate to
Control Panel > Network and Internet > Network
and Sharing Center and select “Ethernet” (It
may have a different name).
- Open a web browser (Chrome is recommended) and type in https://192.168.1.1 to access the web GUI.
Access via a WAN Port - Connect the ETH1 port of the device and your computer to the same network router or switch with DHCP server enabled.
- Configure the computer's IP address automatically.
Take Windows 10 as an example:
- Navigate to
Control Panel > Network and Internet > Network
and Sharing Center and select “Ethernet” (It
may have a different name).
- Navigate to Properties > Internet Protocol
Version 4 (TCP/IPv4) Properties, then select
either Obtain an IP address automatically.
- Navigate to
Control Panel > Network and Internet > Network
and Sharing Center and select “Ethernet” (It
may have a different name).
- Check the device IP address received from the
screen.
- Press any screen button to activate the device screen.
- Press
 button to
navigate to the Interface Status Menu.
button to
navigate to the Interface Status Menu. - Press
 button to
navigate to the Ethernet Status page to obtain the
ETH1 IP address (in the format of
xx.xx.xx.xx).
button to
navigate to the Ethernet Status page to obtain the
ETH1 IP address (in the format of
xx.xx.xx.xx).
- Open a web browser (Chrome is recommended) and type in https://xx.xx.xx.xx to access the web GUI.
- Enable the Wireless Network Connection on your
computer, search for the corresponding for Wi-Fi
SSID, and connect to it. Default Wi-Fi
credentials:
- Log in to the web GUI using the default
credentials:
Username: admin
Password: password - After logging the web GUI for the first time,
it is necessary to change the default
password.
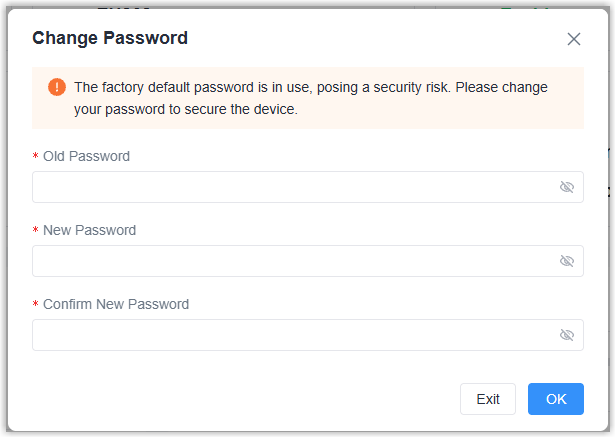
- Enter the Old Password.
- Enter a New Password. The password must contain at least one letter and one number, and be 5 to 31 characters long.
- Enter Confirm New Password.
- Click OK.
- Log in to the web GUI using the new credentials.