Add Devices
This topic describes how to add devices to Milesight Development Platform via the Milesight ToolBox App.
Prerequisites
Account
- The target enterprise and data center are selected. Devices are isolated between different enterprises; the device list and adding operations correspond only to the currently selected enterprise.
- The device quantity of the enterprise has not reached the upper limit.
- Confirm with your enterprise administrator whether the current account role permits access to the device addition feature.
Device
- The device is a Milesight product compatible with Milesight Development Platform and Milesight ToolBox App cloud features. For more details, see Supported Devices.
- To add a device via NFC or Bluetooth, the device supports the corresponding configuration method and is powered on.
- To add a device by scanning the label, the device label contains readable model and EUI information.
Step
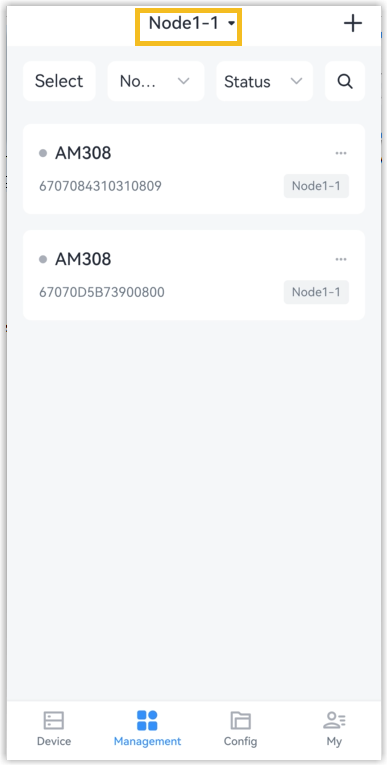
- Navigate to Management page.
- Select the target group from the drop-down list in the top area.Note: Groups are created and managed on Milesight Development Platform. The App only displays and uses them.
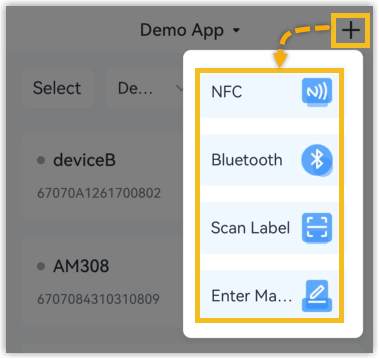
- Click + in the top right corner and select an adding method in the pop-up
menu.
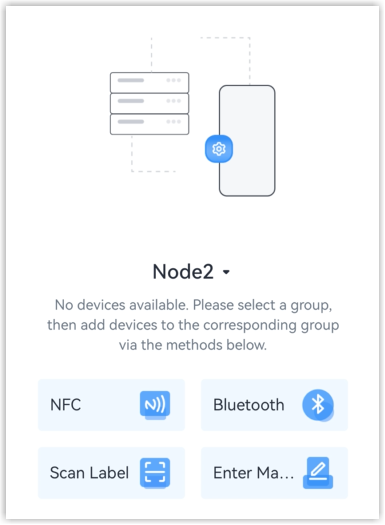
 When the current group has no devices, the App also provides NFC, Bluetooth, Scan Label and Enter Manually shortcut buttons on the page.
- Add the device according to the selected method.
Method Step NFC - Select NFC. Put the NFC detection area of the phone close to the NFC antenna of the device.
- Confirm the recognition result, fill in the device information.
Bluetooth - Select Bluetooth, the App automatically scans the devices around.
- Select the target device in the list.
- Enter the device password and click Confirm to connect.
- Confirm the recognition result, fill in the device information.
Scan Label - Select Scan Label to enter the camera scanning page, align the device label with the scanning frame at the center of the page.
- The App recognizes the EUI, model name and other information on the label. You can click Album to recognize the information from a local image, or turn on Flashlight to provide extra lighting.
- Confirm the recognition result, fill in the device information.
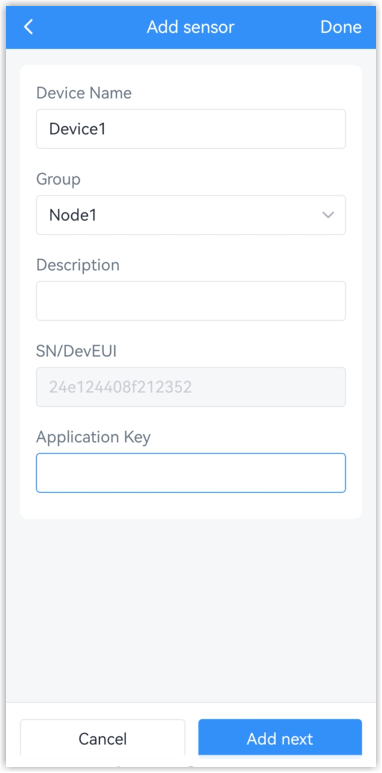
Note: Scan Label only supports text recognition and does not support QR code recognition. If the recognition fails, the App will prompt you to select the image again.Manual Input - Select Enter Manually to enter the Add Sensor page.
- Fill in the device information. Device Name, Group
and SN/DevEUI are required, while Description and
Application Key are optional. Leaving the
Application Key blank means using the default
value.Tip: After saving, SN/DevEUI cannot be modified.
- Click Done to save the device, or click Add next to save the
current device and continue adding the next one.
After the device is added successfully, it is uploaded to the corresponding enterprise and group on Milesight Development Platform, and displayed in the device list.