Installation
EM300 Device Installation
- Installation Location
- Keep the device away from metal objects and obstacles.
- Wall Mounting
Step 1: Attach EM300 device to the wall and mark the two holes on the wall. The connecting line of two holes must be a horizontal line.
Step 2: Drill the holes according to the marks and screw the wall plugs into the wall.
Step 3: Mount the EM300 to the wall via mounting screws.
Step 4: Cover the mounting screws with screw caps.
Besides, it can also be mounted to the wall via a 3M tape.
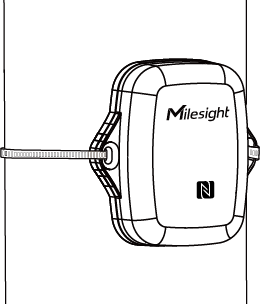
- Pole Mounting
- Pass the cable tie through the mounting holes of the device and wrap the
device to the pole.
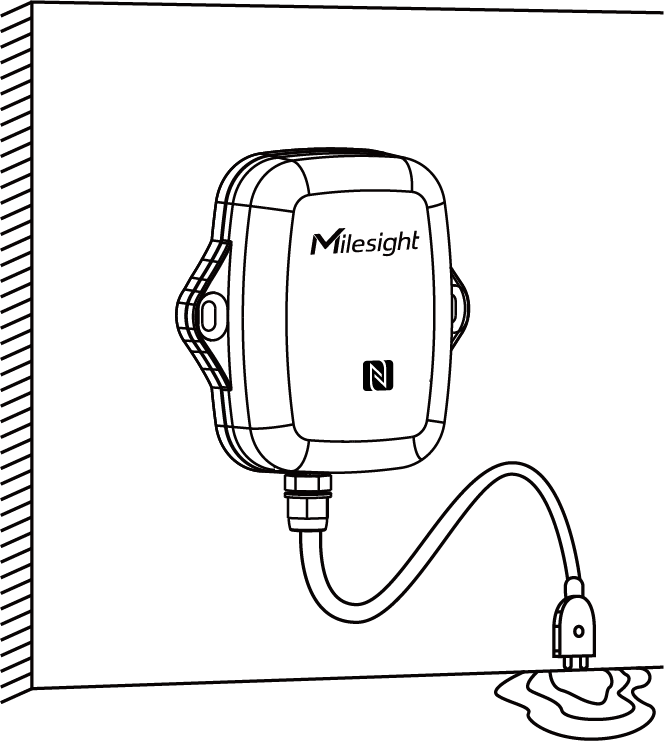
Detection Probe Installation
EM300-SLD leak detection probe has two metal pins to detect the water leakage. When the water touches both metal pins at the same time (soaking water length > 2.4 cm), the device will trigger the leakage alarms.The small probe is suitable for below sites:
- Narrow spaces or corner areas that only accommodate small detection probes;
- Drain pans, floor drains, pits, etc;
- Locations where water will reach first or accumulate easily when a leak occurs.
Note: Do not
touch the metal pins to metal objects to avoid error alarm report.