6.1.2 ANPR Result Search
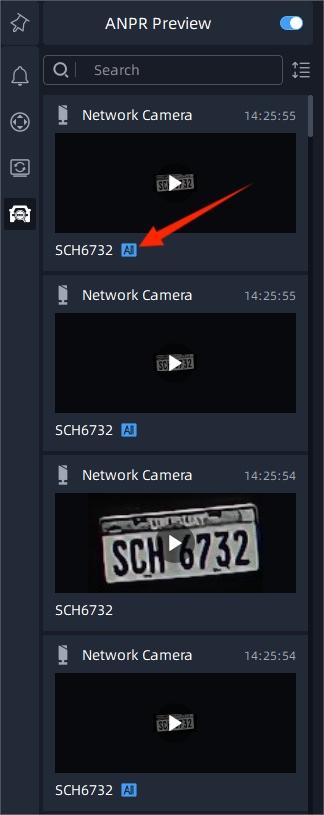
The real-time detection results will be displayed on the center of Smart Search page, including License Plate, Plate Type, Capture Time, live screenshot, camera name and IP.
How to search the license plate recognition results?
Step1: Select Time, License Plate, Group Name, Plate Type, Analytics Mode,
Vehicle Features, etc., and then check the corresponding camera. The related license
plate information will be displayed as below by clicking ![]() button;
button;
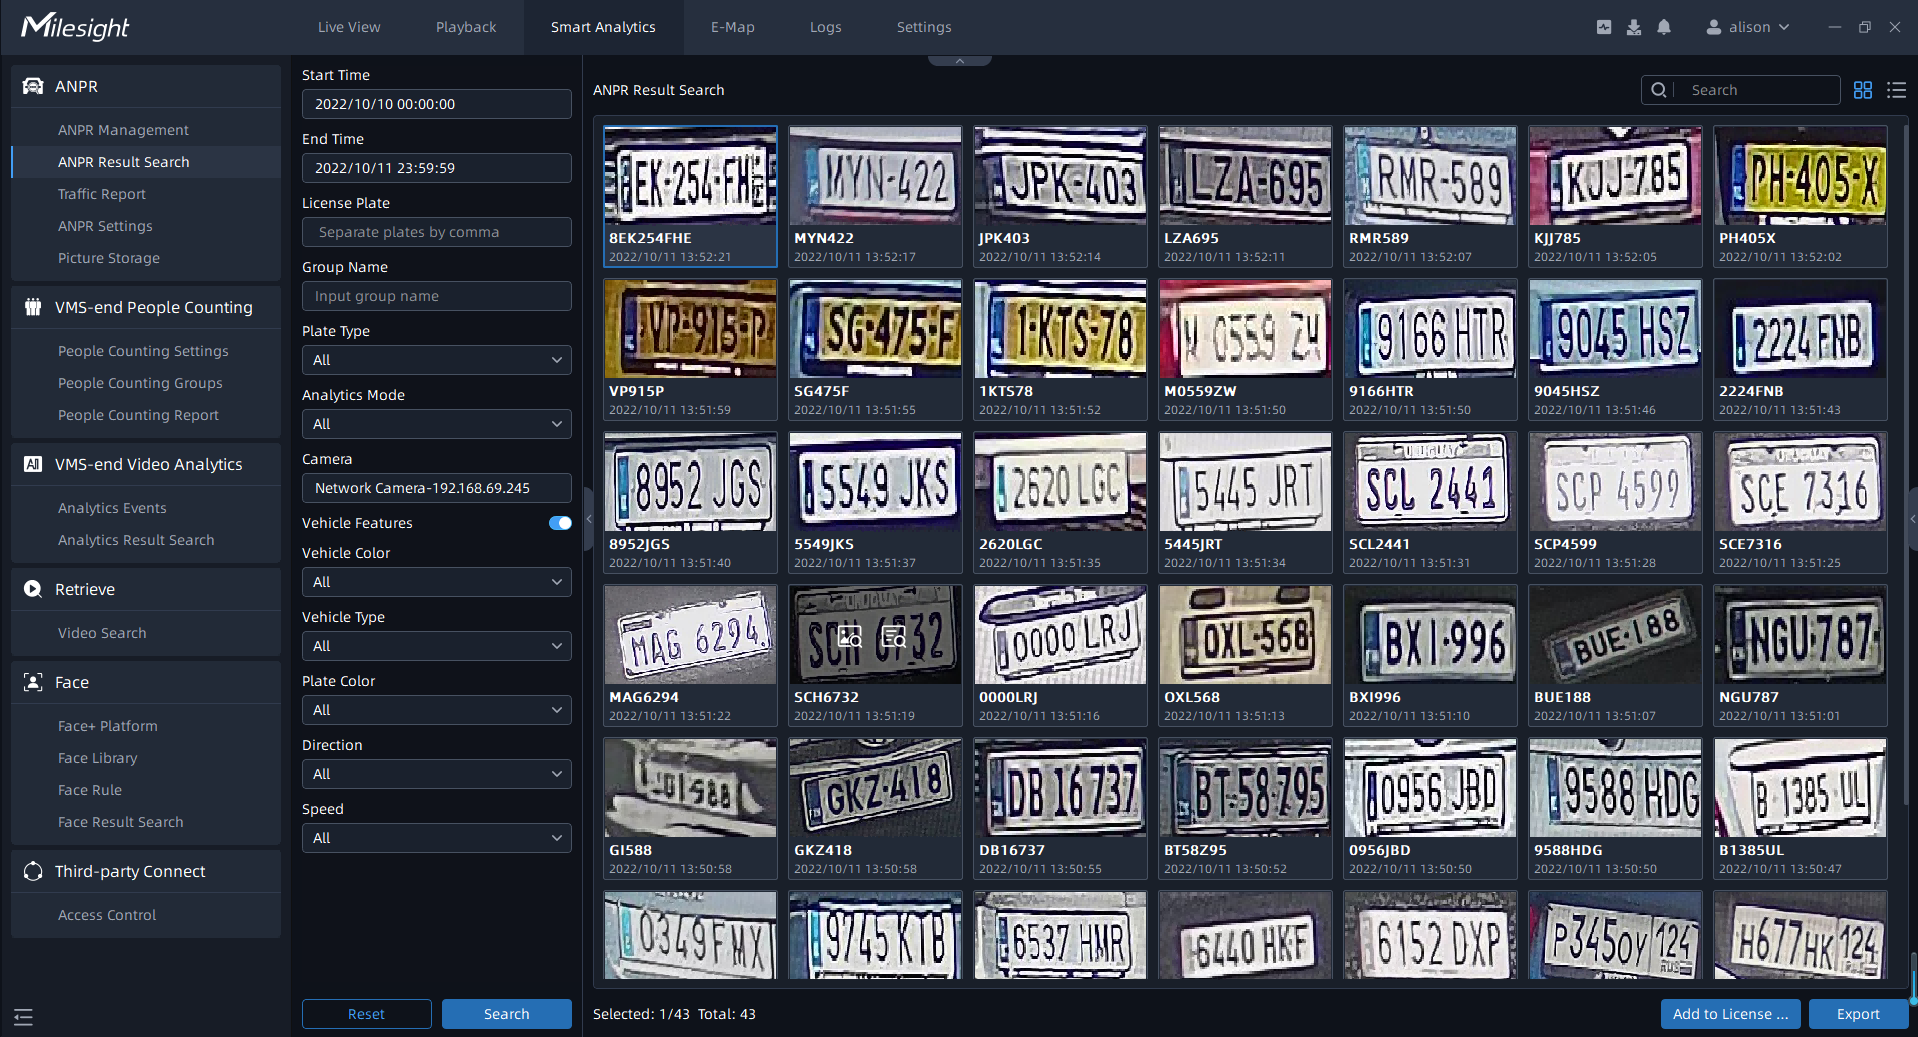
Click ![]() button to show Thumbnail Mode as below:
button to show Thumbnail Mode as below:
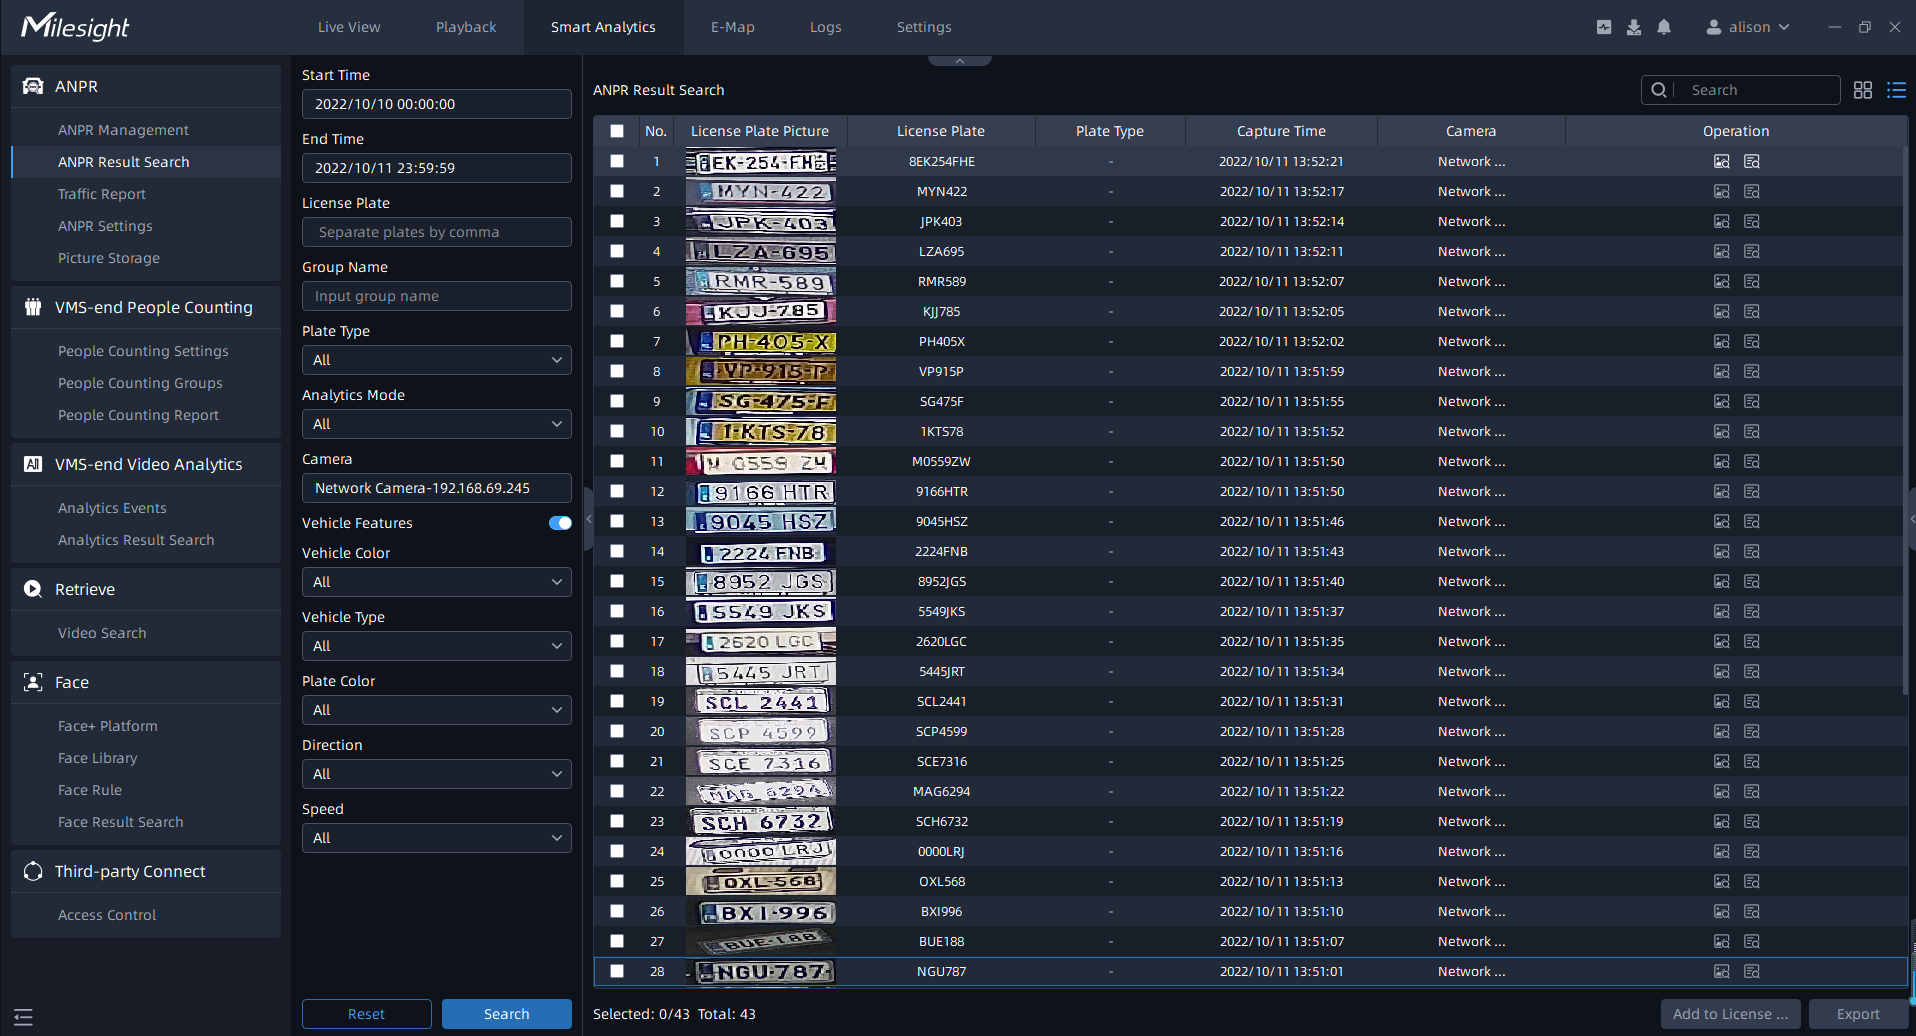
Click ![]() button to switch to List Mode as below:
button to switch to List Mode as below:
- The
 icon in the left bottom of thumbnail photo
means the license plate is in the Black List, while the
icon in the left bottom of thumbnail photo
means the license plate is in the Black List, while the  icon means the license plate is in the White List.
 - Both the recognition results of Camera Analytics and VMS analytics can be searched
and managed in this interface at the same time. The
 icon
means that the recognition result is from VMS analytics.
icon
means that the recognition result is from VMS analytics.

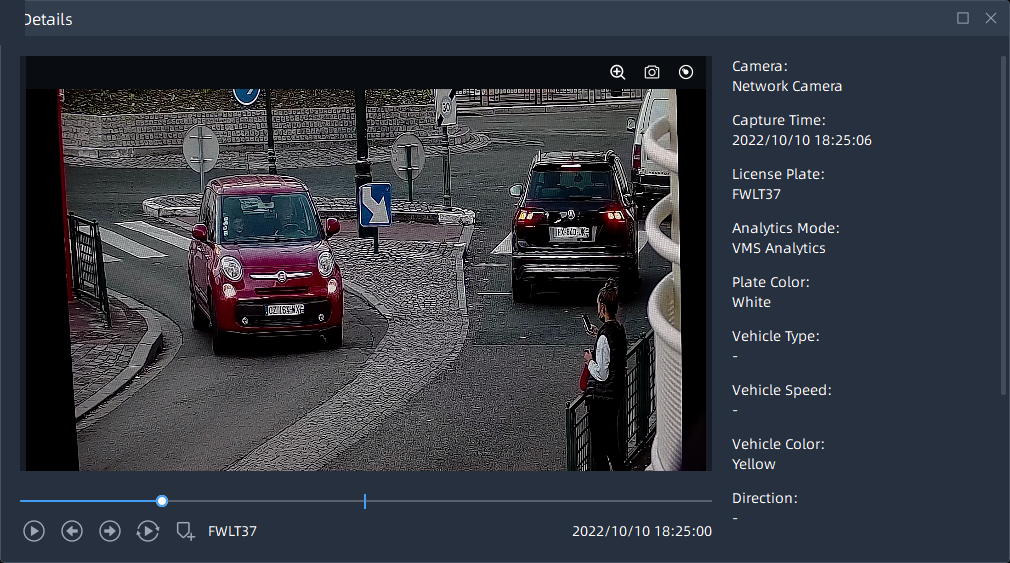
Step2: Click the ![]() icon in the upper right corner of the result, it will display the
entire snapshot including the detection frame as shown below:
icon in the upper right corner of the result, it will display the
entire snapshot including the detection frame as shown below:

And click the ![]() icon in the upper right corner of the result,
you can check the recording of the event and the detailed information of the detection
result as shown below. You can also add tags for the video or play the video in the
playback interface with one click.
icon in the upper right corner of the result,
you can check the recording of the event and the detailed information of the detection
result as shown below. You can also add tags for the video or play the video in the
playback interface with one click.
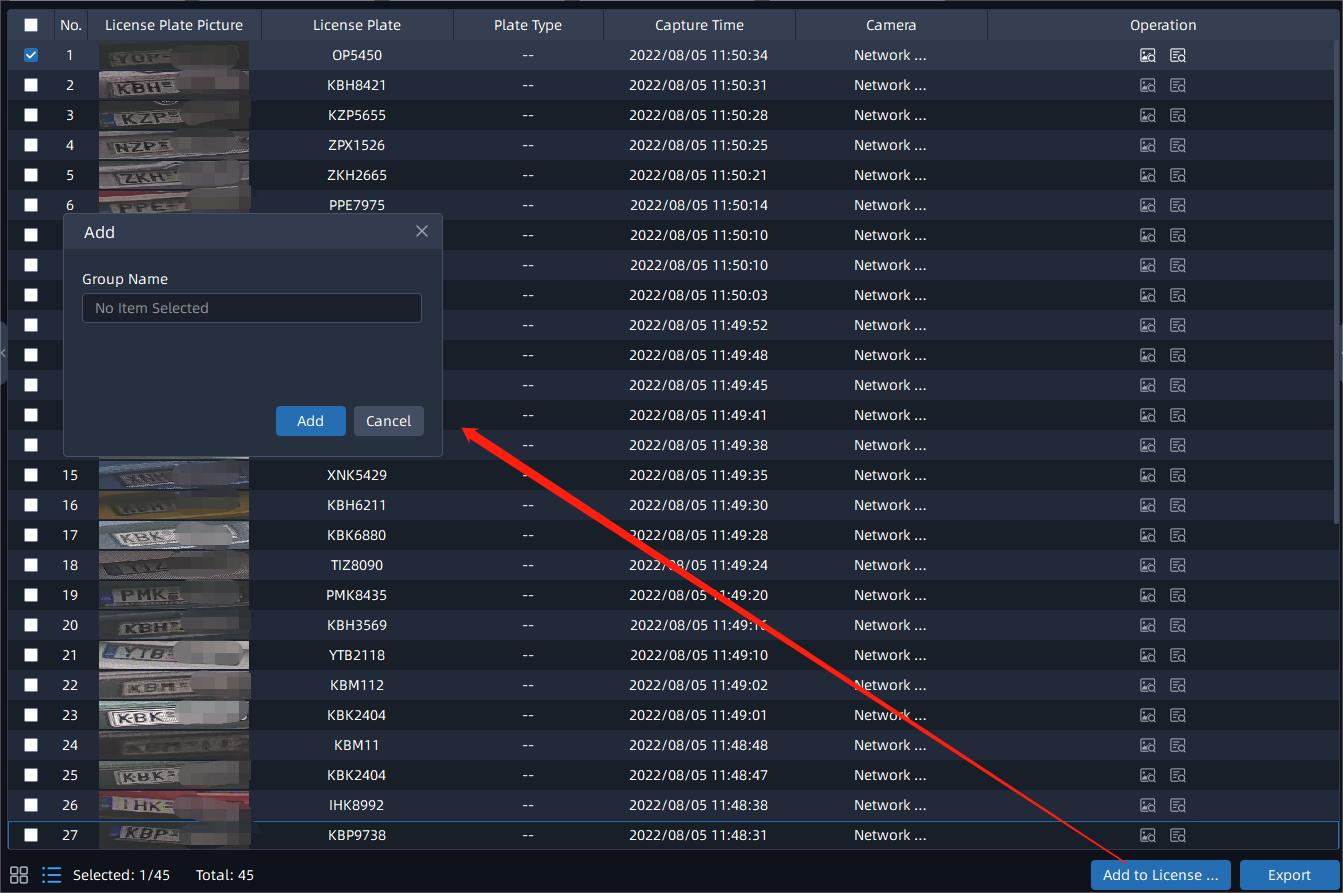
Step3: Select the detection result and click ![]() button to add the license plate to the license
plate group.
button to add the license plate to the license
plate group.
Step4: Select the detection result and click ![]() button to export the videos to the destination folder. After setting
the export file destination, type and format, click
button to export the videos to the destination folder. After setting
the export file destination, type and format, click ![]() button to start the file backup. You can click
button to start the file backup. You can click ![]() button to check task export situation as below. For more details about
Client Files Management, you can see the table of User Interface Introduction.
button to check task export situation as below. For more details about
Client Files Management, you can see the table of User Interface Introduction.
