Communication
WLAN
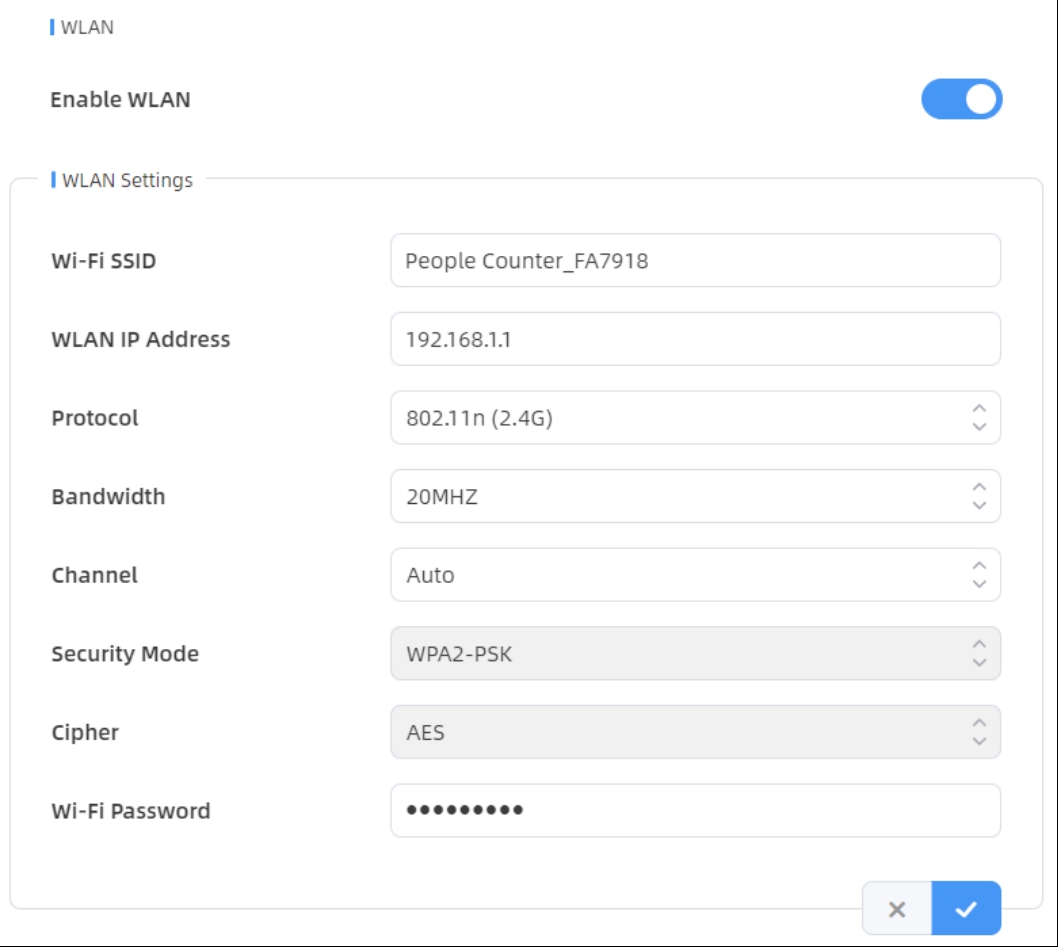
The device supports wlan feature to work as AP mode to configure device and it can not connect to other access point.
| Parameters | Description |
|---|---|
| Enable WLAN | Enable or disable Wi-Fi feature. If disabled, users can use button to enable it. |
| Wi-Fi SSID | The unique name for this device Wi-Fi access point, defined as People Counter_xxxxxx (can be found on the device label). |
| WLAN IP Address | Configure WLAN IP address for web access, the default IP address is 192.168.1.1. |
| Protocol | 802.11g (2.4 GHz) and 802.11n (2.4 GHz) are optional. |
| Bandwidth | 20 MHz or 40 MHz are optional. |
| Channel | Select the wireless channel. Auto, 1,...11 are optional. |
| Security Mode | Fixed is WPA2-PSK. |
| Cipher | Fixed is AES. |
| Wi-Fi Password | Customize the password, 8-63 characters, including numbers, lowercase letters, uppercase letters and special characters. |
VPN
| Parameters | Description |
|---|---|
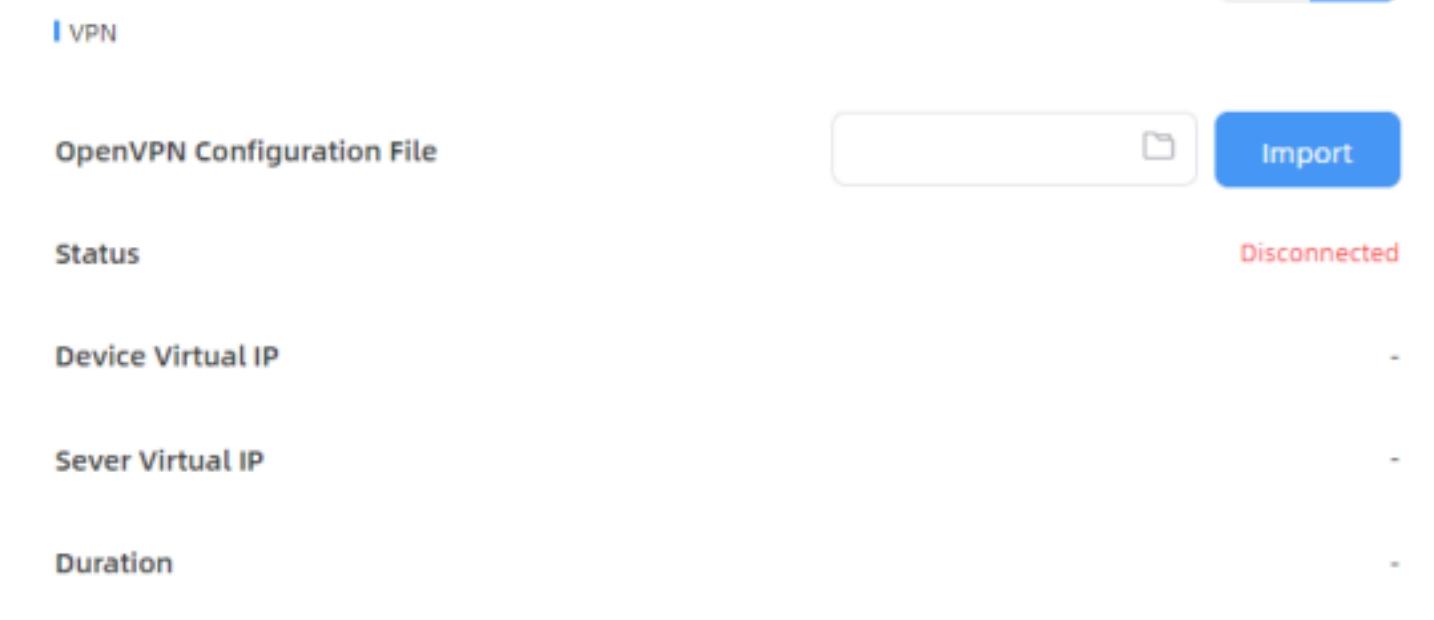
| OpenVPN Configuration File | Import the ".conf" or ".ovpn" format OpenVPN client configuration profile. |
| Status | Show the connection status of the device and the VPN server: Disconnected, Connecting or Connected. |
| Device Virtual IP | Show the virtual IP of device. |
| Sever Virtual IP | Show the virtual IP of VPN Server. |
| Duration | Show the connection duration. |
Cellular
| Parameters | Description | |
|---|---|---|
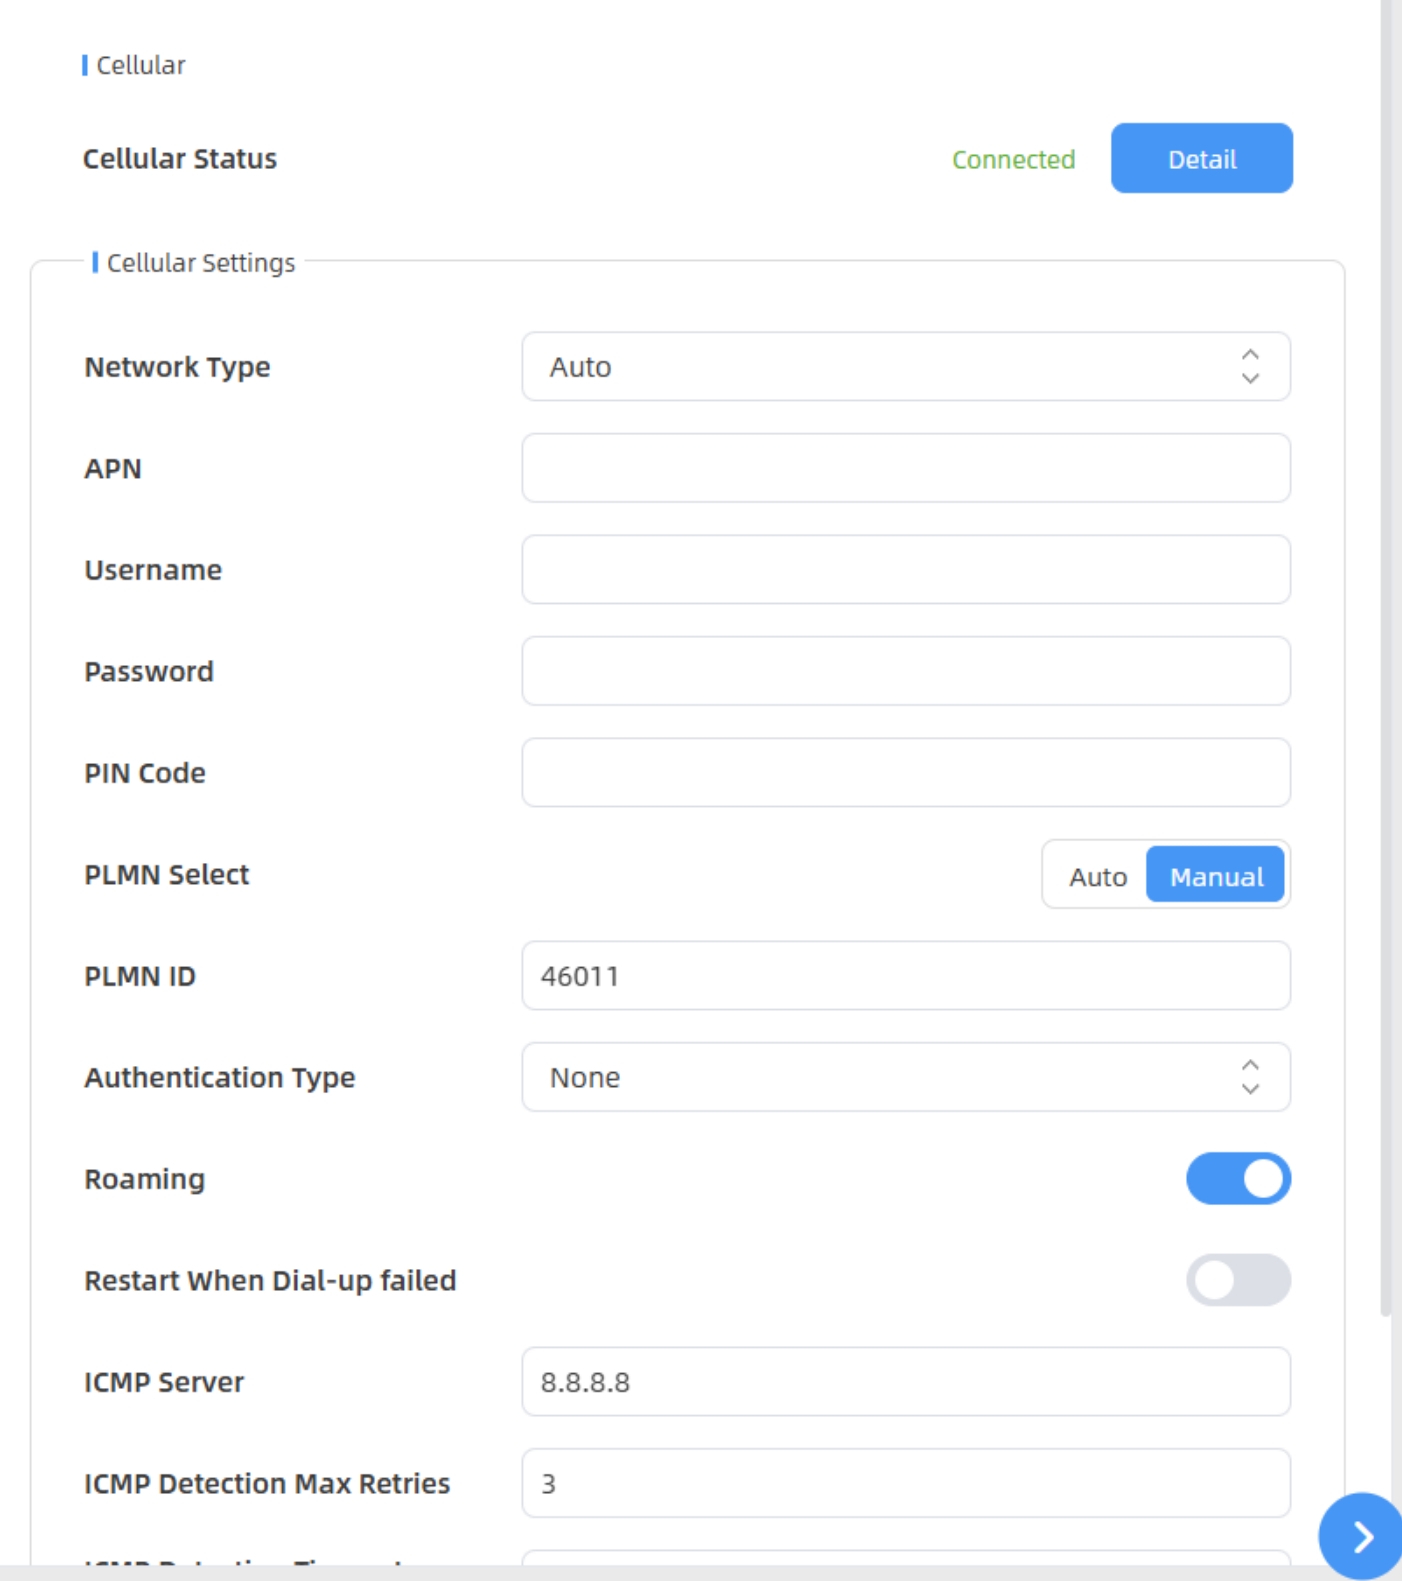
| Cellular | Cellular Status | Display the connection status of the
network, including “connect” and “disconnect”. You can also click “Detail” button to view the cellular status. |
| Network Type | Select from “Auto”, “4G Only”, and
“3G Only”. Auto: connect to the network with the strongest signal automatically. 4G Only/3G Only: connect to 4G/3G network only. |
|
| Cellular Settings | APN | Enter the Access Point Name for cellular dial-up connection provided by local ISP. The max length is 31 characters. |
| Username | Enter the username for cellular dial-up connection provided by local ISP. The max length is 31 characters. | |
| Password | Enter the password for cellular dial-up connection provided by local ISP. The max length is 31 characters. | |
| PIN Code | Enter a 4-8 characters PIN code to unlock the SIM. | |
| PLMN Select | Select the way to configure the PLMN. | |
| PLMN ID | Manually fill in the PLMN ID. | |
| Authentication Type | Select the Authentication Type. None, PAP, CHAP, PAP and CHAP are optional. | |
| Roaming | Click to enable the Roaming. | |
| Restart When Dial-up Failed | Enable automatic device restart when multiple dial-up failed. | |
| ICMP Server | Configure the IP address of the ICMP detection server. | |
| ICMP Detection Max Retries | Set the maximum number of retries when ICMP detection failed. | |
| ICMP Detection Timeout | Configure ICMP detection timeout. | |
| ICMP Detection Interval | Configure ICMP detection interval. | |
| Parameters | Description | |
|---|---|---|
| Cellular Status | Refresh | Click this button to manually refresh the above status. |
| Modem Status | Show the corresponding detection
status of the module and SIM card.
|
|
| Model | Show the model name of the cellular module | |
| Version | Show the version of the cellular module. | |
| Signal Level | Show the current signal strength of the network. | |
| Register Status | Show the connection status of the network, including “connect” and “disconnect”. | |
| IMEI | Show the IMEI of the module. | |
| IMSI | Show IMSI of the SIM card. | |
| ICCID | Show ICCID of the SIM card. | |
| ISP | Show the network provider which the
SIM card registers on. Note: It will display
"-" when the SIM card is not inserted or not
recognized. |
|
| Network Type | Show the connected network type,
such as LTE and 3G. Note: It will display "-"
when the device is not connected to network. |
|
| PLMN ID | Show the current PLMNID, including MCC, MNC, LAC, and Cell ID. | |
| LAC | Show the location code of the SIM
card. Note: It will display "-" when the
SIM card is not inserted or not recognized. |
|
| Cell ID | Show the Cell ID of the SIM card
location. Note: It will display "-" when
the SIM card is not inserted or not recognized. |
|
| Network Status | Show the Network Status, IP Address, Netmask, Gateway and DNS Address of the current network. If the SIM card is not inserted or not recognized, it will display 0.0.0.0. | |
| IP Address | ||
| Netmask | ||
| Gateway | ||
| DNS | ||
| Connection Duration | Show the cellular dial-up connection duration. | |
Data Push Settings
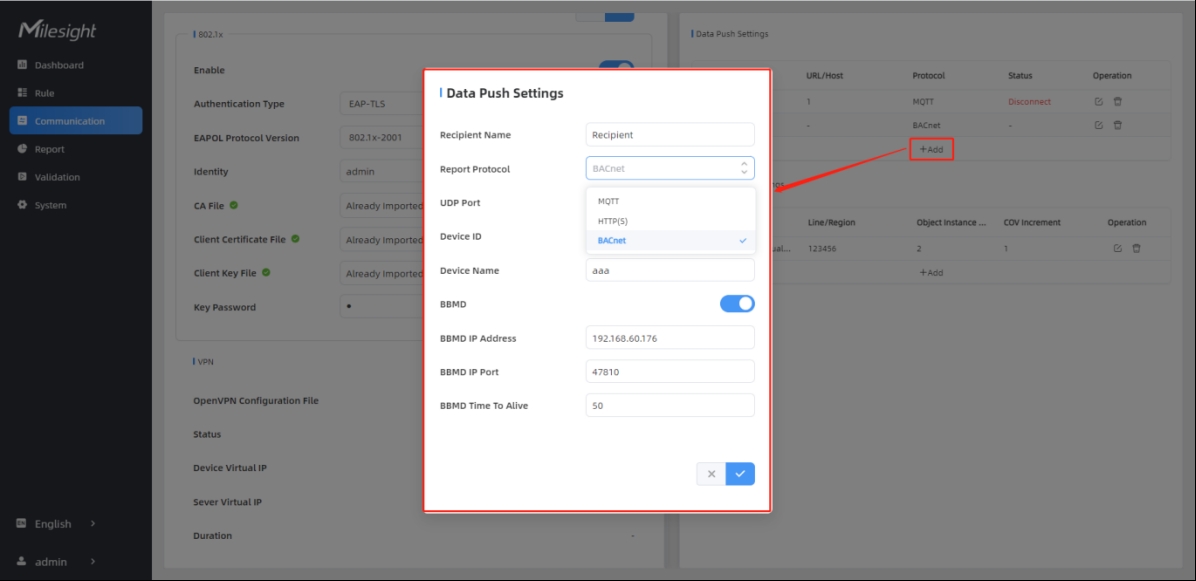
The device supports adding data recipients (supports HTTP(s)/MQTT(s)). The device will proactively push data to the receivers according to the configured reporting scheme.
Besides, users can get the people counting data or configure the device via CGI.

| Parameters | Description |
|---|---|
| Recipient Name | Show the recipient name. |
| URL/Host | Show the URL/host of HTTP(s) server or MQTT broker. |
| Protocol | Show the report protocol. |
| Status | Show connection status from device to HTTP(s) server or MQTT broker. |
| Operation | Click to edit the information or delete the recipient. |
- Up to 8 receivers can be added.
- When working mode is the Node mode, the device will not support Data Push Settings.
| Parameters | Description |
|---|---|
| Recipient Name | Customize the recipient name. |
| Report Protocol | HTTP(s) or MQTT is optional. |
| HTTP(s) | |
| URL | The device will post the people counting data in json format to this URL. |
| Connection Test | Click Test to send test message to URL to check connectivity. |
| User | The username used for authentication. |
| Password | The password used for authentication. |
| MQTT | |
| Host | MQTT broker address to receive data. |
| Port | MQTT broker port to receive data. |
| Client ID | Client ID is the unique identity of
the client to the server. It must be unique when all clients are connected to the same server, and it is the key to handle messages at QoS 1 and 2. |
| Username | The username used for connecting to the MQTT broker. |
| Password | The password used for connecting to the MQTT broker. |
| Topic | Topic name used for
publishing. These strings will be replaced with device info when subscribing to a topic: $devsn:Device SN $prdmd:Product Model $devid:Customized Device ID $siteid:Customized Site ID  Note: Please
replace the specific information when subscribing the topics to
test if works. |
| QoS | QoS0, QoS1, QoS2 are optional. |
| TLS | Enable the TLS encryption in MQTT communication. |
| Certificate Type | CA Signed Server or Self Signed is
optional. CA signed server certificate: verifying with the certificate issued by Certificate Authority (CA) that is pre-loaded on the device. Self signed certificates: upload the custom CA certificates, client certificates and secret key for verification. |
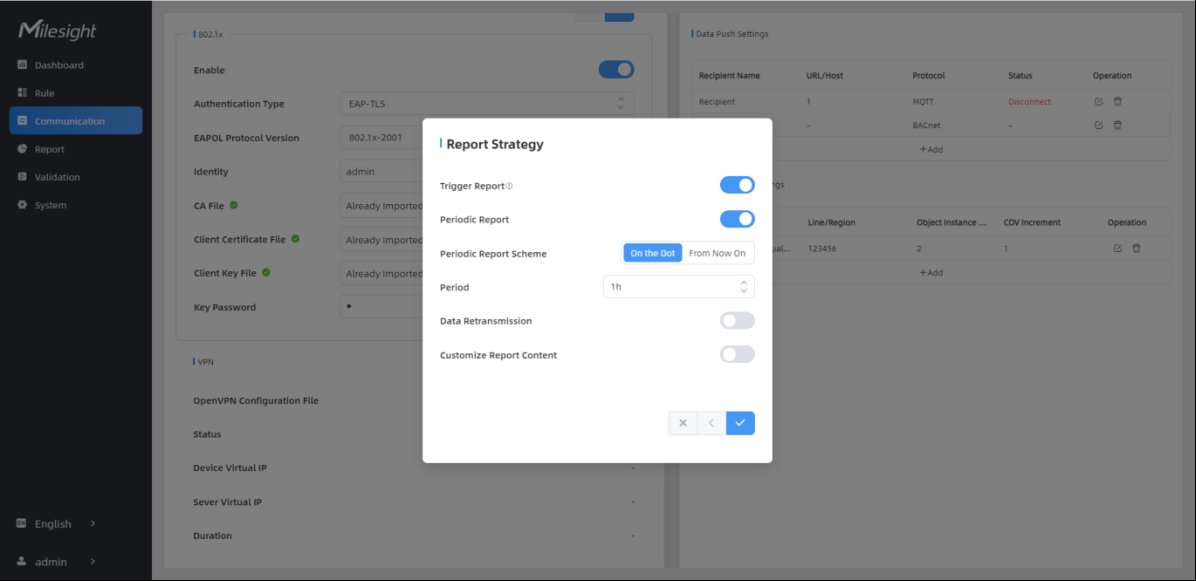
| Report Strategy | |
| Trigger Report | Report immediately when there is a change of the line crossing people counting number or region people counting number. |
| Counting Report Control | Enable this option if you don't want to receive frequent trigger reports from line cross counting and region people counting when there is too much foot traffic. You will receive the cumulative data after the cooldown period. |
| Cooldown Period | During the cooldown period, any triggers will not be reported. Once the cooldown period ends, reporting will resume. |
| Periodic Report | Select the periodic
report of “On the Dot” or “From Now On”. On the Dot: The device will report at the top of each hour. For example, When the interval is set to 1 hour, it will report at 0:00, 1:00, 2:00 and so on; when the interval is set to 10 minutes, it will report at 0:10, 0:20, 0:30, and so on. From Now On: Begin reporting from this moment onwards and regularly report based on the interval cycle. |
| Periodic Report Scheme | |
| Period | |
| Data Retransmission | Enable to resend stored data packets from the disconnected period when the device's network connection is restored. Every recipient supports to receive 50,000 pieces of data at most. |
| Customize Report Content | Customizable selection of content to
be reported, avoiding data redundancy.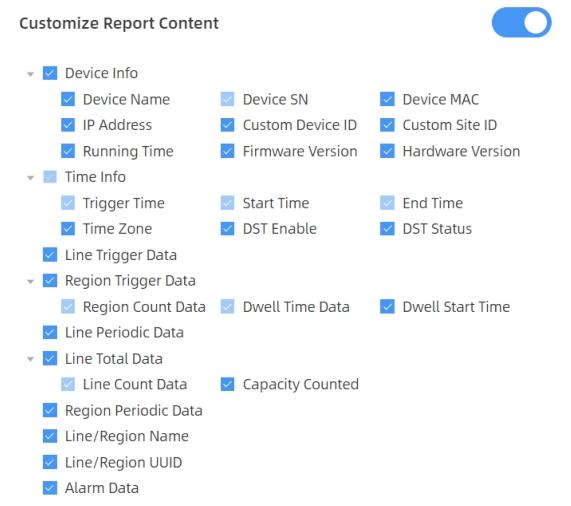 Note: When the device is
in Master mode, the Node Device Info will appear.
Including SN, MAC, Software, Product Model, IP, and Connection
Status. |
MQTT API
The device provides MQTT API to support to receive downlink commands from MQTT broker to achieve the configuration. About the commands please refer to MQTT downlink command.
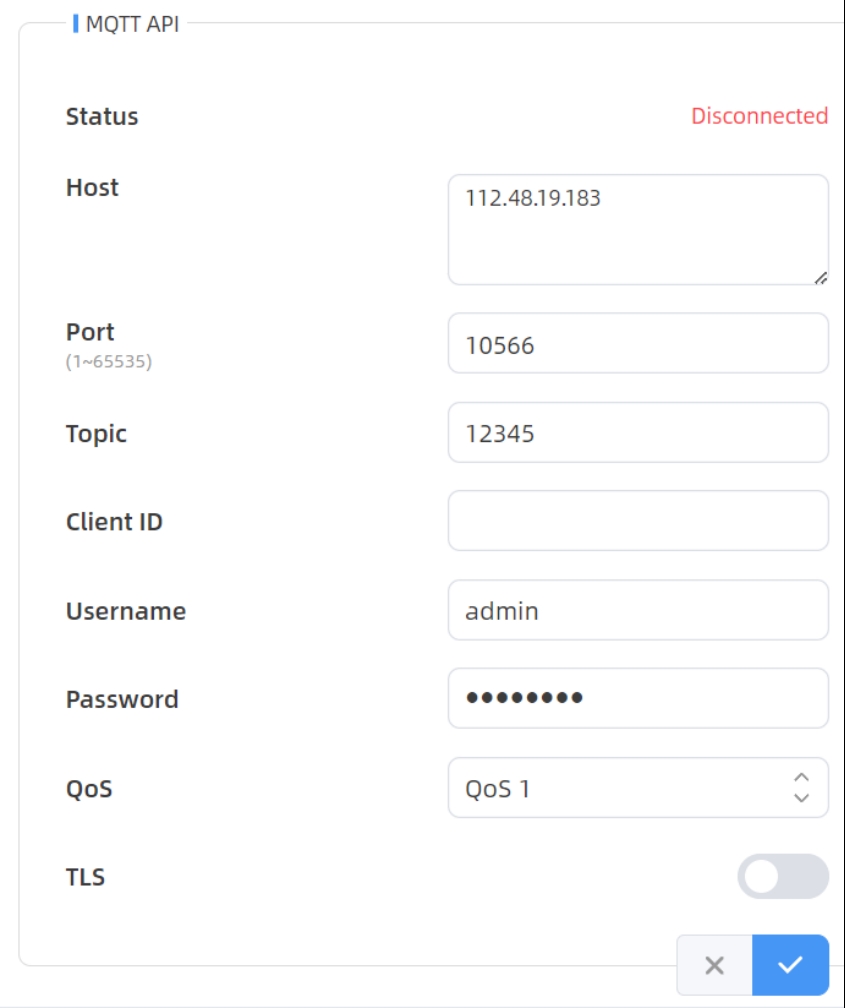
| Parameters | Description |
|---|---|
| Status | Show connection status between device and MQTT broker. |
| Host | MQTT address to receive data. |
| Port | MQTT port to receive data. |
| Topic | Topic name used for publishing. |
| Client ID | Client ID is the unique identity of
the client to the server. It must be unique when all clients are connected to the same server, and it is the key to handle messages at QoS 1 and 2. |
| Username | The username used for connecting to the MQTT. |
| Password | The password used for connecting to the MQTT. |
| QoS | QoS0, QoS1, QoS2 are optional. |
| TLS | Enable the TLS encryption in MQTT communication. |
| Certificate Type | CA Signed Server or Self Signed is
optional. CA signed server: verifying with the certificate issued by Certificate Authority (CA) that is pre-loaded on the device. Self signed: upload the custom CA certificates, client certificates and secret key for verification. |