Installation Step
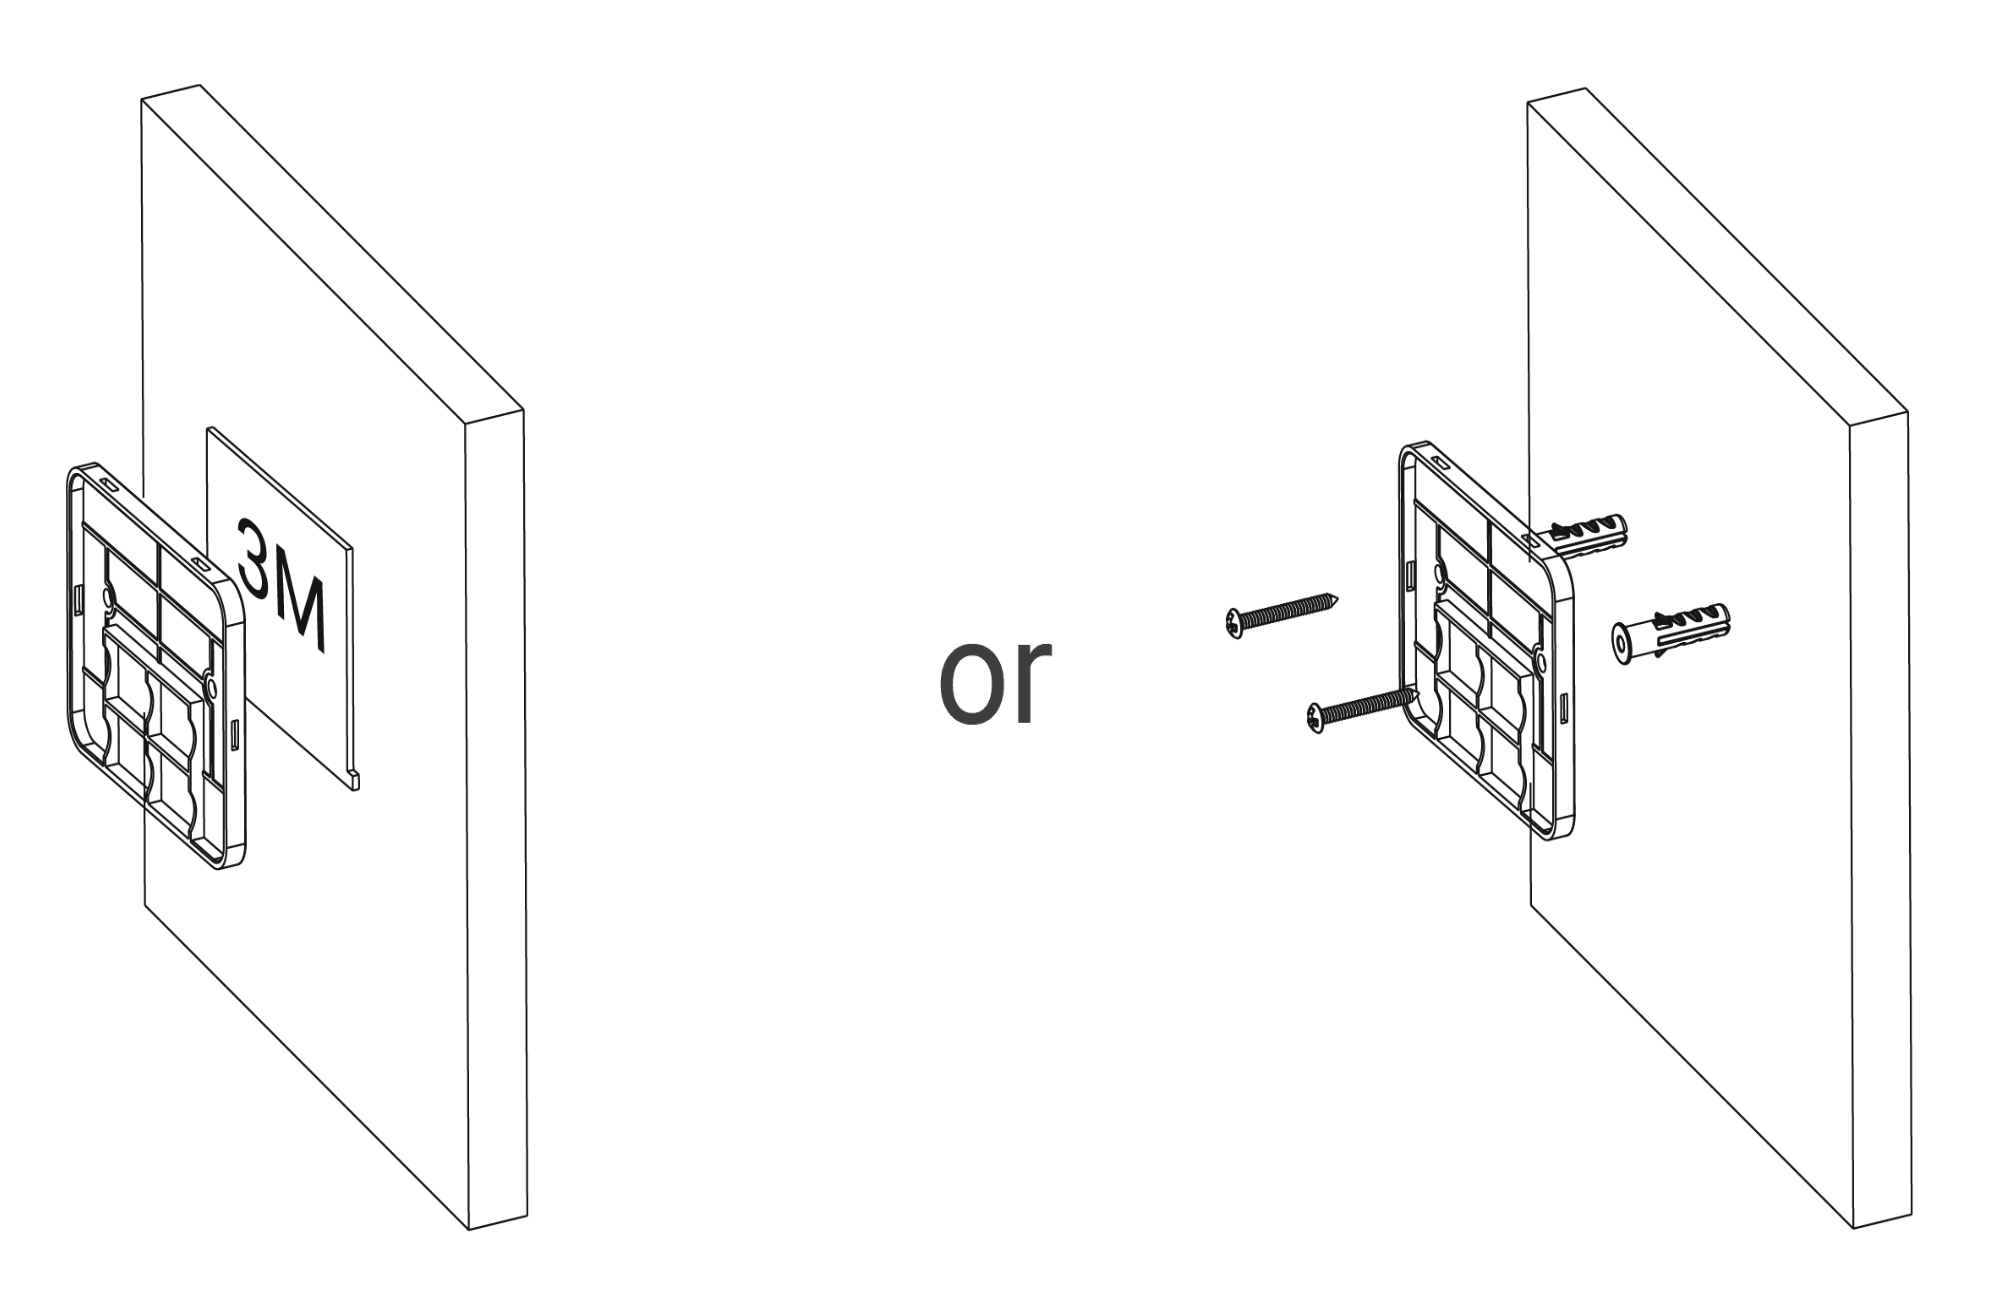
Step 1: Remove the back cover of the node device, determine the installation
position of the node device at a height of 0.7~1.2 meters above the ground, then use 3M
tape or the mounting kits to attach it to a wall or other surface.
Step 2: Adjust node device's DIP. The recommended detection range between node device and master device is 1.2~3m. If the range is 2 meters or less, set the DIP switch on the node device to the "Short" position; if the range exceeds 2 meters, set it to the "Long" position.
Step 3: Press the node device onto the back cover.

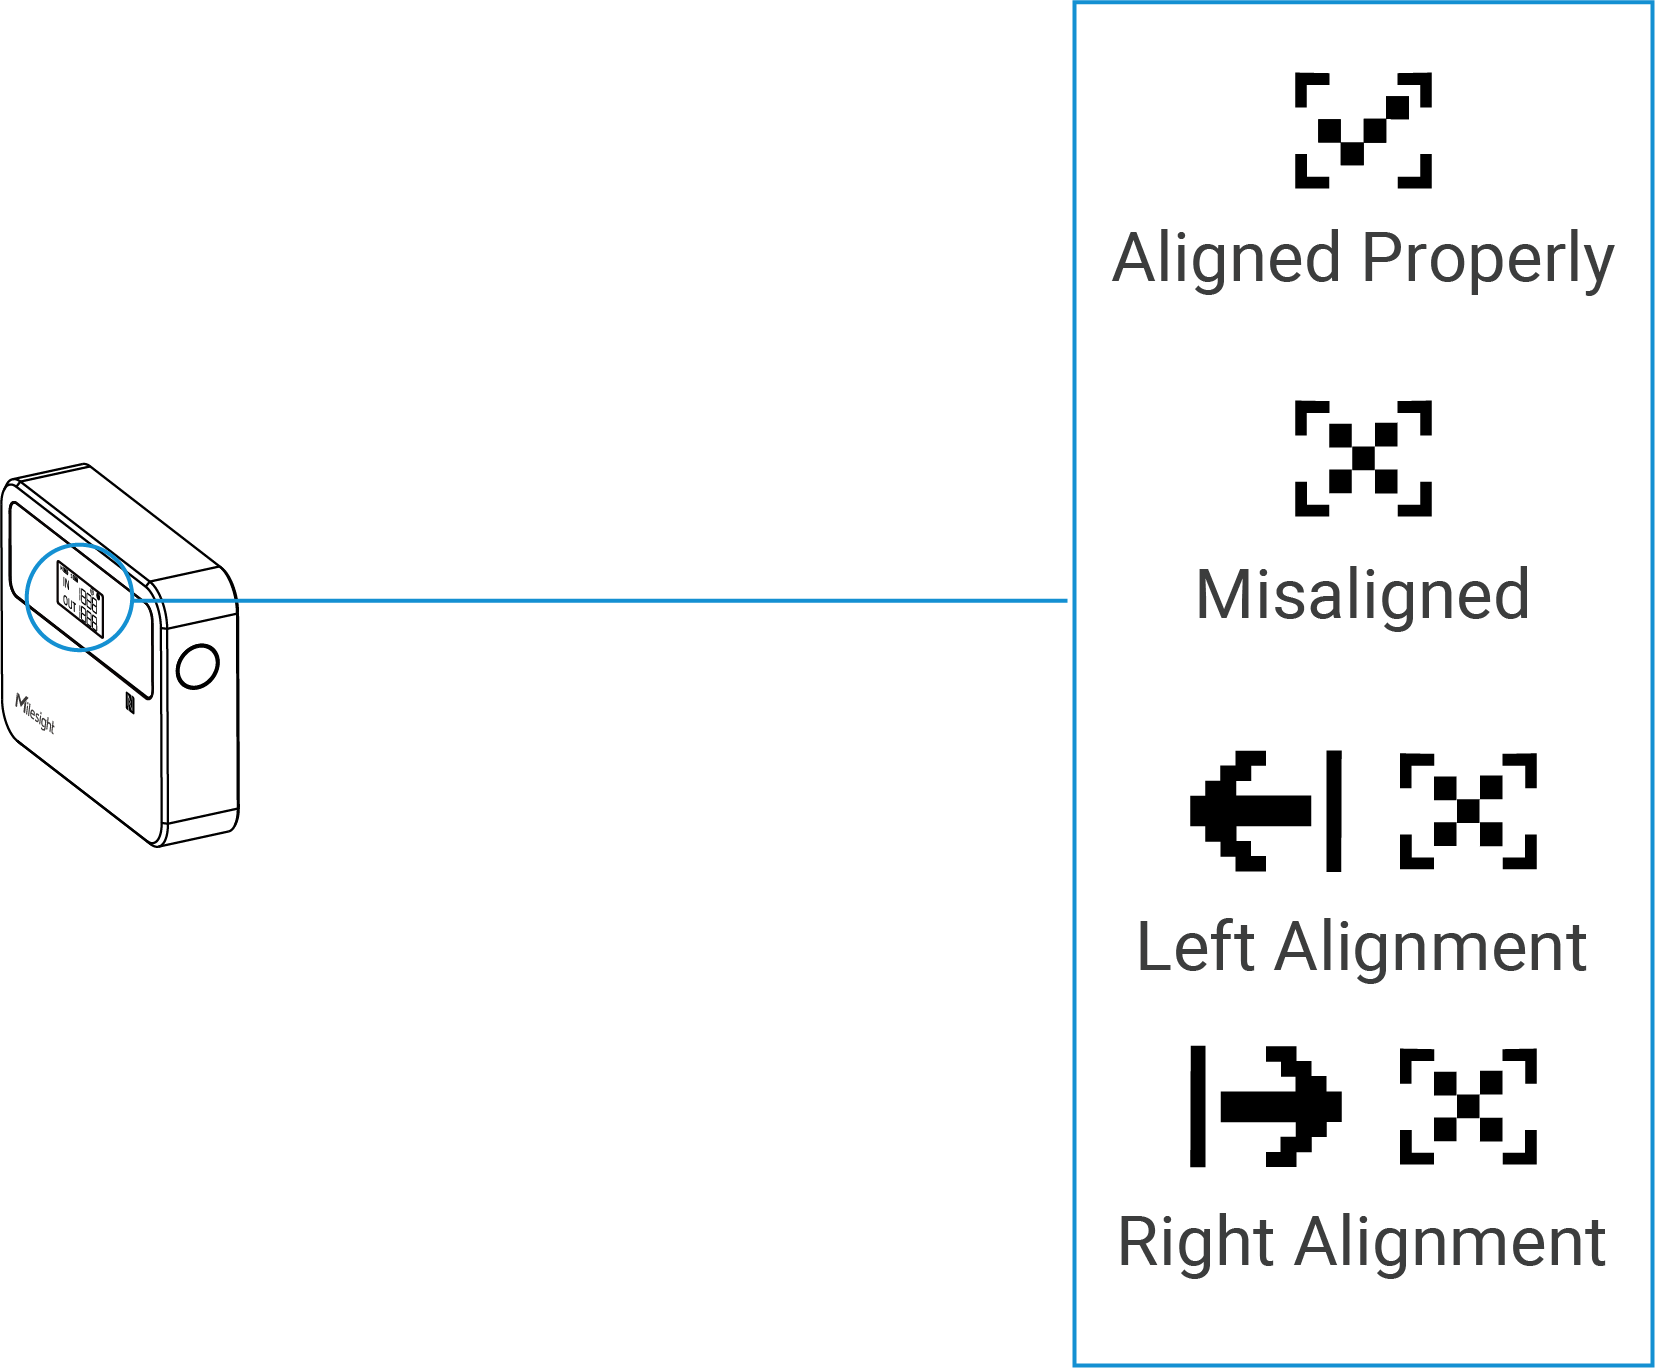
Step 4: Remove the master device, press and hold the side button to turn it on, ensure that the screen display is not blocked and verify the alignment results.
Step 5: Position the master device at a distance of 0.7~1.2 meters from the
ground. Adjust its position according to the prompt on the screen by pressing the power
button until a “✔” is displayed.
Step 6: Use a marker or similar tool to outline the position of the master device for mounting. Then, secure the back cover of the master device at this position using 3M tape or mounting kits.
Step 7: Press the master device onto the back cover.
