Network
The Network page is as below:

[Email]
Alarm video files will be sent to specific mail account through SMTP server. Please make sure that the Email settings were correctly set before using it.

|
Parameters |
Function Introduction |
|---|---|
| Enable |
Check the checkbox to enable Email |
| User Name |
The sender's name. It is usually the same as the account name |
| Sender |
Email address to send video files attached to emails |
| Password |
The password of the sender |
| Server |
The SMTP server IP address or host name(e.g.smtp.gmail.com) |
| Port |
The port of SMTP server. The default TCP/IP port for SMTP is 25(not secured). For SSL/TLS port, it depends on the mail you use |
| To E-mail |
E-mail address to receive video files |
| Encryption |
Check the checkbox to enable SSL or TLS if it is required by the SMTP server |
| Alarm Snapshot File Name |
Default(YYYY-MM-DD) /MM-DD-YYYY/ DD-MM-YYYY/ Add prefix/ Overwrite with the base file name/ Customize are available. |
| Time Snapshot File Name |
Default(YYYY-MM-DD) /MM-DD-YYYY/ DD-MM-YYYY/ Add prefix/ Overwrite with the base file name/ Customize are available. |

[FTP]
Alarm video files will be sent to specific FTP server. Please make sure that the FTP settings were correctly set before using it.

The meanings of the items on FTP page can be referred to the table below:
|
Parameters |
Function Introduction |
|---|---|
| FTP Type | FTP and SFTP are optional. |
|
Server |
FTP/SFTP server address |
|
Server Port |
The port of the FTP server. Generally it is 21. The port of the SFTP server. Generally it is 22. |
|
User Name |
User name that used to log in to the FTP/SFTP sever |
|
Password |
User password |
|
Storage Path |
Storage Path where video and image will be uploaded to the FTP server. Four FTP storage path types are available, including Root Directory, Parent Directory, Child Directory and Customize. |
|
Parent Directory |
Choose IP Address/ Device Name/ Date as the folder name of Parent Directory, or customize the folder name. |
|
Alarm Action File Name |
Choose the default(YYYY-MM-DD) or customize the alarm action file name. |
|
Timing Snapshot File Name |
Default(YYYY-MM-DD) /MM-DD-YYYY/ DD-MM-YYYY/ Add prefix/ Overwrite with the base file name/ Customize are available. |
- Parent Directory will be under Root Directory
- Users can refer to the following file name tip to customize the file name.
[DDNS]
DDNS allows you to access the camera via domain names instead of IP address. It manages to change IP address and update your domain information dynamically. You need to register an account from a provider.

The meanings of the items on DDNS page can be referred to the table below:
|
Parameters |
Function Introduction |
|---|---|
|
Enable DDNS |
Check the checkbox to enable DDNS service |
|
Name |
Support DDNS from now dyndns.org, freedns.afraid.org, www.no-ip.com, www.zoneedit.comand Customize |
|
User name |
Account name obtained from DDNS provider |
|
Password |
Account password |
|
Host name |
DDNS name enabled in the account |
You can choose “ddns.milesight.com” as provider for DDNS. After enabling it, you can access the device via the URL “http://ddns.milesight.com/MAC address” .
- Please do the Port Forwarding of HTTP Port and RTSP Port before you use Milesight DDNS.
- Make sure that the internal and the external port number of RTSP are the same.
[Cellular]
The 5G Series Network Camera provides a fresh experience of UHD image quality,
low latency and fast transmission speed to some scenarios where network wiring is inconvenient.
You can check the cellular status and set the cellular settings here after connecting the 5G AIoT Pro Bullet Plus Network Camera to CMS via P2P type, as shown below:

- If you use the 5G camera for the first time, it is necessary to connect the camera through the network port to access the web page of the camera for basic configuration.
- Before using the 5G network, please insert the SIM card into the SIM card slot at the bottom of the camera. It supports Nano SIM for SIM card slot.
Step1: Fill in the information provided by your Internet Service Provider (ISP) to Cellular Settings
interface, then click Save to access the network successfully.

|
Parameters |
Function Introduction |
|---|---|
|
Enable Cellular |
Check this option to enable 5G network. |
|
APN |
Enter the Access Point Name for cellular dial-up connection provided by local ISP. |
|
Username |
Enter the username for cellular dial-up connection provided by local ISP. |
|
Password |
Enter the password for cellular dial-up connection provided by local ISP. |
|
PIN Code |
Enter a 4-8 characters PIN code to unlock the SIM. |
|
Access Number |
Enter the dial-up center NO. For cellular dial-up connection provided by local ISP. |
|
Authentication Type |
Select the Authentication Type. There are five options including Auto, PAP, CHAP, MS-CHAP, MS-CHAPv2 to match different Internet Service Providers. The default option is Auto, which can automatically match Internet Service Provider. |
|
Network Type |
Select the network type of cellular network. There are five options including Auto, 5G, 4G, 3G and 2G. Auto: connect to the network with the strongest signal automatically. |
|
Re-dial Interval |
Fill in the re-dial interval time. When the 5G network is offline, it will re-dial according to the interval you set. The Re-dial Interval must be between 0-3600s. |
|
Billing Day |
Select the date for clearing the data each month. Users can choose from 1st to 31st, and the system will clear the data on the date you set each month. |
|
Effective Time |
Set the schedule, the 5G network will take effect according to the schedule you set.  |
Step2: After connecting to the network successfully, you can check the cellular status information on Cellular Status interface, as shown below.

|
Parameters |
Function Introduction |
|---|---|
|
ISP |
Show the network provider which the SIM card registers on. Note: It will display "-" when the SIM card is not inserted or not
recognized.
|
|
SIM Card Status |
Display the connection status of SIM card. No SIM Card: The SIM card is not inserted. Invalid: The SIM card has been inserted but failed to connect to the network. Valid: The SIM card has been inserted and successfully connected to the network. |
|
Signal Strength |
Display the current signal strength of the network. |
|
Status |
Display the connection status of the network, including “3G/4G/5G Connected” and “Disconnect”. |
|
IMEI |
Show the IMEI of the module. |
|
IMSI |
Show IMSI of the SIM card. |
|
ICCID |
Show ICCID of the SIM card. |
|
IP Address |
Display the IP Address, Subnet Mask, Gateway and DNS Address of the current network. If the SIM card is not inserted or not recognized, it will display 0.0.0.0. |
|
Subnet Mask |
|
|
Gateway |
|
|
DNS Address |
|
|
Data Usage Monthly |
Display current monthly used data. |
|
Click this button to manually refresh the above status. |
Step 3: After configuring the cellular settings, you also need to complete other basic configurations of the camera if needed, such as events, recordings, etc.
Step 4: After completing the basic settings of the camera, you can access the camera using 5G network without connecting the network cable.
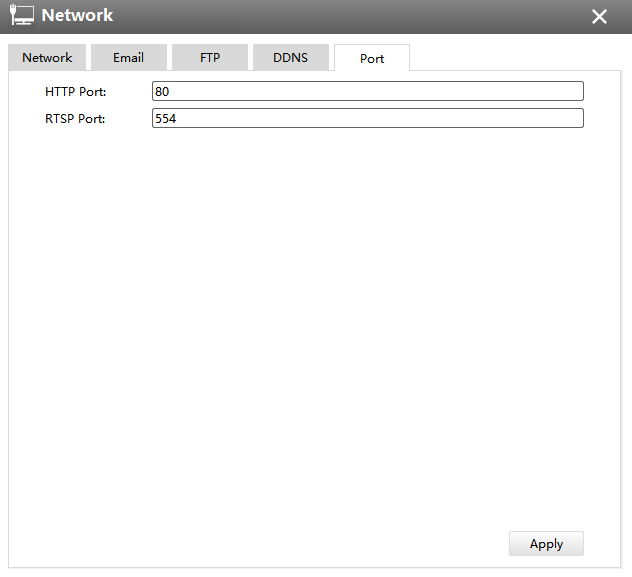
[Port]
You can set HTTP and RTSP port here.