Add Data Recipients
This section describes how to add data recipients.
Configure HTTP(s) or MQTT(s) Parameters
The device supports the addition of data recipients using HTTP(s) or MQTT(s) protocols. It proactively pushes data to configured recipients according to the specified reporting scheme. For detailed data format specifications, refer to Uplink Data. Additionally, device configuration and people counting data retrieval are available through CGI interfaces. For details, refer to Milesight AI Stereo Vision People Counting Sensor API Specification.
- In the main page, click Communication from the left
navigation tree, then click
 in
the lower right corner.
in
the lower right corner.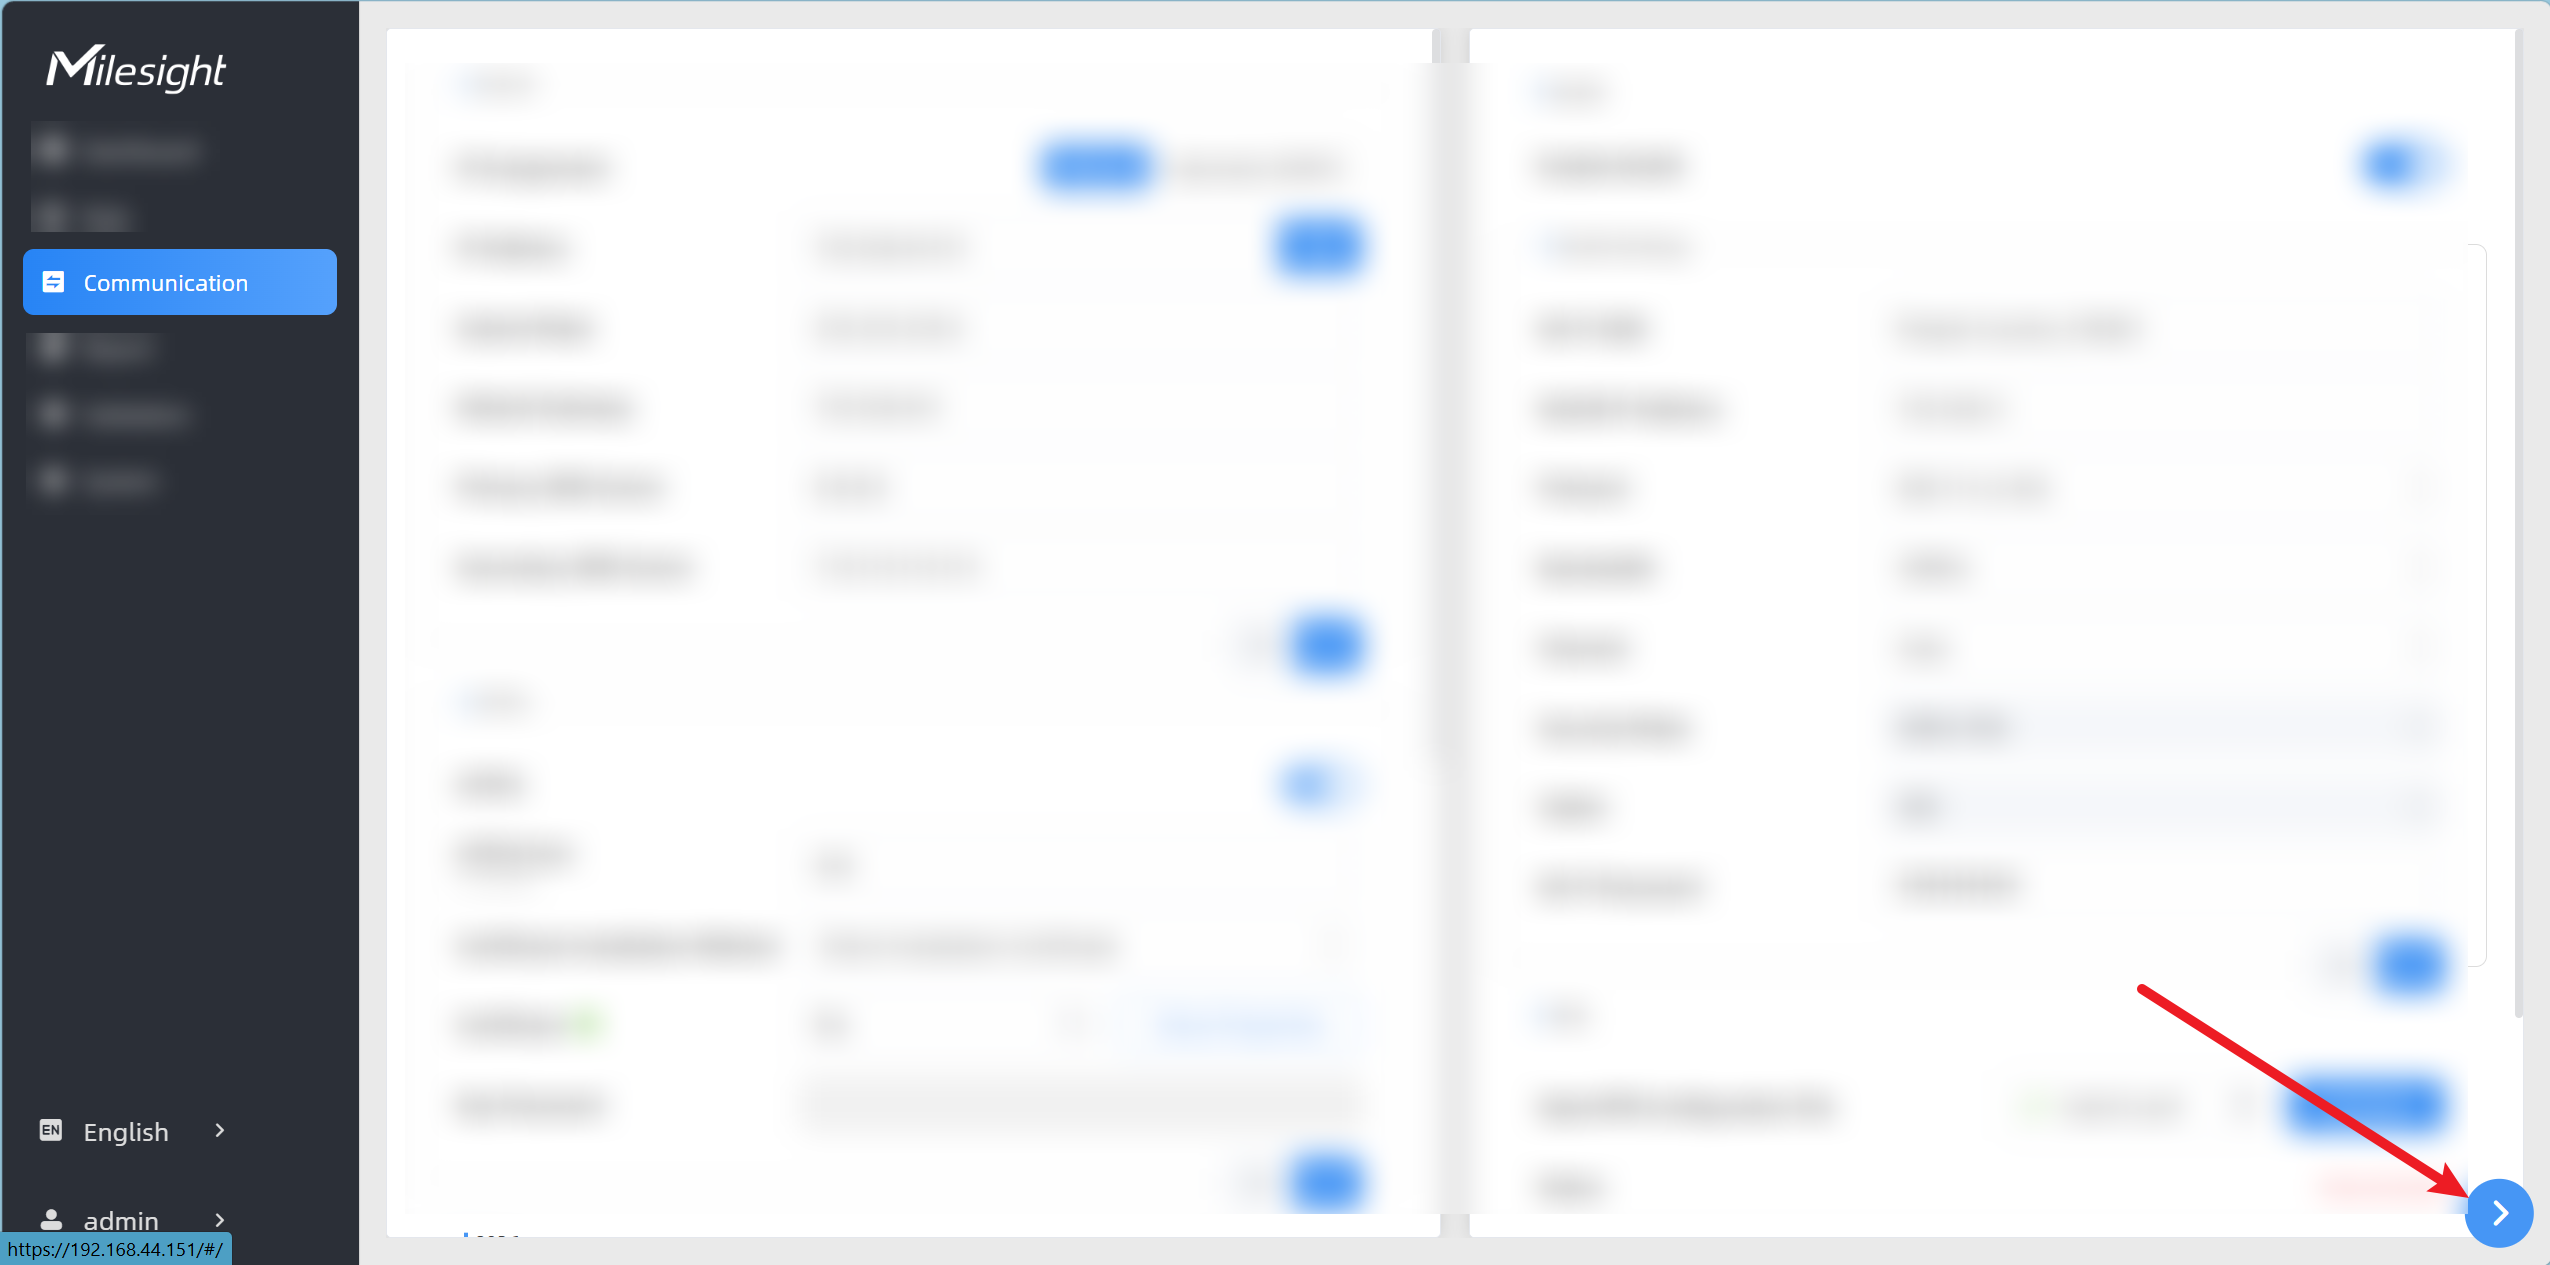
- In the HTTP(S)/MQTT(S)area, click +Add to add a recipient. You
can add up to 8 recipients.
.png)
- The Recipient Settings dialog box is displayed. Configure the recipient parameters as needed.
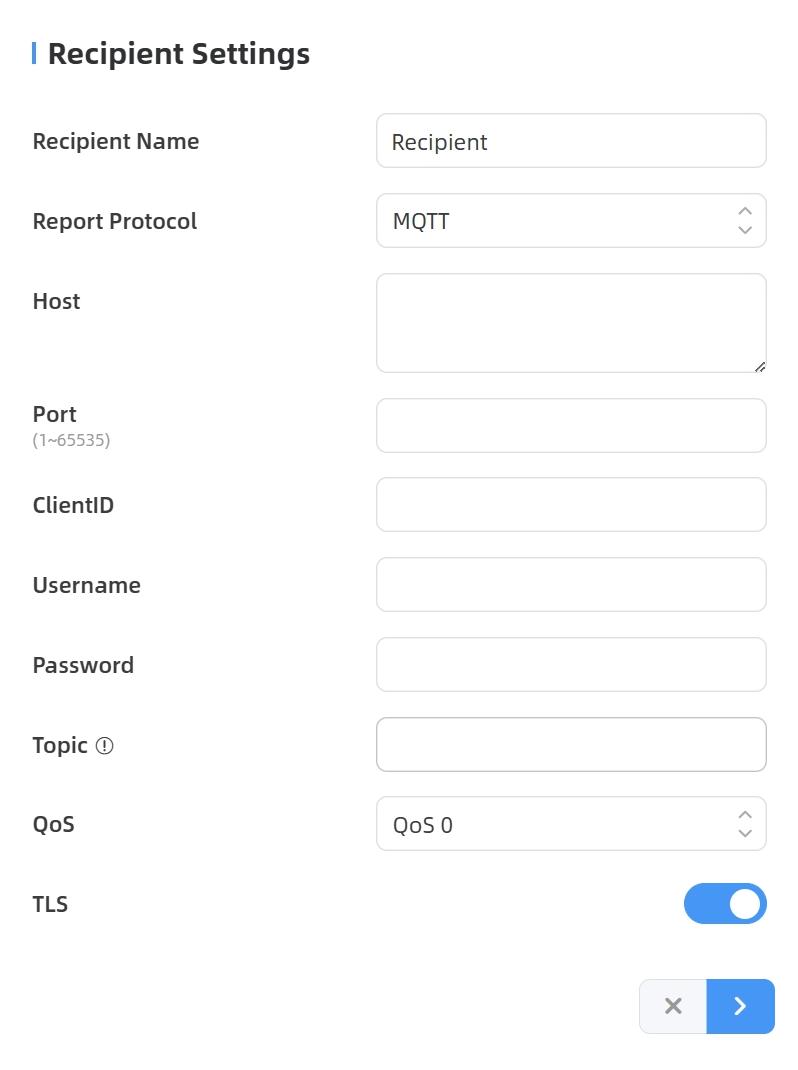
- In the Recipient Name text box, enter a recipient name.
- Set Report Protocol to HTTP(s) or MQTT as needed.
- Perform the following operations as needed.
- If Report Protocol is set to HTTP(s), configure
the following parameters.
Parameters Description URL Data Recipient URL. It configures the target URL to receive people counting data in JSON format. This device supports multiple third-party platforms. For the supported platforms, refer to Milesight official website.
Connection Test Click Test to send test message to a URL to check connectivity. Authentication Mode Authentication mode configuration. - Options: None, Basic, Digest, Auto
- None: No authentication required.
- Basic: Standard HTTP Basic authentication using username and password.- Digest: HTTP Digest authentication for enhanced security.
- Auto: Automatic authentication negotiation.Username User name used for authentication. Password Password used for authentication.
- If Report Protocol is set to MQTT, configure the
following parameters.
Parameters Description Host Address of the MQTT broker to receive data. This device supports multiple third-party platforms. For the supported platforms, refer to Milesight official website.
Port Port of the MQTT broker used to receive data. Client ID Unique client identifier for the MQTT server. It must be unique across all connections to the same server and is essential for managing message delivery at QoS levels 1 and 2. Username User name for MQTT broker authentication. Password Password for MQTT broker authentication. Topic Topic name used for publishing messages. An example topic name is as follows:  The following placeholders are dynamically replaced with device information upon subscription.
- - $devsn: Device SN
- - $prdmd: Product model
- - $devid: Customized device ID
- - $siteid: Customized site ID
QoS Options: QoS 0, QoS 1, and QoS 2. TLS Enables TLS encryption for MQTT communication. Certificate Type Options: CA Signed Server or Self Signed. - If Certificate Type is set to CA Signed Server, server verification is performed using a CA certificate that is pre-installed on the device.
- If Certificate Type is set to Self
Signed, click
 in the CA File,
Client Certificate File, and Client Key
File areas to upload the corresponding files
for identity verification.
in the CA File,
Client Certificate File, and Client Key
File areas to upload the corresponding files
for identity verification.
- If Report Protocol is set to HTTP(s), configure
the following parameters.
- Click to save the configuration. The
Report Strategy dialog box is displayed.
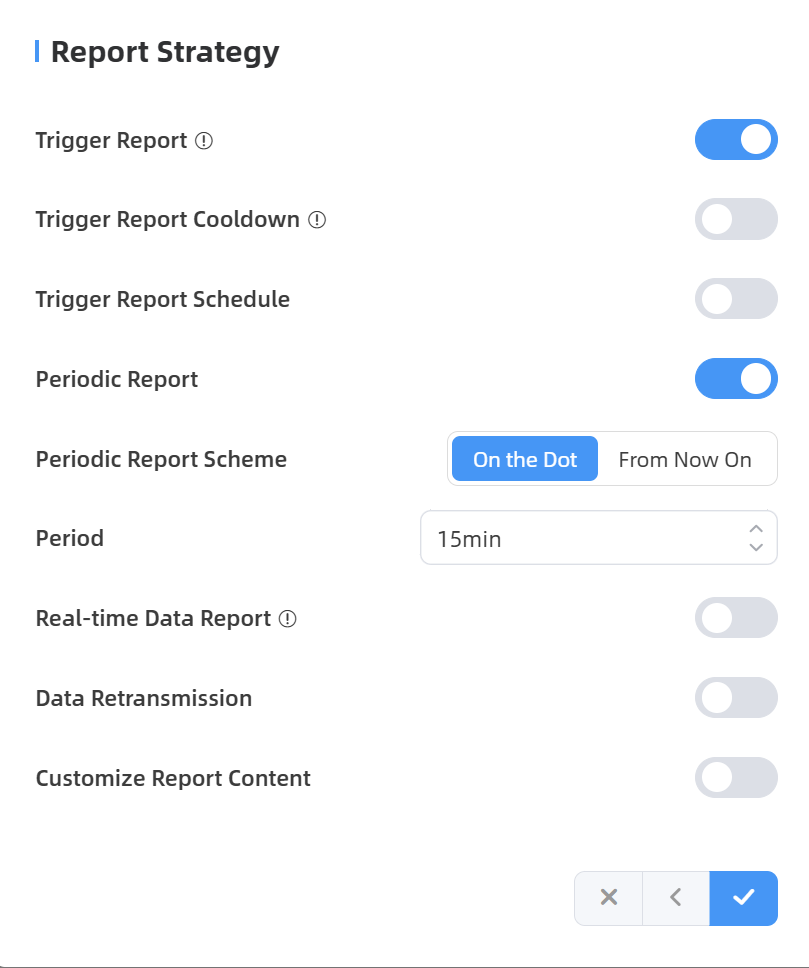
- Configure the report strategy parameters as needed. For
parameter descriptions, refer to the following table.
Parameter Description Trigger Report Enables reporting statistical data or event information to the platform when configured trigger events occur. Trigger Report Cooldown Enable this option to prevent frequent trigger reports when foot traffic is high. The cumulative data will be reported after the cooldown period. Cooldown Period: During the cooldown period, trigger events are not reported. Once the cooldown period ends, reporting will resume.
Trigger Report Schedule Events are reported only if they occur within up to five configurable time periods. If a cooldown is enabled, reporting occurs only if the cooldown ends within a work period. No reporting occurs outside the defined periods. Periodic Report Enables periodic reporting of line crossing and region counting data. Periodic Report Scheme Options: On the Dot or From Now On. - If Periodic Report Scheme is set to On the
Dot, select the interval from the
Period drop-down list as needed. Then the
device reports at the top of each hour. For
example:
- 1-hour interval: Reports occur on the hour (00:00, 01:00, 02:00...)
- 10-minute interval: Reports occur at 10-minute marks (00:10, 00:20, 00:30...)
- If Periodic Report Scheme is set to From Now On, enter an interval value in the Period text box as needed. Then the device initiates periodic reporting immediately upon activation and regularly report at the configured interval.
Real-time Data Report When real-time reporting is required, enable this feature. Once enabled, the device reports data at a fixed interval of 500 ms. High-frequency reporting may increase network traffic and server load. Alarm Report Supports configuring whether to report alarm events separately for each server. Data Retransmission If enabled, the device automatically transmits all buffered data packets from the offline period once the network connection is restored. Each recipient endpoint supports a maximum capacity of 50,000 data records. Customize Report Content Enables report content customization. Select the required content to avoid data redundancy. 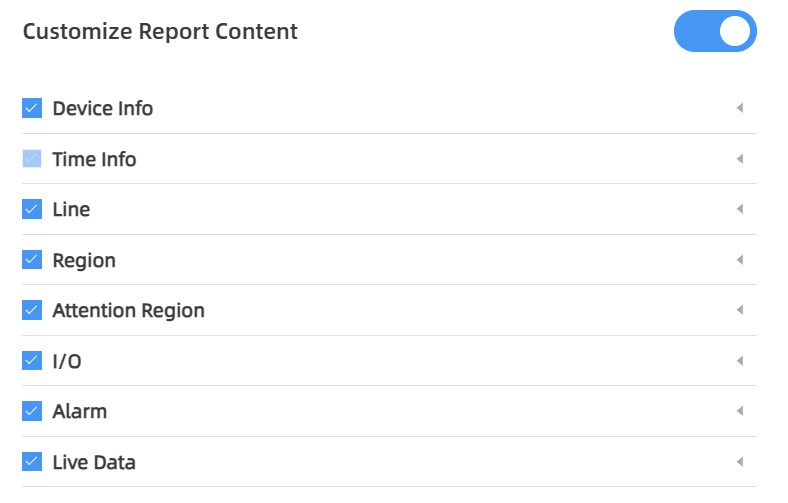
- If Periodic Report Scheme is set to On the
Dot, select the interval from the
Period drop-down list as needed. Then the
device reports at the top of each hour. For
example:
- Click
 to save the configuration. The added
recipient is displayed in the Recipient page.
to save the configuration. The added
recipient is displayed in the Recipient page. 
- (Optional) To edit or delete the recipient, click
 or
or  .
.
Configure BACnet Parameters
The device provides a BACnet/IP protocol connection to the BMS system, enabling data exchange and communication between devices within building automation systems as BACnet Server.
- In the main page, click Communication from the left
navigation tree, then click in
the lower right corner.
- In the BACnetarea, click
 to enable BACnet.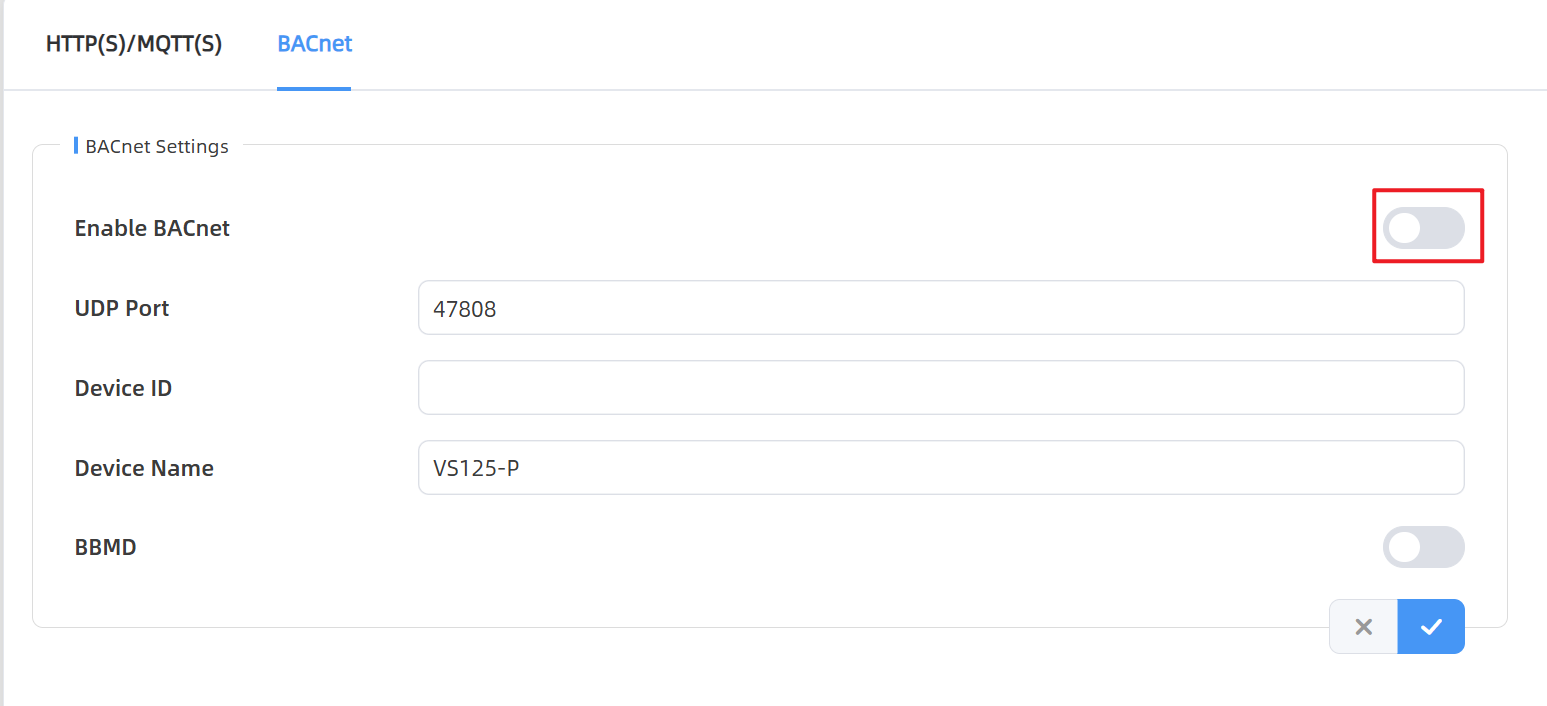
- Configure the following parameters as needed.
Parameters Description UDP Port Set the communication port for BACnet/IP. Range: 1-65535. The default port is 47808. Device ID The unique BACnet device identifier that must not conflict with other devices. The default value is the 6th to 11th characters of SN. Device Name The name to represent the device. BBMD Enable BBMD (BACnet/IP Broadcast Management Device) if BACnet devices of different network subnets should work together. - IP Address: Fill in the IP address of BBMD device or external device registrar.
- IP Port: Fill in the UDP/IP port for external device registration.
- Time To Live: Number of seconds used on external device registration.
- Click to save the configuration. The BACnet
Object Settings dialog box is displayed.
- Click + Add. The Add BACnet Object Settings dialog box is
displayed.
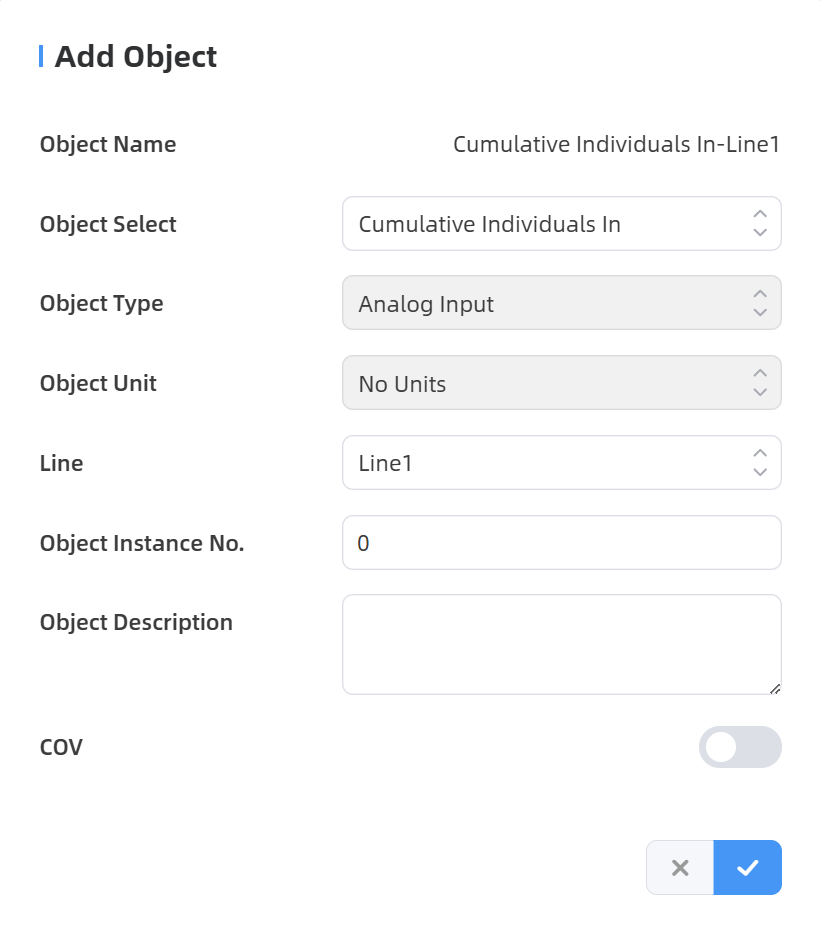
Parameters Description Object Name Show the name of the BACnet object. Object Select Select the variable data for the device as an object. Line/Region Select one of the detection line or region which object you select. 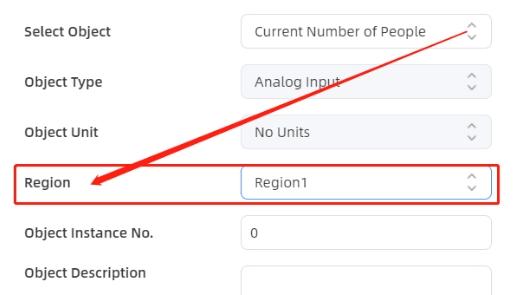
Object Instance No. Set the object instance number. Object Description Set the object description. COV When enabled, a notification is sent when the object value changes of new value to BACnet client. COV Increment Set the minimum change value for the current object. - Click to save the configuration.