PTZ
- Basic
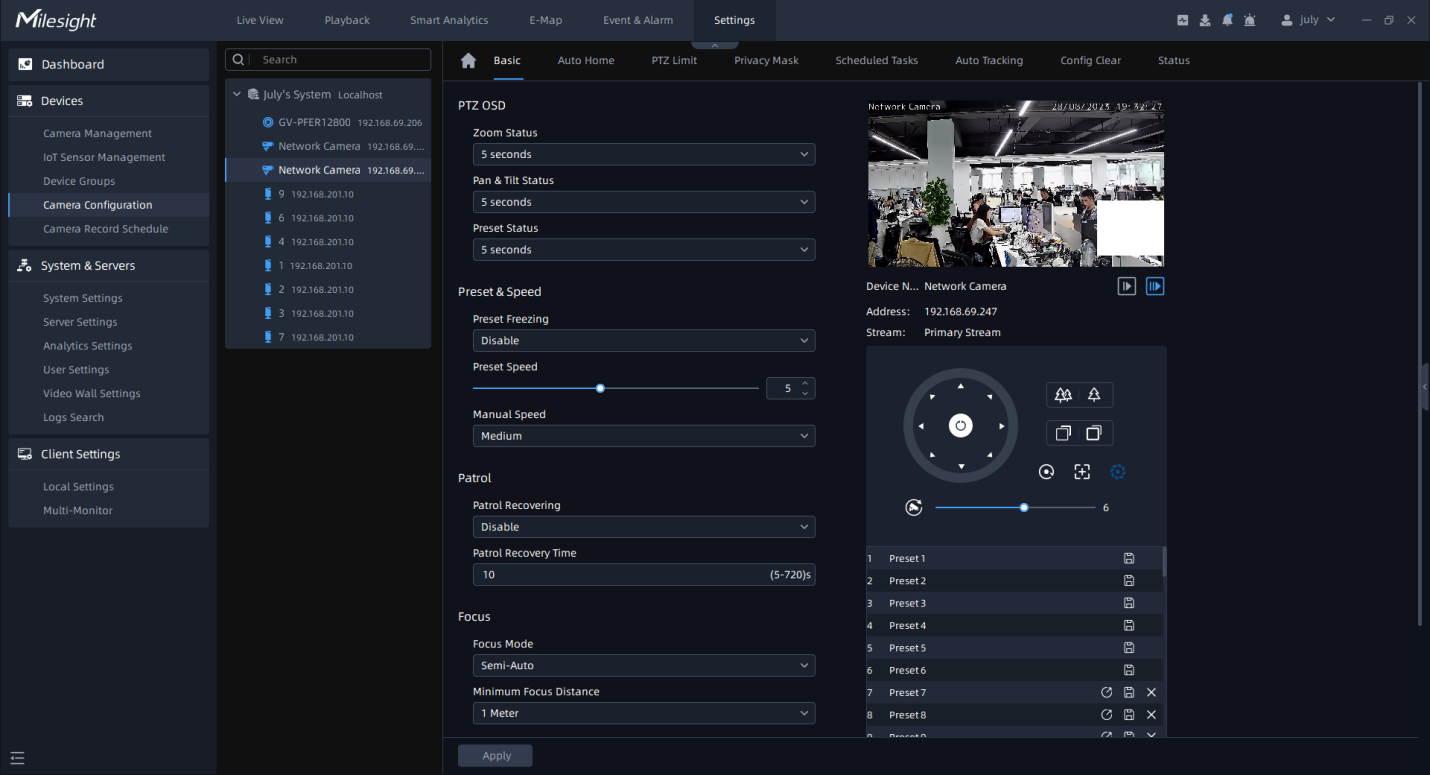
The meanings of the parameters on PTZ-Basic can be referred to the table below:
|
Parameters |
Function Introduction |
|---|---|
|
PTZ OSD |
Configure the OSD parameter, you can set the Zoom status OSD, Pan&Tilt Status, Preset Status with Always Close/Always Open/2 seconds/5 seconds/10 seconds. |
|
Preset Freezing |
If Preset Freezing is enabled, the live view of preset position will be showed directly instead of showing both the moving path to the position and the live view. It can also reduce the use of bandwidth in the network system. |
|
Preset Speed |
It determines the speed of calling presets. Level 1~10 are available. |
|
Patrol |
Patrol Recovering: Click to enable Patrol Recovering. Patrol Recovery Time: Set time for Patrol Recovering, which is between 5 to 720 seconds. |
|
Focus |
Focus Mode: Three focus modes are available: Auto/ Semi-Auto/ Manual. Minimum Focus Distance: Set the minimum focus distance to adjust the step length of each focus. 1 meter, 1.5 meters, 3 meters, 6 meters, 10 meters and 20 meters are available. The default minimum focus distance is 1 meter. |
|
Power Off Memory |
If the camera stop working for a longer time than predefined, then the position of it will be recorded. And it will resume to the position after going back to the normal work from power off. You can set the resume time from 30 seconds, 60 seconds, 300 seconds or 600 seconds to record its position. |
|
Initial Position |
You can configure the Initial Position for PTZ cameras as a zero point. Set: Click to set the current position as a Initial Position. Clear: Clear the Initial Position to default settings. Call: Click to call the Initial Position. |
- Auto Home
Auto Home allows the PTZ camera to return to a predefined Home Position automatically
after a period of latency time. Click ![]() to enable the Auto Home mode.
to enable the Auto Home mode.
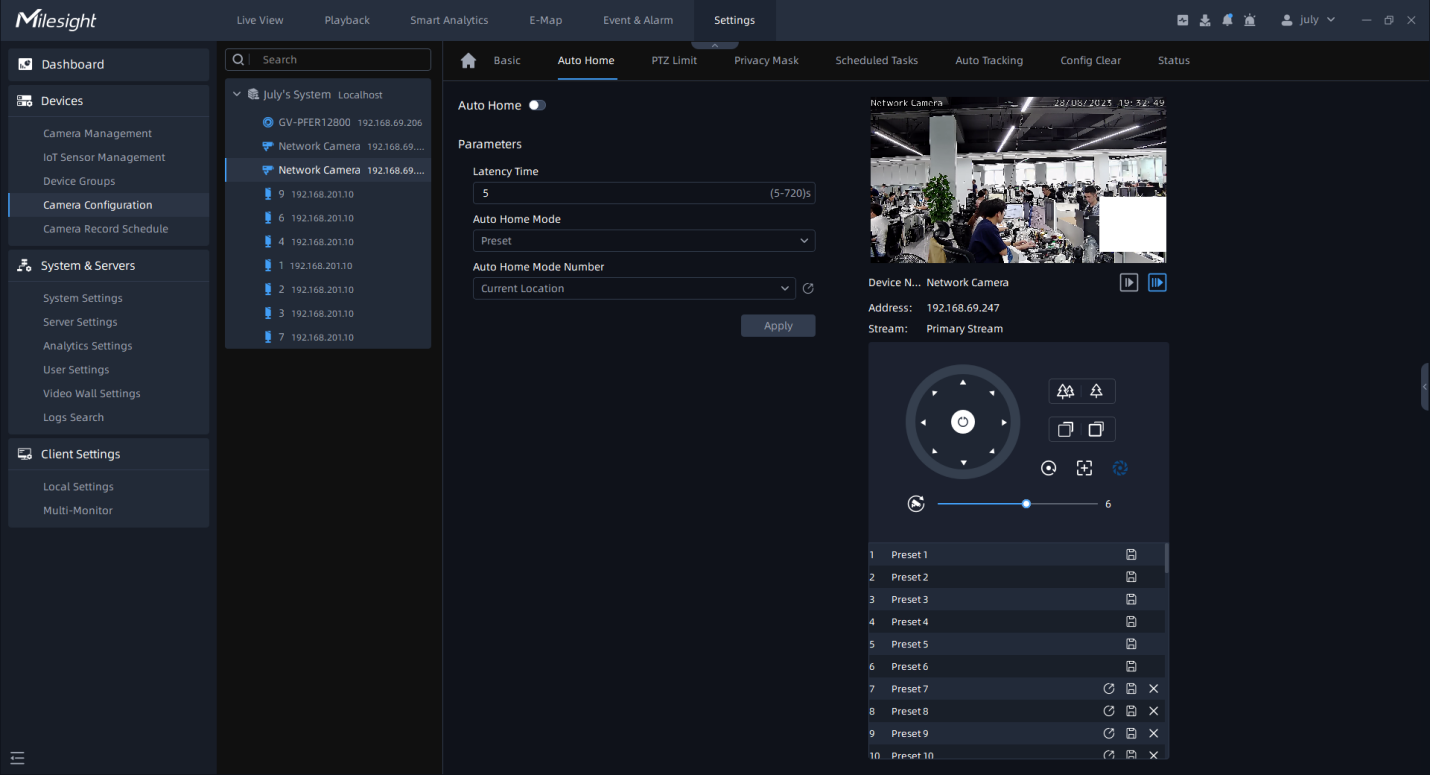
The meanings of the parameters on PTZ-Auto Home can be referred to the table below:
|
Parameters |
Function Introduction |
|---|---|
|
Latency Time |
Set a latency time to trigger Auto Home mode, 5-720s. |
|
Auto Home Mode |
Preset: A preset point will take effect when triggering the Auto Home. |
|
Auto Home Mode Number |
Select a predefined preset in the list, press |
- PTZ Limit
The PTZ camera can be programmed to move within the configurable PTZ Limits (Left/Right and Up/Down).

Step1: Choose Manual Limit or Scan Limit;
- Manual Limit:
When Manual limit stops are set, you can operate the PTZ control panel manually only in the limited surveillance area.
- Scan Limit:
When Scan limit stops are set, the auto scan is performed only in the limited surveillance area.
Step2: Click ![]() button to enable the PTZ Limit function;
button to enable the PTZ Limit function;
Step3: Click ![]() and then click the PTZ controller buttons to set
the left/right/Up/Down limit stops. You can also call the defined presets and set them
as the limits of the PTZ camera;
and then click the PTZ controller buttons to set
the left/right/Up/Down limit stops. You can also call the defined presets and set them
as the limits of the PTZ camera;
Step4: After setting all limit stops, click ![]() button to apply the limit stops, or click
button to apply the limit stops, or click
![]() to clear the settings.
to clear the settings.
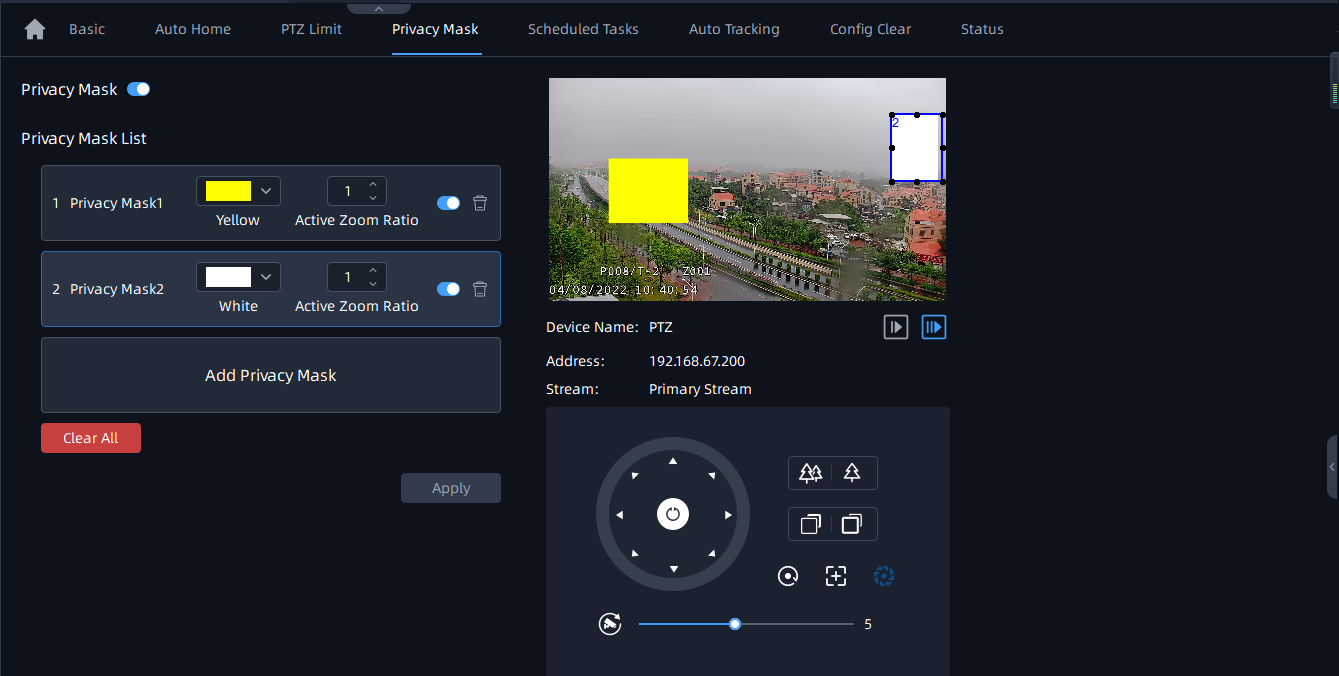
- Privacy Mask
Privacy mask enables to cover certain areas on the live video to prevent certain spots in the surveillance area from being viewed and recorded. The mask area does not move as the lens moves.
(1) For non-AI series
You can set 8 mask areas at most. The setting steps are as below:
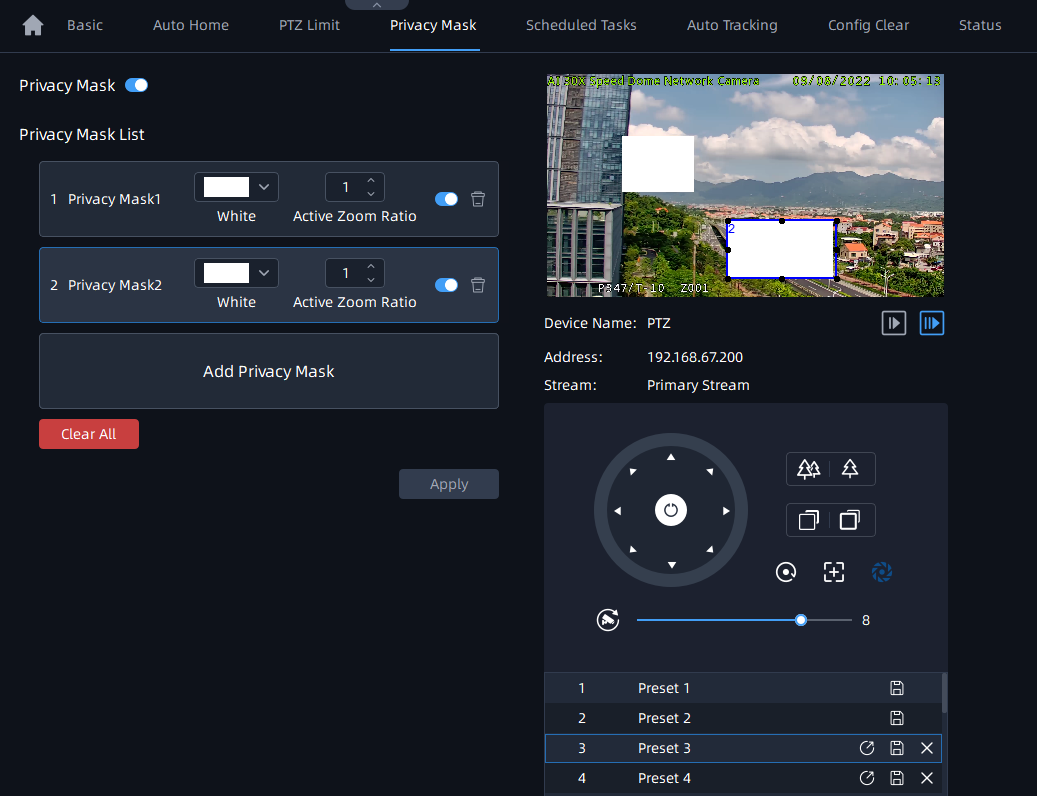
Step1: Enable the Privacy Mask function;
Step2: Click the Add Privacy Mask and hold down the mouse to draw the area in the preview window;
Step3: The added area will be listed in Privacy Mask List;
Step4: Configure color and Active Zoom Ratio for added Privacy Mask;
Step5: Click ![]() button to apply Privacy Mask area. You can also
click
button to apply Privacy Mask area. You can also
click![]() button to delete mask area, or click
button to delete mask area, or click ![]() button to clear all drawn areas.
button to clear all drawn areas.
(2) For AI series
You can set 28 mask areas at most, which includes 24 mask areas and 4 mosaic areas. The setting steps are as below:
Step1: Enable the Privacy Mask function;
Step2: Click the Add Privacy Mask and select the mask type as Mask or Mosaic, then hold down the mouse to draw the area in the preview window;

Step3: The added area will be listed in Privacy Mask List;
Step4: Configure color and Active Zoom Ratio for added Privacy Mask;
Step5: Click ![]() button to apply Privacy Mask area. You can also
click
button to apply Privacy Mask area. You can also
click ![]() button to delete mask area, or click
button to delete mask area, or click ![]() button to clear all drawn areas.
button to clear all drawn areas.
The meanings of the parameters on PTZ-Privacy Mask can be referred to the table below:
|
Parameters |
Function Introduction |
|---|---|
|
Click to enable or disable the Privacy Mask function. |
|
|
Add the current drawing area as Privacy Mask. |
|
|
Delete Privacy Mask area. |
|
|
Clear all areas you drew in the Privacy Mask list. |
|
Color options box |
Select the color for the privacy areas. There are eight colors available: White, Black, Blue, Yellow, Green, Brown, Red, Violet. If you set the mask type to Mosaic, this option will be Mosaic by default and cannot be modified. |
|
Active Zoom Ratio |
Set the value of Active Zoom Ratio from 1 to 12 according to your needs, and then the mask will only appear when the zoom ratio is greater than the predefined value. |
- Scheduled Tasks
You can configure the PTZ camera to perform a certain action automatically in a user-defined time period. The page is as shown below:
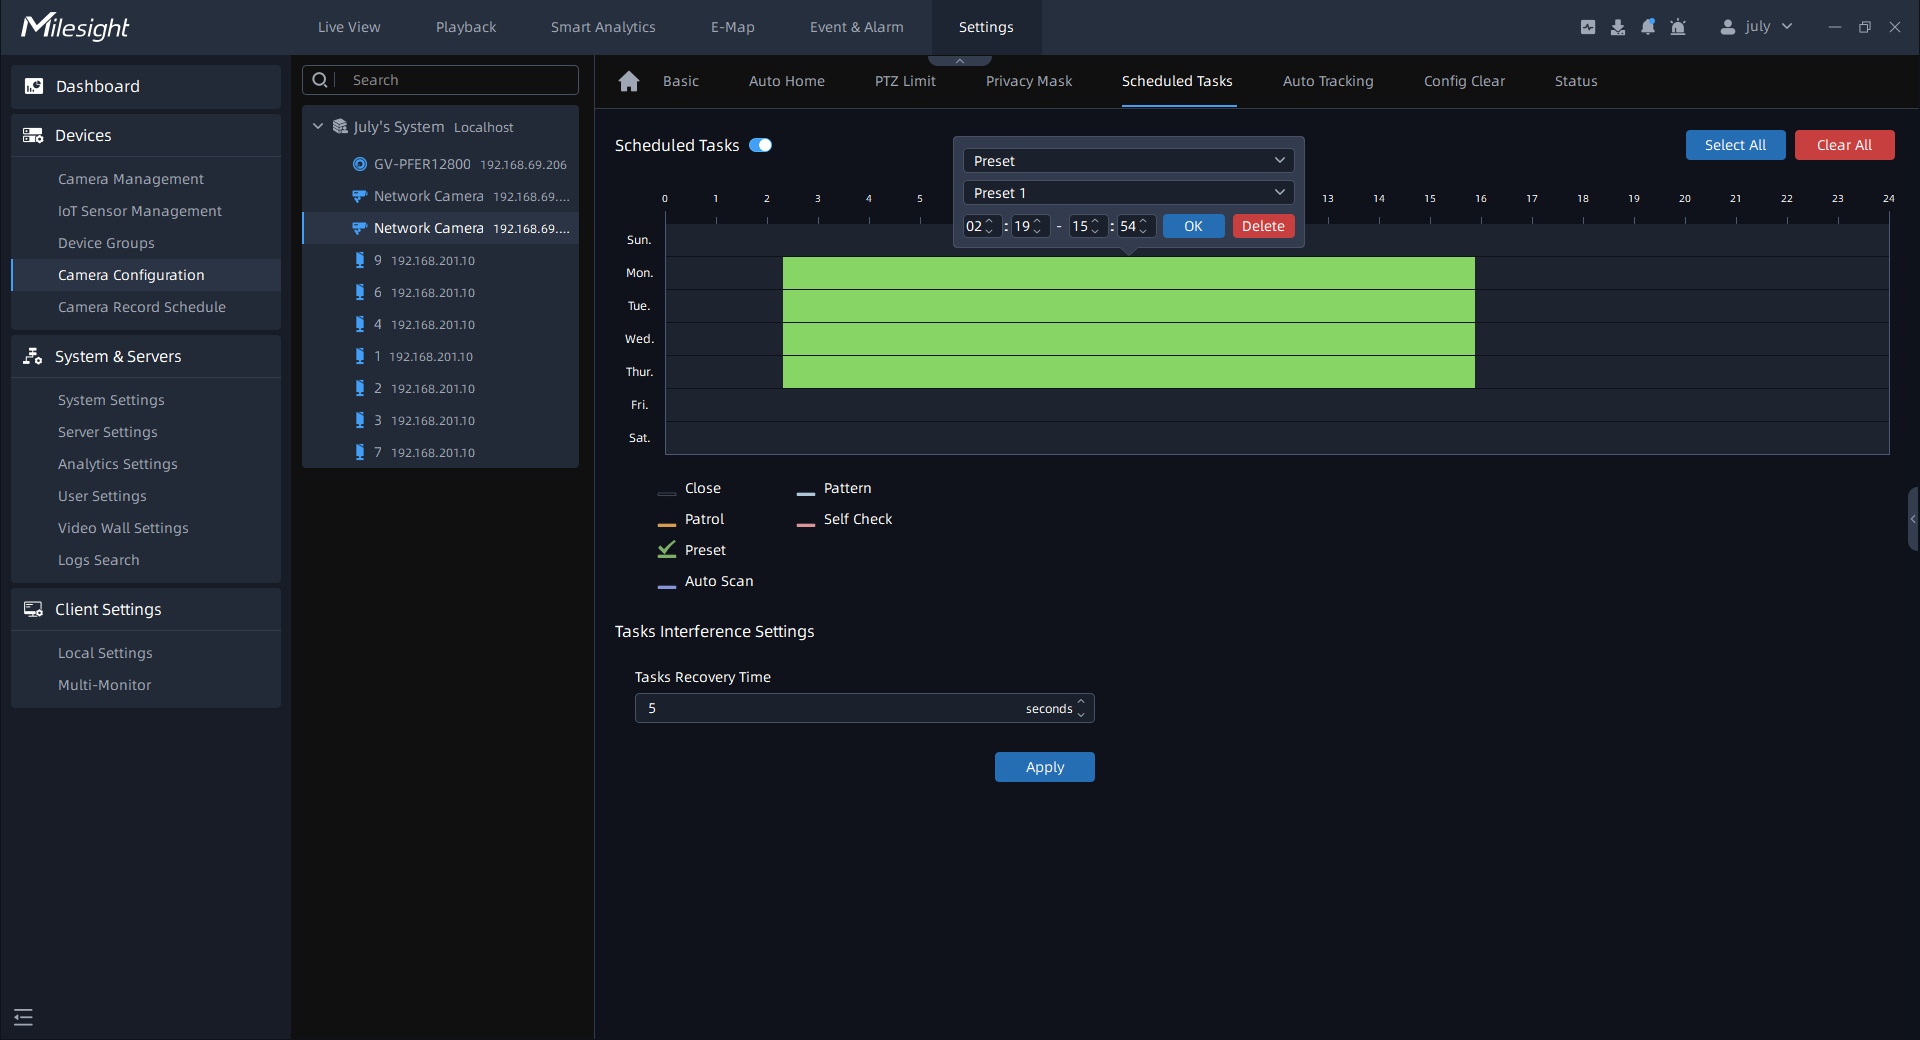
Step1: Check the checkbox to enable Scheduled Task;
Step2: Set the schedule and task details;
Step3: Set the Task Recovery Time (from 5-720 seconds). You can set the time (a period of inactivity) before the PTZ camera starts the schedule and task details.
Step4: Click ![]() button to save all the configurations.
button to save all the configurations.
- The time of each task cannot be overlapped. Up to 10 tasks can be configured for each day.
- The Scheduled Tasks function is prior to Auto Home function. When these two functions are set at the same time, only the Scheduled Tasks function takes effect.
- You can click
 button to select or close all schedules
of different kinds of tasks.
button to select or close all schedules
of different kinds of tasks.
- Auto Tracking
PTZ cameras support auto tracking of the moving objects after you configure this function.
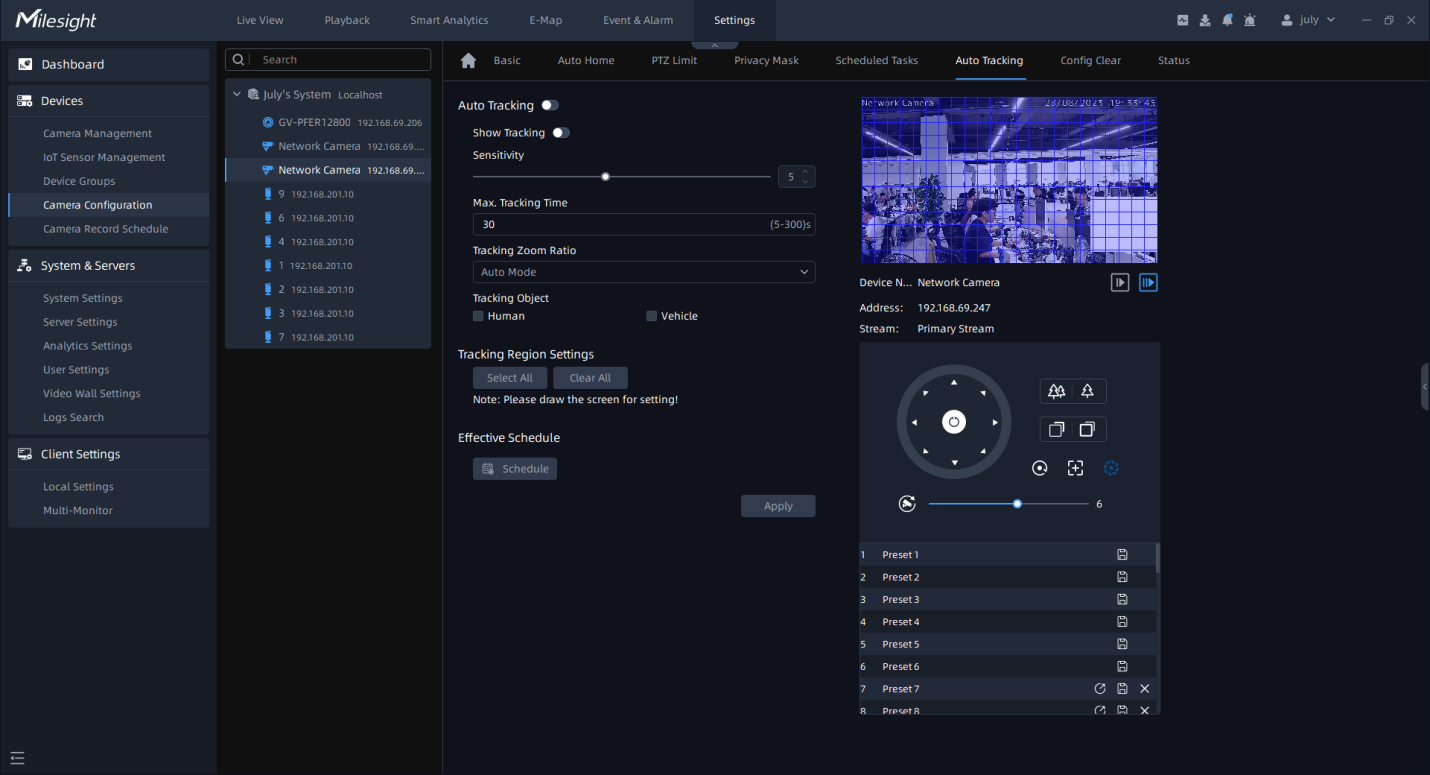
Step1: Enable Auto Tracking function;
Step2: Choose whether to show tracking process;
Step3: Set detecting sensitivity from 1-10;
Step4: Set Max Tracking Time which must be between 5~300s. The camera will stop tracking when the tracking time expires;
Step5: Set Tracking Zoom Ratio including Auto Mode and Customize. The camera will
automatically adjust tracking zoom ratio when Auto Mode is chosen. When Customize is
chosen, user needs to set the tracking zoom ratio first by adjusting zoom button, then camera will automatically track the moving objects according to customized tracking zoom ratio and the object's proportion in the picture at the moment. At the same time, the object will always keep the same proportion in the picture during the tracking process.
Step6: Set Tracking Object. Check Human or Vehicle attribute, and the camera will automatically track the corresponding object;
Step7: Draw the screen to set the detection region.
Step8: Click ![]() to set Auto Tracking schedule;
to set Auto Tracking schedule;
Step9: After setting the configurations, click ![]() button to apply the settings.
button to apply the settings.
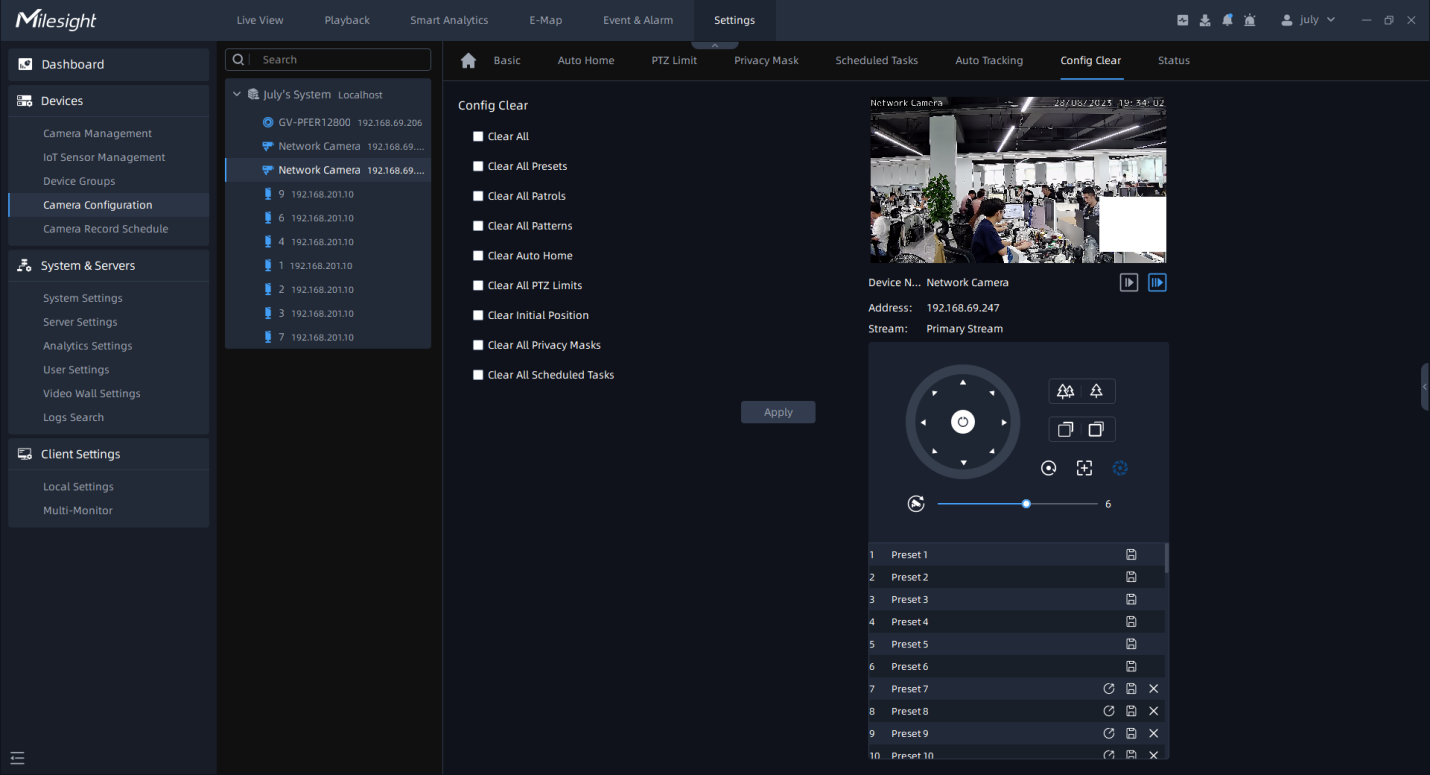
- Config Clear
Here you can clear PTZ configurations which you set before, including Clear All, Clear All Presets, Clear All Patrols, Clear All Patterns, Clear Auto Home, Clear All PTZ Limits , Clear All Privacy Masks and Clear All Scheduled Tasks. After checking the configuration clear checkbox, click “Apply” button.
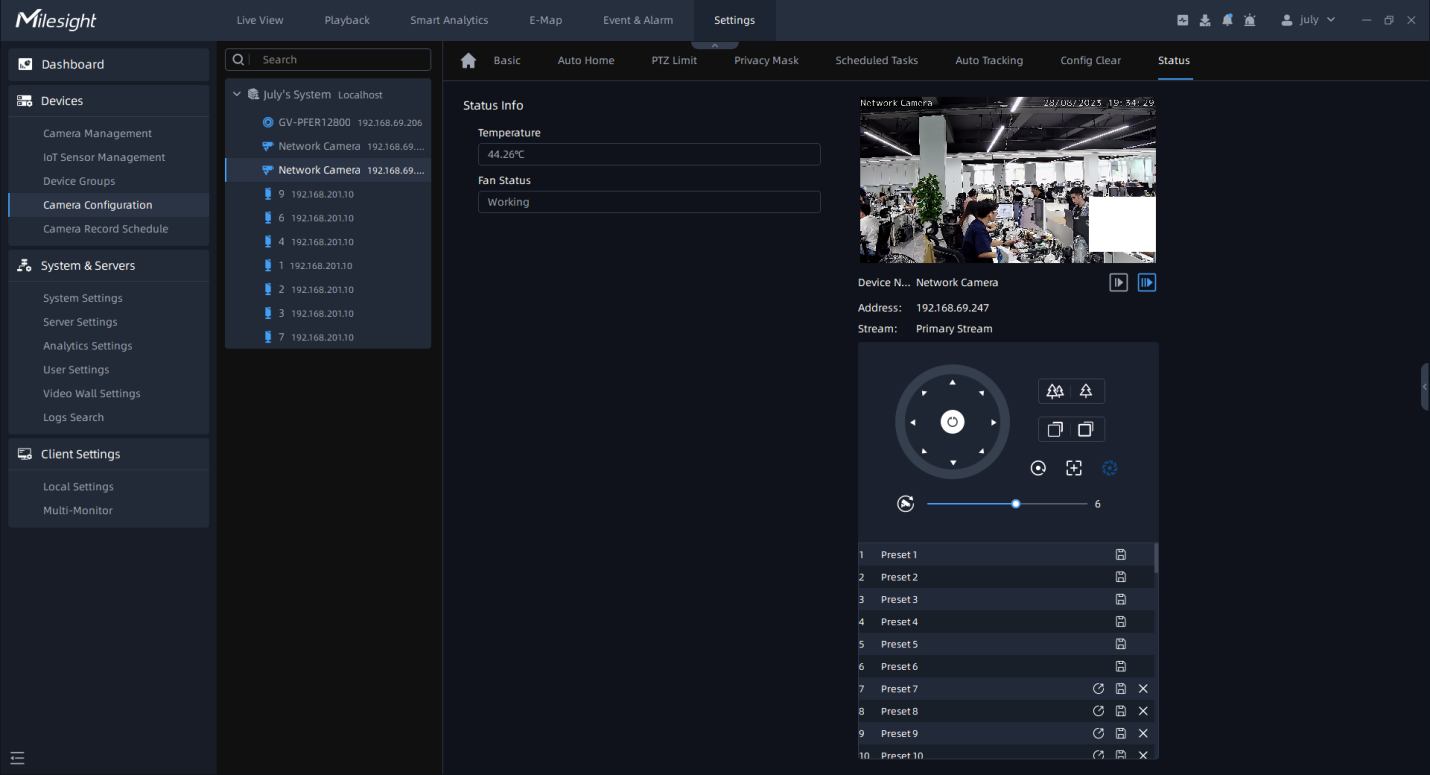
- Status
Here you can know the status of the PTZ, including temperature, heater status and fan status.