Add Device to Application
This topic describes how to add devices to a specific application.
Restrictions
- Confirm with your enterprise administrator whether current account role permits access to this feature and the left number of devices that can be added to the enterprise.
- The selected application is enabled.
Add Demo Device to Application
When you do not have real devices, you can add demo devices to test the API and
Webhook features.
- Procedure
-
- Log in to Milesight Development Platform.
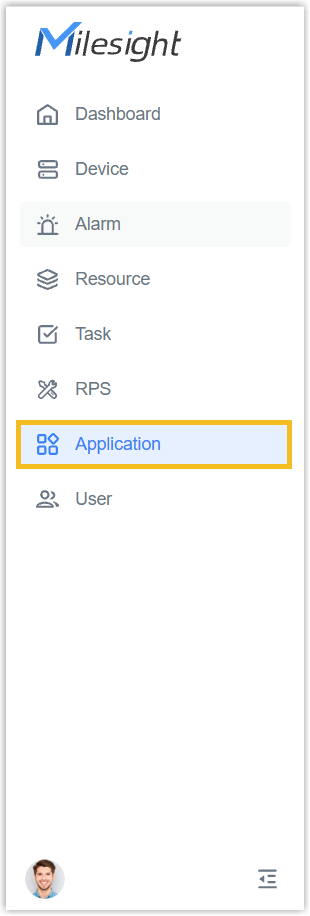
- On the left bar, select the
Application
tab.
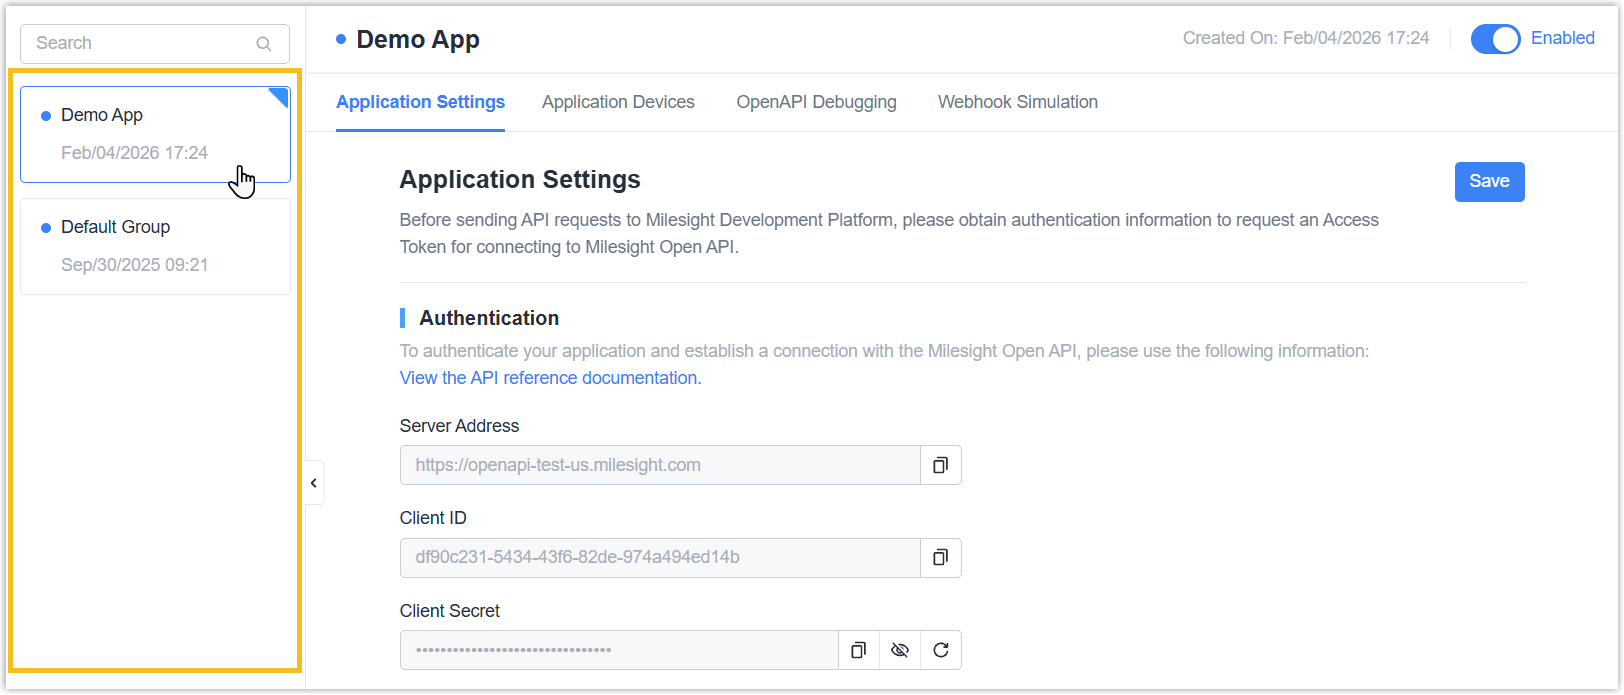
- Select the desired application from the
group
list.
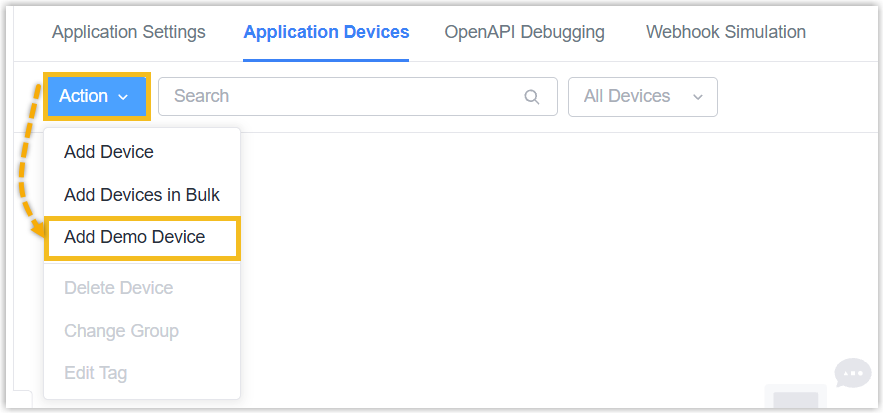
- Select Application Devices tab, move to Action
button, select Add Demo
Device.
- In the pop-up window, configure the demo device
information.
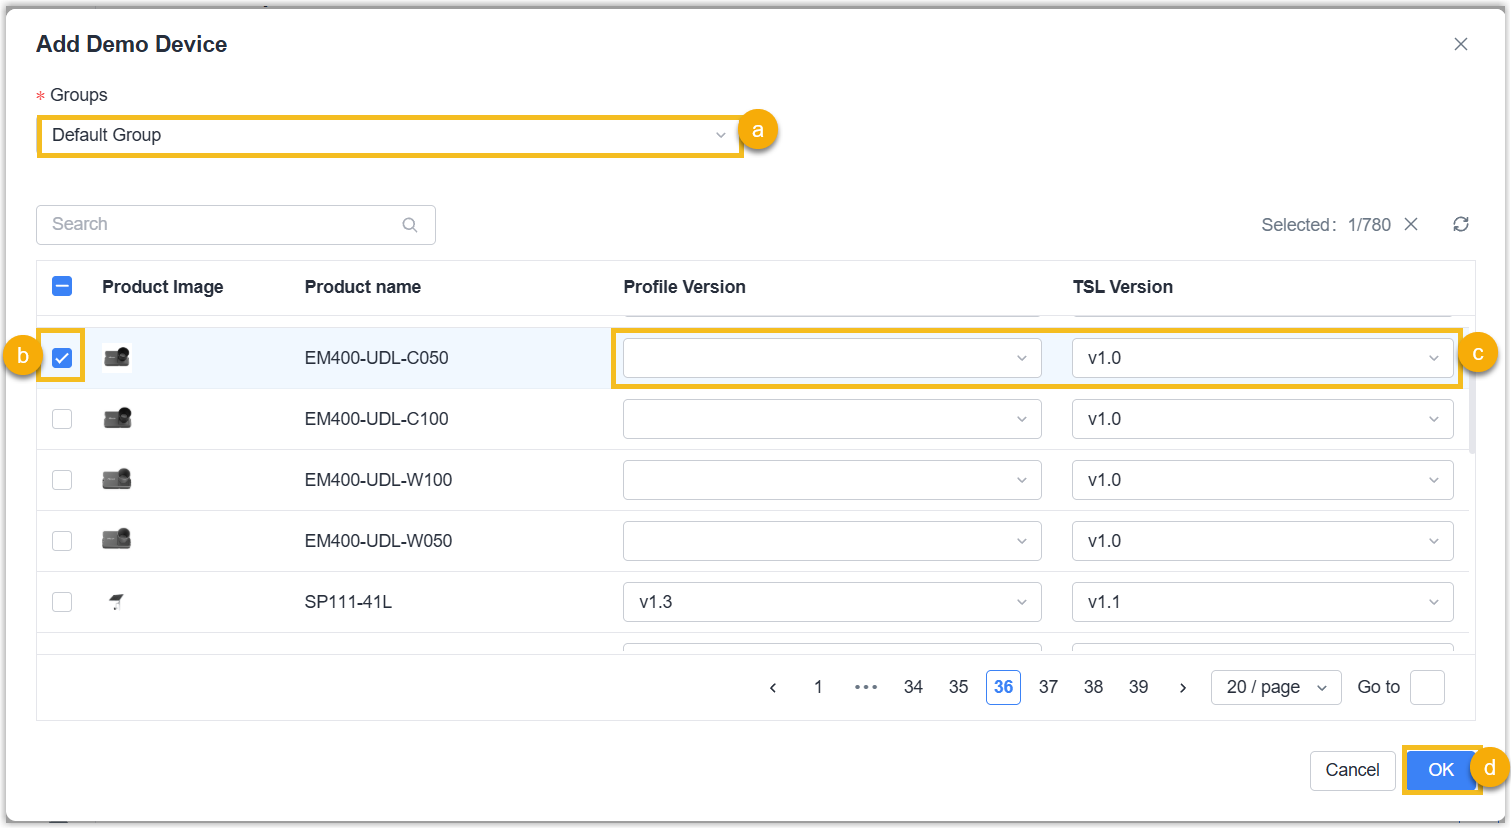
- Select the group to add demo devices.
- Check the box of desired model.
- Select the profile version (TSL version).
- Click OK.
- Result
- A demo device is added to both Device page and Application page of Milesight Development Platform.
Add Device to Application Individually
- Prerequisites
-
- You have collect the device's SN or EUI.
- You have upgraded the firmware version of device model to a supported
version.Note: You need to reboot the device after the SN is added to platform.
- If you want to apply custom settings to devices that support initial configuration, you need to create custom Profile templates for the devices or export the configuration file from the devices.
- Procedure
-
- Log in to Milesight Development Platform.
- On the left bar, select the
Application
tab.
- Select the desired application from the
group
list.
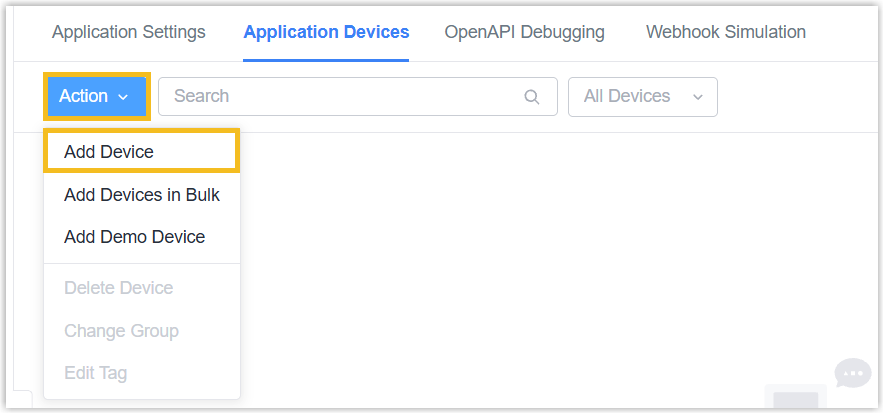
- Select Application Devices tab, move to Action
button, select Add Device.
- In the Add Device page, fill in the
basic
information.
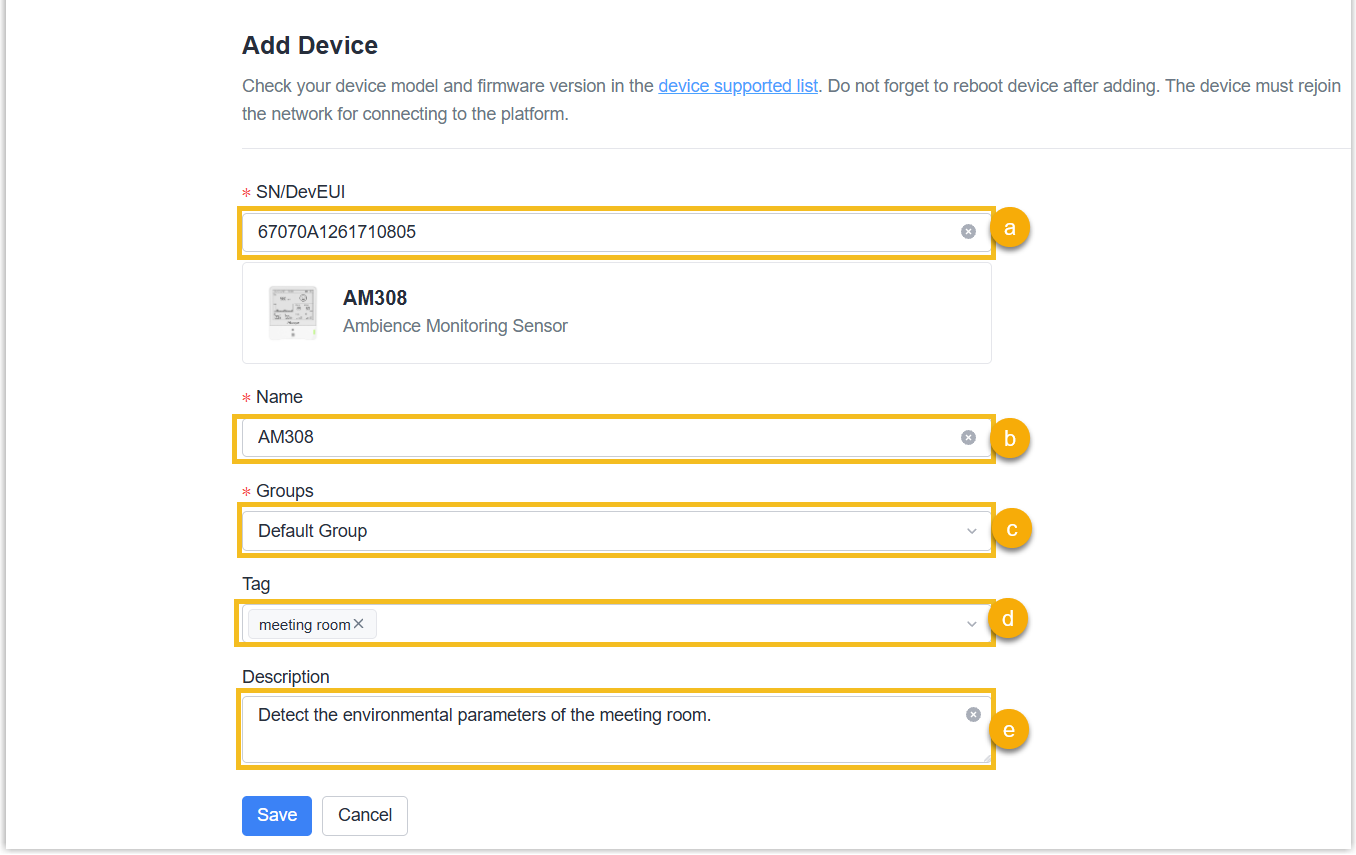
- In the SN/DevEUI field, enter the device's SN
(Serial Number) or EUI (Extended Unique Identifier).
If the SN/EUI is correct, the system automatically detects the device type.
- In the Name field, specify a name to help you identify this device.
- In the Groups drop-down list, select the group to which the device belongs.
- Optional: Select one or more tags for marking. You can also add, edit or delete the tags here.
- Optional: Enter the device description.
- In the SN/DevEUI field, enter the device's SN
(Serial Number) or EUI (Extended Unique Identifier).
- If this
device supports RPS, you can configure
the initial configuration for
it.
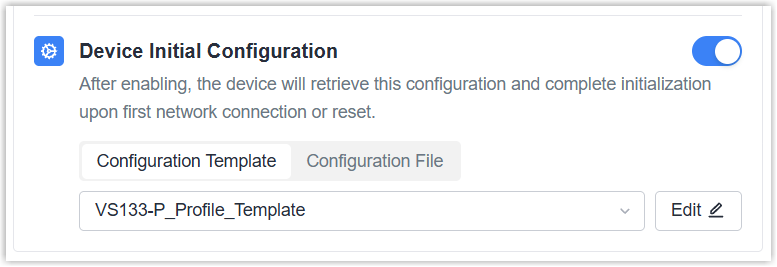
- Enable Device Initial Configuration.
- Select the configuration type and configure the related parameters.
If you require device to receive configurations from configuration
URL, see Add RPS Records Individually.
- Configuration Template: In the drop-down list, select
the desired configuration file to apply settings to the
device. You can click Edit to edit
the selected file as needed.Note: The listed files include the default Config template and the custom Config templates you created.
- Configuration
File:Upload the
.datformat configuration file generated from the device by clicking upload button.Note: Ensure that the hardware and firmware versions of the device from which the configuration file is exported match those of the target device.
- Configuration Template: In the drop-down list, select
the desired configuration file to apply settings to the
device. You can click Edit to edit
the selected file as needed.
- Click Save.
- Result
- The device is added to both Device page and Application page of Milesight Development Platform.
Add Devices to Application in Bulk
- Prerequisites
-
- You have collect the devices' SNs or EUIs.
- You have upgraded the firmware version of device model to a supported
version.Note: You need to reboot the device after the SN is added to platform.
- If you have a large number of devices that need to be added, it's
recommended to compile the devices' SNs or EUIs into a file with the
following requirements:
- Format:
xlsxorxls. - Size: Less than 100 KB.
- Content:
Each
line contains information of one device, with four columns from left
to right showing SN (or EUI), device name,
group,
and tags.

- Format:
- If you want to apply custom settings to devices that support initial configuration, you need to create custom Config templates for the devices or export the configuration file from the devices.
- Procedure
-
- Log in to Milesight Development Platform.
- On the left bar, select the
Application
tab.
- Select the desired application from the
group
list.
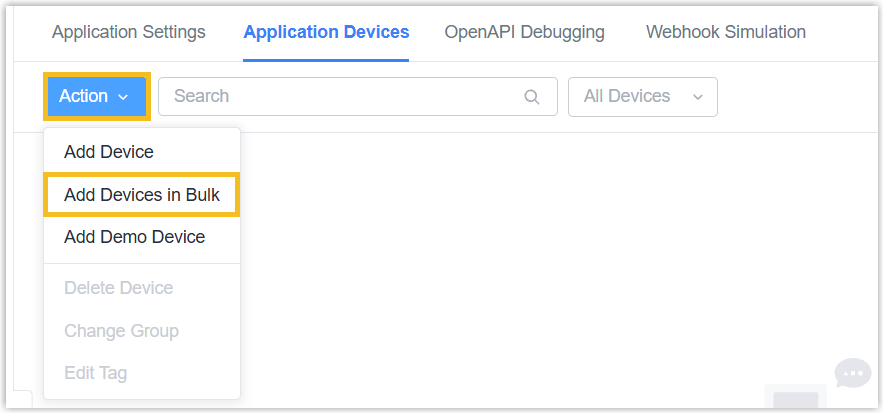
- Select Application Devices tab, move to Action button,
select Add Devices in Bulk.
- In the Upload File step, configure the device
template to upload the devices' information.
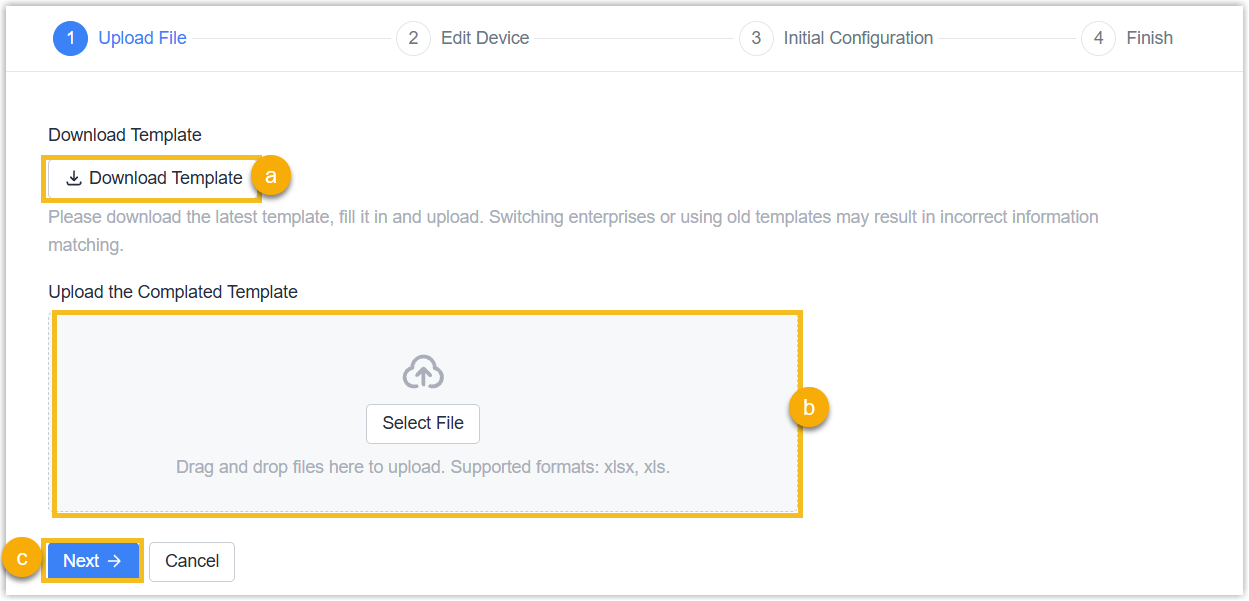
- Click Download Template to download the device import template, and to compile the devices' information into this file.
- Click Select File button or drag the file to here to upload.
- Click Next.
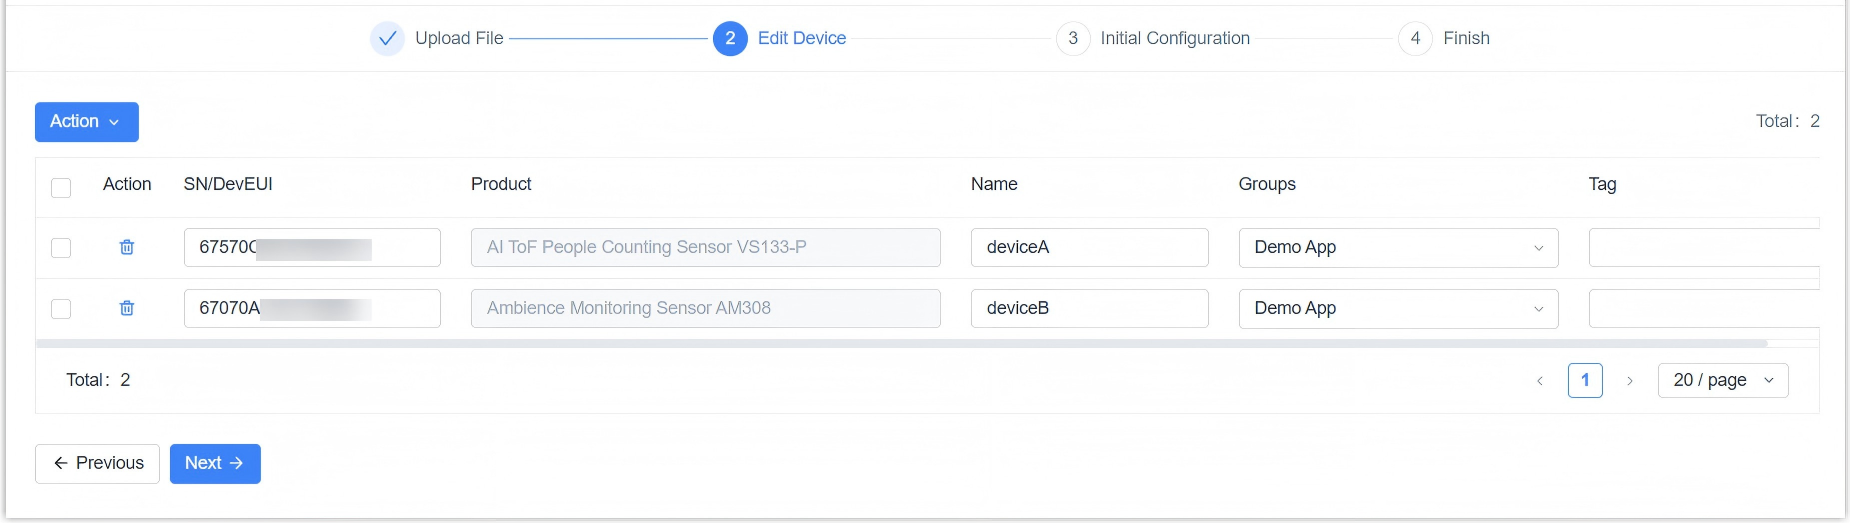
- In the Edit Device step,
edit the device names and
tags
as needed. Click Next.Note: If the SN/DevEUI is identified as incorrect, please re-enter it.
- In the
Initial Configuration step, configure the initial configuration
if there are devices that support RPS.
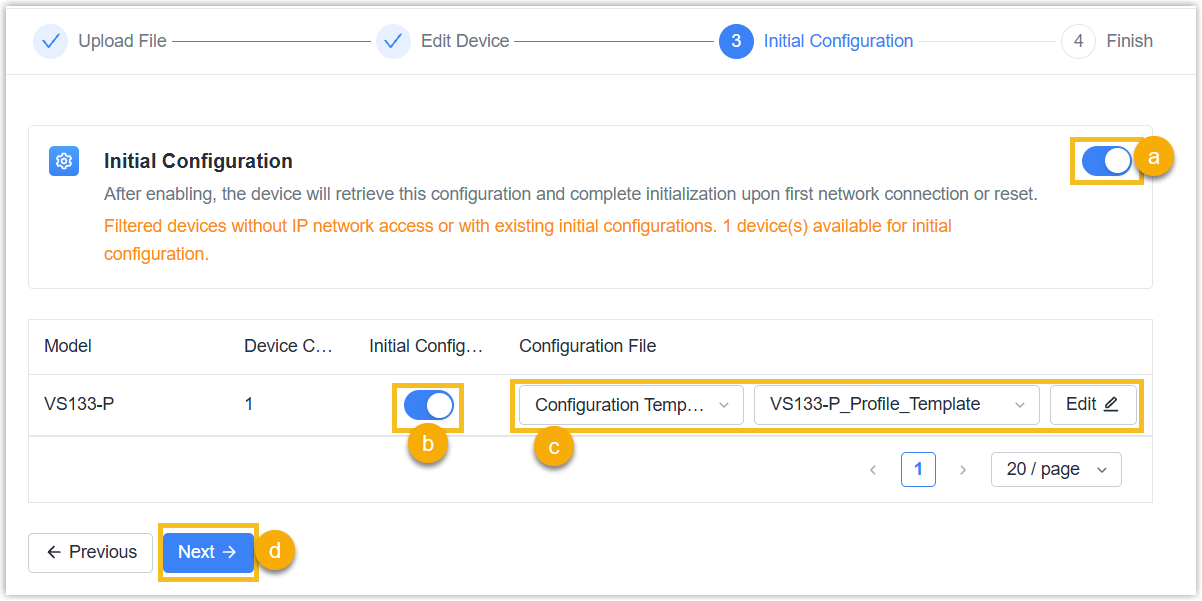
- Enable Initial Configuration.
- Enable Initial Configuration for selected devices.
- Select the configuration type and configure the related parameters.
If you require device to receive configurations from configuration
URL, see Add RPS Records in Bulk.
- Configuration Template: In the
Configuration File drop-down
list, select the desired configuration file to apply
settings to the device. You can click
Custom to edit the selected file
as needed.Note:
- The listed files include the default Config template and the custom Config templates you created.
- If you do NOT want to enable auto provision for specific devices, then select [None].
- Configuration
File:Upload the
.datformat configuration file generated from the device by clicking upload button.Note: Ensure that the hardware and firmware versions of the device from which the configuration file is exported match those of the target device.
- Configuration Template: In the
Configuration File drop-down
list, select the desired configuration file to apply
settings to the device. You can click
Custom to edit the selected file
as needed.
- Click Next.
- In the Finish step, click Back to Device List or Batch Add Again.
- Result
- The devices are added to both Device page and Application page of Milesight Development Platform.