Configure Obstacle Exclusion
This section describes how to configure Obstacle Exclusion function.
The device supports the Obstacle Exclusion function. It can exclude human-like static obstacles from detection when they cannot be avoided through adjustment of detection lines or regions.
Steps:
- In the main page, click Rule from the navigation tree on the left.
-
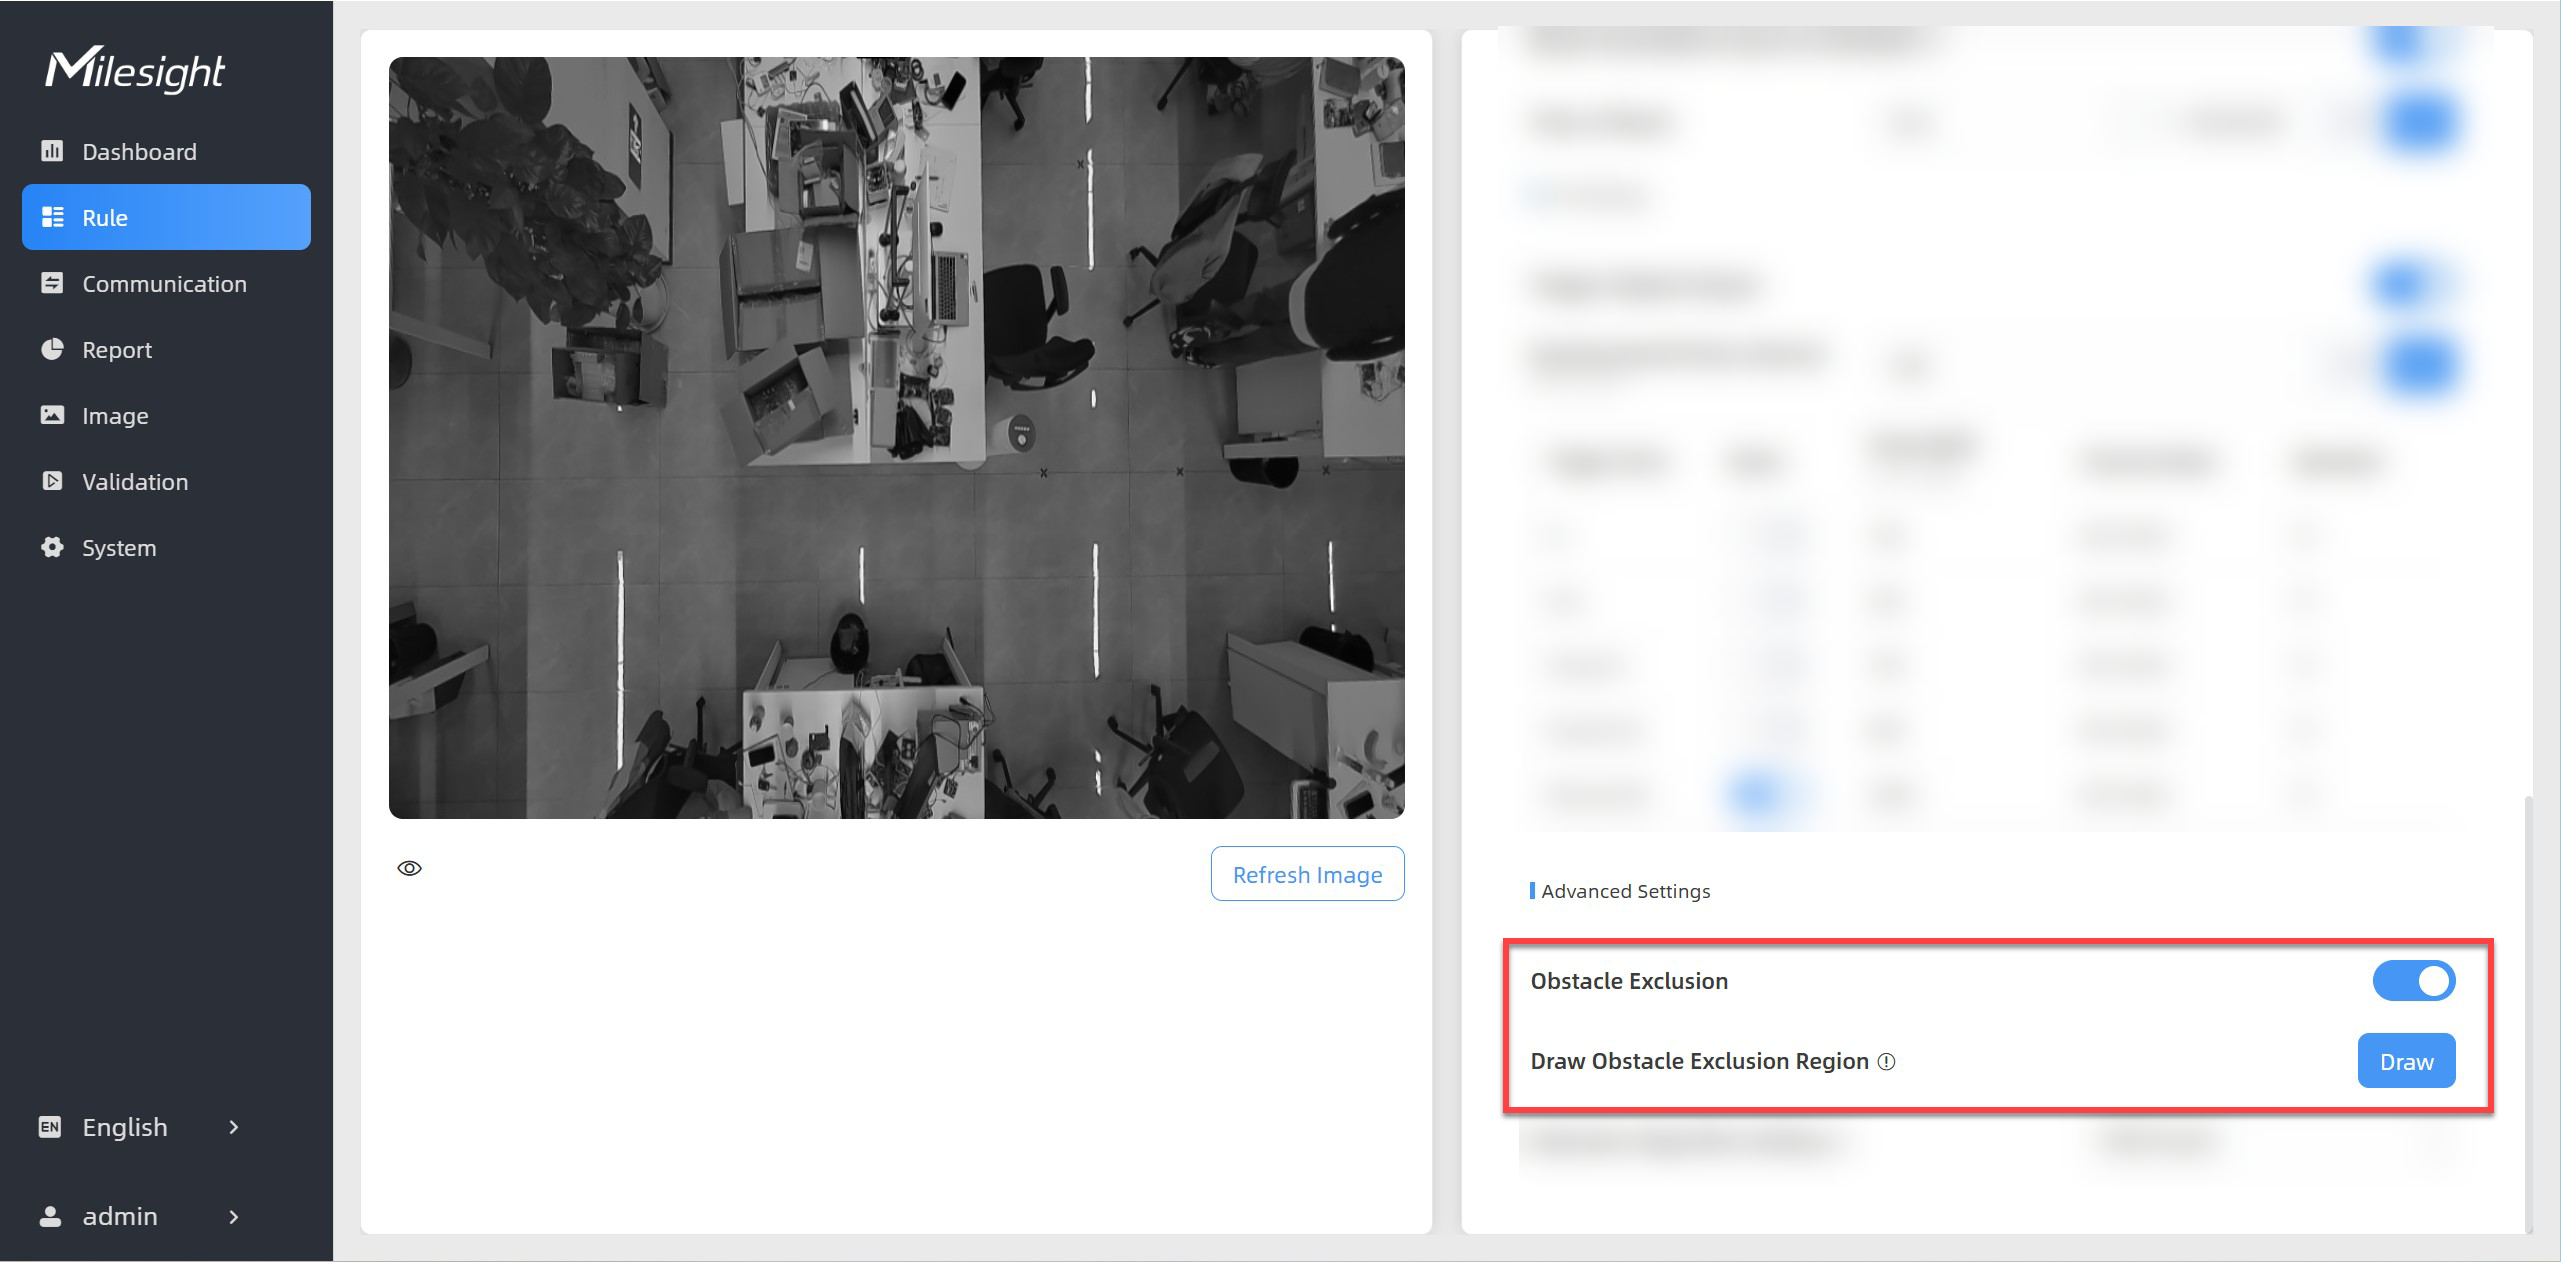
In the Advanced Settings area in the bottom on the right, enable Obstacle Exclusion and click Draw.
-
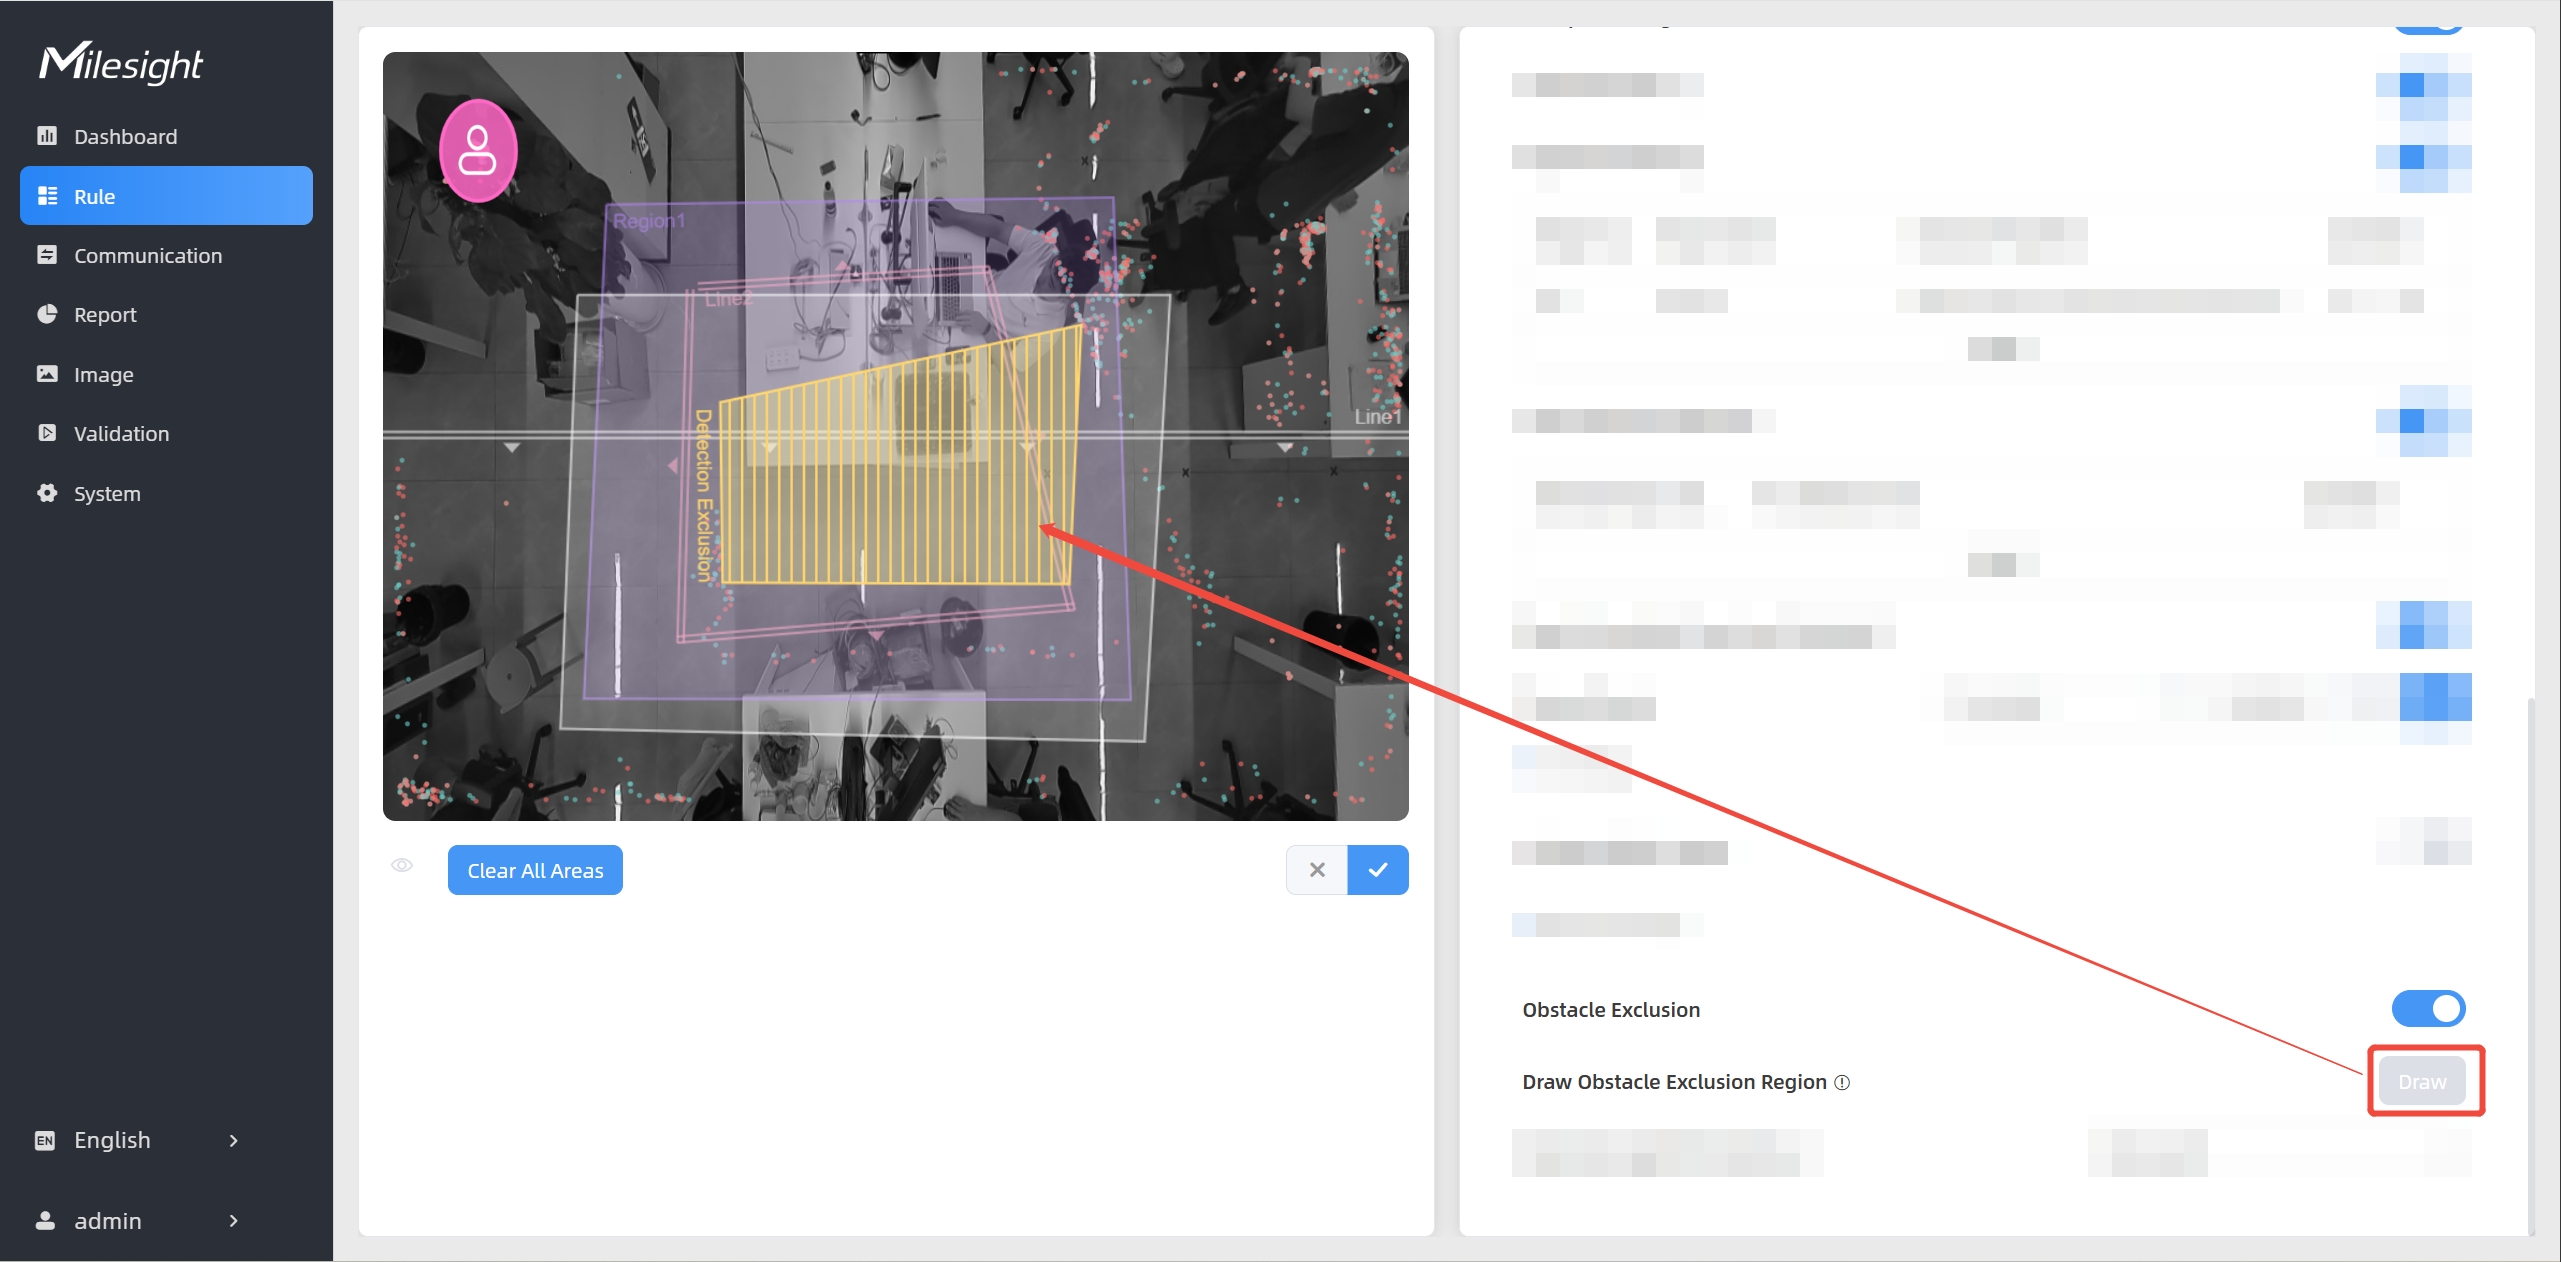
Draw an obstacle exclusion area, you can draw up to 4 regions with a maximum of 10 segments per area:
-
Left-click to start and drag to draw the first line segment.
- Left-click to add vertices and change direction and drag to draw another line segment.
- Repeat step b to draw more line segments as needed.
- Right-click to finish.
- (Optional) Adjust the region by dragging.
-
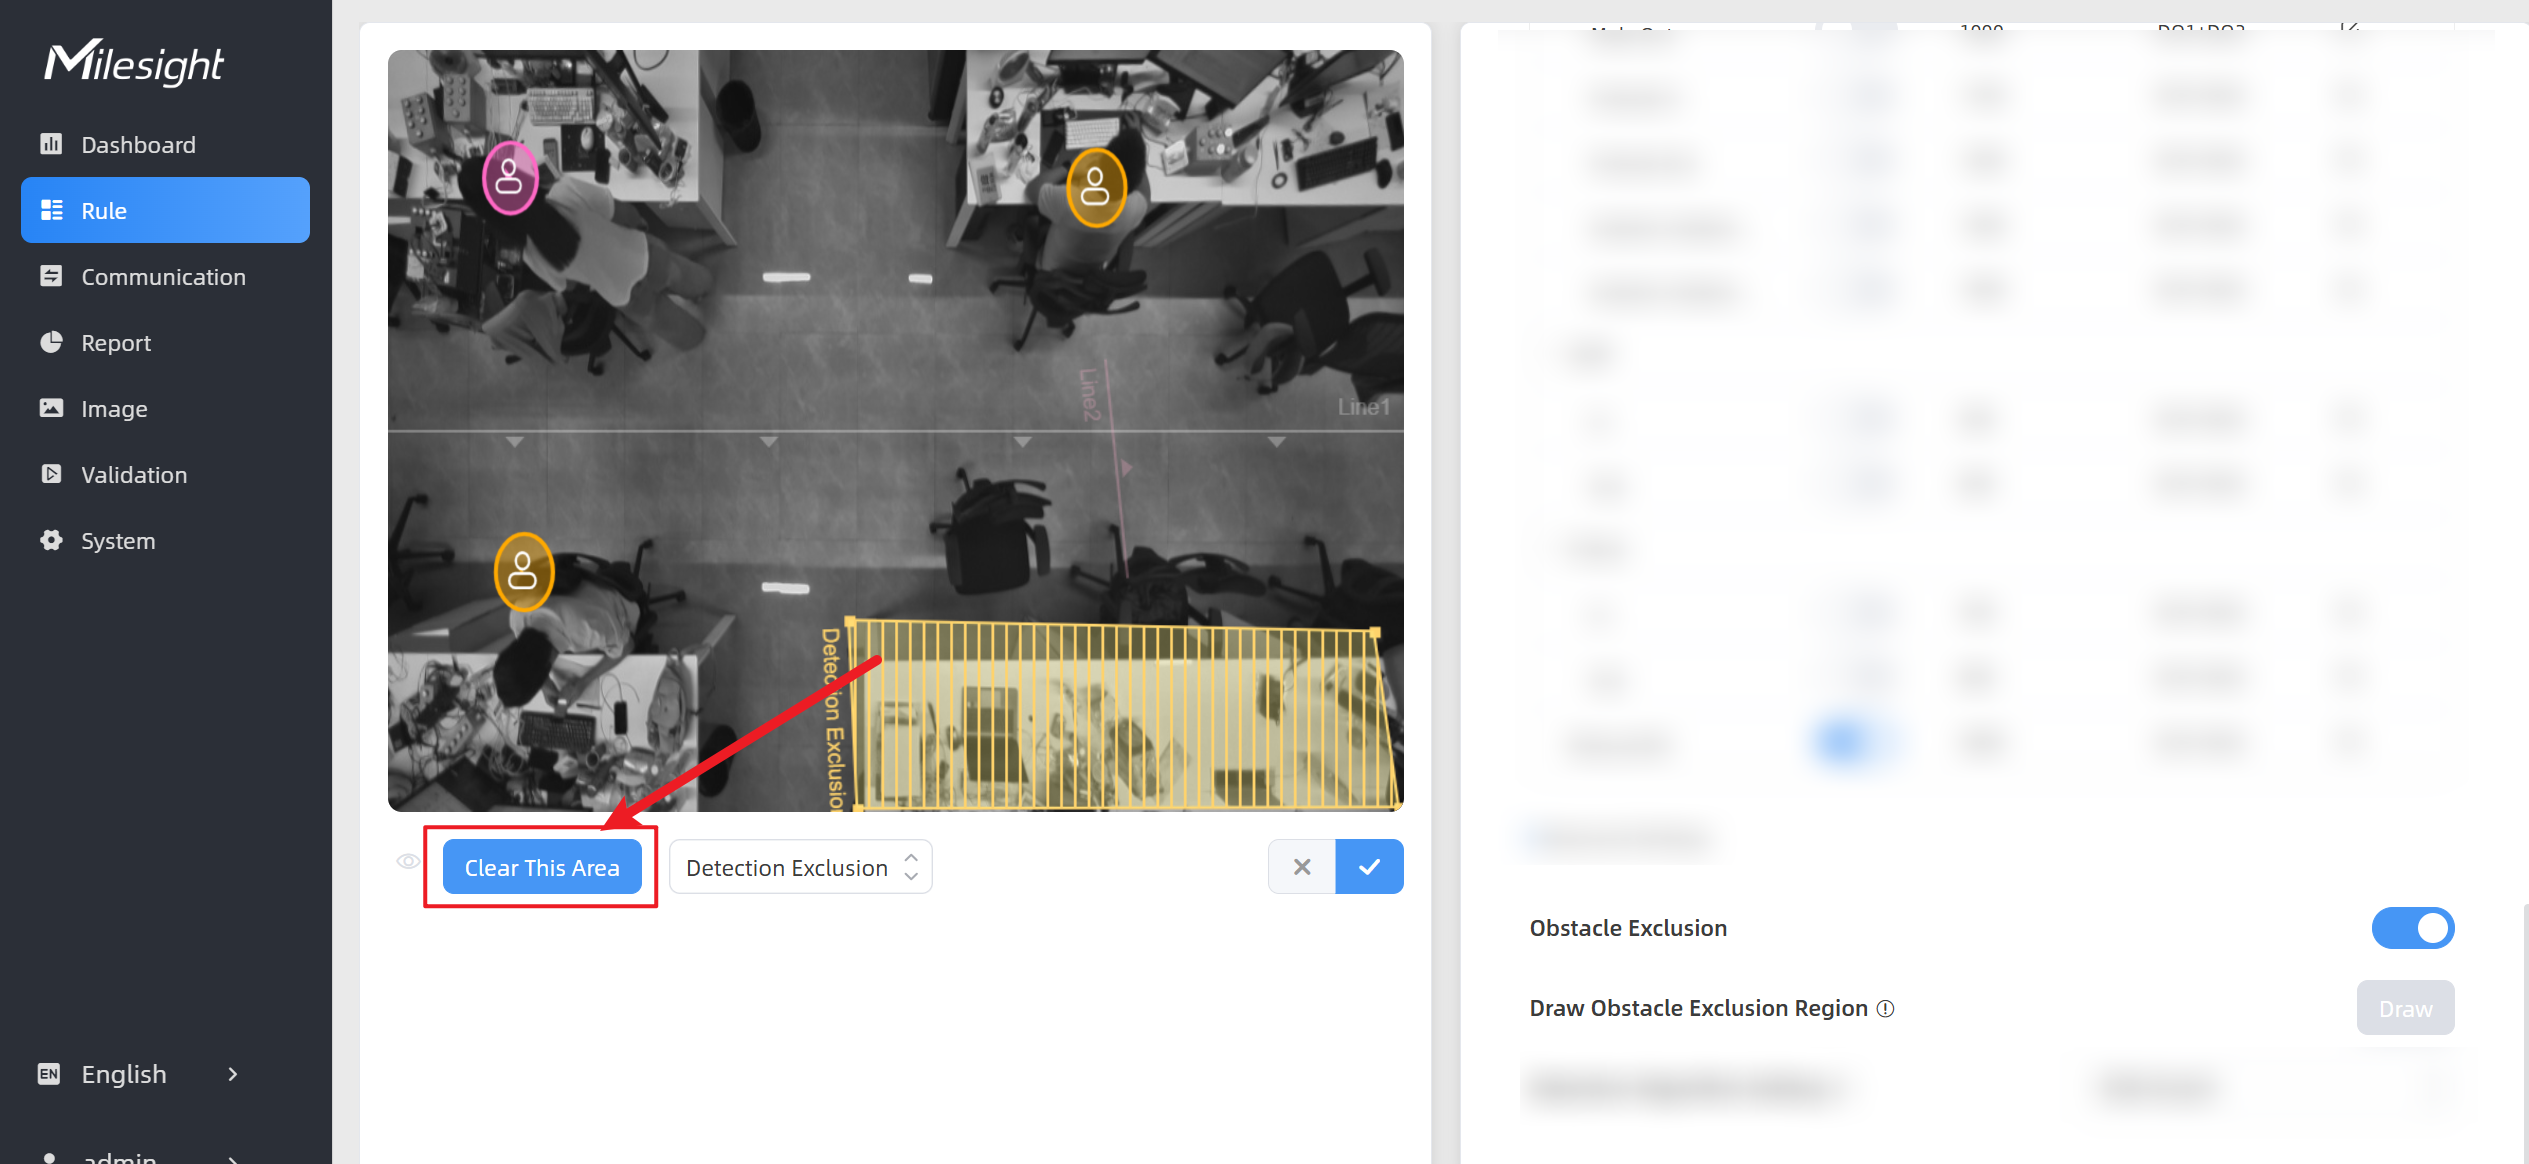
(Optional) To redraw a region, click Clear This Area.
-
Select the exclusion method:
- Detection Exclusion: Select it when you don't want to detect
anything in this area. You can just draw the highest part of the
obstacle. The device uses this highest part as a reference to
automatically exclude this specific area.
For example, in a shelf scenario, you can just frame the upper edge of the shelf, then the shelf won't be mistakenly detected as a person.
- Height Exclusion: Select it when you want to avoid false
detection caused by mixing obstacles with targets. You can just box
out the parts that are easy to confuse with the targets.
For example, in a gate passage scenario, you can outline the gate structure to prevent misclassification. This ensures a child passing through is not identified as an adult, even if the child's silhouette blends with the gate structure.
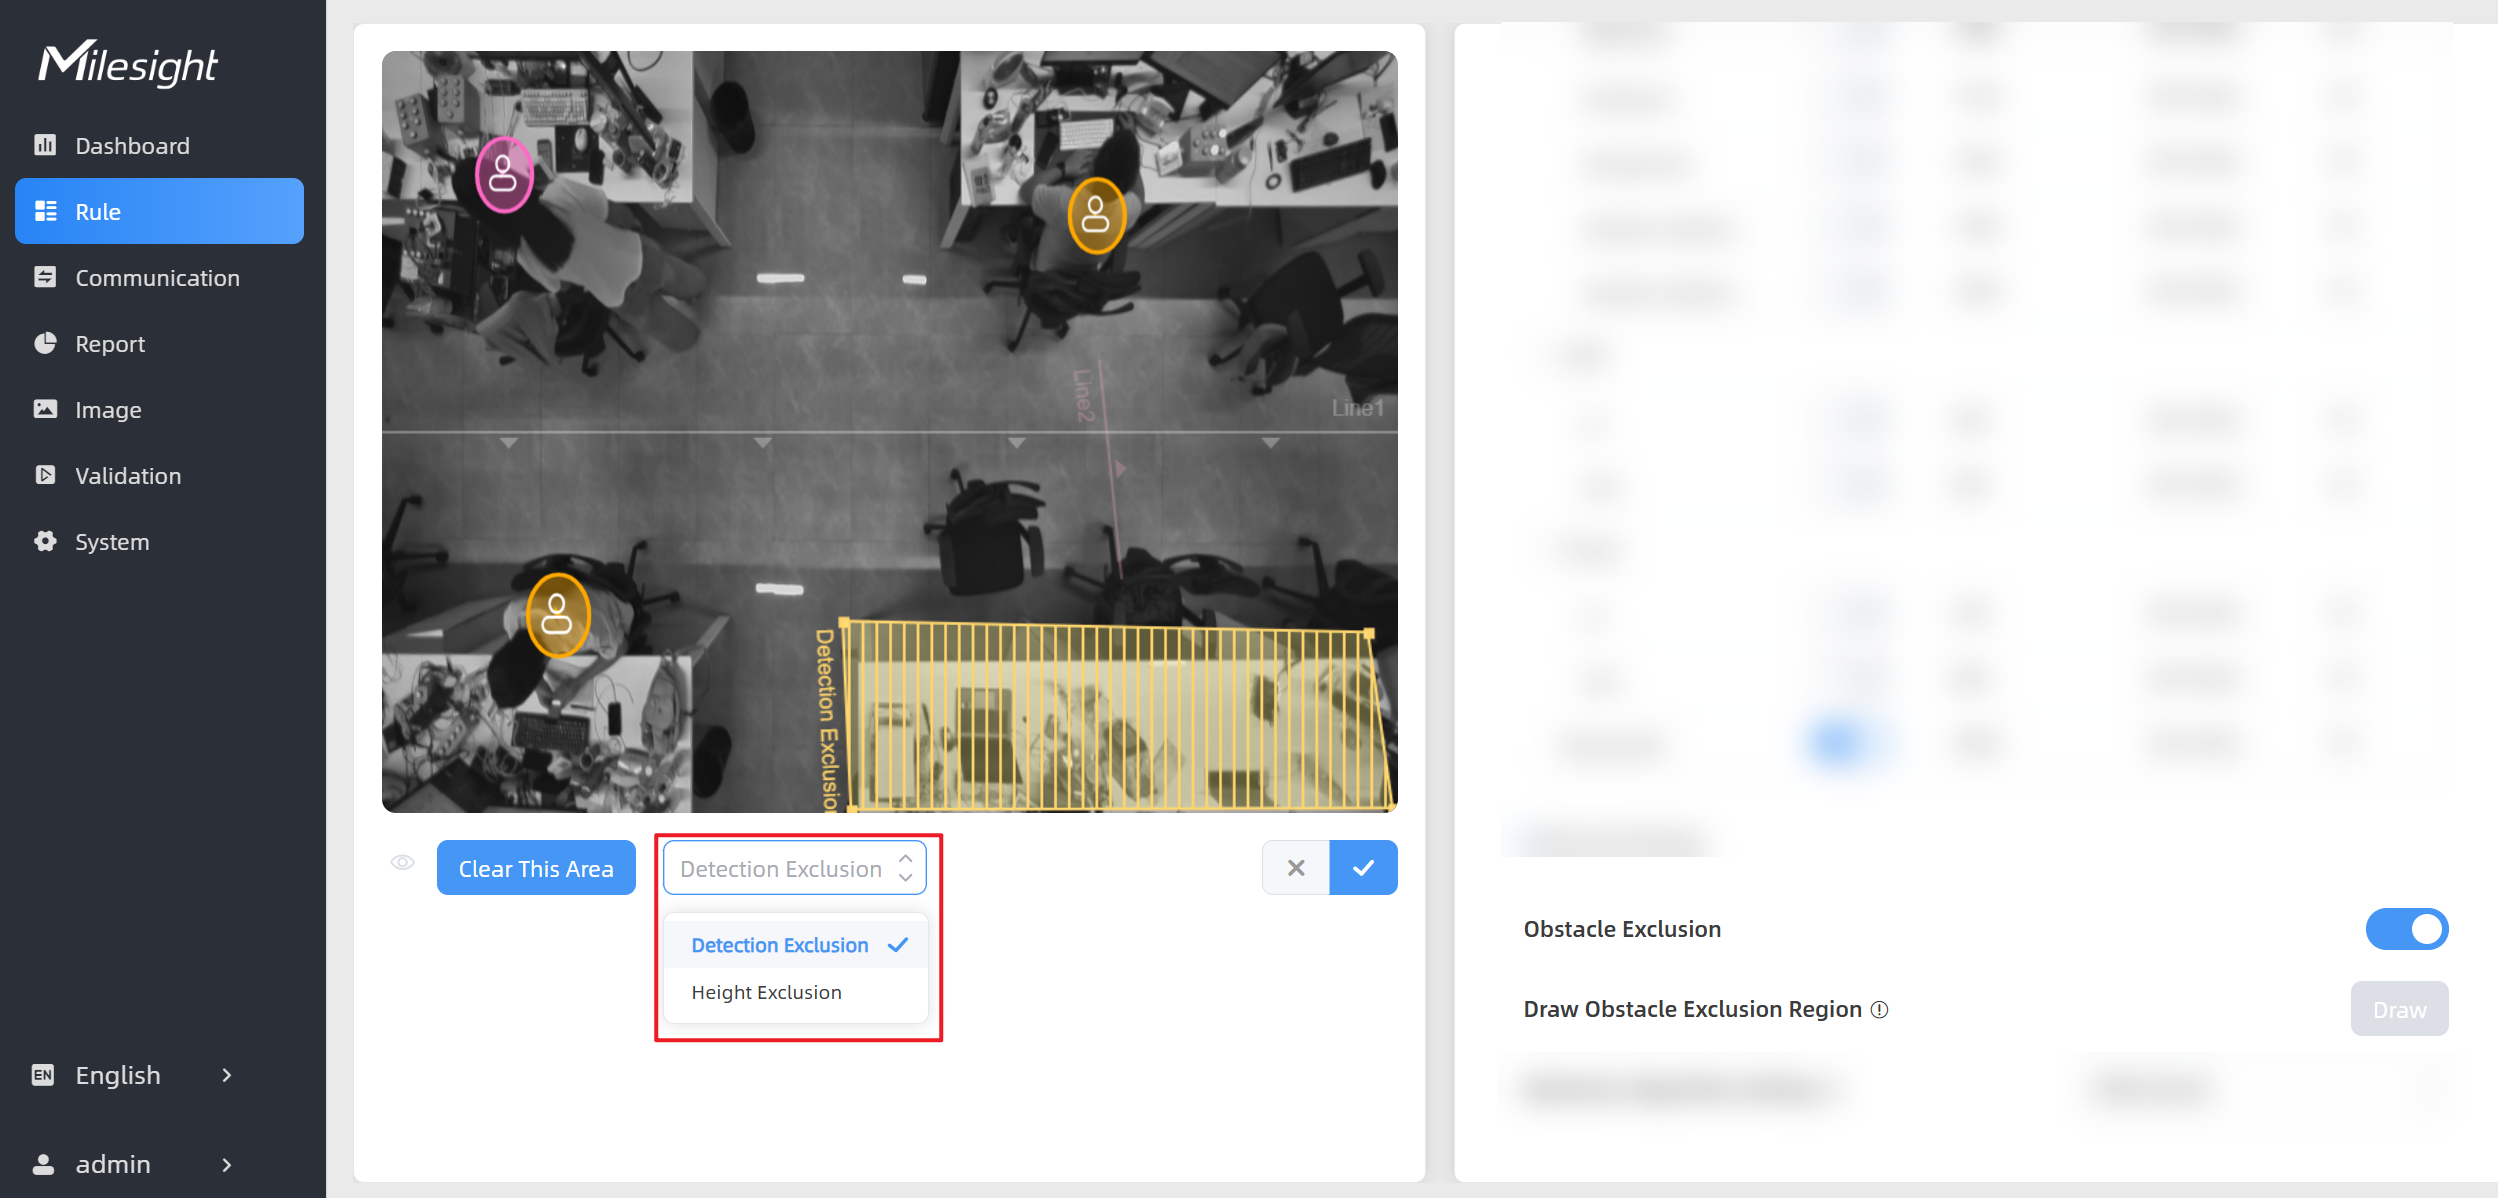
- Detection Exclusion: Select it when you don't want to detect
anything in this area. You can just draw the highest part of the
obstacle. The device uses this highest part as a reference to
automatically exclude this specific area.
-
- Click
 to save the configuration.
 -
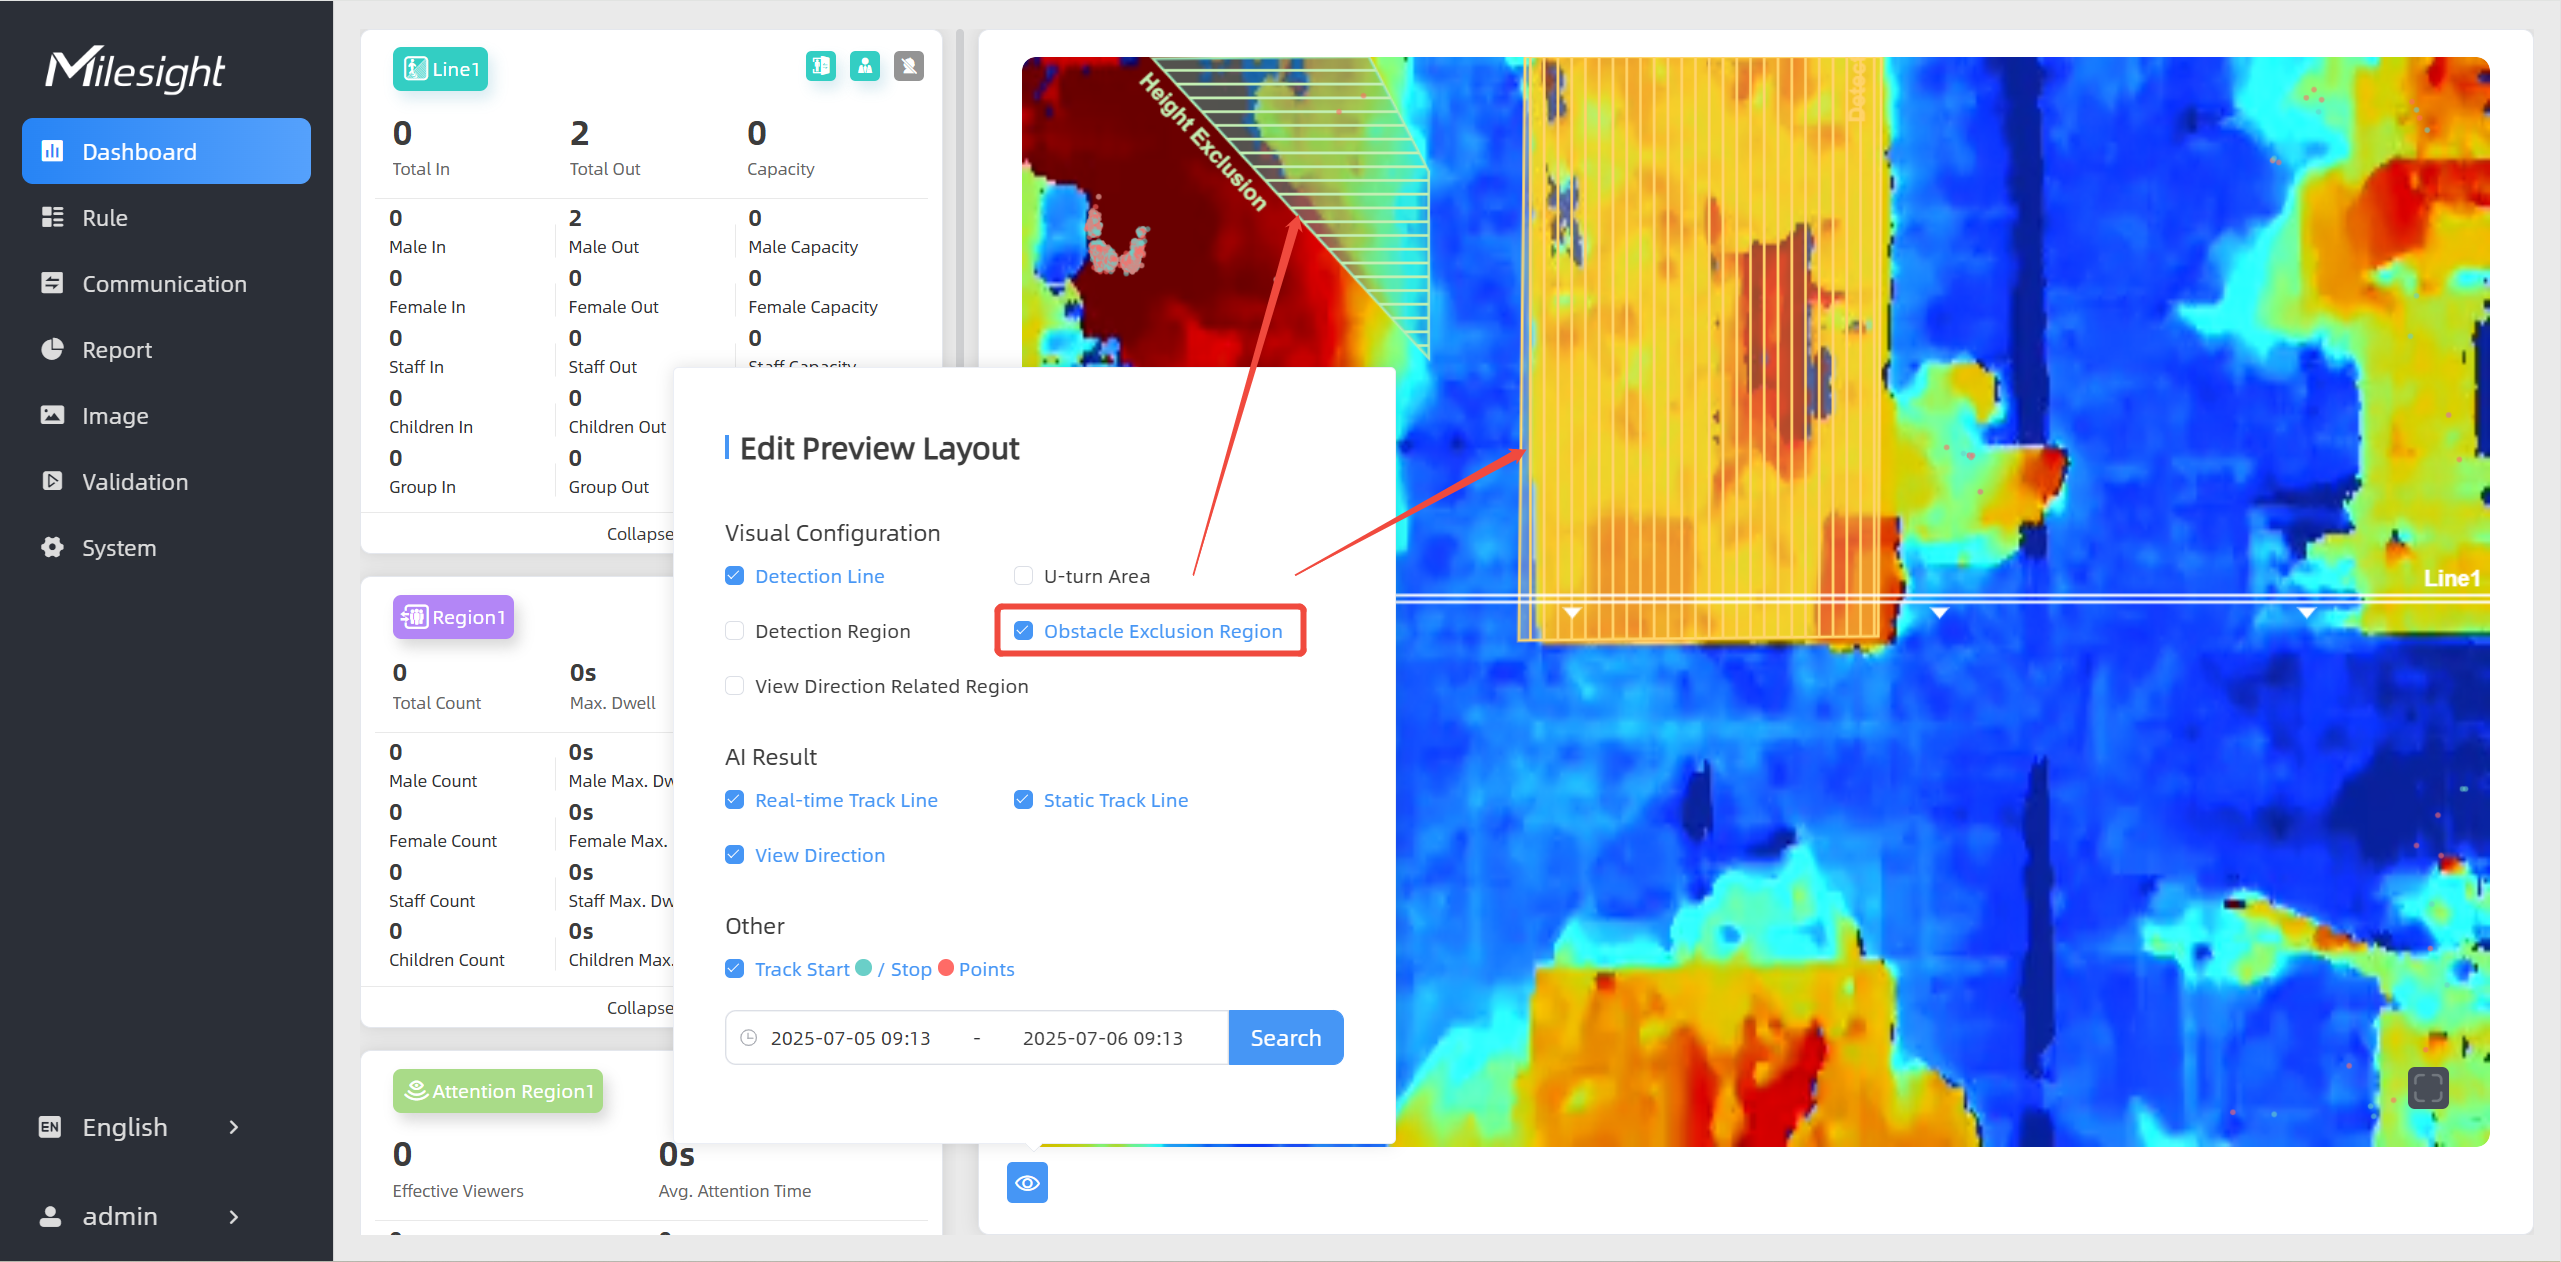
To check the visual configuration effect, click Dashboard from the left navigation tree.