General Settings
This section describes the basic settings of the device.
Temperature Control Settings
Steps:
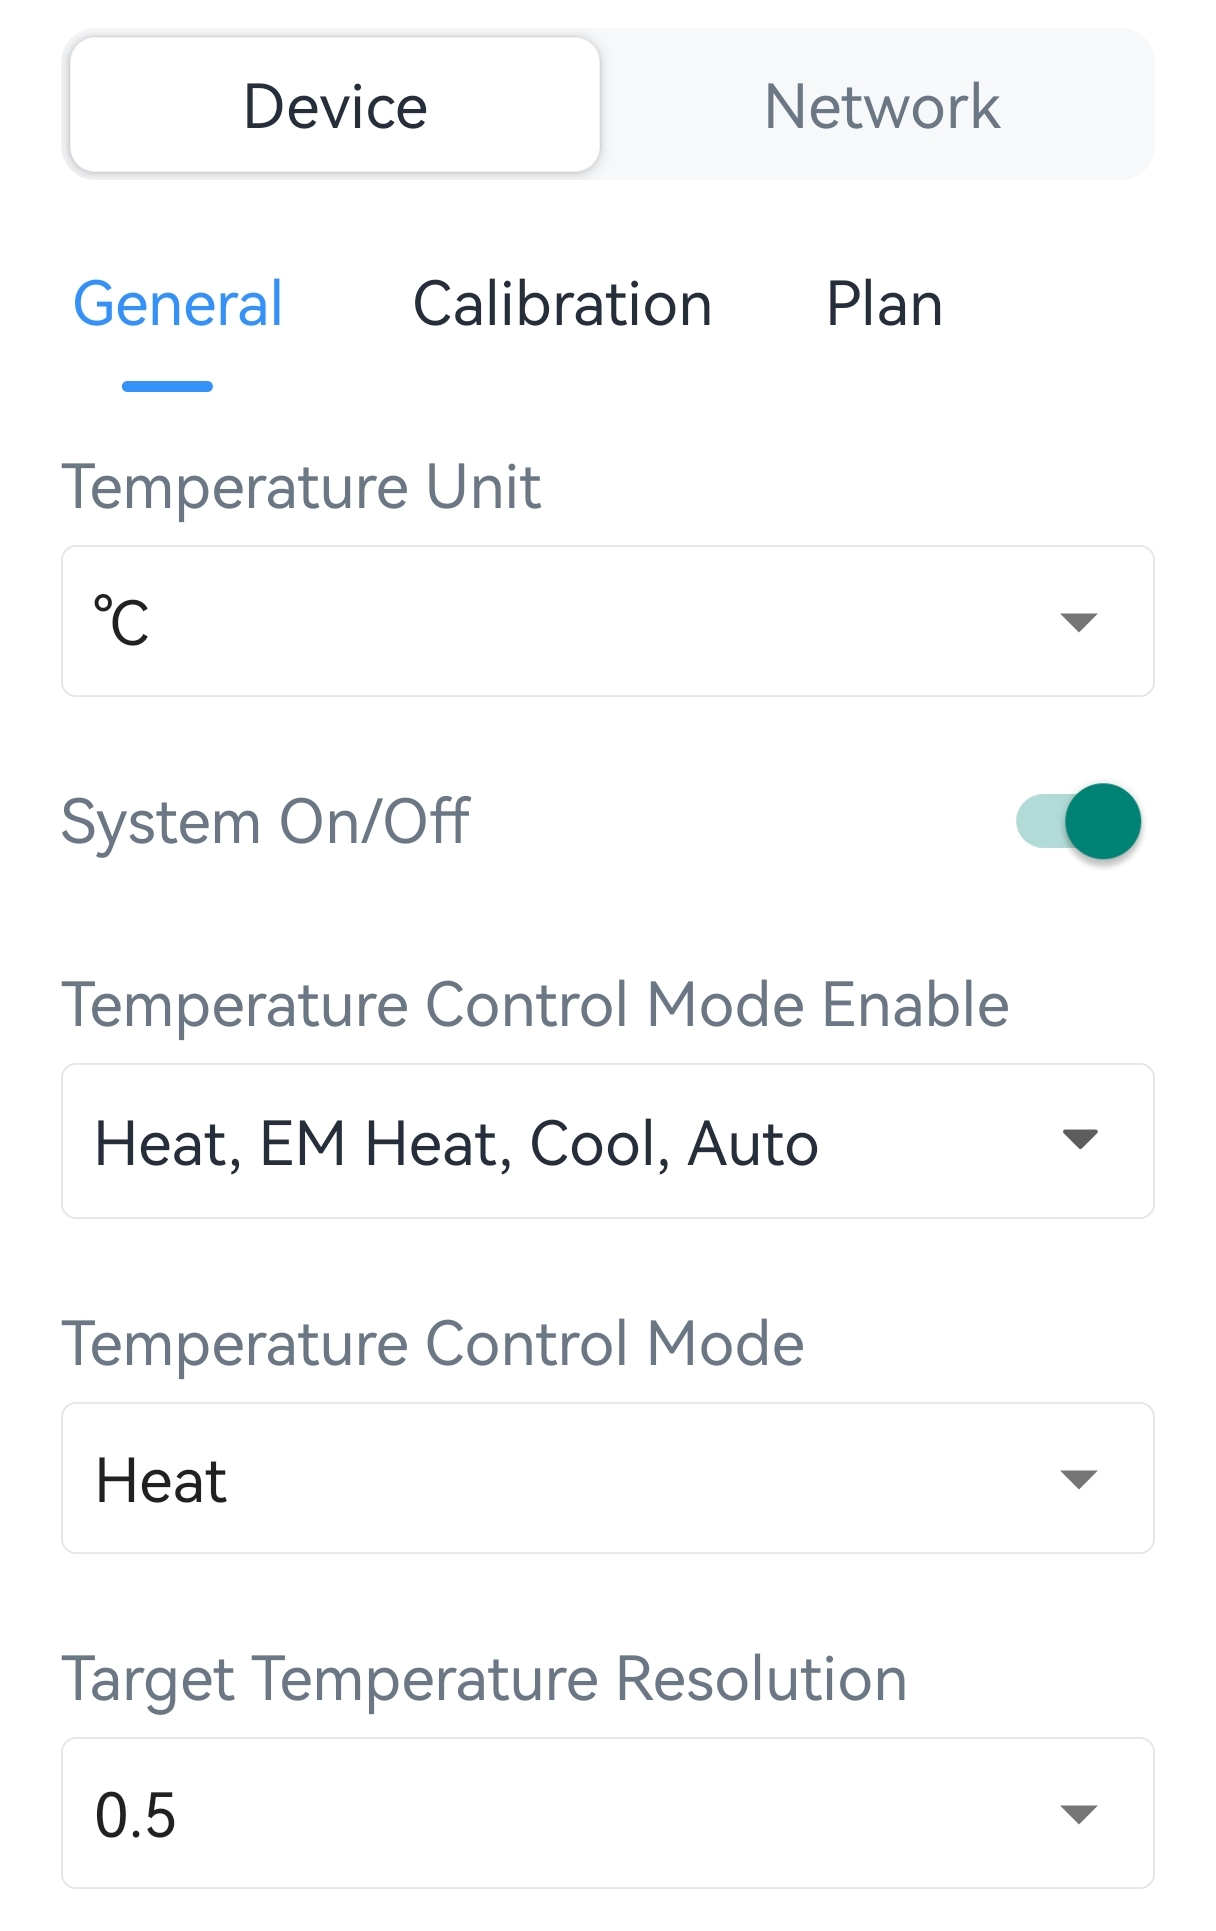
1. Go to Setting > Device > General page.
2. Select the temperature unit as °C or °F. This will affect the temperature display of the screen or the temperature configuration parameters.
3. Tap the System On/Off button to turn the system on or off. This can also be controlled by downlink command or the button.
| Parameter | Description |
|---|---|
| Temperature Control Mode Enable | Select the control mode range and disable some certain control modes. |
| Temperature Control Mode | Select the temperature control mode from Auto, Heat, EM Heat and Cool. This can also be controlled via downlink command or the button. |
| Target Temperature Resolution | Select the resolution of the
target temperature. Options:
|
5. Configure the target temperature related parameters according to the temperature control mode.
| Parameter | Description |
|---|---|
| Target Temperature | Set the target temperature for the device to control. The device will send the value out when it changes. Range: 5-35°C. |
| Target Temperature Regulation Range | Set the range to adjust the target temperature. Range: 5-35°C. |
| Parameter | Description |
|---|---|
| Target Temperature Mode | Select the target temperature
configuration mode. Options: Single Target Temperature: Use the same target temperature for cooling and heating. Dual Target Temperature: Use separate target temperatures for cooling and heating. |
| Target Temperature Regulation Range | Set the range to adjust the target temperature. Range: 5-35°C. |
| Under single target temperature mode | |
| Target Temperature | Set the target temperature for the device to control. The device will send the value out when it changes. Range: 5-35°C. |
| Under dual target temperature mode | |
| Heating Target Temperature | Set the heating target temperature.
Range: 5-35°C. Note: This value must be lower
than cooling target temperature. |
| Cooling Target Temperature | Set the cooling target temperature. Range: 5-35°C. |
| Deadband | Set the minimum allowed difference between heating and cooling target temperatures. |
6. Select the fan mode. This can also be controlled by downlink command or the button.
7. Click Write to save the settings.
Occupancy Detection and Energy Saving
Steps:
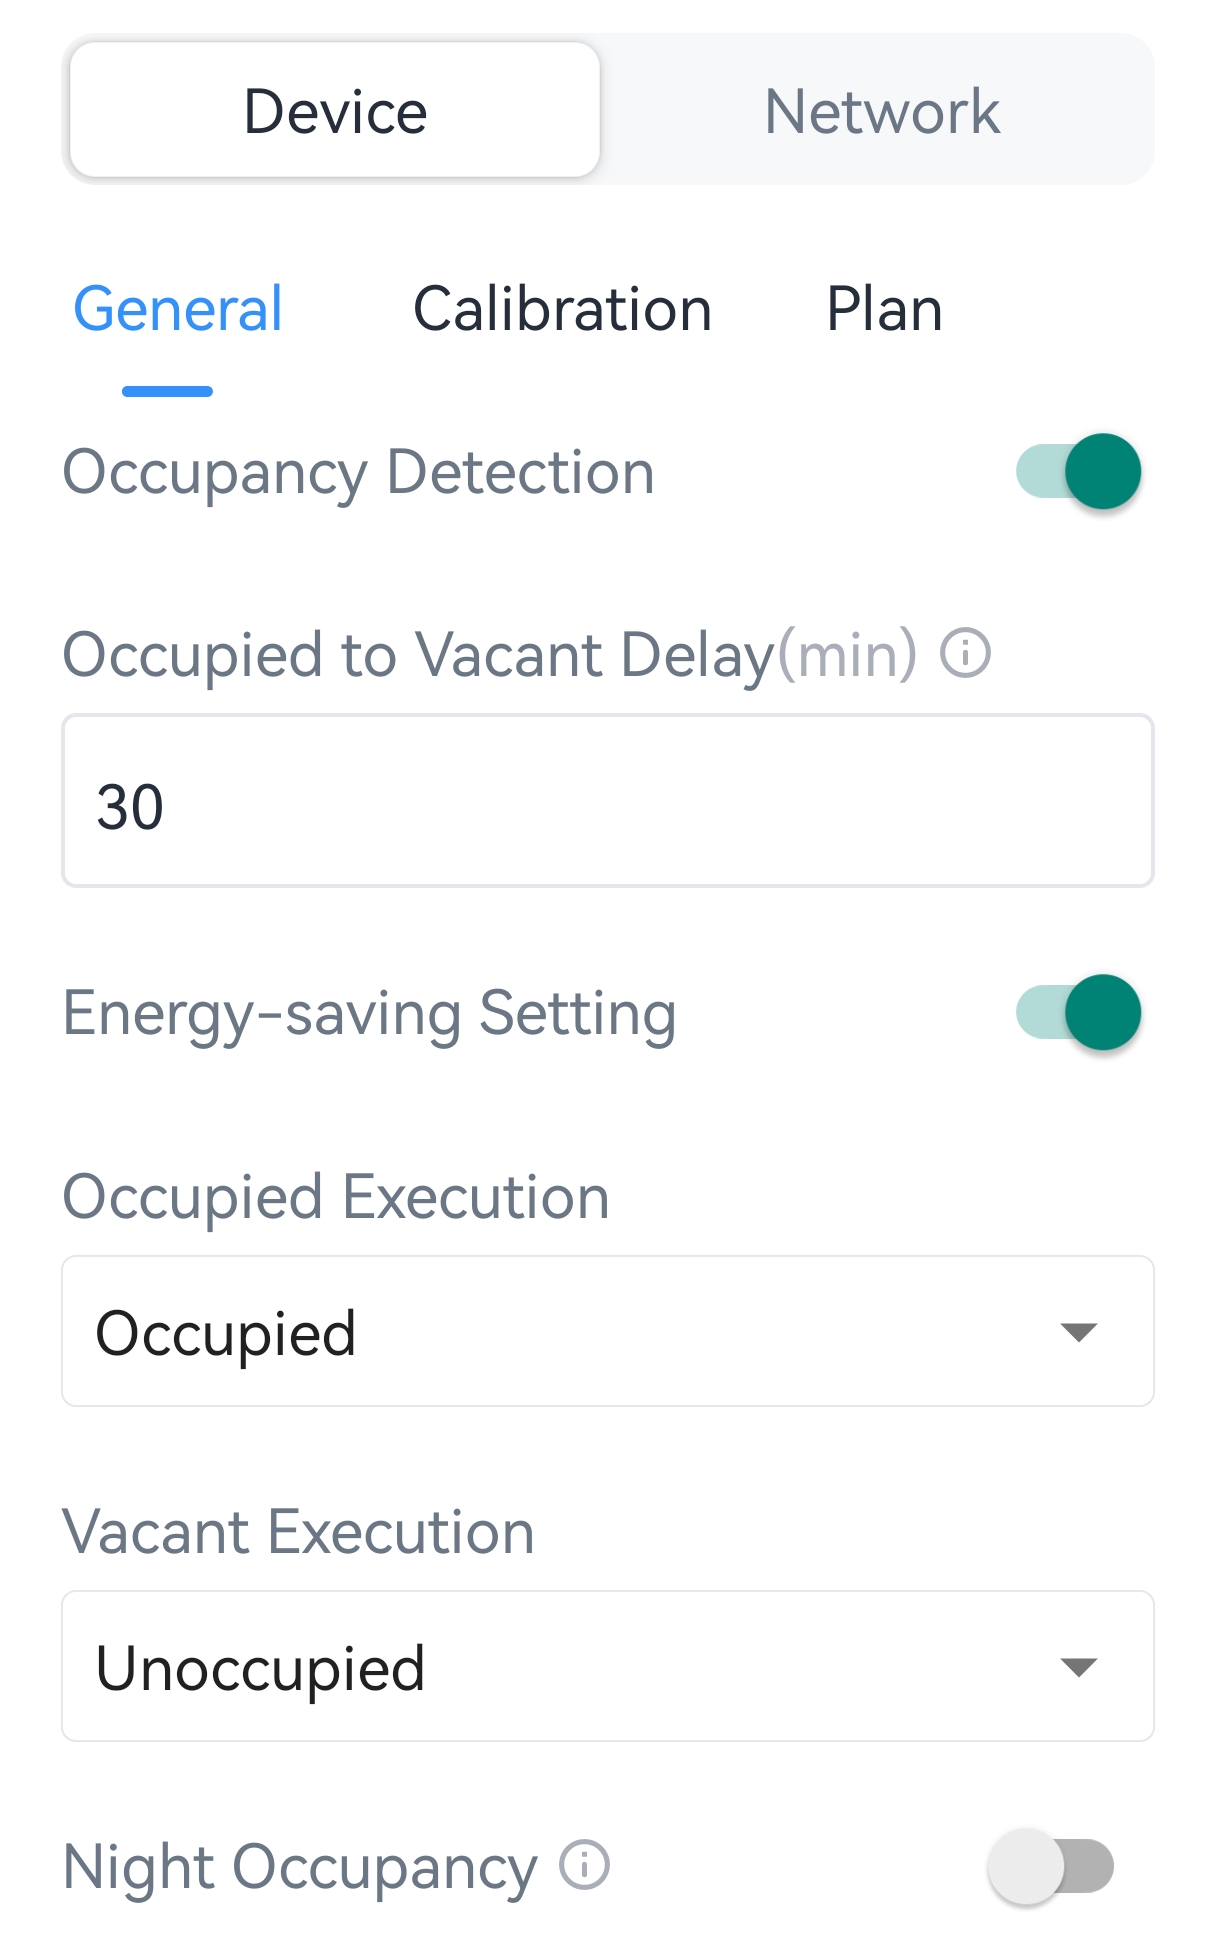
1. Go to Setting > Device > General page.
| Parameter | Description |
|---|---|
| Occupancy Detection | If disabled, the occupancy(PIR) sensor will not work, and the device will neither display nor report the occupancy status. |
| Occupied to Vacant Delay | After entering the "Occupied" status, the device will switch to "Vacant" status only if no motion is detected during the delay time. |
| Parameter | Description |
|---|---|
| Occupied Execution | Select the plan to execute when occupancy status changes to "Occupied". |
| Vacant Execution | Select the plan to execute when occupancy status changes to "Vacant". This plan must differ from occupied execution plan. |
| Night Occupancy | Once enabled, if an "Occupied"
trigger is detected after the start time, the device will remain in
"Occupied" status until the specified end time. Start Time/End Time: Set the time range for night occupancy. Night Occupied Execution: Select the plan to execute when an "Occupied" trigger is detected after the start time. |
Button and Screen Settings
1. Go to Setting > Device > General page.
| Parameter | Description |
|---|---|
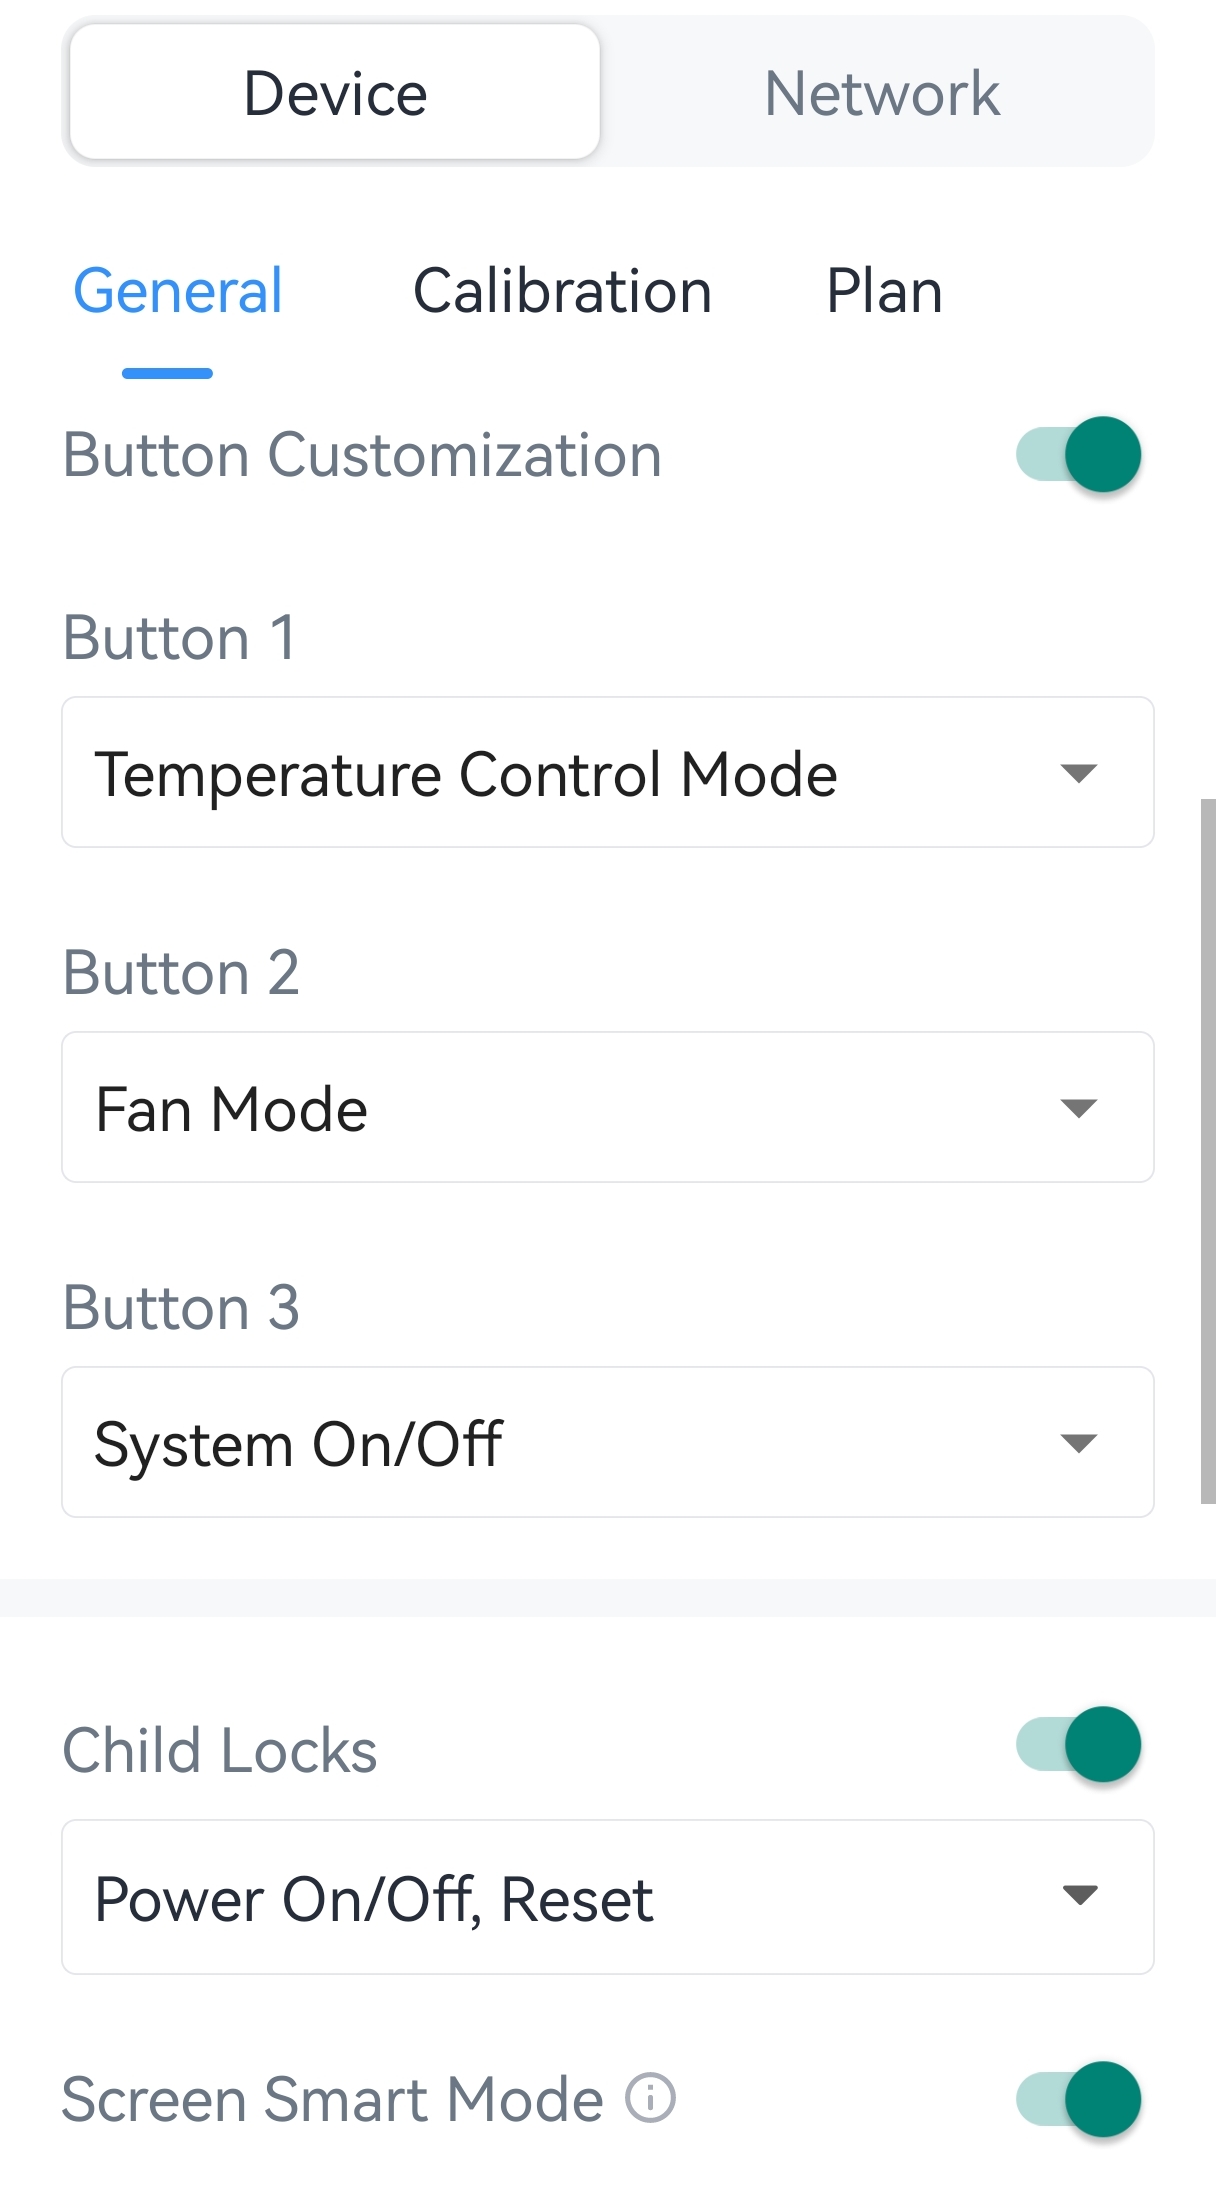
| Button Customization | Once enabled, the features of button 1-3 can be changed. This will not affect basic features. |
| Button 1 | Select the feature for button 1: Temperature Control Mode (default), Fan Mode, Event 1 Report, °C or °F switch. |
| Button 2 | Select the feature for button 2: Fan Mode (default), Temperature Control Mode, Event 2 Report, °C or °F switch. |
| Button 3 | Select the feature for button 3: System On/Off (default), Event 3 Report, °C or °F switch. |
4. Enable or disable Smart Display Mode as needed. Once enabled, the screen will stop updating environment temperature or humidity if the newly collected value is close to the last value (temp. ≤ ±0.5°C or hum. ≤ ±3%) within 10 minutes. This helps conserve power and extend the screen lifespan.
5. Click Write to save the settings.
Time Settings
Steps:
1. Go to Setting > Device > General page.
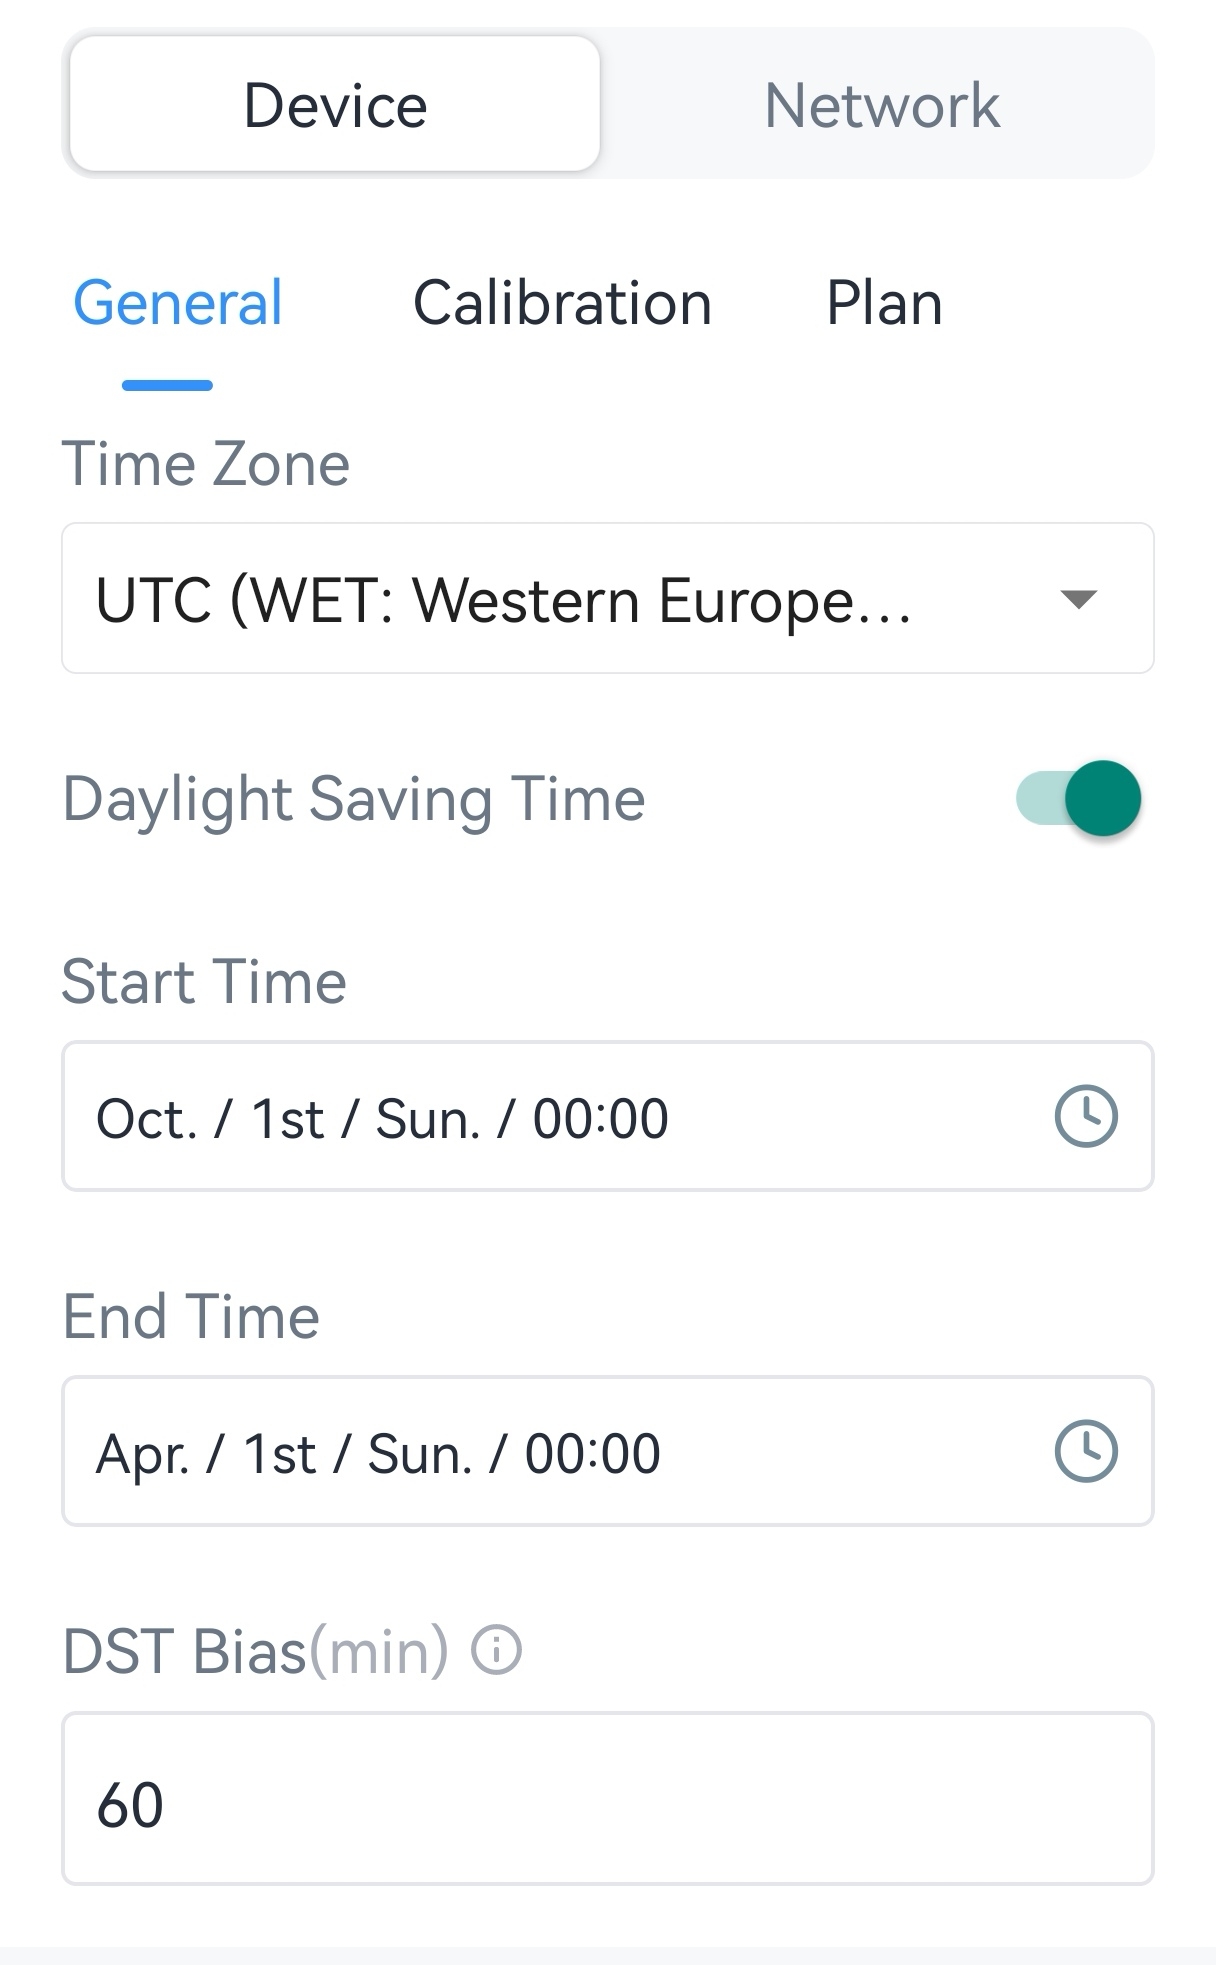
2. Select the appropriate UTC time zone. You can also go to Device > Basic Information to synchronize the device time with the time zone of your smartphone.
| Parameter | Description |
|---|---|
| Start Time | The start time of DST time range. |
| End Time | The end time of DST time range. |
| DST Bias | The DST time will be offset forward by this bias. |
4. Click Write to save the settings.
Change Bluetooth Name and Device Password
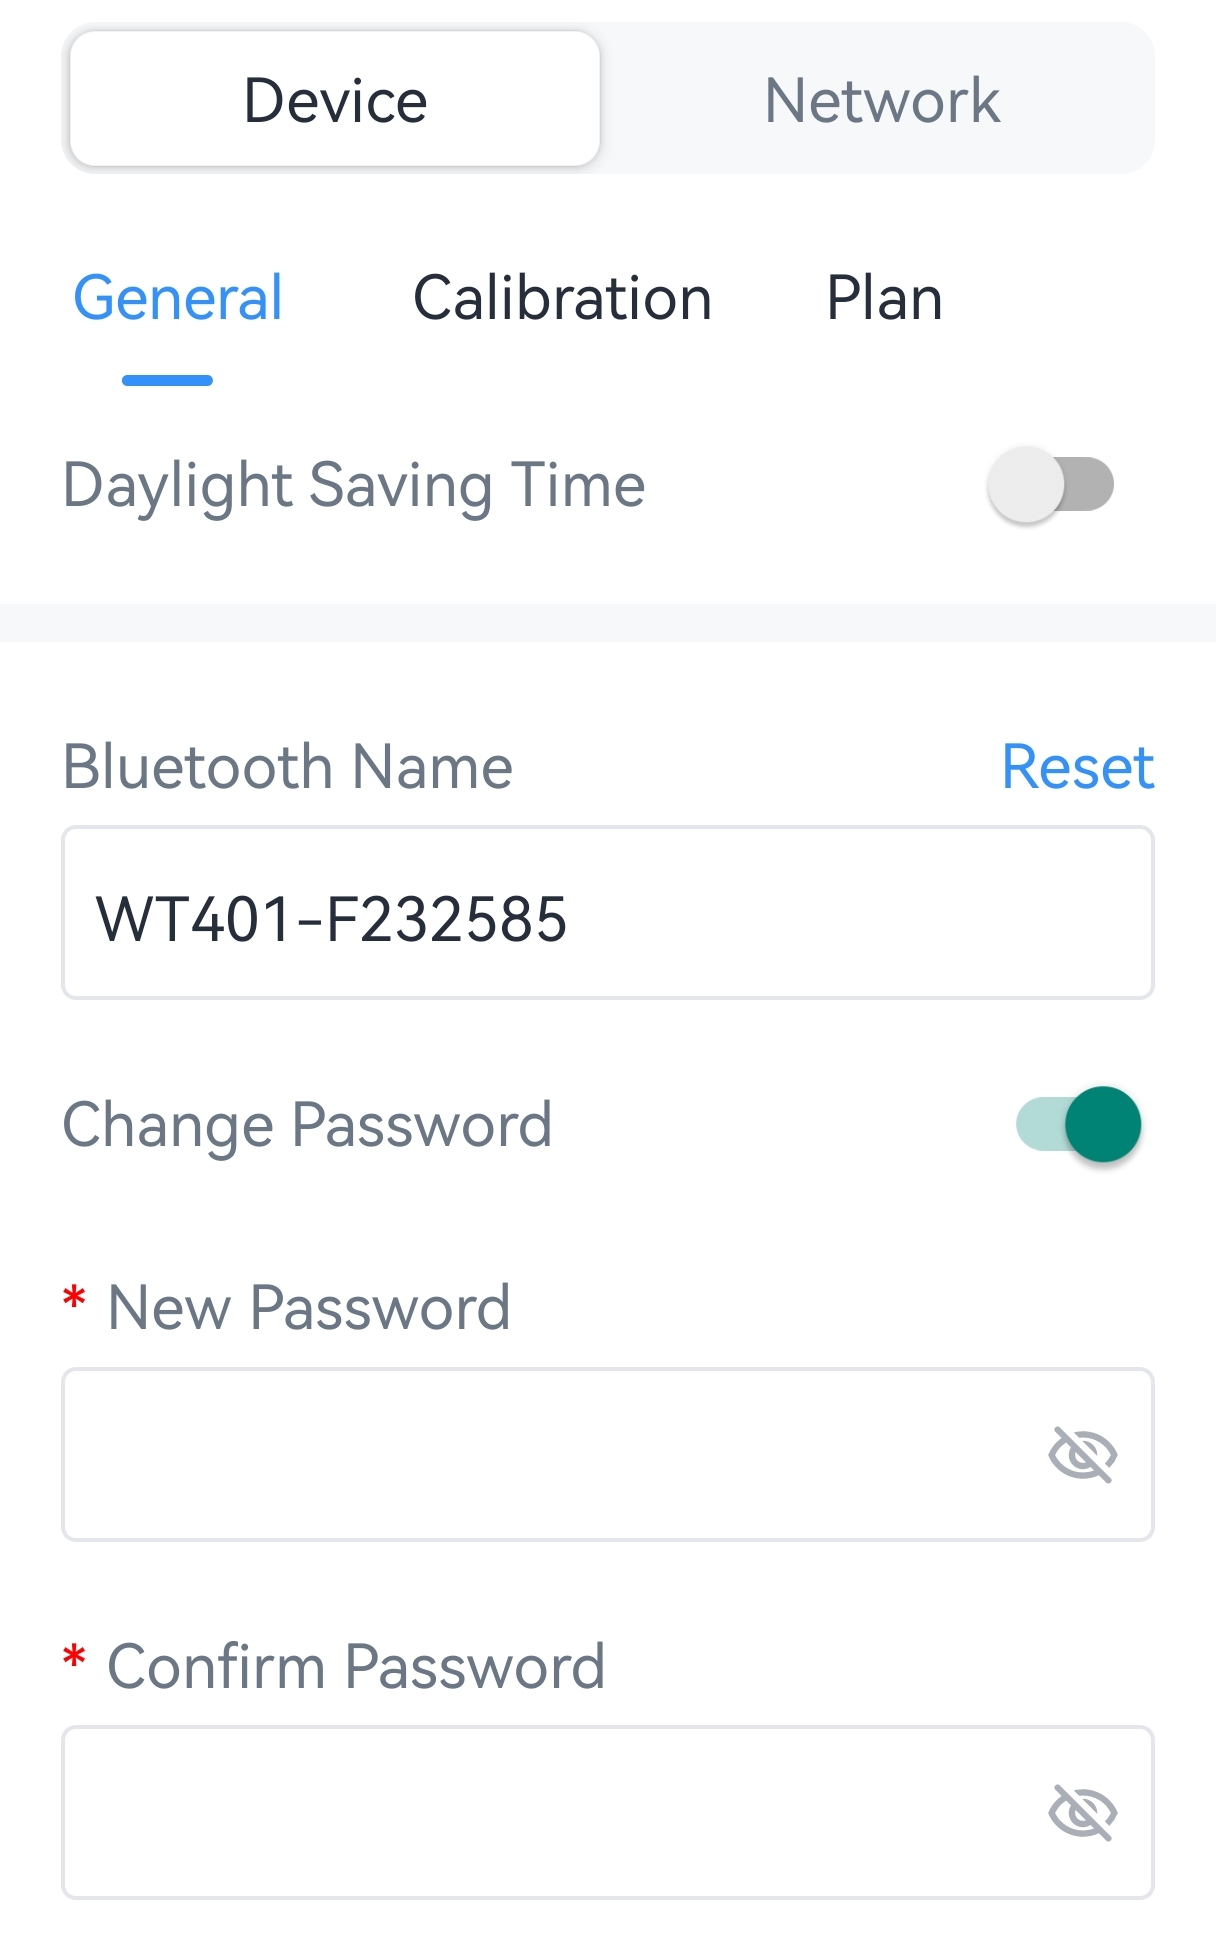
Steps:
1. Go to Setting > Device > General page.
WT401-XXXXXX (5th to 11th of
device SN). 3. Enable Change Password and configure the new password. The password must be 6 characters long. This device password is used for writing to the device via NFC or for connecting via Bluetooth.
4. Click Write to save the settings.