WLAN
This chapter describes how to configure Wi-Fi settings.
AP Mode Settings
The device can work as a Access Point for device web access or Wi-Fi sensors
connection.
Steps:
- On the left bar, select Network > Interface
page.
- On the top bar, select WLAN tab.
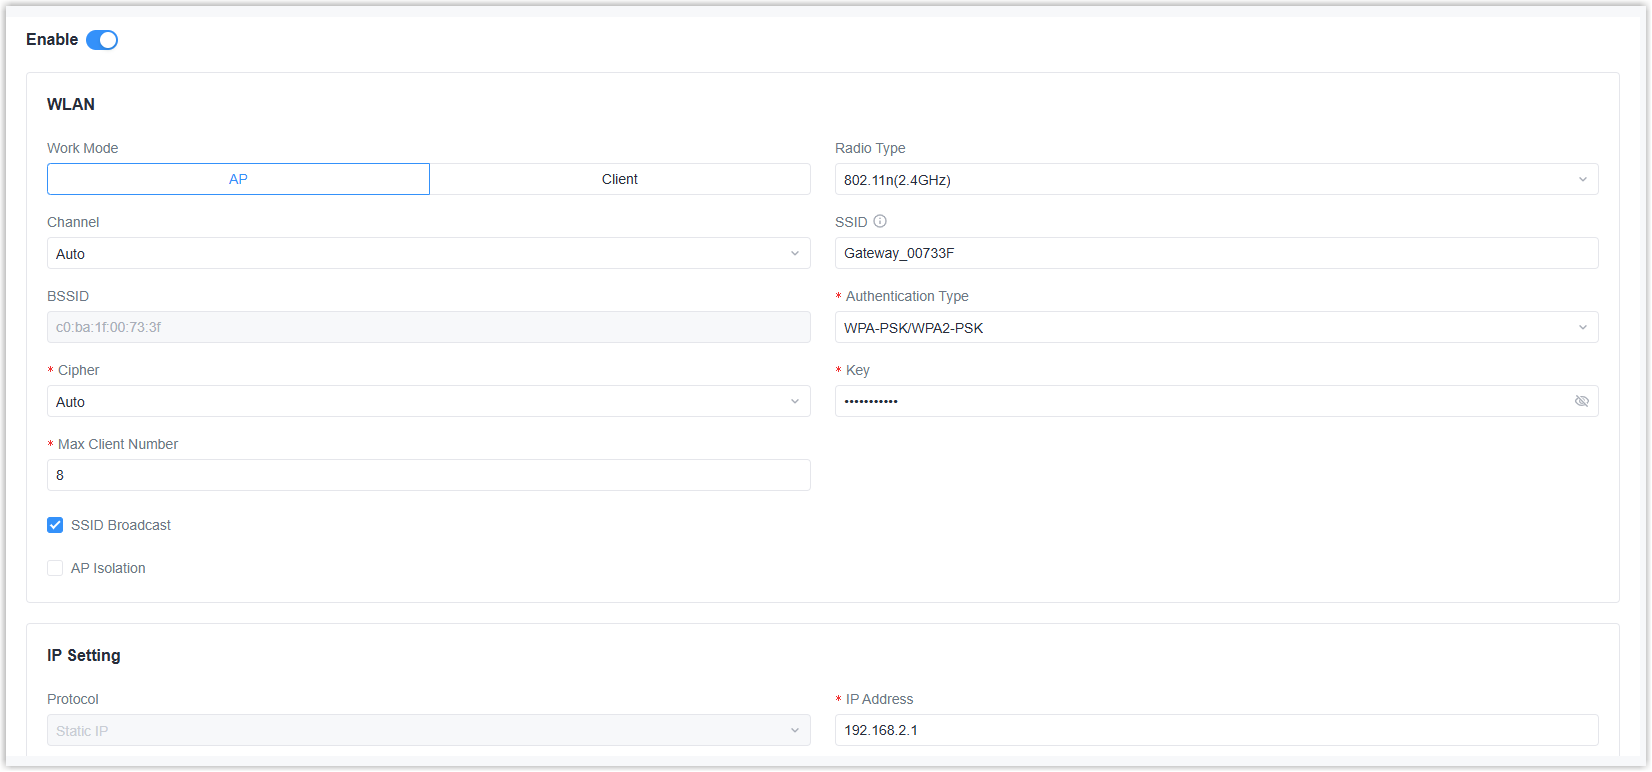
- Enable WLAN feature.
- Select the work mode as AP and configure the related parameters.
Parameter Description Radio Type Select the radio type from 802.11b(2.4GHz), 802.11g(2.4GHz), 802.11n(2.4GHz). Channel Select the frequency channel to transmit data. Tip: It is recommended to use a Wi-Fi analyzer tool to check channel occupancy at the target installation location. Select the least crowded channel to avoid interference, improve network speed, and enhance stability.SSID Set the Service Set Identifier (SSID) to identify this access point. The default value is Gateway_XXXXXX (=last 6 digits of WLAN MAC address). BSSID Display the MAC address of WLAN interface. Authentication Type Select the authentication type for connection. Options: No Encryption, WEP, WPA-PSK, WPA2-PSK, WPA-PSK/WPA2-PSK. Cipher: Select the encryption cipher when the encryption mode is not No Encryption.
Key: Set the key to connect to this access point. Only ASCII characters without spaces are allowed. The default value is iotpassword.Max. Client Number Set the maximum allowed clients to connect to this access point. Range: 1-8. SSID Broadcast After disabled, the SSID can not be searched directly. Users have to enter the SSID manually to connect to the access point. AP Isolation After enabled, all connected clients can not communicate with each other. - Configure the IP settings for client devices as required.
Parameter Description Protocol It's fixed as Static IP. IP Address Set the IP address of this WLAN interface. The default value is 192.168.2.1. Subnet Mask Set the subnet mask of this WLAN interface. DHCP Server DHCP Server Enable the DHCP server to assign IP address to connected client devices automatically. If disabled, the client devices are required to configure their own IP addresses. Start Address Set the start IP address of the IP range to assign IP addresses. End Address Set the end IP address of the IP range to assign IP addresses. Netmask Set the netmask of the IP range to assign IP addresses. Lease Time Set the lease time during which the client can use the IP address from the DHCP server. After this time, the client has to request a new lease. Primary DNS Server Set the primary DNS server address. Secondary DNS Server Set the secondary DNS server address if the primary DNS server does not work. Windows Name Server Define the Windows Internet Naming Service obtained by DHCP clients from the DHCP server. Generally, you can leave it blank. MAC Binding Click Add to bind the specific IP addresses to specific clients by client MAC addresses. - Click Apply to save the settings.
- Connect a smart phone or a Wi-Fi client device to the access point. This requires the parameters the same as the access point.
- After connected, go to Status page to check if there is any client information.
Client Mode Settings
The device can work as a Client to connect to another Access Point for Internet
access or Wi-Fi sensors connection.
Note: Do not access the web GUI
via wireless method if you need to configure the WLAN interface as client
mode!
Steps:
- On the left bar, select Network > Interface
page.
- On the top bar, select WLAN tab.
- Enable WLAN feature.
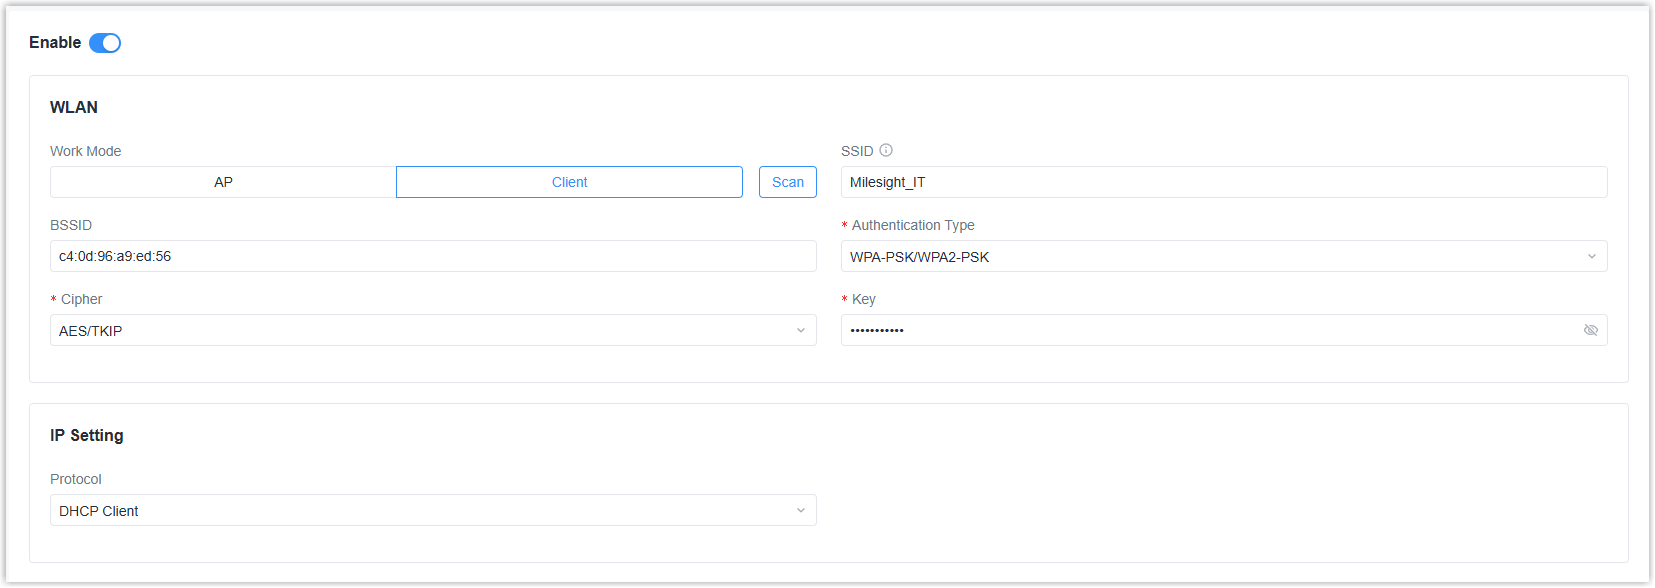
- Select the work mode as Client, click Scan to search the access
points around the device.

- Select an available access point, click Join Network.
- After selected, the basic information of the access point will be typed automatically. For some access points, it requires typing the key (Wi-Fi password).
- Configure the IP settings for client devices as required.
Parameter Description Protocol Select the mode to receive the WLAN IP address. DHCP Client: Receive IP address from the access point.
Static IP: Assign the IP address manually.Static IP Setting IP Address Set the WLAN interface IP address with the same subnet as the access point. Subnet Mask Set the subnet mask of the WLAN interface IP address. Gateway Set the IP address of the connected gateway. Primary DNS Server Set the primary DNS server address. Secondary DNS Server Set the secondary DNS server address if the primary DNS server does not work. - Click Apply to save the settings.
- After connected, go to Status page to check if the status is Connected.
- Configure Link Failover settings to enable WLAN interface as network link.